-
Kurt Boehringer
Peachtree City, Georgia
1970 - CT70K0 - Mini-Trail
1978 - SR500 - Thumper
1979 - CT70H - Mini-Trail
1979 - XS1100SF - Pensacola
1980 - XS850SG - Rocky
1980 - XS1100SG - The Ugly Duck
1980 - XS1100SG - Mayberry Duck
1981 - XS1100SH - DEAD Duck Cafe'
1981 - XJ550 Maxim - Nancy's Mini-Max
1982 - XJ650 SECA - Hurricane
1986 - FJ1200 - Georgia Big Red
1992 - FZR1000 - Genesis
2016 - FJR1300A - Montgomery -
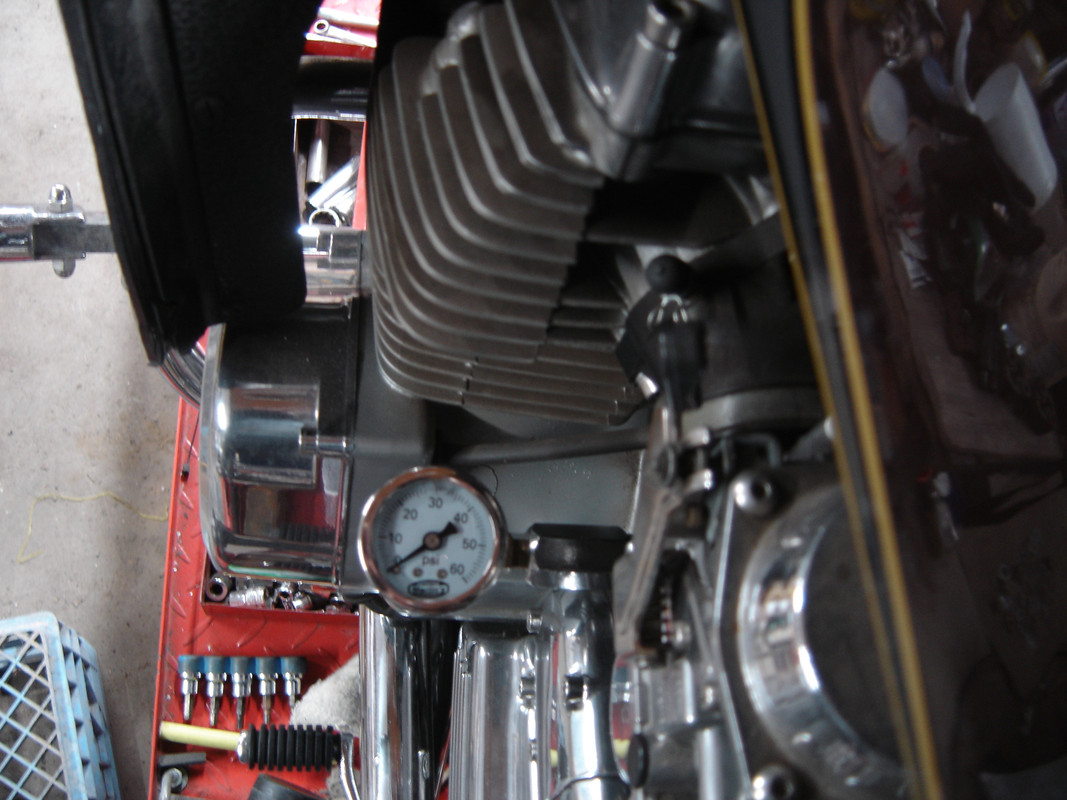
Mike, with the plugs removed there is very little load on the moving parts and oil flows freely, good for surfaces and your time.
If you notice,in the pic, the 4x4 then 2x4 then a small bottle jack right under where the oil filter cup goes
I had limited space at the time using only one garage bay and renting the other two so I hung the bike from the ceiling, using a hoist, so I was able to build the rail buggy you can see the front end with the winch in the pic. I lowered the bike onto the table and, nearing completion, hoisted it again to set it on its wheels.
By the way your engine looks amazing !!!
P.S. Any luck with the banjo bolt ?
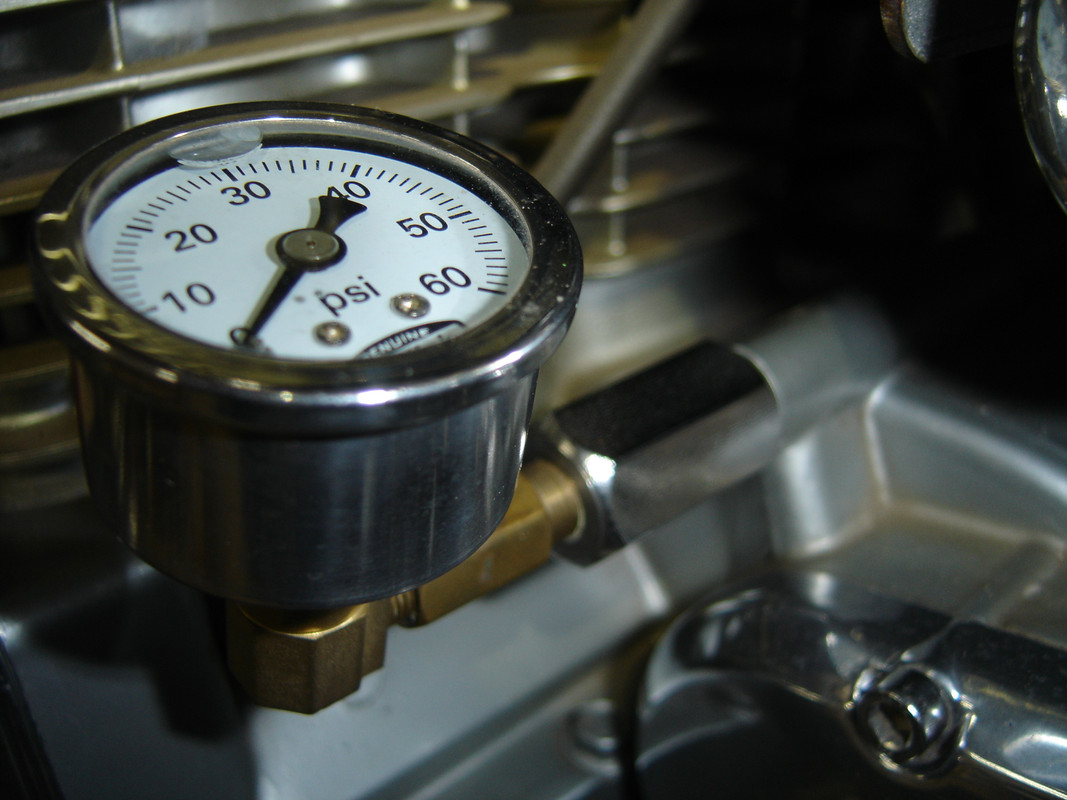
Member, Planedick , (RIP) machined an adapter for the oil pressure gauge and I was lucky to be able to purchase one from him for my '80G. I will have to use it as a pattern to have a couple more made for the other Elevens in my stable.
 1980 XS1100G "Dolly G" Full Dresser (with a coat of many colors
 )
)
1979 XS1100SF (stock-euro mods planned)
1984 XV700L Virago (to be hot-modded)
1983 XJ750MK Midnight Maxim (semi-restored DD)
1977 XS650D ( patiently awaiting resto)
Sometimes it takes a whole tank of gas before you can think straight.
Comment
-
Kurt, the table was a small steel desk that I welded the legs to a 3/16" steel plate that is solidly sitting on heavy casters. I added a 3/4 " plywood top that is on top of the desktop. As soon as I rebuilt the forks and was able to set the bike on the wheels I got it off the table 'cause it was at its limit
P.S. love your latest resto 1980 XS1100G "Dolly G" Full Dresser (with a coat of many colors )
1979 XS1100SF (stock-euro mods planned)
1984 XV700L Virago (to be hot-modded)
1983 XJ750MK Midnight Maxim (semi-restored DD)
1977 XS650D ( patiently awaiting resto)
Sometimes it takes a whole tank of gas before you can think straight.Comment
-
Schming: Yes, I found the exact OE banjo bolt on eBay.
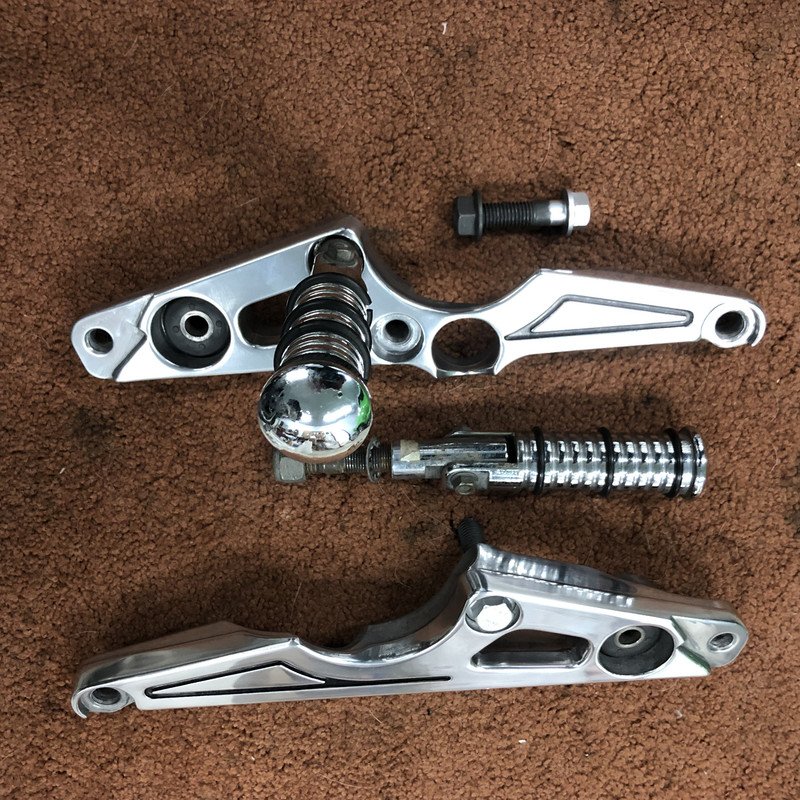
Polishing
I finally finished the polishing of all the aluminum parts, completing the footrest/exhaust brackets.
Oil Pan Leak
I removed the oil pan to look for the source of my leak. I made a garf on the RF corner of the pan when I removed it. I remember it wouldn't come off by bopping it with a rubber mallet, so I took a stiff putty knife and tapped it into the gasket in the RF area. I made a garf that had a very small burr sticking up:

I filed the burr, re scraped the gasket surface even better than before, and reinstalled the pan with a new gasket... coated with the copper gasket spray recommended by Mike P. I think this must be the product he recommended, because I went to 4 stores and this was the only choice:
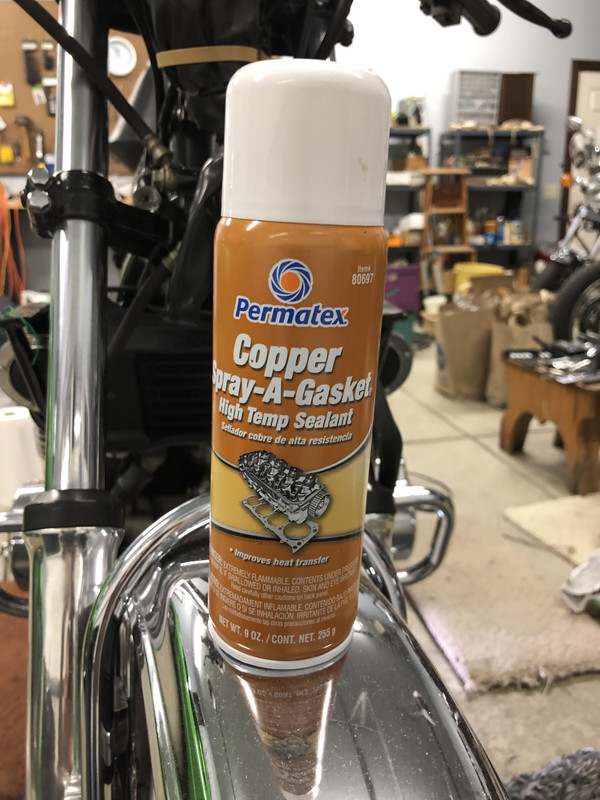
This sealer behaves like contact cement. You have to position the gasket correctly on the first try. I used the bolts to locate it on the pan first, then installed it. I hope I never have to remove the pan, because I got the impression this sealer will behave like glue.
Leak is fixed! Completely dry.
Gas Tank
I still have to rebuild the carbs, the install the exhaust, etc...but I decided it would good to know in advance what material I might need to order for the gas tank (like paint or ?). Remember the decals are badly cracked:
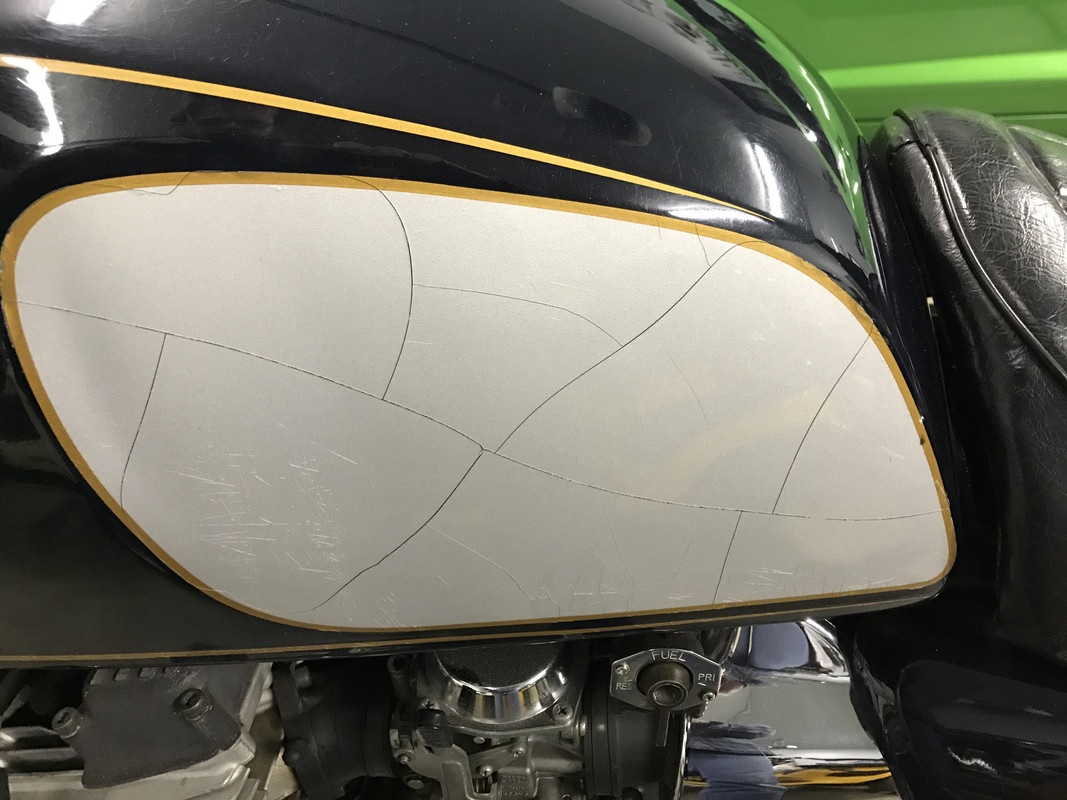
The paint is generally salvageable, so I decided to try removing the decals without damaging the paint. I found 400# sandpaper was the right choice. The most difficult area is the perimeter of the silver patched because the decal is double-thick in these areas. After 2 hours. I managed to gently sand the perimeter on one side with only one minor casualty. I think that trouble spot was already chipped:
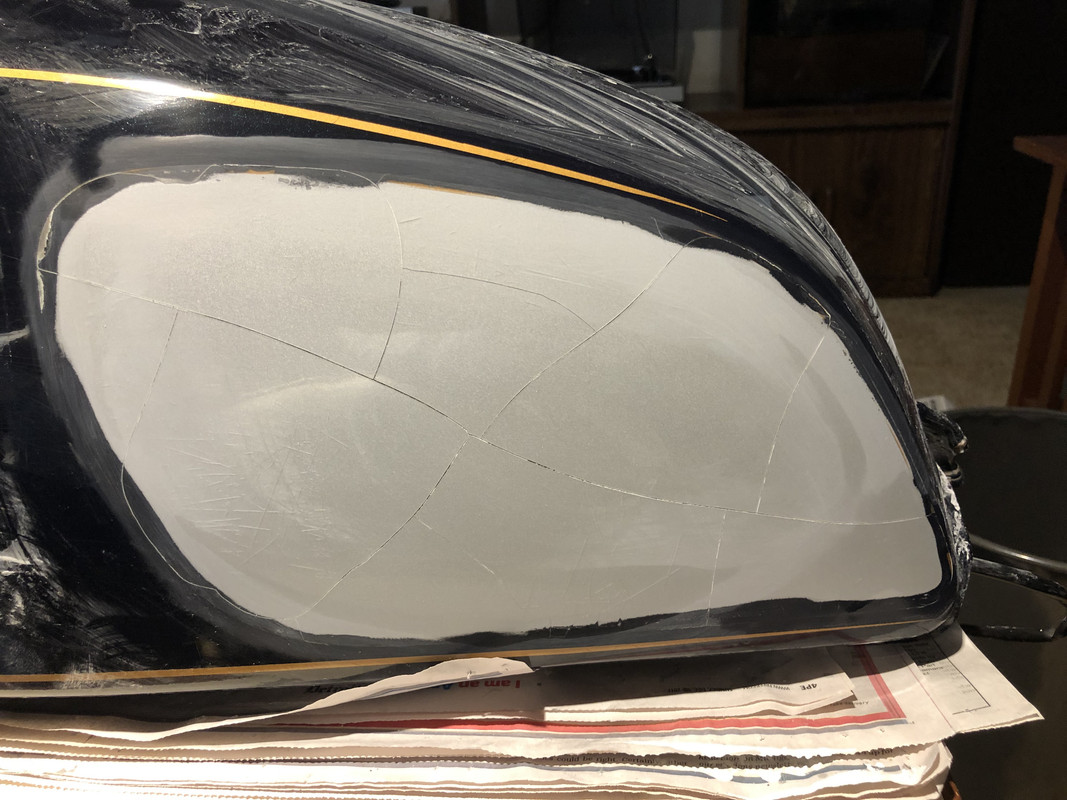
One problem I have is that the cracks are not just through the decal. The cracks go through the paint also. If I am successful to save the paint, I may need to fill the cracks before applying the new decal.
__________________
I have been having trouble accessing this site, so my update took a a while to post.-Mike
_________
'79 XS1100SF 20k miles
'80 XS1100SG 44k miles
'81 XS1100H Venturer 35k miles
'79 XS750SF 17k miles
'85 Honda V65 Magna ~7k miles
'84 Honda V65 Magna 48k miles (parts bike)
'86 Yamaha VMAX 9k miles
Previous: '68 Motoguzzi 600cc + '79 XS750SF 22k miles +'84 Honda V65Comment
-
Hi Mike,
Mine has those cracks under the repaint done by PO. I thought he had just painted over the decals but maybe from what you say hehad removed the decals but not filled the cracks.
Phil1981 XS1100 H Venturer ( Addie)
1983 XJ 650 Maxim
2004 Kawasaki Concours. ( Black Bear)Comment
-
The Right Stuff
Mike, That is the sealer I was referring to. Another brand is K&W. I have used this more many years on many applications - even head gaskets.
Permatex also offers an RTV sealant with Copper. You can use that on an exhaust system in place of or with a gasket. Recheck pan bolt tightness after a few heat cycles.Last edited by MPittma100; 05-04-2020, 06:54 PM.1981 XS1100H Venturer
K&N Air Filter
ACCT
Custom Paint by Deitz
Geezer Rectifier/Regulator
Chacal Stainless Steel Braided Brake Lines
Chrome Front Rotor & Caliper Covers
Stebel Nautilus Horn
EBC Front Rotors
Limie Accent Moves On In 2015
MikeComment
-
Tank Work
Tank Appearance
It took about 8 hours of careful sanding, but I finished removing the cracked gray decals from each side of the tank. In some small areas around the perimeter, the paint was lifted:

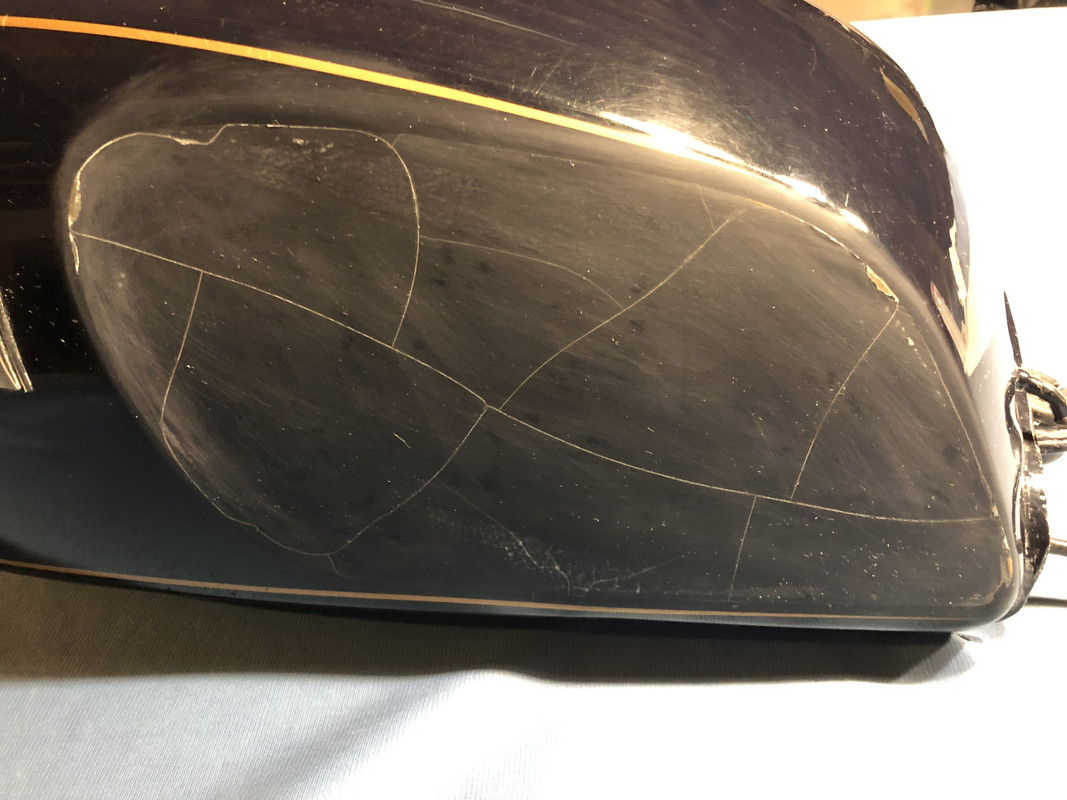
Unfortunately more paint peeled when I removed the emblems.
I am using touch-up paint from my Grand Cherokee to fill in the missing paint. For the cracks, I filled them with Bondo glazing and tried to cover them with the same touch-up paint as much as possible. The new decal measures slightly smaller, and locating it will not be precise, so I can't be sure it will cover all the cracks around the perimeter.
Rear Footpegs
Remember the PO had installed floorboards for the driver. Then he realized the opportunity to move the rear footpegs to a new location:
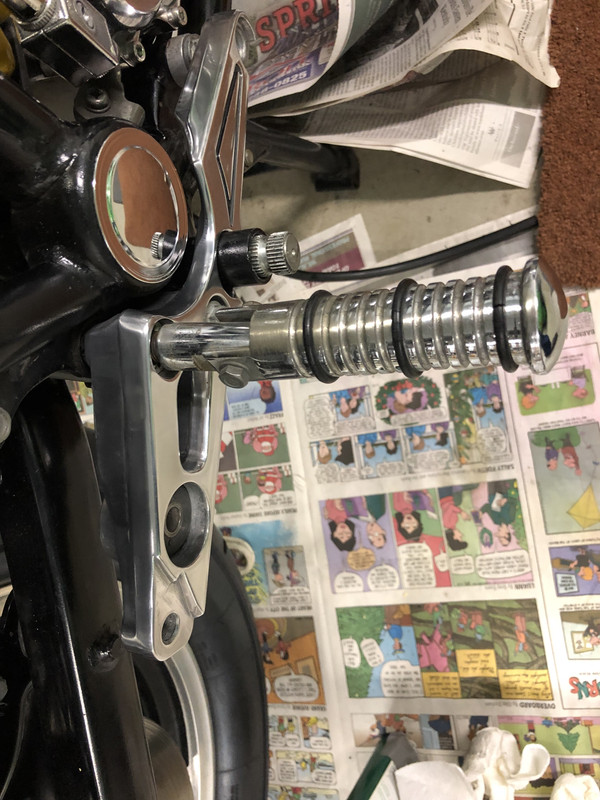
That location is supposed to mount the bracket to the frame with a 10mm flange bolt threaded into the frame. He drilled them out to 1/2" and mounted the aftermarket footpegs.
I like to keep the bike all metric, so I took 12mm flange bolts, and turned down the flanges to fit the holes; then painted them to look normal as much as possible:
Tank Emblems
As Mike P has lamented in the past, the emblems are not available anywhere for the XS11H. I tried buying the Chinese version without screw holes. They look really nice, but it takes significant force to spring them into the shape of the tank. I was reluctant to believe they would stay bonded tightly against the tank. I tried putting one in the toaster oven for 10 minutes at 200 degrees to bend it. Too hot! The two emblems in the top left of this picture are the before and after pictures:
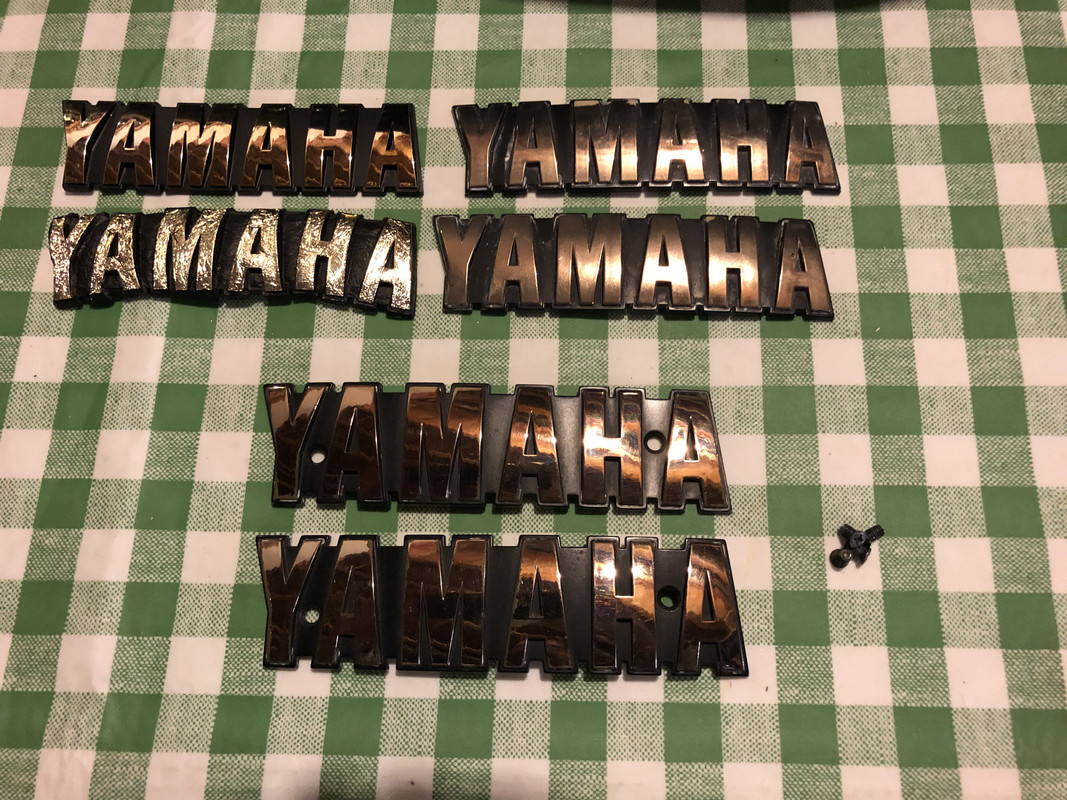
Might be good for one of the cafe mod guys!
The top right emblems are the ones I removed from the tank. They are much more rubbery and flexible than the emblems on my other bikes. The PO has one painted gold, and the other is missing some foil and has been touched up with paint.
I have more cheap Chinese emblems on order so I can try to perfect the bending technique.
I did test the adhesive after the hot oven trial, and it was still fine.
Meanwhile, I know the SG emblems are sill available for the mother-ship. I dug a couple up and the left one fits perfectly, and the right one requires just a little twist to get it to fit. The replacements from Yamaha are now a single part number, so I don't know exactly how they compare until I borrow one from the Bagger. These SG logos are a bit bigger than the Venturer emblems, but I may decide to use them if I don't get satisfaction with the bending process.
I am really itching to do some wrenching in lieu of this patient cosmetic stuff.-Mike
_________
'79 XS1100SF 20k miles
'80 XS1100SG 44k miles
'81 XS1100H Venturer 35k miles
'79 XS750SF 17k miles
'85 Honda V65 Magna ~7k miles
'84 Honda V65 Magna 48k miles (parts bike)
'86 Yamaha VMAX 9k miles
Previous: '68 Motoguzzi 600cc + '79 XS750SF 22k miles +'84 Honda V65Comment
-
Kurt Boehringer
Peachtree City, Georgia
1970 - CT70K0 - Mini-Trail
1978 - SR500 - Thumper
1979 - CT70H - Mini-Trail
1979 - XS1100SF - Pensacola
1980 - XS850SG - Rocky
1980 - XS1100SG - The Ugly Duck
1980 - XS1100SG - Mayberry Duck
1981 - XS1100SH - DEAD Duck Cafe'
1981 - XJ550 Maxim - Nancy's Mini-Max
1982 - XJ650 SECA - Hurricane
1986 - FJ1200 - Georgia Big Red
1992 - FZR1000 - Genesis
2016 - FJR1300A - MontgomeryComment
-
Hi Mike,
I have a snail mail address for a company in Thailand that I bought a set of stick on tank badges from a few years ago. Don't recall how i found the company. They look really nice and one day when I paint my tank i will put them on
Phil1981 XS1100 H Venturer ( Addie)
1983 XJ 650 Maxim
2004 Kawasaki Concours. ( Black Bear)Comment
-
Not for the purist, but the Venturer tank is more amenable for painting when compared to the older tanks. You could paint “Yamaha” and make it look real good.Skids (Sid Hansen)
Down to one 1978 E. Stock air box with K&N filter, 81H pipes and carbs, 8500 feet elevation.Comment
-
Possible Badge Solution
In this thread is badge restoration by Jim.
Marty (in Mississippi)
XS1100SG
XS650SK
XS650SH
XS650G
XS6502F
XS650EComment
-
Kurt:
Thanks for the offer to provide replacement footpeg brackets. I would need to drill out the same mounting hole in your brackets because the threaded hole in the frame is also drilled out to ½”.
However, there would be big benefit to lose the modification to my bracket where the rear footpeg is supposed to mount. I can’t figure why the PO reshaped the notch for the rear footpeg. The bracket for the bags comes in from the backside, so that’s not it. He must have tried to make some sort of bracket to move the rear footpeg before he changed to the way I found it.
If I had noticed these rear modifications before I polished the brackets, I probably would have accepted your kind offer.
Marty and Skids:
Thanks for the post about painting the emblems. I can live with some compromises on my bikes but the metallic emblems are really important to my taste. I imagine the original emblems must be been manufactured with a foil hot stamping process (or even a vacuum sputter metallization). Too bad nobody has made a process to restore them.
I have the tank ready to move to the next phase. I’m going to give it a clear coat to make the substrate homogeneous for the decals. I’m going to use 2k rattle can based on the advice of others. I have read how it resists gas, and others were pleased with the results. I saw Mark Lew did an amazing job on his SG tank with 2k clear coat.-Mike
_________
'79 XS1100SF 20k miles
'80 XS1100SG 44k miles
'81 XS1100H Venturer 35k miles
'79 XS750SF 17k miles
'85 Honda V65 Magna ~7k miles
'84 Honda V65 Magna 48k miles (parts bike)
'86 Yamaha VMAX 9k miles
Previous: '68 Motoguzzi 600cc + '79 XS750SF 22k miles +'84 Honda V65Comment
-
I bought these a couple years ago, two sets for a couple of Venturer tanks I’m still working on (I think on Kurt’s recommendation)? Anyway the double stick tape that holds them on is junk but they were the same as the old ones I peeled off in most other regards. Mailed straight from China.
https://www.ebay.com/itm/254128488827Steve R
'80 SG
"Fred" -- TC fuse box, stock airbox/exhaust/jets, SS brake lines, Windjammer V fairing, Cibie headlight lens, TKAT fork brace, Showa rear shocks, MikesXS emulators
Former bikes:
1973 Yamaha 125 Enduro (brother's but I 'borrowed' it a lot, usually after midnight)
1978 XS400E Red
1981 XS850 Special (Stingo)Comment
-
Hi Mike,
You might find what you are looking for here http://www.bdesigns.ca/Main_Decal.htm
They seem to do lots of restoration type services too.
Original Venturer tank emblems are stick on with no screw holes. Not that anyone,( other than me) would notice if you stuck some with screw holes on
Phil1981 XS1100 H Venturer ( Addie)
1983 XJ 650 Maxim
2004 Kawasaki Concours. ( Black Bear)Comment
-
H Tank Emblems
Mike, I did actually find a company that had the correct (stick on) tank emblems for the H (no screw holes). They were a little difficult to conform to the side of the tank, but doable. I will have to back track to find the vendor.1981 XS1100H Venturer
K&N Air Filter
ACCT
Custom Paint by Deitz
Geezer Rectifier/Regulator
Chacal Stainless Steel Braided Brake Lines
Chrome Front Rotor & Caliper Covers
Stebel Nautilus Horn
EBC Front Rotors
Limie Accent Moves On In 2015
MikeComment
 Tweet
Tweet


Comment