OK. I think I "get it"-what Lab3 was talking about. I think I recall Cajun saying the same thing.
https://www.partzilla.com/product/ka...ccf6654a41f25e
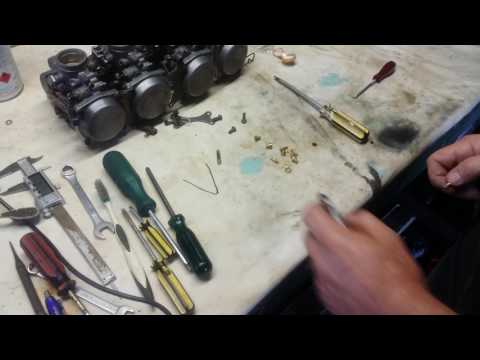
A youtube video at 6:25 shows THIS gasket ( half the price of the XS1100 one at partzilla ) https://www.youtube.com/watch?v=8ZoHFL8hvFI
-
Yes JonnyO, the common float bowl gasket issue IS the first thing to check before any possible o-ring issue. What happens when float bowls are pulled tight back on is the bowl gasket compresses a bit causing gasket to squish a bit forcing a slight bit of it to protrude to inner edge of bowl. As previously stated by LA83, being a common issue with Mikuni carbs, Float clearance IS minimal as it is with these carbs .
.
Leave a comment:
-
THIS IS WHAT I NEED A VIDEO OR PICS OF ...I think.
by Blaine Hoopes
Most of you will already know this but for those who don't this sure made a big difference. I've carefully cleaned the float needles and seats many times but still have a strong gas smell in the garage and once in a while a little drip of gas into the airbox from the carbs overflowing.
I finally realized that my needles and seats were sealing perfectly but the seat was leaking in the carb body. I don't know if you can get that small o-ring individually from Yamaha or if you need the whole kit but I found a set of 6 o-rings at PepBoys (air conditioning hose rings) that were nearly a perfect fit (a little tight but worked well) and cost under $2 for the set. I can leave my petcocks (manual petcocks) turned on with a full tank of gas now and don't get any drips or gas smell in the garage.
The float and float needle act as a fuel valve. On the '80 carb, you pull off the floats and the needle. There is a phillips head screw in a clamp holding the brass seat into the carb body. Remove this screw and clamp and lift out the seat. There is an o-ring around it on the '80 and I would bet on the '81 as well. I just checked and the picture in the service manual is of a '78 and that seat is threaded and has a washer/gasket so this o-ring stuff wouldn't apply to those carbs (1978-79).
Update Feb 24, 1999
After some good insight from Sid (thanks Sid), I thought to look at the float seat again. In good light I noticed the seat had some rough edges which prevented a good seal. I took my drill and put in a 5/32 bit and drilled ever so lightly and for just a few seconds in reverse. Leak solved.Leave a comment:
-
JohnnyO, please check out these links for help, a lot of experience to guide the future XSessives has been collected. The info generally walks you through every step to achieve the satisfaction of getting your bike running yourself and that's a great feeling.
Leave a comment:
-
Wait. Hold on there pardner. Am I being pointed at checking the gaskets FIRST rather than o-rings? The PB Blaster is coming today. I'm lost on what to do first. I have the carbs off. THat much I have. I went to move them inside to work on 'em and a bit of gas spilled out. Is it OK to turn them upside down? THAT is how much I don't know about what I'm about to do. I mean a toilet is only a few bolts and a closet flange but if you've never replaced one it's a puzzling idea.
Anyway, thanks.Leave a comment:
-
Without the vibration from a running engine, air bubbles in the "gas" can cause problems. I say "gas", because I CAN get ethanol free gas in Idaho, and it makes a BIG difference on the way the bike runs.Leave a comment:
-
I tried static and the results were erratic:
I tried running, and the results were accurate.Leave a comment:
-
-
-
JonnyO, pertaining to the carbs and floats, with float bowls removed lay the gaskets in place on each of the bowls. If gasket has any slight overhang towards inside of bowl it can easily cause float to hang up. With gasket in place on float bowl, take a razer blade and follow against inside edge of float while slicing off any excess gasket.
Leave a comment:
-
That little needle/post thingy ends up bein' W A Y mOaR impo'unt than you'd expect. ( •_•)
Somehows, there's a teency-weency SPRING inside the float "needle" thingy which determines just how much that needle moves in/out of the needle body whens the pointy end is s'posedly bottomed out against the SEAT (and s'posedly stopping the flow of fuel...) and the weight of the float is supported by that needle/spring thingy whens you gots the carb upside down and are trying to set the float height to the standard/special float height/distance. (⊙▂⊙)
In the Flea-Bay kits all the needles lookey the same on the outside BUT when you's setting the float levels across all four carbs? (O_o)
Same float weight (relatively...) ends up encountering WAY different spring strengths (QC issue?) so's the actual float height(s) (cuz they're bein held up BY those teency springz....) ends up bein all OVER the place. (-‸ ლ)
So's you end up adjusting the float levels to the same height(s) cross the bank thimkin you done the right thing. (^_^)
But you DIN'T and the bike will TELL you so. (_Oo)
The OEM springs are S T R O N G so's when ya flip/bounce the floats wit yur finners? (O_o)
They bounce back nice-n-firm to the same height. (^_^)
(A N D they's all mOaR or less the same level of strong cross all four of'em...)
Leave a comment:
-
I use this kit from Harbor Freight. Engine Brush Kit, 20-Piece. The brushes fit a drill if you want to be that aggressive but just using the hand tool works fine. I like the kit because you have vinyl, brass and steel brushes to choose from. You don't want to get too aggressive; your goal is to simply get any deposits or grooves smoothed out so that the needle slides smoothly up and down in the seat. One other thing, you have a special so your needles have the rubber base on them and you need to verify that it is still pliable. If not they need to be replaced. The also have a small brass needle on the tops of them and those need to move up and down freely. if they don't then again they need to be replaced. I have has some success with soaking the needles in the gallon can version of Berryman's and they sometimes loosen back up. The problem with all of these small parts is that evil ethanol in our gas these days.Leave a comment:
-
So I've got Blaster and those seals ( Partzilla ) on the way...
"Hey Jonny, you can reuse the needle seats if you polish them. Cut a Q-tip in half, put it in your drill, apply chrome polish and buff the inside where the needle sits. Also clean any deposits off the needle itself and visually inspect. New ones aren't cheap (the good ones), but the o-rings are."
Is there a specific video tutorial on replacing those anywhere online...and polishing the seats? Just asking so I can get my box of Crayolas handy.
I have a dremel and a bunch of polishing bits-
Leave a comment:
-
Yoh Larrym I watched one of steptoexs11’s videos last night. That guy really knows what he’s doing! Essential watching for a beginner like me, how is it that his videos aren’t watched more often? Anyway, thanks for the link and this thread JohnnO and others, I haven’t yet read something here that hasn’t changed my way of thinking and approaching these bikes I agree, they really are too valuable to damage by jumping into a repair without having the correct knowledge. 👍Leave a comment:


Leave a comment: