
 Tweet
Tweet
Wow! TC you are awesome! Thank you so much for fixing my pics in this thread. I was worried I would have to start all over. You are the best. I appreciate the work. And, thank you for noticing the missing washer. I did forget it. I'm sure glad you spotted that.
-
1979 xs1100f
New Fuse Box
Progressive Shocks
Gold Valve Emulator
Dyna Coils
Electronic Flasher
Led Headlight
Led Turn Signals
4 Led Driving Lights
2nd Gear Fix
Auto Cam Tensioner
Digital Dash
Stainless Braided Lines
R6 4 Piston Calipers
Stainless Bolt Kit
Maier Fairing
Dyna Balancing Beads
Spin On Oil Filter
Stebel Nautilus Horn
Plasti Dip Rims
ISO Grips -
I have a friend that owns an auto body shop so I went down to his place this weekend and worked on preparing my parts for paint. I spent a lot of time sanding. Here are some pics

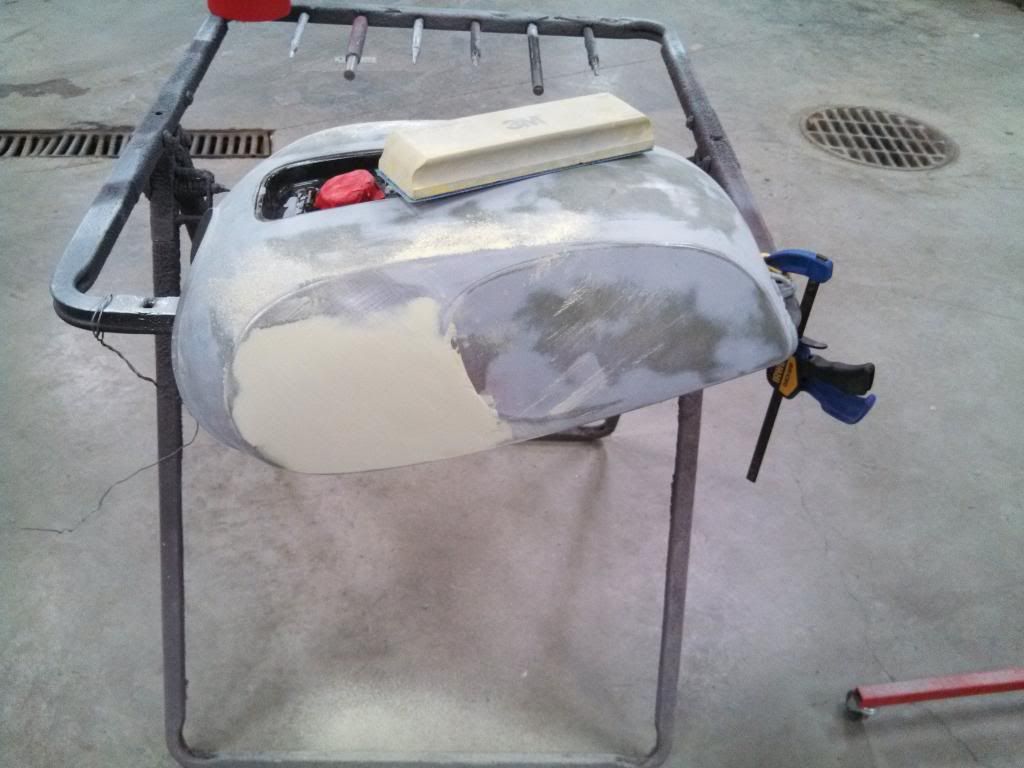
Block sanding is a pain in the rear. I thought I would get to paint this weekend but I ran out of time.
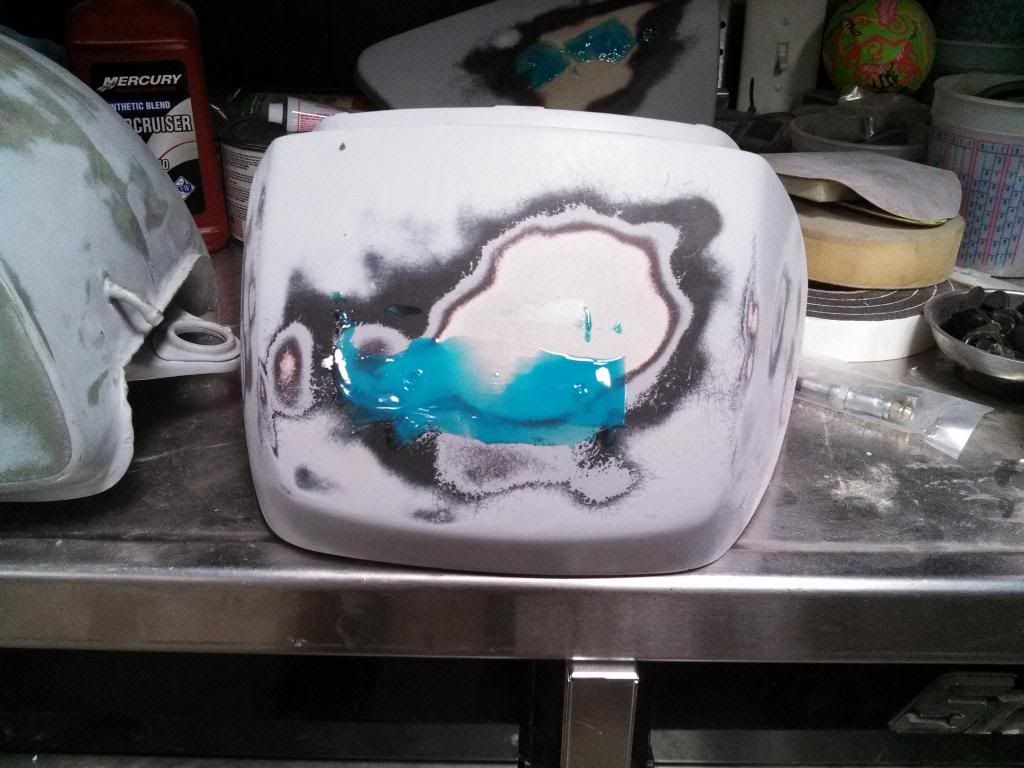
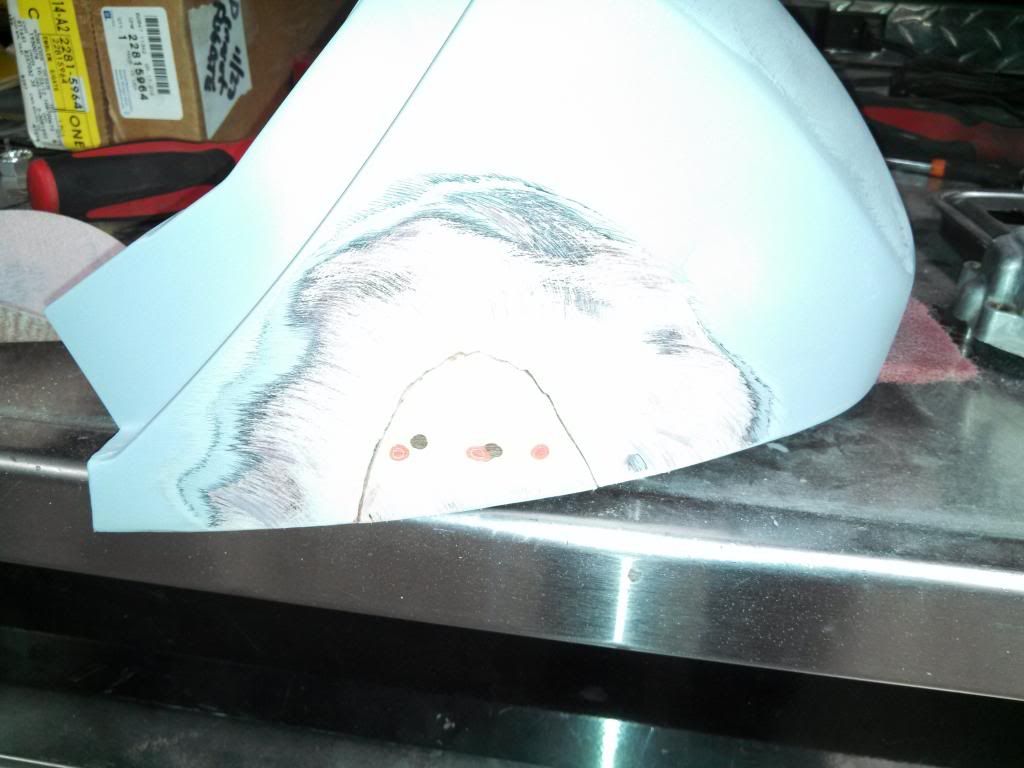
I originally filled the badge holes with body filler but my buddy said he had a better product, so i drilled out the holes and used this stuff
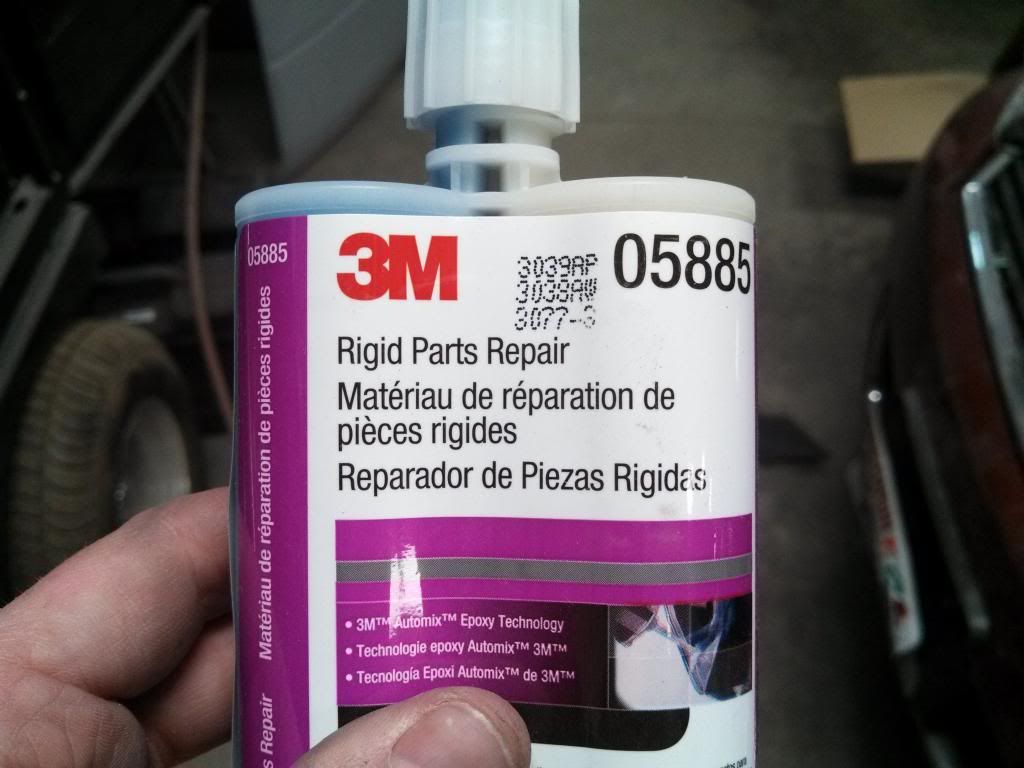
I guess it's super expensive but it works awesome. It bonds all plastic like nothing you believe. He says he uses it to mend plastic bumpers all the time. Any how you apply it just like body filler and wait 30 minutes for it to harden. Then you sand it down like filler. However, it's much much harder to sand. I worked my tail off to get this stuff flat.. But when done you can't tell there was any work done. It's truly that amazing. Here are some more pics of the work I did this week.
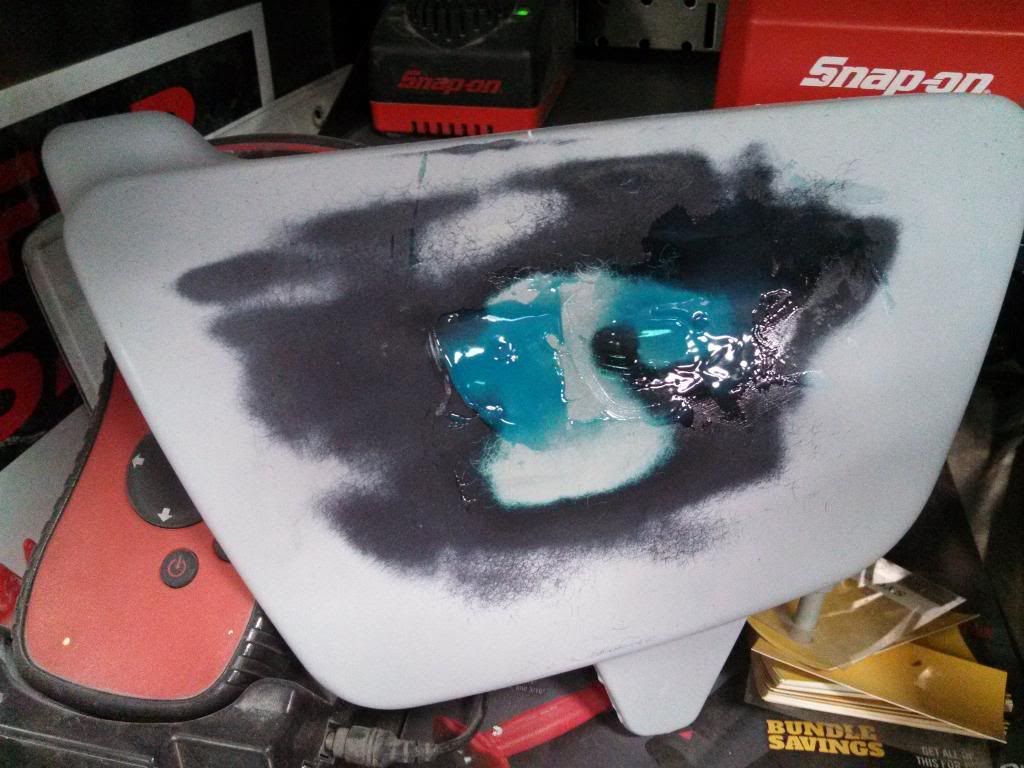
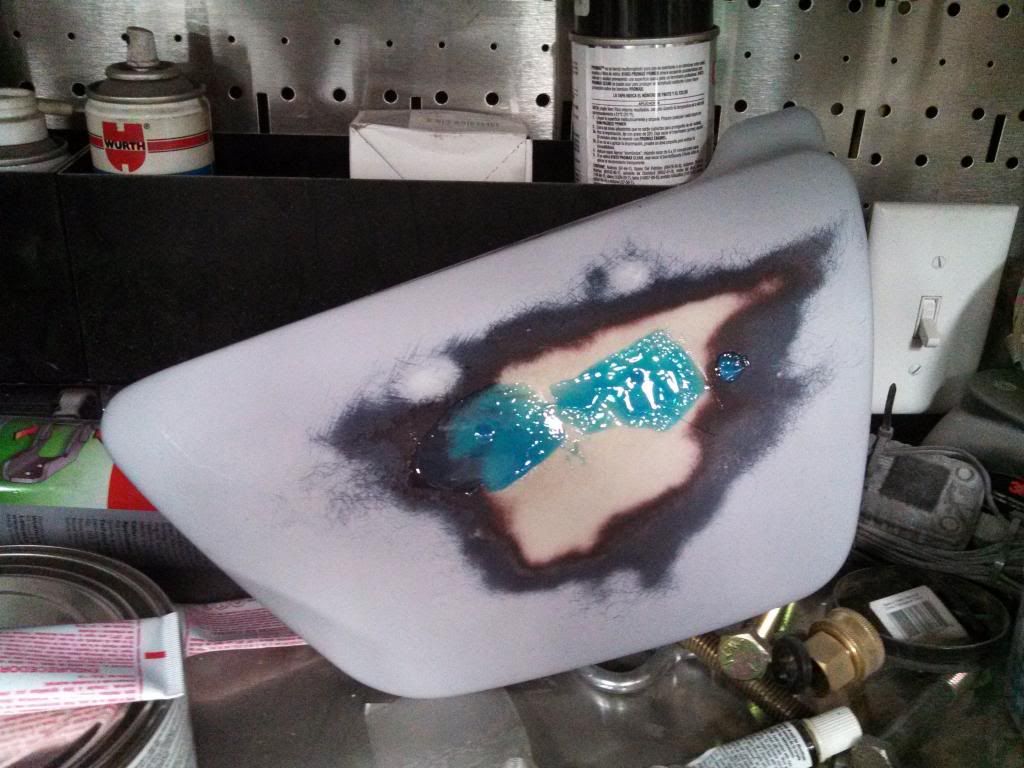
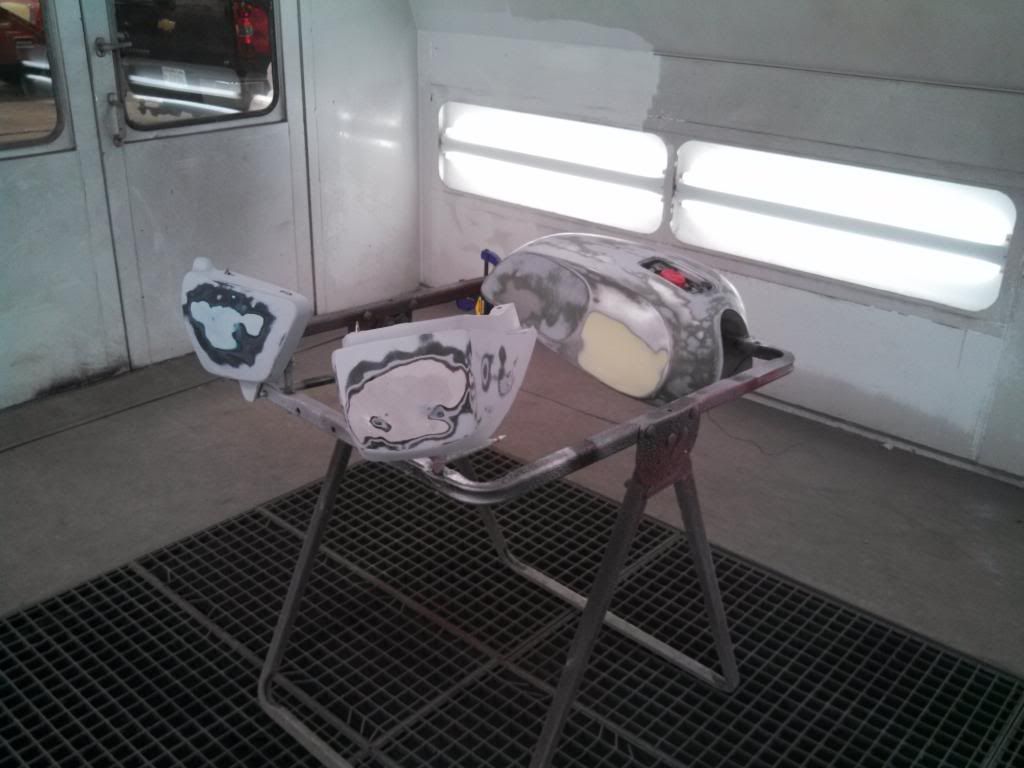
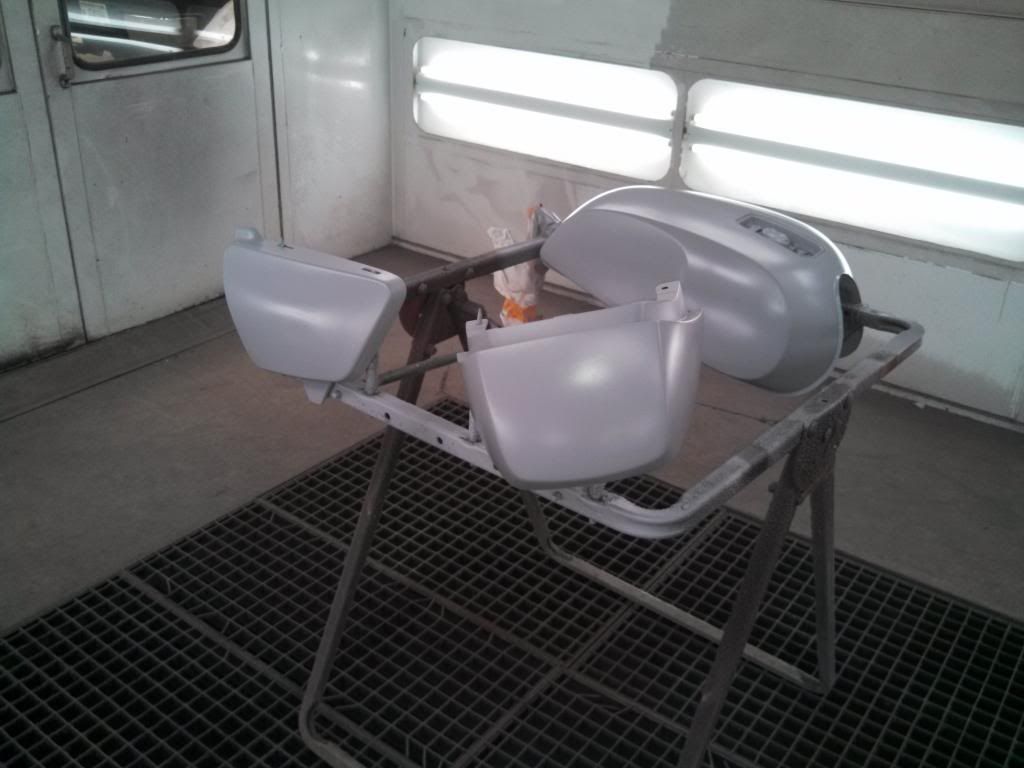
I found a huge patch that the PO tried to fix on the rear cowl. What ever the PO used it looked like crap. I decided to fix the problem the correct way, so I ground down whatever crap the PO used and added some more of the 3M material. I then began the process of sanding, priming, sanding and priming until it was perfect.
Next week I hope to put down the color, stripes, and clear. I am looking forward to seeing how it turns out.1979 xs1100f
New Fuse Box
Progressive Shocks
Gold Valve Emulator
Dyna Coils
Electronic Flasher
Led Headlight
Led Turn Signals
4 Led Driving Lights
2nd Gear Fix
Auto Cam Tensioner
Digital Dash
Stainless Braided Lines
R6 4 Piston Calipers
Stainless Bolt Kit
Maier Fairing
Dyna Balancing Beads
Spin On Oil Filter
Stebel Nautilus Horn
Plasti Dip Rims
ISO GripsComment
-
Nice work. Yes, wit paint it seems the prep work is the real work. By the time your ready to shoot paint, your sick of looking at the thing. But then the paint work goes pretty quick, and will show the detail you put in the prep. Life is what happens while your planning everything else!
When your work speaks for itself, don't interrupt.
81 XS1100 Special - Humpty Dumpty
80 XS1100 Special - Project Resurrection
Previously owned
93 GSX600F
80 XS1100 Special - Ruby
81 XS1100 Special
81 CB750 C
80 CB750 C
78 XS750Comment
-
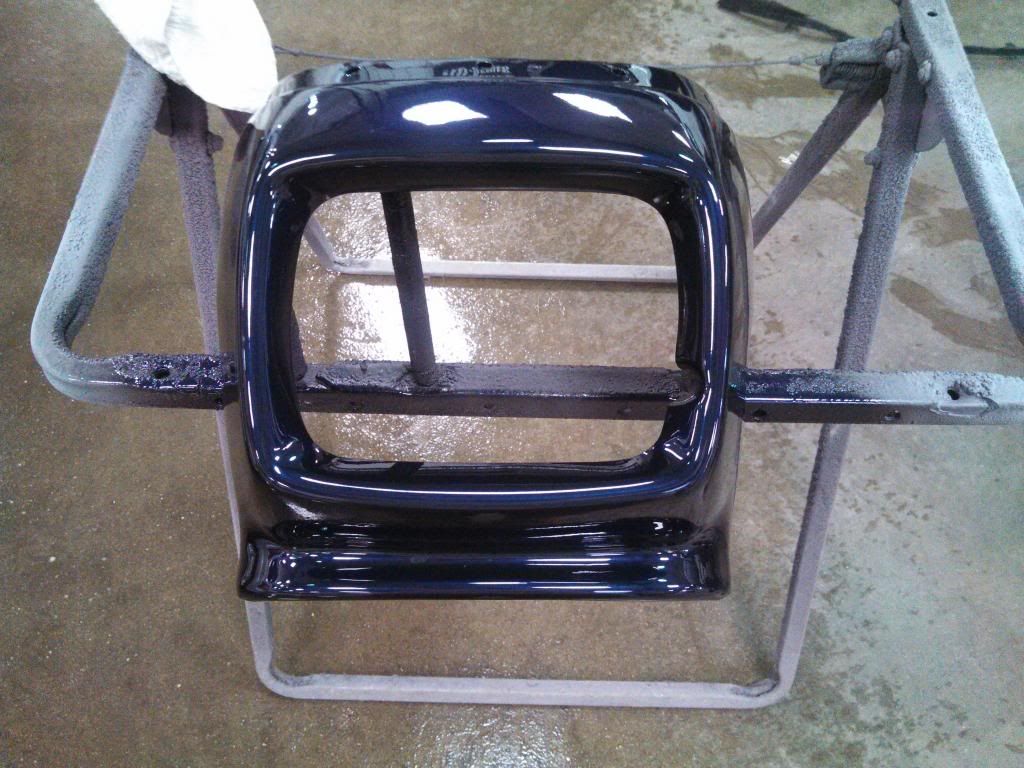
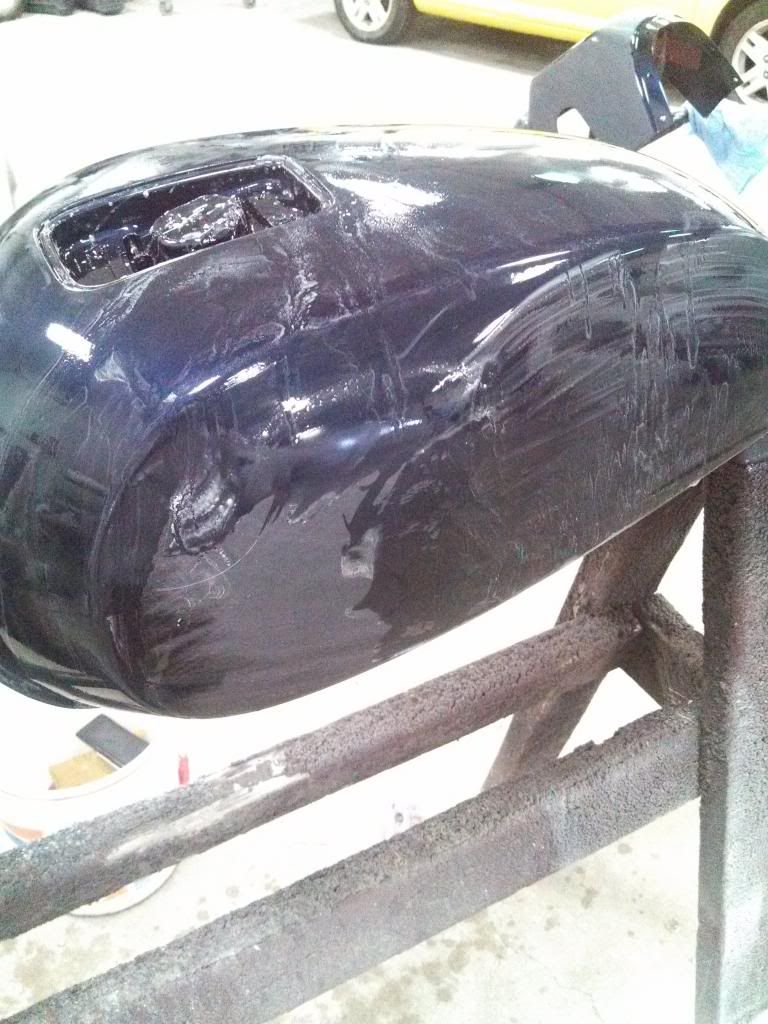
So today I went back to the paint booth to paint the tank, side covers, cowl and fairing. I was so excited to see the color. It turned out awesome! Here are the pics after the base color and 1st clear coat. This picture isn't very good. For some reason it looks all washed out.
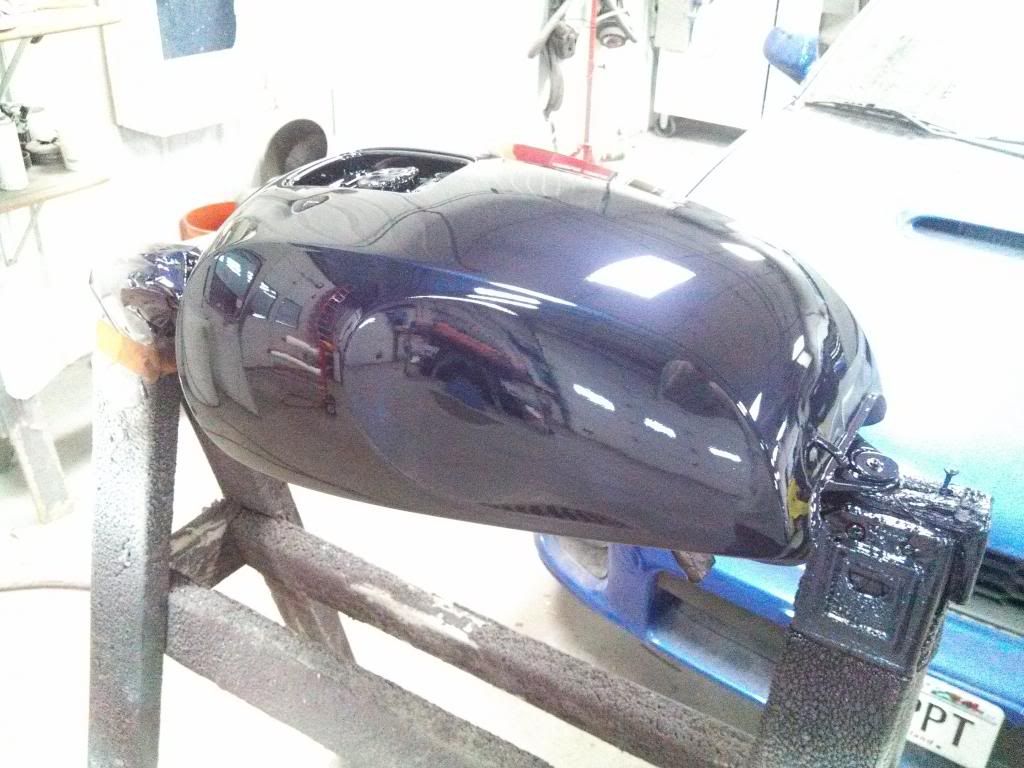
Here is a better pic.
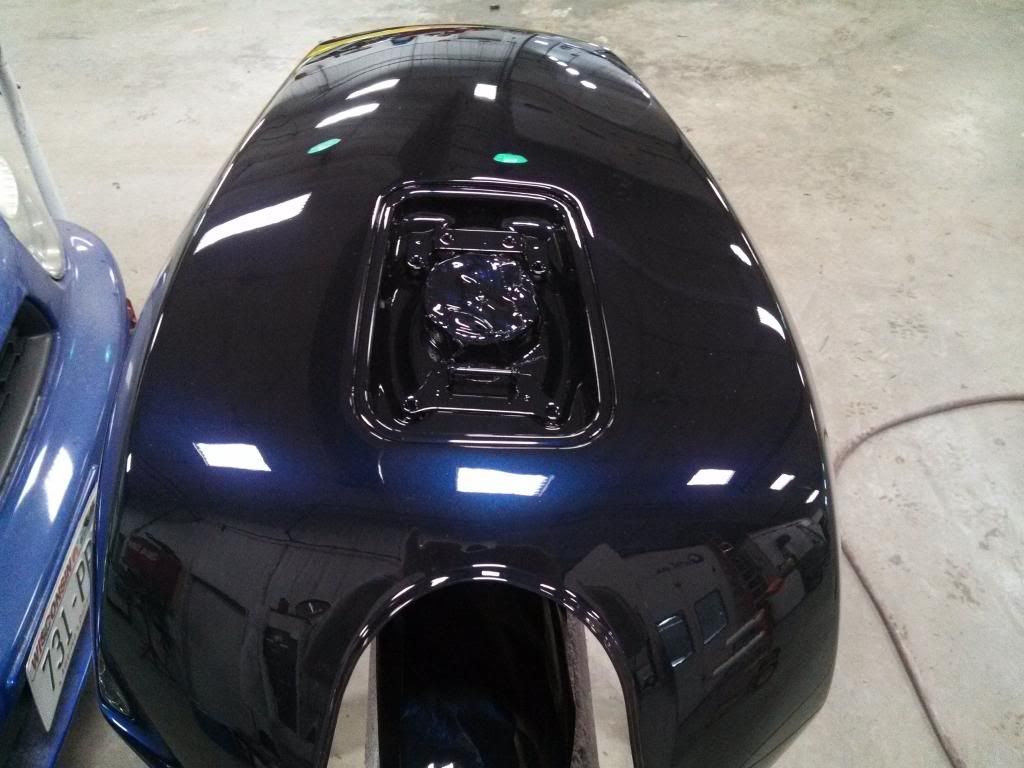
The color is a deep dark blue that looks almost black until the light shines on it. Then the pearl color comes out. It's originally a Porsche color that I have always loved. Here are some more pics.
 1979 xs1100f
New Fuse Box
Progressive Shocks
Gold Valve Emulator
Dyna Coils
Electronic Flasher
Led Headlight
Led Turn Signals
4 Led Driving Lights
2nd Gear Fix
Auto Cam Tensioner
Digital Dash
Stainless Braided Lines
R6 4 Piston Calipers
Stainless Bolt Kit
Maier Fairing
Dyna Balancing Beads
Spin On Oil Filter
Stebel Nautilus Horn
Plasti Dip Rims
ISO GripsComment
-
The next step was to wet sand at 800 grit all the pieces to even out the clear coat. I had to be very careful not to sand too deep and sand off the clear. Everyone has their own way of painting, this is the way I was taught.
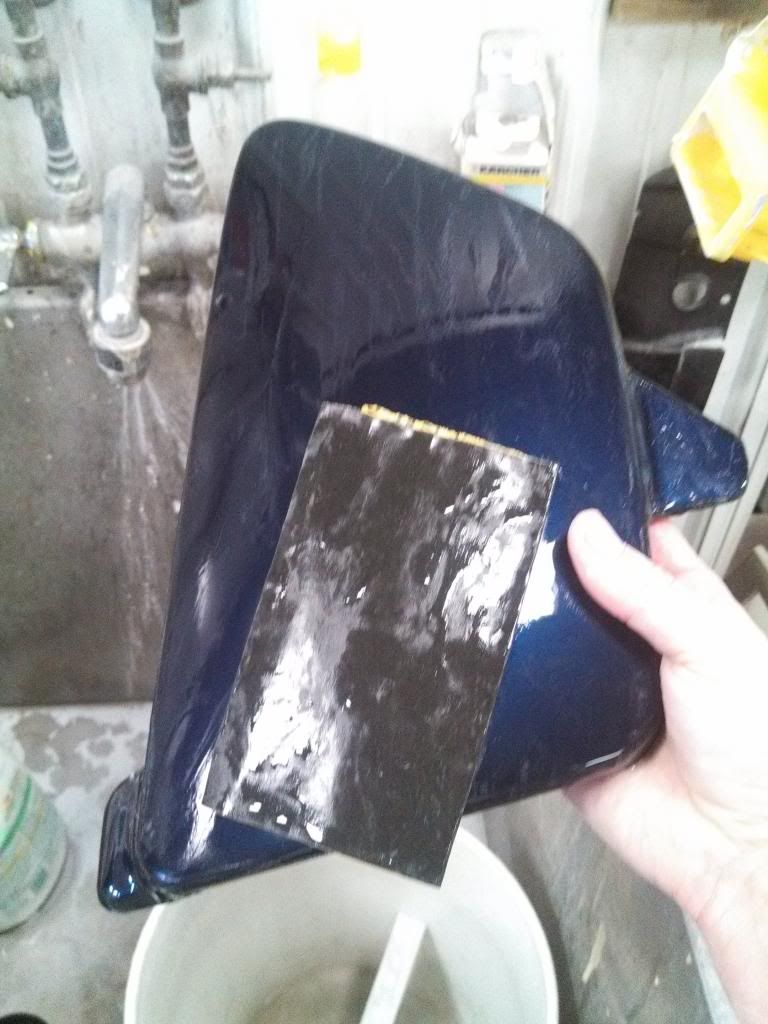
This whole process took about an hour.1979 xs1100f
New Fuse Box
Progressive Shocks
Gold Valve Emulator
Dyna Coils
Electronic Flasher
Led Headlight
Led Turn Signals
4 Led Driving Lights
2nd Gear Fix
Auto Cam Tensioner
Digital Dash
Stainless Braided Lines
R6 4 Piston Calipers
Stainless Bolt Kit
Maier Fairing
Dyna Balancing Beads
Spin On Oil Filter
Stebel Nautilus Horn
Plasti Dip Rims
ISO GripsComment
-
THAT is an AMAZING color! I bet it would look even better with the Yamaha decals.1979 XS1100F
2H9 Mod, Truck-Lite LED Headlight, TECHNA-FIT S/S Brake Lines, Rear Air Shocks, TKAT Fork Brace, Dyna DC-I Coils, TC Fuse Block, Barnett HD Clutch Springs, Superbike Handlebars, V-Star 650 ACCT, NGK Irridium Plugs, OEM Exhaust. CNC-Cut 2nd Gear Dogs; Ported/Milled Head; Modded Airbox: 8x8 Wix Panel Filter; #137.5 Main Jet, Viper Yellow Paint, Michelin Pilot Activ F/R, Interstate AGM Battery, 14MM MC, Maier Fairing, Cree LED Fog Lights.Comment
-
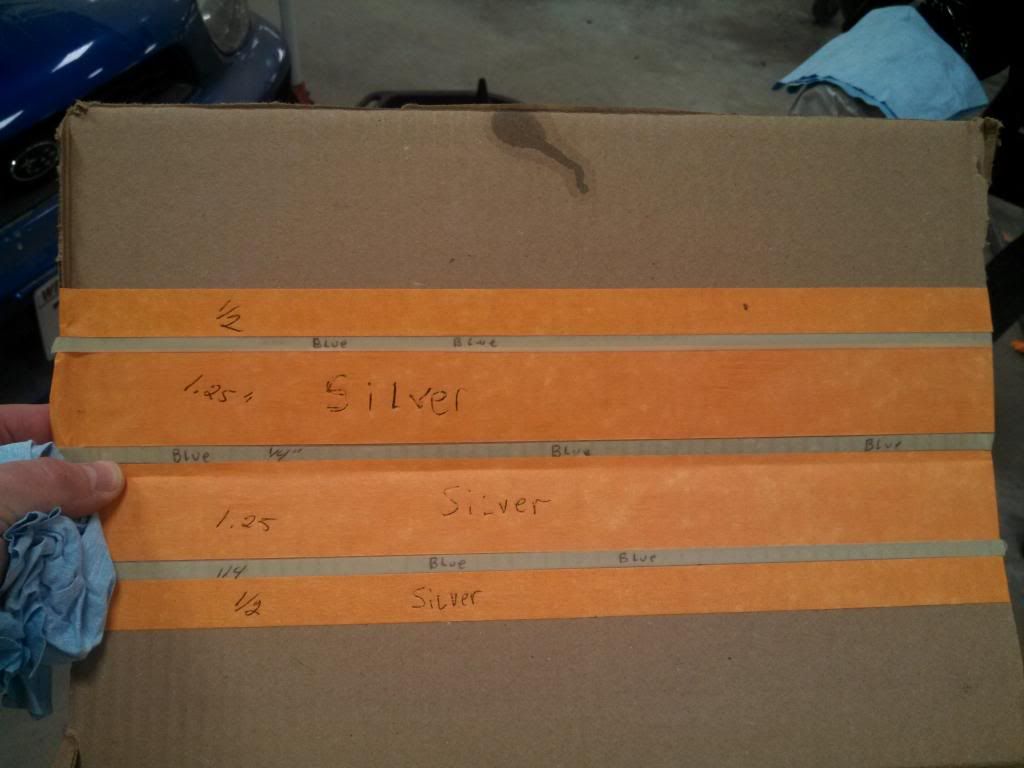
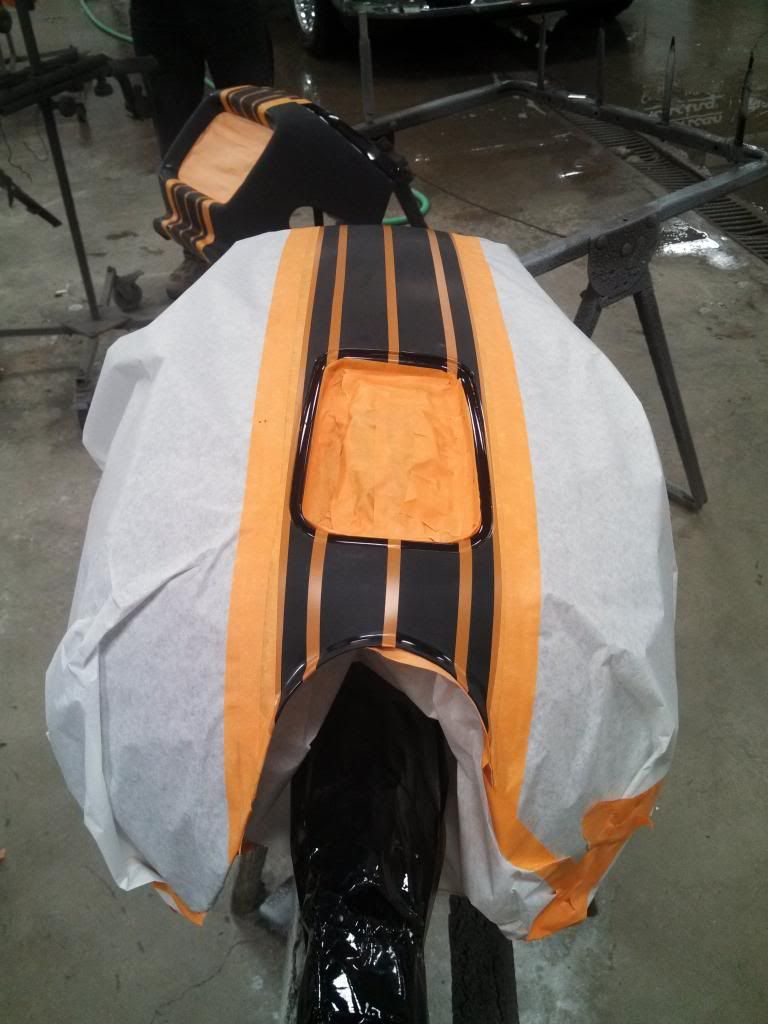
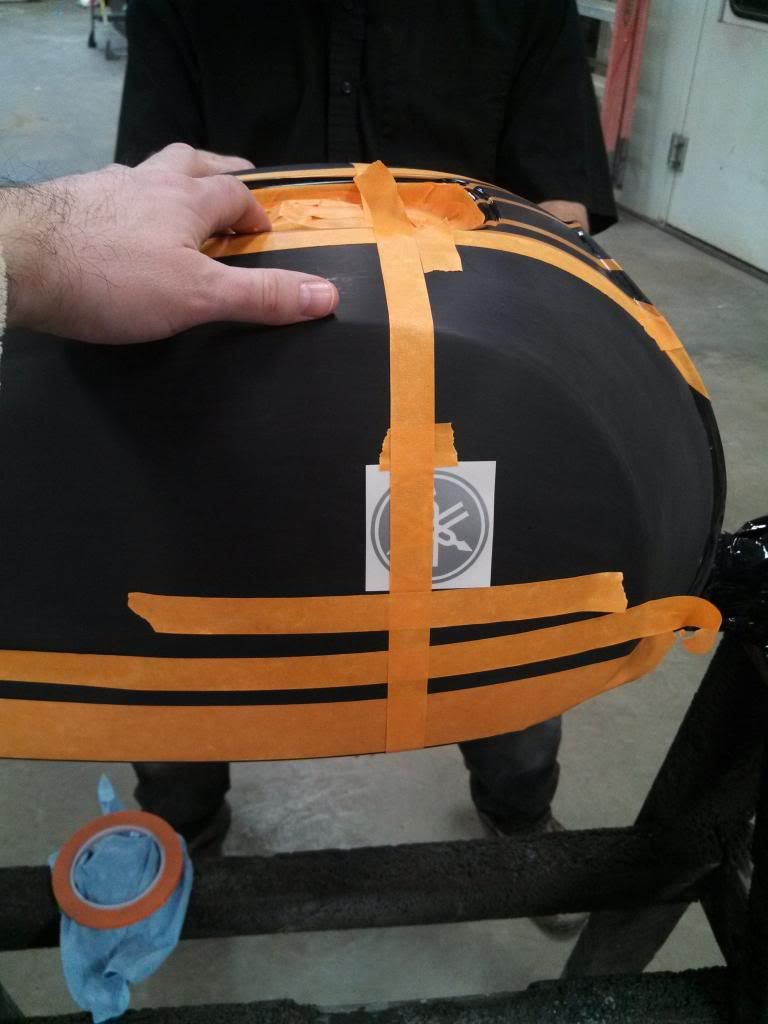
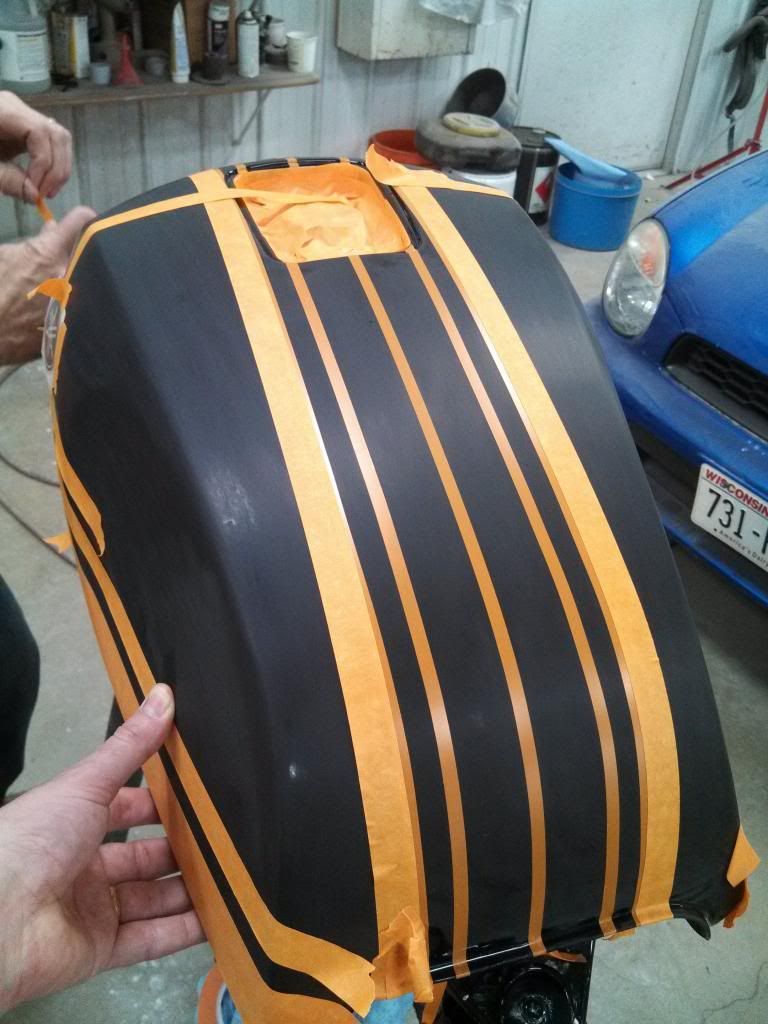
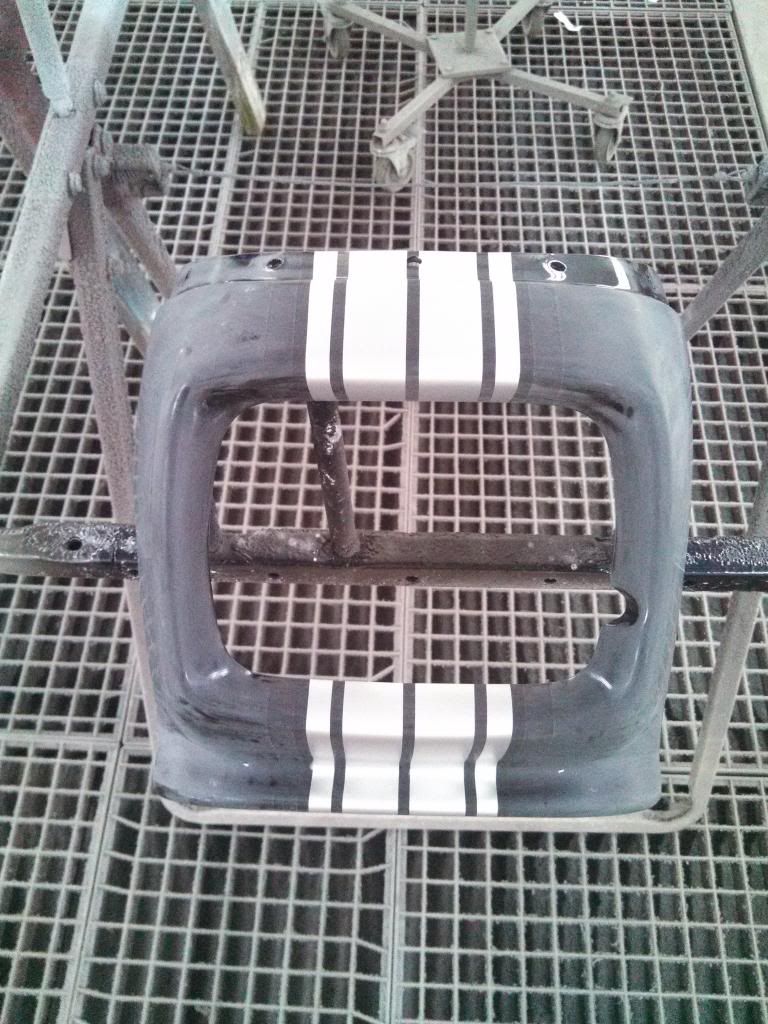
Then the fun began. I started to lay out the stripes. I wanted racing stripes but I wanted them to be done in paint and not a decal. I am sure glad my friend helped me line these up. He was a great help. I began with the tank. First I placed 1/4 inch tape in the center of the tank.
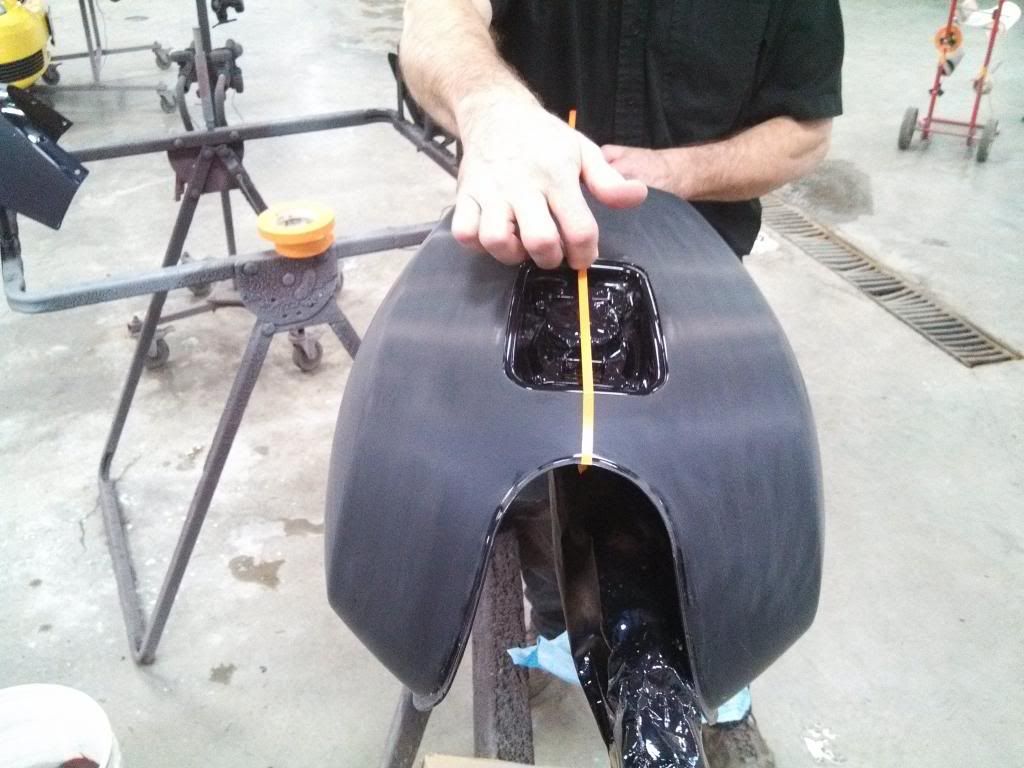
Then using the center line as a guide I placed the next two lines using 1.25 inch tape. Then another 1/4 inch, then 1/2 inch and finally another 3/4 inch. I then carefully removed the 1.25 and the 1/2 inch tape leaving a gap or (stripe) between the 1/4 inch pieces. Sorry if that didn't make any sense. Here is a pic to help.
Here is what it looked like on the actual parts.
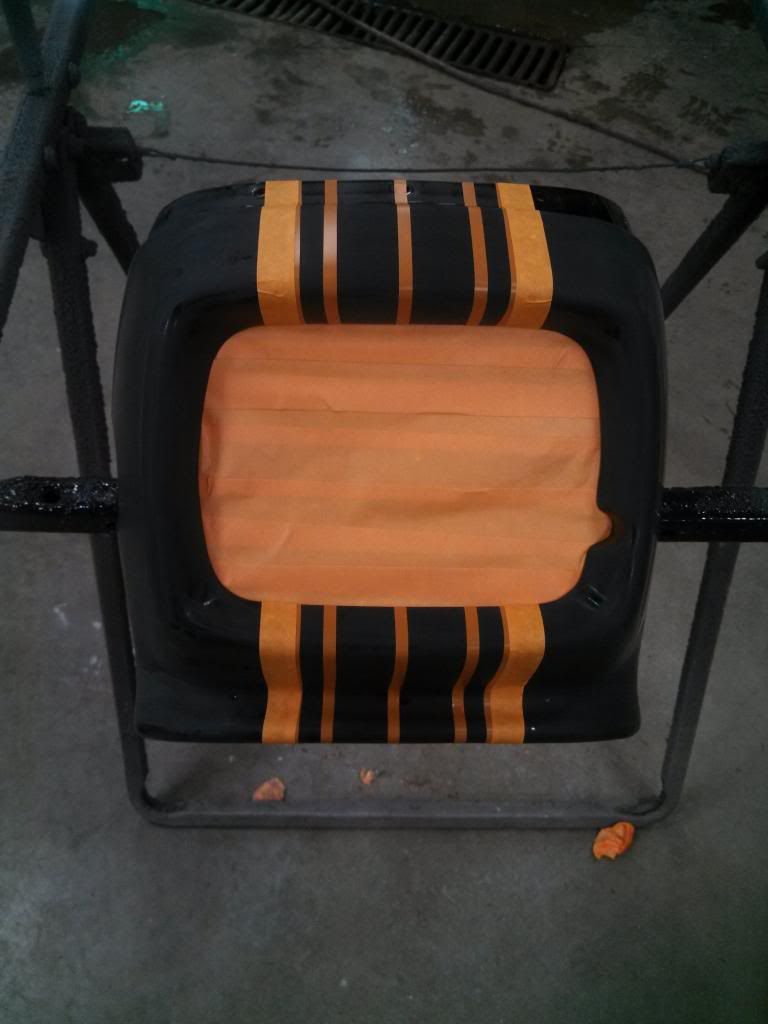
I then placed paper over the rest of the pieces to prepare for painting the stripe.
 1979 xs1100f
New Fuse Box
Progressive Shocks
Gold Valve Emulator
Dyna Coils
Electronic Flasher
Led Headlight
Led Turn Signals
4 Led Driving Lights
2nd Gear Fix
Auto Cam Tensioner
Digital Dash
Stainless Braided Lines
R6 4 Piston Calipers
Stainless Bolt Kit
Maier Fairing
Dyna Balancing Beads
Spin On Oil Filter
Stebel Nautilus Horn
Plasti Dip Rims
ISO GripsComment
-
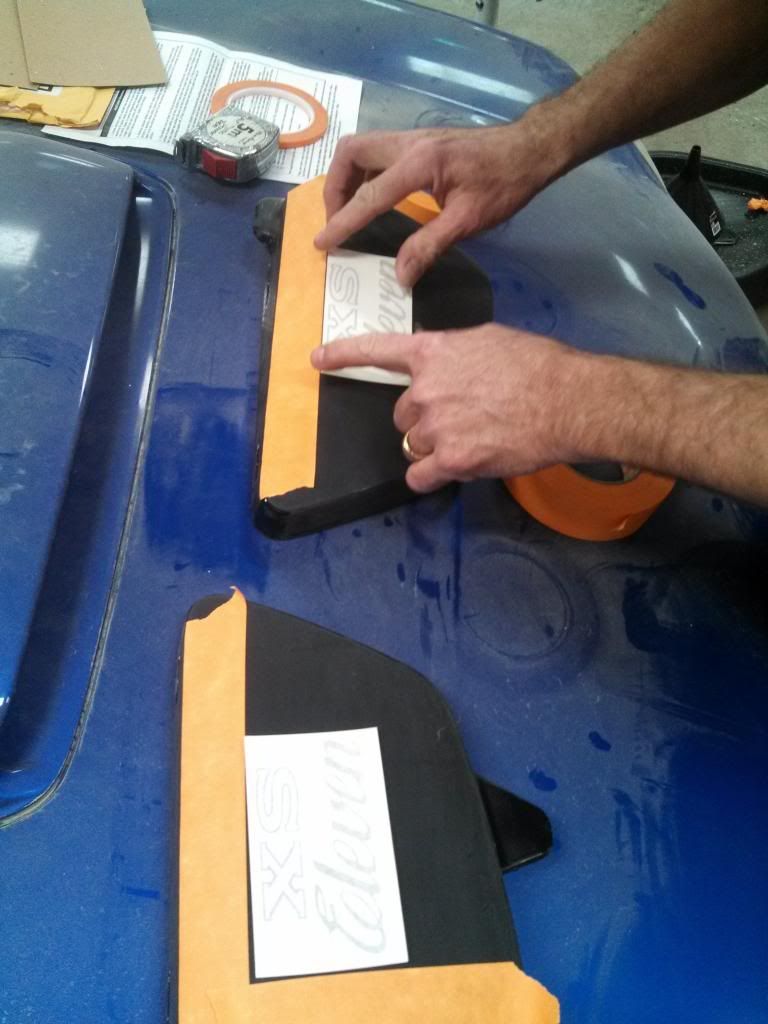
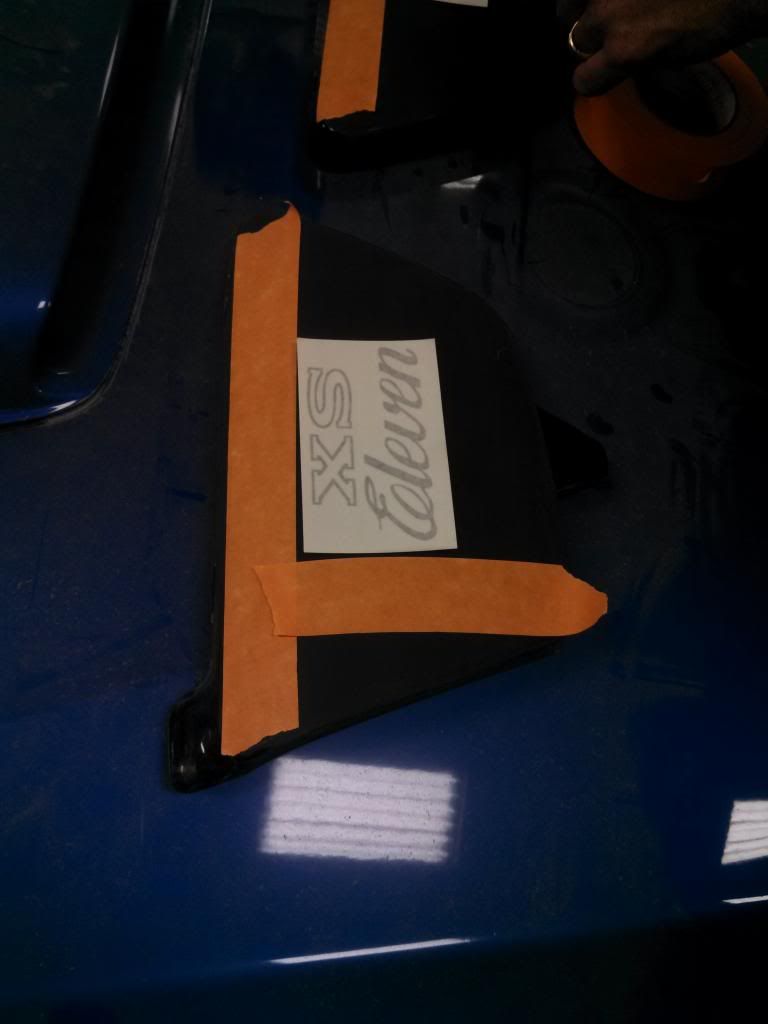
Then I placed the decals. This was a very tough job to make them perfect. The measuring was difficult as well as making everything line up. It would have been much easier if the parts were flat, however life is not that symmetrical and neither is the xs1100. The tank is roundish and the side covers are, let's just say not symmetrical.
 1979 xs1100f
New Fuse Box
Progressive Shocks
Gold Valve Emulator
Dyna Coils
Electronic Flasher
Led Headlight
Led Turn Signals
4 Led Driving Lights
2nd Gear Fix
Auto Cam Tensioner
Digital Dash
Stainless Braided Lines
R6 4 Piston Calipers
Stainless Bolt Kit
Maier Fairing
Dyna Balancing Beads
Spin On Oil Filter
Stebel Nautilus Horn
Plasti Dip Rims
ISO GripsComment
-
More pics please!!!1979 XS1100F
2H9 Mod, Truck-Lite LED Headlight, TECHNA-FIT S/S Brake Lines, Rear Air Shocks, TKAT Fork Brace, Dyna DC-I Coils, TC Fuse Block, Barnett HD Clutch Springs, Superbike Handlebars, V-Star 650 ACCT, NGK Irridium Plugs, OEM Exhaust. CNC-Cut 2nd Gear Dogs; Ported/Milled Head; Modded Airbox: 8x8 Wix Panel Filter; #137.5 Main Jet, Viper Yellow Paint, Michelin Pilot Activ F/R, Interstate AGM Battery, 14MM MC, Maier Fairing, Cree LED Fog Lights.Comment
-
So here are more pics of the process.


 1979 xs1100f
New Fuse Box
Progressive Shocks
Gold Valve Emulator
Dyna Coils
Electronic Flasher
Led Headlight
Led Turn Signals
4 Led Driving Lights
2nd Gear Fix
Auto Cam Tensioner
Digital Dash
Stainless Braided Lines
R6 4 Piston Calipers
Stainless Bolt Kit
Maier Fairing
Dyna Balancing Beads
Spin On Oil Filter
Stebel Nautilus Horn
Plasti Dip Rims
ISO GripsComment
-
Rev- Is that a Meier fairing? If so, where did you find it?1979 XS1100F
2H9 Mod, Truck-Lite LED Headlight, TECHNA-FIT S/S Brake Lines, Rear Air Shocks, TKAT Fork Brace, Dyna DC-I Coils, TC Fuse Block, Barnett HD Clutch Springs, Superbike Handlebars, V-Star 650 ACCT, NGK Irridium Plugs, OEM Exhaust. CNC-Cut 2nd Gear Dogs; Ported/Milled Head; Modded Airbox: 8x8 Wix Panel Filter; #137.5 Main Jet, Viper Yellow Paint, Michelin Pilot Activ F/R, Interstate AGM Battery, 14MM MC, Maier Fairing, Cree LED Fog Lights.Comment
-
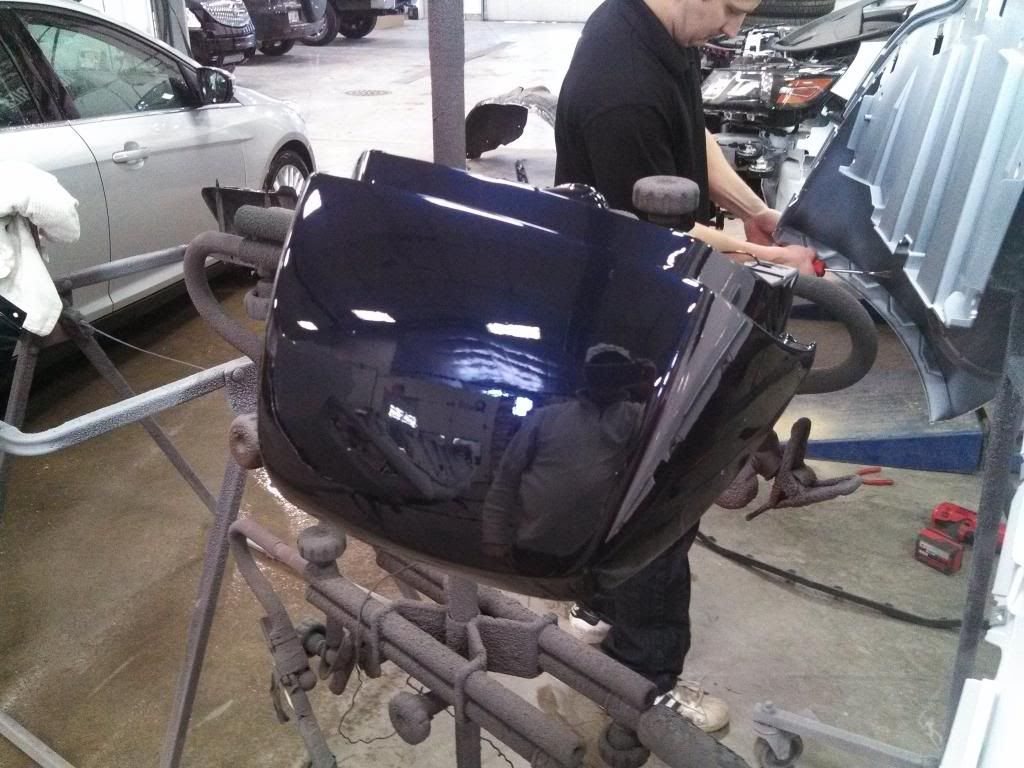
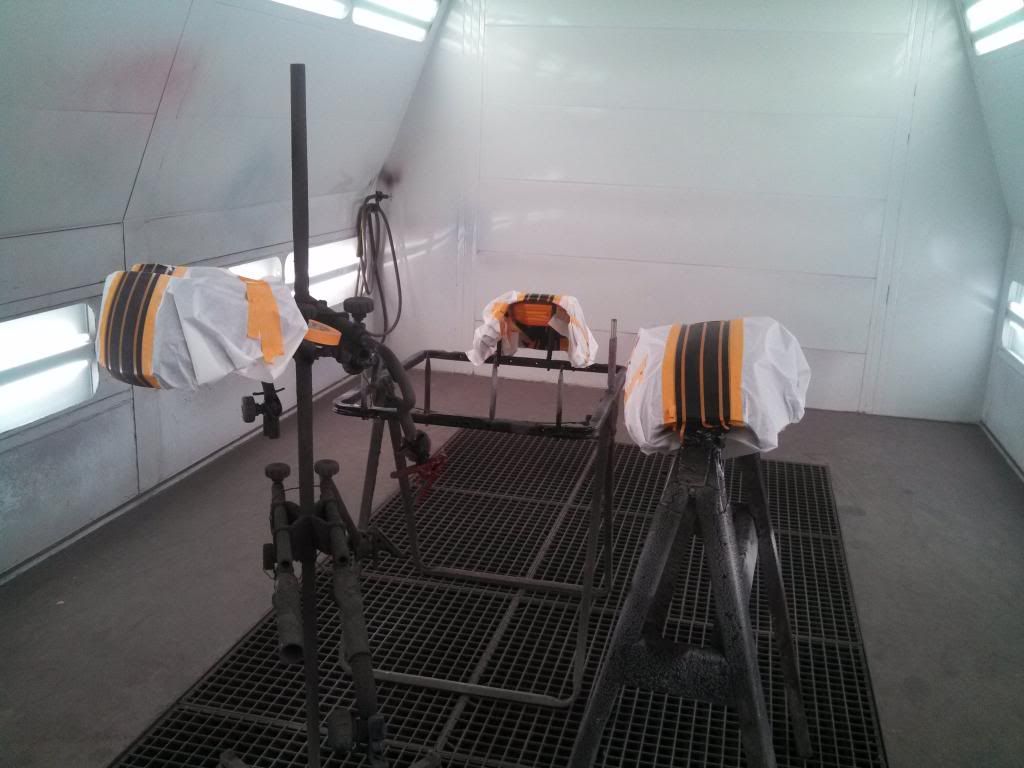
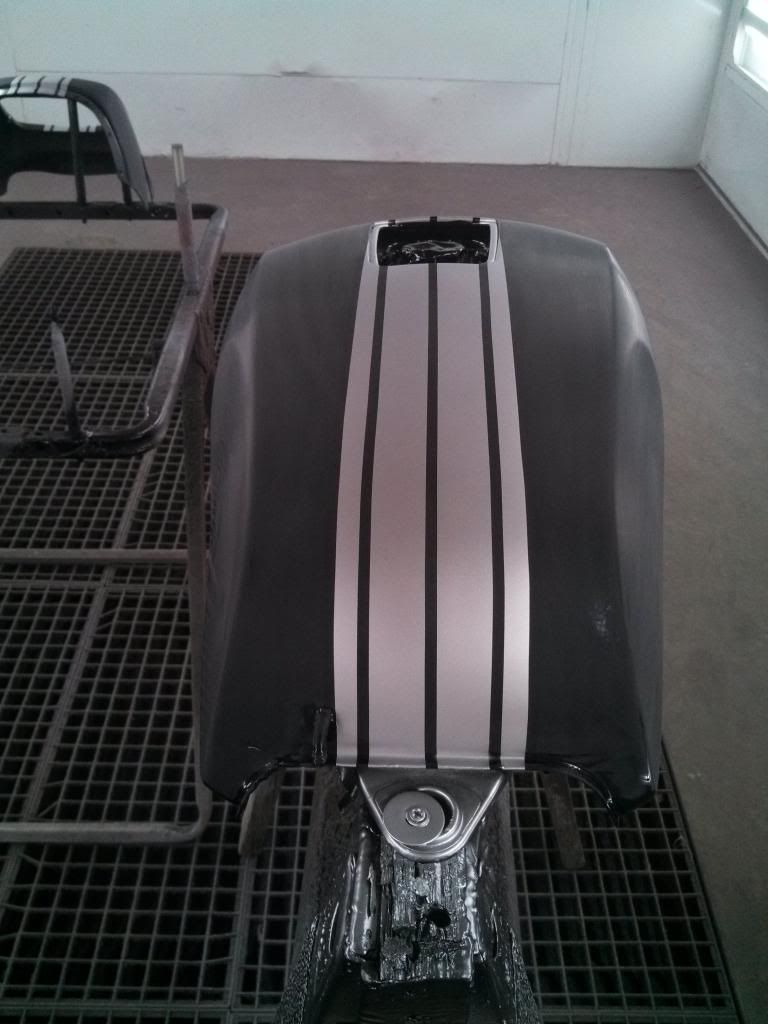
I then sprayed the fairing, tank and cowl with three coats of silver.

Next I baked the parts for 30 minutes. Then I gently pulled the tape and paper off the parts and presto perfect racing stripes that are paint not decals.
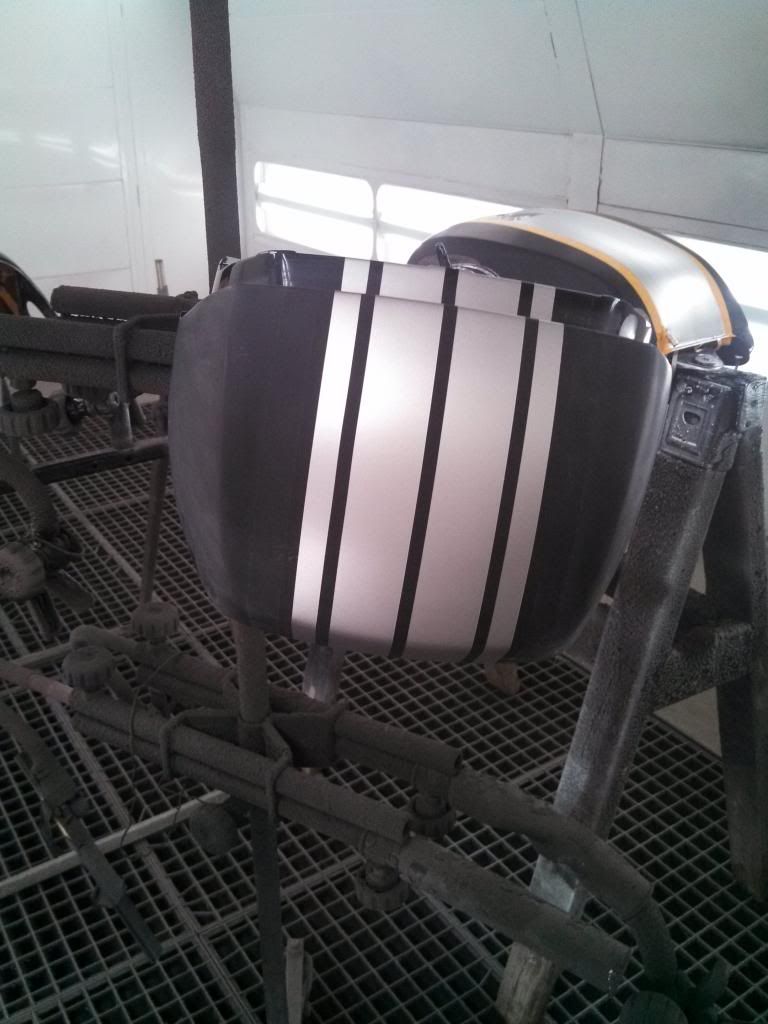
I then put one layer of clear coat on and left for the day. I live about 1.5 hours from the shop and I only have one day off a week. So next Monday I am going to wet sand the parts again, clear, wet sand, clear and then polish. By the end of this project the tank, fairing, cowl and side covers are going to shine. Stay tuned.1979 xs1100f
New Fuse Box
Progressive Shocks
Gold Valve Emulator
Dyna Coils
Electronic Flasher
Led Headlight
Led Turn Signals
4 Led Driving Lights
2nd Gear Fix
Auto Cam Tensioner
Digital Dash
Stainless Braided Lines
R6 4 Piston Calipers
Stainless Bolt Kit
Maier Fairing
Dyna Balancing Beads
Spin On Oil Filter
Stebel Nautilus Horn
Plasti Dip Rims
ISO GripsComment
-
I plan on using an LED Headlight from TruckLite. Here it is.
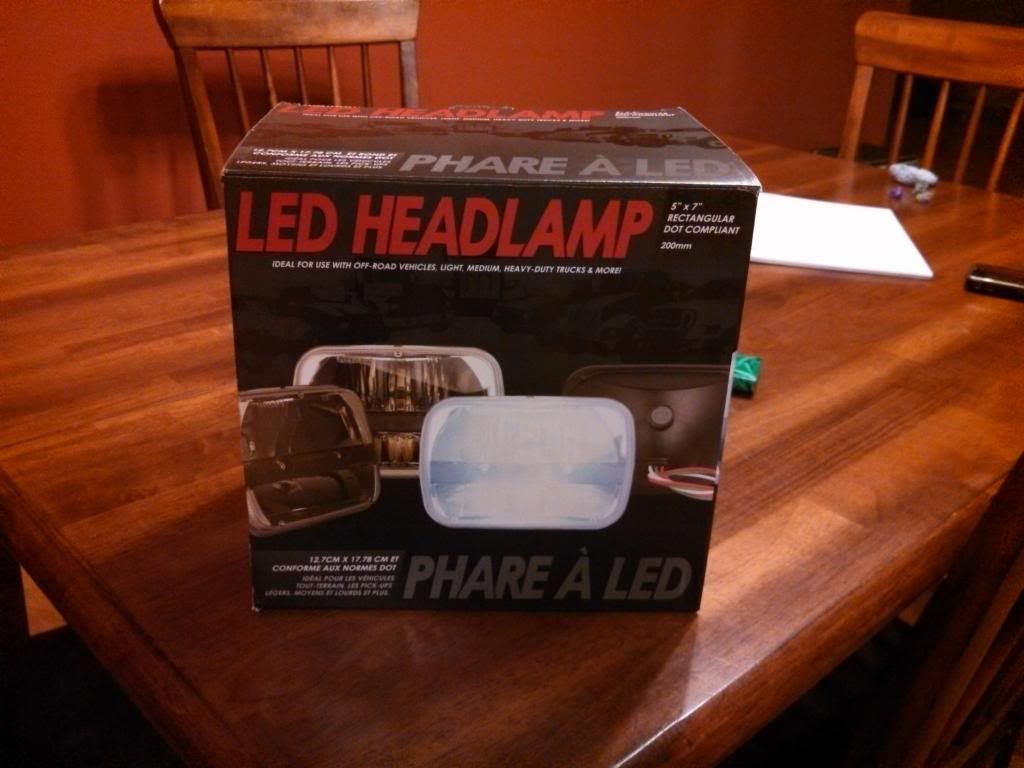
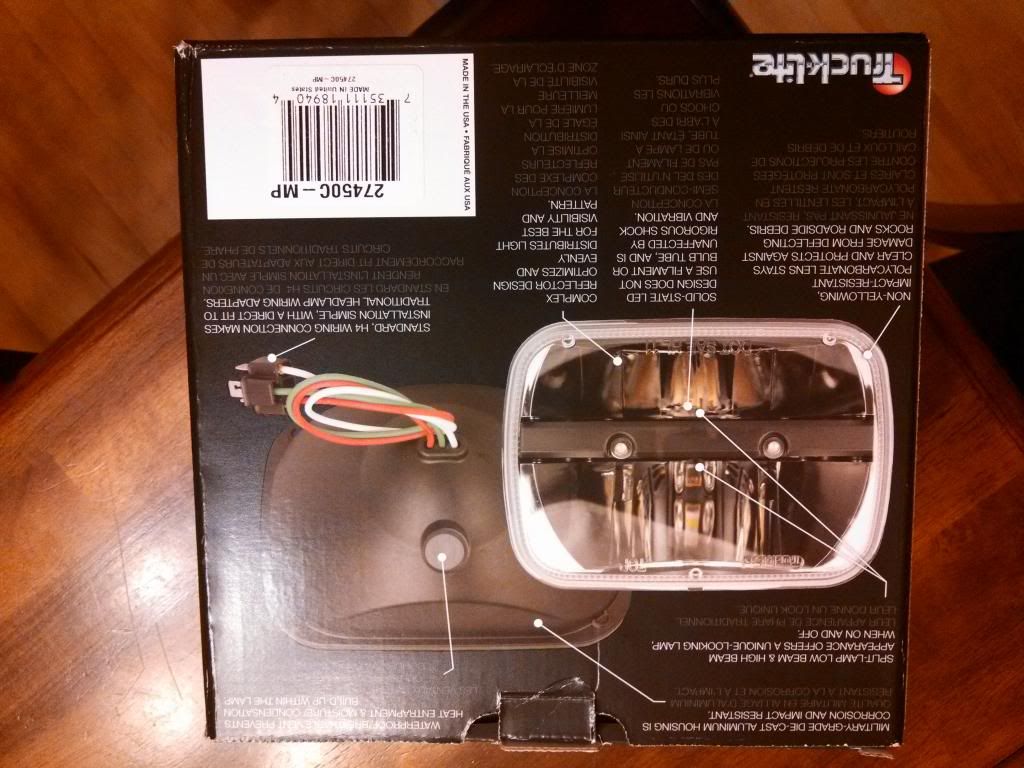

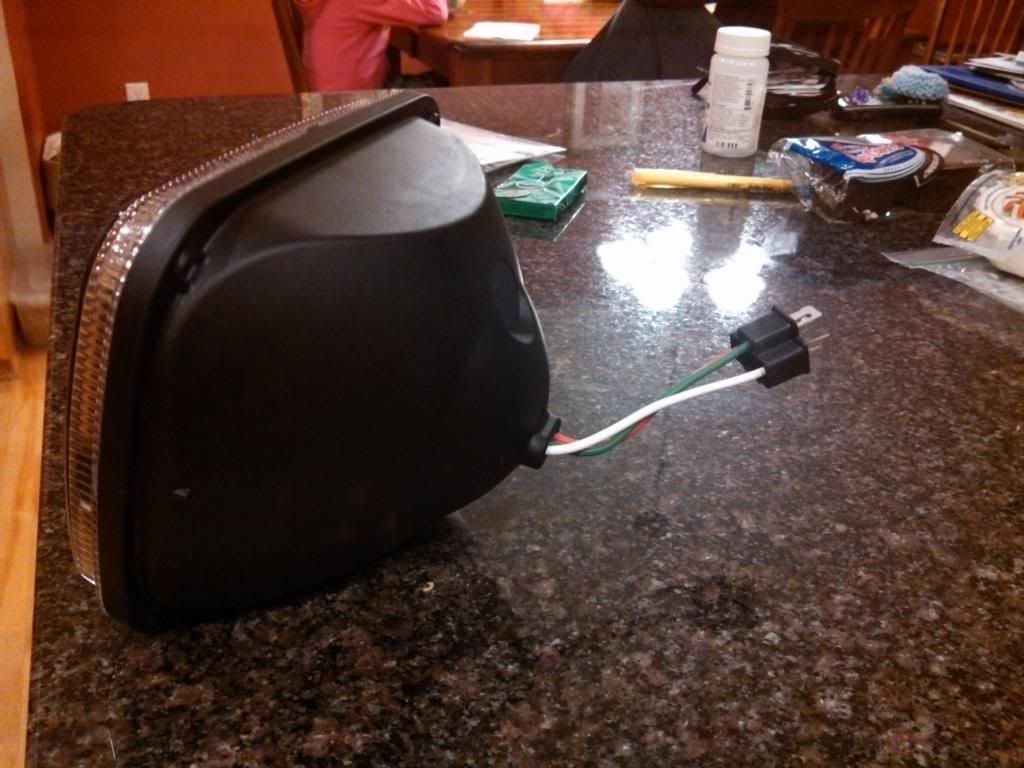
This light uses very little power and is very bright. It will match the color (white) light of the running lights I installed, which are also LED. I am using Crazy Steve's Mod "Install an off the shelf headlight in a standard" to mount it. It is going to be awesome!1979 xs1100f
New Fuse Box
Progressive Shocks
Gold Valve Emulator
Dyna Coils
Electronic Flasher
Led Headlight
Led Turn Signals
4 Led Driving Lights
2nd Gear Fix
Auto Cam Tensioner
Digital Dash
Stainless Braided Lines
R6 4 Piston Calipers
Stainless Bolt Kit
Maier Fairing
Dyna Balancing Beads
Spin On Oil Filter
Stebel Nautilus Horn
Plasti Dip Rims
ISO GripsComment
-
Hi Rev,
Thanks for sharing your painting project with us.
Phil1981 XS1100 H Venturer ( Addie)
1983 XJ 650 Maxim
2004 Kawasaki Concours. ( Black Bear)Comment
-
Hi Ian
Yes it is a Meier fairing. I just did a web search and priced it out. I think at the time it was a seller on Amazon. It should look good with the windscreen, although after seeing the paint with clear coat it looks like the paint will out shine the windscreen.1979 xs1100f
New Fuse Box
Progressive Shocks
Gold Valve Emulator
Dyna Coils
Electronic Flasher
Led Headlight
Led Turn Signals
4 Led Driving Lights
2nd Gear Fix
Auto Cam Tensioner
Digital Dash
Stainless Braided Lines
R6 4 Piston Calipers
Stainless Bolt Kit
Maier Fairing
Dyna Balancing Beads
Spin On Oil Filter
Stebel Nautilus Horn
Plasti Dip Rims
ISO GripsComment


Comment