Announcement

Collapse
No announcement yet.

Time to wake her up...

Collapse
X
 
  • Filter
  • Time
  • Show
Clear All
new posts

  • #31
    Hey Back

    Jim,

    Thanks for the validation, guidance and words of encouragement!
    I guess the details and timelines will unfold as I get into the task.
    Waiting on parts gives me too much time to read and ultimately agonize over the potential details and appropriate techniques.
    The solution is then slow and sure, one step at a time.
    Of all the things I do on this bike, the carb rebuilds needs to be the most meticulous. I will force myself to be thorough and take my time.

    Patience may be a virtue but I want to RIDE it!
    1980 XS1100 Standard (G)
    Original Owner
    Stock plus:
    K&N air filter, Supertrapp 4x1, Techna-fit SS brake lines, TC Fuse Block, TKAT Fork Brace
    ...dirt and grime from several states.
    -------------------
    2011 FJR1300
    1978 SR500

    Comment


    • #32
      Use of the socket as I mentioned may prove to be difficult in removing float pins unless you remove each carb from the rack. I don't suggest you go that far unless it proves to be necessary. Even if you don't go that far it would still pay dividends to re synch the carbs after cleaning.
      2 - 80 LGs bought one new
      81 LH
      02 FXSTB Nighttrain
      22 FLTRK Road Glide Limited
      Jim

      Comment


      • #33


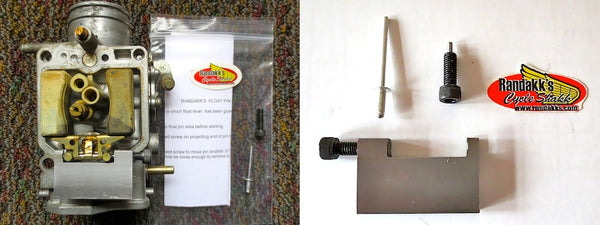
        I believe this float pin tool works on our bike, but I have never taken a measurement. This should save you from the broken post. I use an automatic center punch.

        The link: Float Pin Removal Tool
        Marty (in Mississippi)
        XS1100SG
        XS650SK
        XS650SH
        XS650G
        XS6502F
        XS650E

        Comment


        • #34
          I like the auto center punch as well, done 50 or so of the 80/later carbs with no broken posts. The small pencil sized punch about $10 at Ace.
          76 XS650 C ROADSTER
          80 XS650 G Special II
          https://ibb.co/album/icbGgF
          80 XS 1100 SG
          81 XS 1100LH/SH DARKHORSE
          https://tinyurl.com/k6nzvtw
          AKA; Don'e, UD, Unca Don'e

          Comment


          • #35
            Hey "MIKE",

            The float post pins are made slightly larger on the end nearest the head of the pin, so it causes an interference type fit into that post. Then years/decades of corrosion due to disimilar metals...steel vs. aluminum, as well as the fuel/varnish causes them to get very stuck. SO...first soaking the carb body WITH the float pins will help to remove the varnish. Next, use a heatgun to heat/cool the post/pin a few cycles, this can help break/loosen the corrosion. Then use the heat gun again to loosen the post's grip before trying to pry loose the pin.

            Once you get the pin out, put it in a drill chuck or such, and use some fine emory cloth or such, and file down the pin so that it's a loose slip fit into the posts. The interference fit is NOT needed, the float bowl is designed to keep the pin in place once the bowl is placed back on the carb. This can help NOT to break the posts in the future cleanings or repairings.

            Do a search for float pin remover, you should be able to find the thread that Ken Talbot did regarding the one he designed/made, and possibly how to make one yourself if need to.

            If you can heat up the carb soak solution that can help it work better. DO you have an ultrasound tank....that can really help the solution to penetrate the passages as well as shake loose the crud.
            T. C. Gresham
            81SH "Godzilla" . . .1179cc super-rat.
            79SF "The Teacher" . . .basket case!
            History shows again and again,
            How nature points out the folly of men!

            Comment


            • #36
              You guys are a wonderful wealth of knowledge.
              I hope I can return in kind someday.

              As for the float pins I will have to wait until I see them and try my options - least obtrusive first.
              I.E. some chemical help (card dip and perhaps PB Blaster), heat, diagonal pliers, center-punch.
              I thought as a heat option I could hold a common nail (10D) by the point with pliers and heat the head with a small torch. Then hold the heated head to the post. We will see what I can get away with from the above options on removal attempt.

              My carb kits arrived today (K&L xs1100SG 1980 :K-621 p/n 18-2559)
              My parts guy (who seems very knowledgeable) said after lots of cross referencing that these are the right ones.

              In looking at the kit contents I have some questions (of course)

              1. I should just carefully clean my existing main jets and re-use them. The kit comes with 2 jet sizes (inner and outer carbs) but I recall reading K&L jets can be problematic.

              2. It comes with a new vacuum needle and hardware (clips, washers, spring etc)
              Do I want to use the new one or just clean the existing one without dis-assembly?

              3. What is up with the included plug? I think it is for the pilot jet?

              As always Thanks!

              P.S. TC - That is "ekiM" to you (grin)
              1980 XS1100 Standard (G)
              Original Owner
              Stock plus:
              K&N air filter, Supertrapp 4x1, Techna-fit SS brake lines, TC Fuse Block, TKAT Fork Brace
              ...dirt and grime from several states.
              -------------------
              2011 FJR1300
              1978 SR500

              Comment


              • #37
                Originally posted by ekim View Post
                You guys are a wonderful wealth of knowledge.
                I hope I can return in kind someday.

                As for the float pins I will have to wait until I see them and try my options - least obtrusive first.
                I.E. some chemical help (card dip and perhaps PB Blaster), heat, diagonal pliers, center-punch.
                I thought as a heat option I could hold a common nail (10D) by the point with pliers and heat the head with a small torch. Then hold the heated head to the post. We will see what I can get away with from the above options on removal attempt.

                My carb kits arrived today (K&L xs1100SG 1980 :K-621 p/n 18-2559)
                My parts guy (who seems very knowledgeable) said after lots of cross referencing that these are the right ones.

                In looking at the kit contents I have some questions (of course)

                1. I should just carefully clean my existing main jets and re-use them. The kit comes with 2 jet sizes (inner and outer carbs) but I recall reading K&L jets can be problematic.

                2. It comes with a new vacuum needle and hardware (clips, washers, spring etc)
                Do I want to use the new one or just clean the existing one without dis-assembly?

                3. What is up with the included plug? I think it is for the pilot jet?

                As always Thanks!

                P.S. TC - That is "ekiM" to you (grin)
                I've found for me cleaning the stock carbs without any changes is the best place to start. See how it responds and then continue with whatever changes you think are needed, you are now testing to see if what you think is needed ends up being what you really need. One change at a time and give it some time for you to feel it out before moving on to anything else. Return to stock if your not sure, a little improvement may not be the right move, try some other solution, test and so on. Share with the forum before any change from stock just to get all knowledge, depending on your results from plugs/color/how it starts/how it runs though the rpms. to redline !
                76 XS650 C ROADSTER
                80 XS650 G Special II
                https://ibb.co/album/icbGgF
                80 XS 1100 SG
                81 XS 1100LH/SH DARKHORSE
                https://tinyurl.com/k6nzvtw
                AKA; Don'e, UD, Unca Don'e

                Comment


                • #38
                  The slide needles in the K&L kit are not the same as stock. Reuse your old needles.
                  Marty (in Mississippi)
                  XS1100SG
                  XS650SK
                  XS650SH
                  XS650G
                  XS6502F
                  XS650E

                  Comment


                  • #39
                    Originally posted by jetmechmarty View Post
                    The slide needles in the K&L kit are not the same as stock. Reuse your old needles.
                    Jets either....
                    Greg

                    Everybody is a genius. But if you judge a fish by its ability to climb a tree, it will live its whole life believing that it is stupid.”

                    ― Albert Einstein

                    80 SG Ol' Okie;79 engine & carbs w/pods, 45 pilots, 140 mains, Custom Mac 4 into 2 exhaust, ACCT,XS850 final drive,110/90/19 front tire,TKat fork brace, XS750 140 MPH speedometer, Vetter IV fairing, aftermarket hard bags and trunk, LG high back seat, XJ rear shocks.

                    The list changes.

                    Comment


                    • #40
                      Originally posted by ekim View Post
                      You guys are a wonderful wealth of knowledge.
                      I hope I can return in kind someday.

                      As for the float pins I will have to wait until I see them and try my options - least obtrusive first.
                      I.E. some chemical help (card dip and perhaps PB Blaster), heat, diagonal pliers, center-punch.
                      I thought as a heat option I could hold a common nail (10D) by the point with pliers and heat the head with a small torch. Then hold the heated head to the post. We will see what I can get away with from the above options on removal attempt.

                      My carb kits arrived today (K&L xs1100SG 1980 :K-621 p/n 18-2559)
                      My parts guy (who seems very knowledgeable) said after lots of cross referencing that these are the right ones.

                      In looking at the kit contents I have some questions (of course)

                      1. I should just carefully clean my existing main jets and re-use them. The kit comes with 2 jet sizes (inner and outer carbs) but I recall reading K&L jets can be problematic.

                      2. It comes with a new vacuum needle and hardware (clips, washers, spring etc)
                      Do I want to use the new one or just clean the existing one without dis-assembly?

                      3. What is up with the included plug? I think it is for the pilot jet?

                      As always Thanks!

                      P.S. TC - That is "ekiM" to you (grin)
                      IMHO I wouldn't get a heat gun near the floats as it could melt the solder in the early carbs floats or melt the material ( plastic?) in the later carb foats.
                      Your idea with the heated nail, pinpointing the heat, should work well with some PB soak, although I've never needed any more than some PB.

                      The kits you have, K&L 18-2559 seem like the only ones available for the XS1100G as they include the rubber plugs for the pilot jet tower.
                      As for the ?'s

                      1) Clean all your original Mikuni jets and reuse if in good condition, or if in questionable condition buy new Mikuni's. The US '80G,stock, has 115 mains in carbs 1 & 4 and 120 mains in carbs 2 & 3

                      2) You can disassemble your Jet needle from the slide, for cleaning, but you don't really have to. And yes keep the originals or make sure they in fact are original. They are: 5IZ7 Mikuni and might I add that they are very delicate and sharp and very easy to bend DAMHIK

                      3) If the plug you're referring to is the rubber cap plug it's for the pilot jet tower inside the float bowl area.
                      But, if your referring to the metal plug with a small hole in the middle, from the kit, which are anti-tamper plugs, they are for plugging the mixture screws at the front- top area of the carbs once dialed in.
                      There is no reason to reinstall the anti-tamper plugs unless purity is a priority.
                      1980 XS1100G "Dolly G" Full Dresser (with a coat of many colors )
                      1979 XS1100SF (stock-euro mods planned)
                      1984 XV700L Virago (to be hot-modded)
                      1983 XJ750MK Midnight Maxim (semi-restored DD)
                      1977 XS650D ( patiently awaiting resto)

                      Sometimes it takes a whole tank of gas before you can think straight.

                      Comment


                      • #41
                        Hey "ekiM",

                        The vacuum slide needle fits and rides down inside the main jet, and so can rub and wallow out the inner hole of the main jet...which then changes the jet size making it larger/richer! So...after soaking/cleaning the main jets, use a strong magnifier and view the jet thru the hole and see if it looks round or oval. If oval, then it's too worn, and should be replaced. You can remove the needle from the slide, and lay it on something truly flat and roll it to see if it shows any signs of wear/bending. You can also then compare it's profile with the ones you got in the kit. Would be nice to actually take some hi res macro type photos of them side by side so "WE" can see the difference it tapers and such.

                        In '80, Yamaha was transitioning from the early carb bodies to the later style, but apparently had lots of early parts left over, so there were some bastardized carbs that are like the newer style, but still used the older main jet nozzle/emulsion tube which has the hole in the end to allow the sharing of the fuel supply from the main jet tower to the pilot jet tower, even though they still use the newer smaller jet sizes. And so the rubber plugs are needed to CAP OFF the pilot jet towers so that the pilot jet will only feed from the sharing tunnel, and not ALSO from the bowl directly like the true later carbs do since the later ones do NOT have the sharing tunnel. SO...you just need to inspect your carbs closely to see 1.) if it has the sharing tunnel between the main/pilot jet towers, 2.) if it has the main jet nozzle/emulsion tube with the sharing hole/path thru the end of it, and 3.) IF the carbs had the rubber plugs already over the pilot jet towers when you take off the bowls. IF so...then use the new rubber caps. IF not, then just ignore the new rubber caps.

                        Also, even though the MANUALs say that the main jets were staggered, richer for the inner carbs to facilitate cooling, Yamaha realized that it wasn't really needed, and just put the same size across all 4, so also inspect your mains closely to see/verify if you do actually have different sized jets for 1-4 vs. 2-3, or just the same in all 4.

                        T.C.
                        T. C. Gresham
                        81SH "Godzilla" . . .1179cc super-rat.
                        79SF "The Teacher" . . .basket case!
                        History shows again and again,
                        How nature points out the folly of men!

                        Comment


                        • #42
                          Originally posted by TopCatGr58 View Post
                          Hey "ekiM",

                          The vacuum slide needle fits and rides down inside the main jet, and so can rub and wallow out the inner hole of the main jet...which then changes the jet size making it larger/richer!

                          I have never seen or heard of this happening TC. Have you?

                          It is a helluva theory but in my mind gas is oil, oil is a lubricant, therefore wear would be minimal.

                          Automotive carbs run metering rods also and I've never seen it there either.
                          Greg

                          Everybody is a genius. But if you judge a fish by its ability to climb a tree, it will live its whole life believing that it is stupid.”

                          ― Albert Einstein

                          80 SG Ol' Okie;79 engine & carbs w/pods, 45 pilots, 140 mains, Custom Mac 4 into 2 exhaust, ACCT,XS850 final drive,110/90/19 front tire,TKat fork brace, XS750 140 MPH speedometer, Vetter IV fairing, aftermarket hard bags and trunk, LG high back seat, XJ rear shocks.

                          The list changes.

                          Comment


                          • #43
                            Hey Greg,

                            Yeah, a fellow xsive posted about it, and I think even showed photos, but I think it was from where the spring was messed up that was part of the needle assembly, and caused the needle to rub against one side of the nozzle/main jet assembly all the time/too much. So..yes, wearing of the main jet/nozzle and needle is probably rare, but I've also heard others mentioning their needles being worn.

                            I'll try to find the thread/post.
                            T.C.
                            T. C. Gresham
                            81SH "Godzilla" . . .1179cc super-rat.
                            79SF "The Teacher" . . .basket case!
                            History shows again and again,
                            How nature points out the folly of men!

                            Comment


                            • #44
                              I've some worn needles from 650s, looks like they are worn right where the person riding it held the throttle most of the time, maybe long freeway rides or just same roads taken to work every day ?
                              76 XS650 C ROADSTER
                              80 XS650 G Special II
                              https://ibb.co/album/icbGgF
                              80 XS 1100 SG
                              81 XS 1100LH/SH DARKHORSE
                              https://tinyurl.com/k6nzvtw
                              AKA; Don'e, UD, Unca Don'e

                              Comment


                              • #45
                                Hmmmm.......seems if the needles were worn the jets would be too.

                                Pics?
                                Greg

                                Everybody is a genius. But if you judge a fish by its ability to climb a tree, it will live its whole life believing that it is stupid.”

                                ― Albert Einstein

                                80 SG Ol' Okie;79 engine & carbs w/pods, 45 pilots, 140 mains, Custom Mac 4 into 2 exhaust, ACCT,XS850 final drive,110/90/19 front tire,TKat fork brace, XS750 140 MPH speedometer, Vetter IV fairing, aftermarket hard bags and trunk, LG high back seat, XJ rear shocks.

                                The list changes.

                                Comment

                                Working...
                                X