 Tweet
Tweet
Try bypassing the headlight relay, unplug it and jump the red/yel and the blu/blk in the harness plug and see if the HL comes on with the key on.
-
2H7 (79) owned since '89
3H3 owned since '06
07 Triumph Tiger 1050 (night rider)
"If it ain't broke, modify it"
☮ -
-
Your bike is an 81, there is a diode in the harness in line with one of the white wires from the alt which could be bad. The yel wire shouldn't do anything on your 81, it was used in the 78-79 bikes with a different type relay and was omitted on the later models though it is still there. Check for AC voltage at the white wire at the relay when the bike is running. If you want to check the relay, open it up and look for a bad solder joint.2H7 (79) owned since '89
3H3 owned since '06
07 Triumph Tiger 1050 (night rider)
"If it ain't broke, modify it"
☮Comment
-
I've only opened the 79 type, the metal nearest the plug can be pried back and the guts will pop out, not sure on the 80-81 type, maybe someone will chime in about that. It is safe to leave the relay bypassed permanently if you choose, many people do.2H7 (79) owned since '89
3H3 owned since '06
07 Triumph Tiger 1050 (night rider)
"If it ain't broke, modify it"
☮Comment
-
Unplug the relay, and jump the wires in the harness plug and wrap with electrical tape.2H7 (79) owned since '89
3H3 owned since '06
07 Triumph Tiger 1050 (night rider)
"If it ain't broke, modify it"
☮Comment
-
-
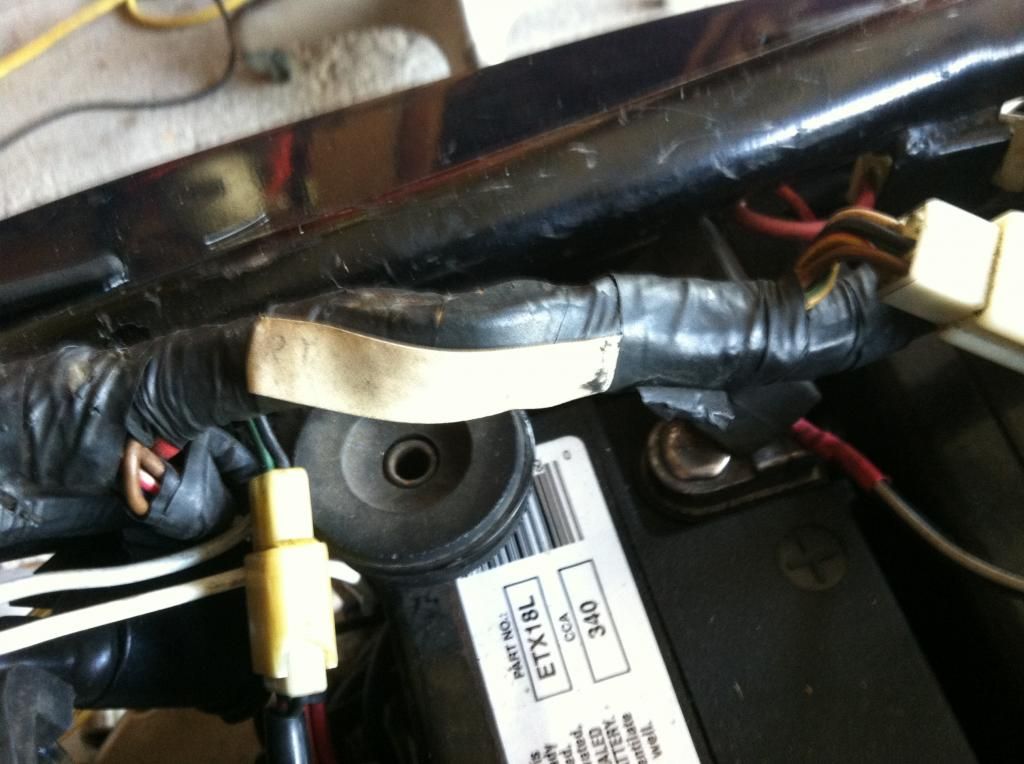
I may be on to something, there is a white label on the harness just above and forward of the battery on the right side of the frame. Diode location? Would they be so kind? Got to run will post pictures later during USA win over belwhatever") BAMN!
BAMN!
'81 XS1100H "Brutus"Comment
-
Here is Scott's writeup on the diode repair...
2H7 (79) owned since '89
3H3 owned since '06
07 Triumph Tiger 1050 (night rider)
"If it ain't broke, modify it"
☮Comment
-
I believe this to be the location of the diode, will investigate to verify, man I hate having to slice my harness up. Since I do not trust my soldering skills I have an OEM HL relay on the way. I have pulled and tugged from that spot so many times over the years, if I only knew
 Last edited by Nubian; 07-04-2014, 07:58 AM.BAMN!
'81 XS1100H "Brutus"Comment
-
Not so sure now is it broken? Are those two points supposed to be connected? There were no loose pieces inside and nothing fell out.
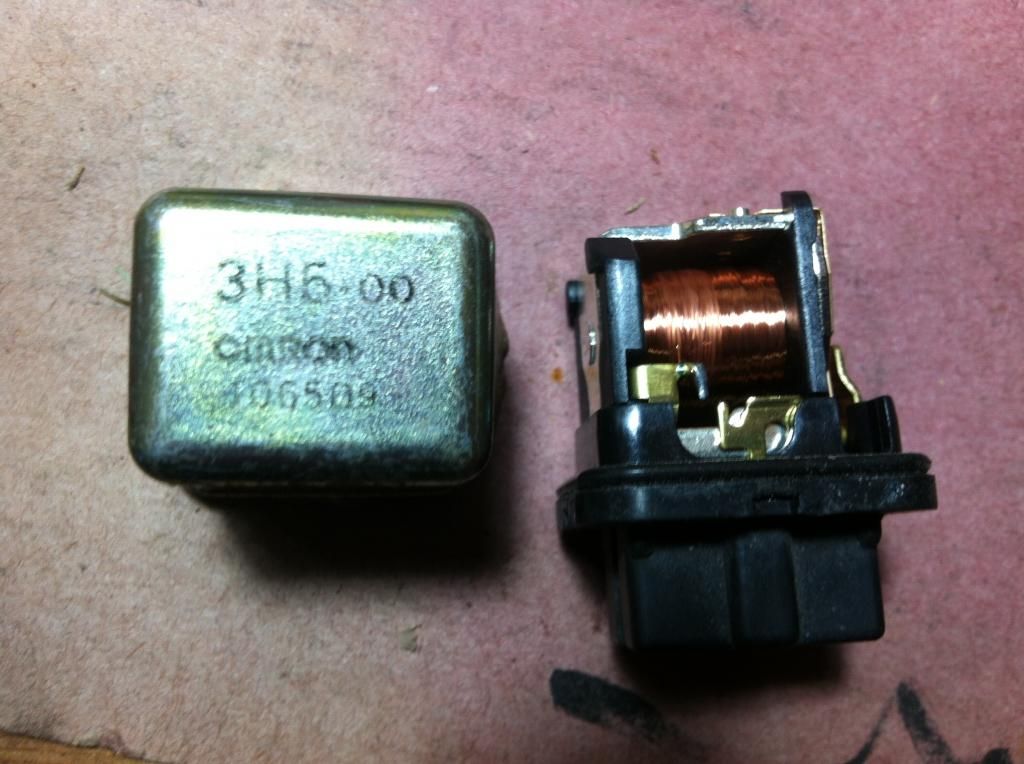
I should have taken a pix of the other side,where there was connection between these two points. So in my infinite wisdom I soldered them up and re connected, blew the fuse twice. More pix's coming......Last edited by Nubian; 07-04-2014, 08:09 AM.BAMN!
'81 XS1100H "Brutus"Comment
-
Hey Dude,
Yep, you made a direct SHORT by soldering those two "U" shaped peices of metal together! If you looked closer at the one on the left, there is a small wire that goes to that large coil. I'm not positive but I would expect the other "U" shaped piece is connected to the harness prongs that go to ground! If you look at the flat pieces on the RIGHT SIDE as shown in that picture, you'll see that they MOVE to make or break a connection between the static and moving part....likes the POINTS in an old points/ignition piece. Those contact can either corrode, or build up burned pits in the surface that prevents the electricity from flowing thru it. A thin fine file or folded piece of sandpaper/emory cloth can recondition those contacts.
Then you can test it by applying a 12 volt current to the connector prongs that go thru the large coil to see if the relay will throw. You can also test the other 2 connector prongs with a meter and just PUSH the lever like the magnetic coil would do when/if were energized together and ensure you have continuity. If both work, then the relay is probably good, and like you've possibly figured out by now that the DIODE has gone bad, and will probably have to cut into your harness afterall!
T.C.T. C. Gresham
81SH "Godzilla" . . .1179cc super-rat.
79SF "The Teacher" . . .basket case!
History shows again and again,
How nature points out the folly of men!Comment


Comment