-
I've never liked the idea of fuel dumping onto a hot engine and, even when it evaporates, it leaves a residue on the engine to which dirt sticks. Having just repainted mine, I don't want to take the chance of gasoline damaging the paint before it's heat cured. Better a pool on the ground than on the engine, definitely! -
Progress report. Fanfare of trumpets
Well folks, I am going to request a fanfare of trumpets, wild cheering and much rejoicing. I got the carbs back on the bike, as per previous post, and today fired up the engine. Instant start and smooth running! I warmed up the engine, then synced the carbs........

.......getting the following readings after a little tweaking.....engine is running in this pic..

The engine now behaves absolutely impeccably. It woofs up and down with a quick throttle twist, no misfiring, returns to and sits at idle perfectly. The sync really made a huge difference and the engine is really smooth.
It's been an eye-opener for me, this one. Firstly, I missed out cleaning the pilot jets in the first place. But, it seems incredible how two only partially blocked jets could cause such a diverse range of nasty, seemingly incomprehensible symptoms such as...revving and staying high with a slow return to tickover. Then complete engine cutoff. Then difficult starting followed by misfires etc etc...... I mention this so that anyone else out there who has reached the stage of pulling their hair out or attacking the bike with an axe (I reached this stage), might be able to stay calm and work through the problem!
On the cosmetic front... I found one left side exhaust heat shield at www.cmsnl.com. Then I found a right side one from an eBay seller in France....here are the results...
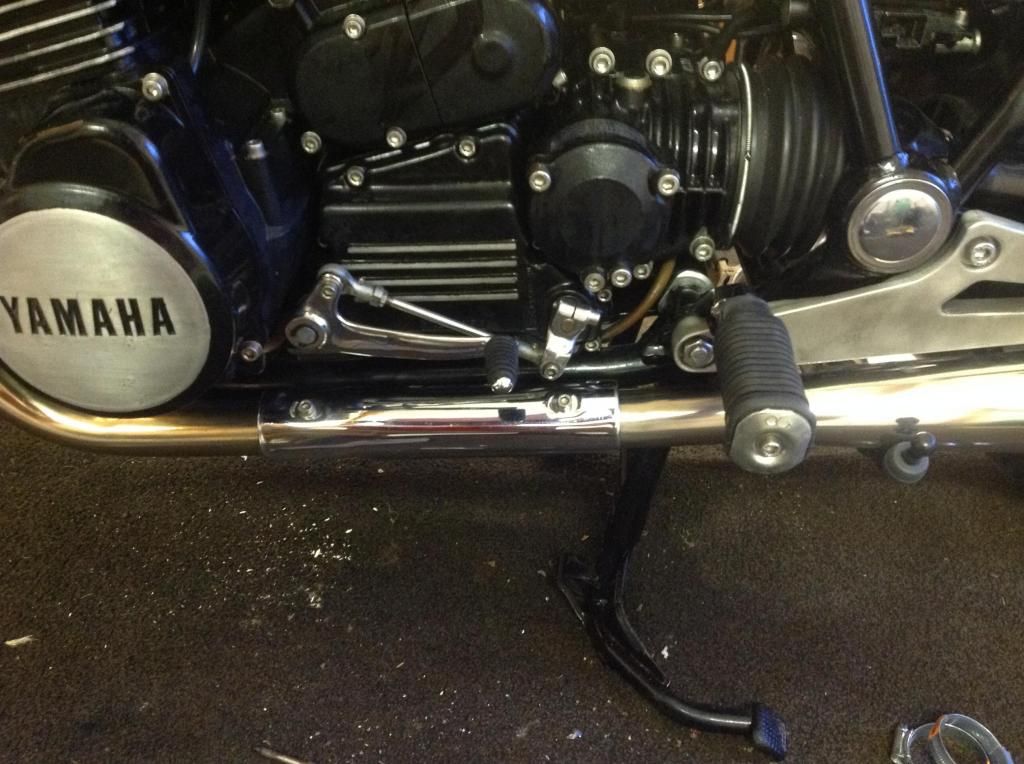

Having run the engine after the recent work, including soda blasting the engine, I've now drained the oil and changed the oil filter, just to be on the safe side.
So, this project is now approaching completion........ I need to get the tank etc back and installed, then a road test..........
Onwards and upwards......Leave a comment:
-
-
Nice mod for the air box James...the down turn is you might not know if your carbs are leaking until you see a puddle under the bikeLeave a comment:
-
James, I believe the spring-loaded seat acts as a shock absorber for the various movements of the bike, keeping fuel from coming in squirts if they were bouncing a bit, and giving a more constant level while running. Since the later model carbs(81-XJ) setting is a 'running fuel level' setting, not a static setting, and have the bowl seat/drains, makes it easy to see that varience of running fuel levels in each carb using the aftermarket float needle seats. The 23mm static float setting gets them close initially for a hose check on each one while idleing, looking for the '3mm down from upper carb casting' as far as fuel levels. Unfortunately, the later carbs not having the cross-over for pilot/main circuit seems to make that float level and fuel levels more critical, and that they all be the same.
Least you have the earlier carbs that are IMO more forgiving and easier to tune to keep the motor 'happy'.Leave a comment:
-
-
The chrome bits, including the stubs for the fuel pipe are metal and the tubes are thick glass. The inner filter is ceramic and the bit inside that holds the inner filter in place is also metal. There isn't actually any plastic used anywhere on them. I had them on my last XS1100. They're a good filter which can be used in a hot environment like near the engine. I believe there are plastic lookalikes out there though, so one needs to buy with caution!Leave a comment:
-
I had some fuel filters like that. They are pretty cool looking but I eventually junked them. Be careful with those because they can warp and become leaky, strip the plastic threads, or just break at the plastic nipples.Leave a comment:
-
I had Viton ones in originally but cleaned them in the wrong chemical and they swelled up to four times their usual size. They weren't actually the correct needles for my carbs though...they had Viton tips and quite obviously had had a little clip on the side which had been removed. So, I bought the after-market seats and needles. The needles don't have Viton ends. When those kits first arrived I found that the seat washers, which are fibre on OEM but alloy on after-market kits, were all too small! They wouldn't fit over the seats. When I phoned the distributor, he told me that all 400 of his stock had incorrect washers. Eventually he sent me the correctly-sized alloy ones. Then, of course, they all failed to seal properly and touched the float pivot tube.
I've hooked up the little oil container to the carbs and marked the fuel level. Two hours later and the level is still the same, so I can assume that no fuel is dripping forward into the cylinder and the oil. There are no leaks under the carbs. I undid each float bowl drain plug just to test each needle and everything is fine. I've left it hooked up and will check the level tomorrow. It's looking like that irritating side of things is cured now.
I've often wondered re the spring tension in the float needles. It does seem critical but thinking about float heights etc etc...the carbs will vibrate to some degree, the bike gets thrown all over the place when running and there is quite a wide margin on the float height spec. so....maybe the little spring tension isn't critical after all?
One other thing.... when the carbs overflowed, gas flowed out of the drain hole thing in the bottom of the airbox. The foam in this thing was ruined anyway, so I removed the assembly from the box and put some exhaust matting in it

then replaced it on the airbox but with a length of hose attached to it so that, if the carbs overflow again, the fuel will not drip onto a hot engine but will go down the hose and drip under the bike. I tested it with a bit of gas and it works fine...

 Last edited by James England; 11-21-2014, 05:05 PM.
Leave a comment:
-
Nice work James!......Along with that, I also found that aftermarket(K&L) viton float needles apparently are missin' some 'quality control' . The springs in the float needles do NOT all compress at the same rate, giving varying RUNNING fuel levels in the four bowls. I very well could end up buffin' up the viton ends on the original Mikuni float needles, since they at least gave four matching fuel levels when static settings were all set identical. Plus, one of the K&L float needles compresses farther than the rest causing that carb to weep fuel just enough to wet carb bowl on outside when motor is shut down. Aftermarket at times 'is what it is', so looks like not only are their jets incorrect, but the float needles AND seats miss the mark also
 .
.
Leave a comment:
-
Progress report
Whilst waiting for the respray to be completed, I thought I may as well try to get the engine up and running after the recent work on it. I've learned a few things which may be of help to other XSives and will describe them here, even though one of them is rather embarassing
I rigged up an old, clean, oil bottle (with a small hole in the top for it to breathe) in a bench vice pending getting a lawnmower fuel tank for future tuning....very hi-tech..

The engine fired up easily enough after a few turns and burned off the oil I'd squirted in the cylinders, cams etc. It ran rough though! All the headers got hot but the engine wouldn't idle. I synced the carbs with four vacuum gauges but whilst it felt smoother, it was still lumpy and rough and only fired properly above 3,000rpm or so. Then, when I turned the engine off, fuel started dripping from the bottom of the airbox, so definitely a float valve problem. I removed the bottom half of the airbox and got my finger into each of the velocity stack rubbers and found the leaking one. Then it stopped, and another one started dripping. Then a third.....so
I removed the bank of carbs and checked the new float valves and seats. I found the new seats are approx 1mm higher than the oem and the pivot tube on the float actually touched the top of the seat, quite possibly making the float stick! Totally rubbish. I used the new needles and old seats and did Gregs(?) trick of spinning the needle in the seat with a bit of metal polish at the end to grind them in. Each needle acquired a ring where it seals in the seat....
Then, having read numerous threads here where people have had to clean and strip carbs again after thinking the job was done, I thought "I know I did the job properly last time and I know what I'm doing but I may as well do it all again while the carbs are off". That is when I discovered that I had not actually removed and cleaned the pilot jets as in the pic below from the Haynes manual....

I just cannot believe that I didn't remove and clean the pilot jets! I mean...HOW? Probably a late night, tired, not thinking and shouldn't have been working on the bike. Two of the jets were 75% clogged up at the venturi end, although the side holes were clear. I sucked through each jet and the difference was clear. So, they are now cleaned, along with the rest of the carbs......
I did Greg's(?) upside down test, using the oil container connected to the carbs and all is dry. Then lifted each float and fuel comes out and stops each time.

Then I replaced the bowls, making sure the gaskets did touch the floats and after checking the float heights. The replacement seats had altered the heights drastically but putting back the oem seats put the heights correct again. I've sat the carbs attached to the fuel tank and...no leaks...
So having cleaned those two pilot jets, I'm hoping that sorts it out.....progress report later..
Things I've learned:
1. Don't work on a bike when tired or otherwise incapacitated..
2. Don't assume that, because a job has been 'done', that it has definitely been done correctly, however clever one may think one is! It may be necessary to double-check
3. Be wary of aftermarket carb bits..... those needle seats really are too big
4. Persevere.......carbs can be swines....Last edited by James England; 11-21-2014, 12:52 PM.Leave a comment:
-
Incidentally, the indicators themselves cost $72 for the four, ready to fit and use. Delivery cost on top of that though... Looking at the occasional OEM NOS examples, often offered for sale at $75 each, I thought the price wasn't too bad.Leave a comment:
-
No, they just sell the lights themselves.
The front brackets are sometimes available as NOS although they are mirror images of each other, so a matched pair is needed. I actually have a spare pair, with the pastic cable clips, which I just had rechromed with some other parts. They are here.... http://www.ebay.co.uk/itm/3215676547...84.m1555.l2649Leave a comment:
-
Do they make the front turn signal brackets to mount onto the forks too?Leave a comment:
-
German repro blinkers
I received the reproduction indicators from Germany yesterday and thought I'd post a few pix just in case anyone out there ever wants any. These cost less to buy and have sent to me from Germany than to buy them in the UK. I would say they are every bit as good as OEM and entirely authentic looking. They are chromed metal, not plastic. They come complete with bulbs and the lenses are really nice...shiny and a nice colour, not the faded, foggy look of OEM lenses that have sat around for 30 years.
I got these connected up today and they are flashing fine. I bought a replacement flasher unit, 3 prong, supposedly for an XS1100 and it just didn't work! So I ended up putting the original two prong one back on and the flashers worked immediately....
Onwards and upwards.....


 Last edited by James England; 11-11-2014, 02:22 AM.
Leave a comment:


Leave a comment: