Valve Adjustment Pictorial

Collapse
X
 
  • Time
  • Show
Clear All
new posts

  • XS1100_OEM4ME
    replied
    MP tool

    Not to do anouther step by step on the MP tool (did one a while back for someone here) The thing most people have a problem with is they turn the cam lob all the way down on the tapet, then try to install the tool, it won't fit that way. If you turn the cam till the valve just starts to open, then slide in the tool, then turn the cam alittle more if needed til it just goes in place, put in the bolt and turn the cam back, the tool works fine

    Originally posted by EricHa
    Thanks Steve. I'm in the middle of shimming too, and I struggled with that Motion Pro piece of junk tool last night. I'm going to pull my carbs this weekend, and appreciate the tutorial!

    Leave a comment:


  • crazy steve
    replied
    I should have mentioned that.... good catch. I actually do use a magnet so as not to lose anything, particularly those washers under the cam cap nuts.

    Leave a comment:


  • DAVINCI
    replied
    Nice work, steve. I would suggest to anyone new at this, only because it gives me more piece of mind...to tape a magnet to your socket when removing the cam cap nuts / washers and stuff a rag in the tunnel. I know there are magnetic sockets and insert magnets for sockets, but I've never quite gotten around to gettin a set of those

    Leave a comment:


  • crazy steve
    replied
    Part 2

    Check the shim size, which should be etched on the 'bottom' side. To determine your new shim size, check your recorded clearance. I use 'inch' feeler gauges as I've found it's much simpler to calculate shim changes.

    Now in this case, all the valves were good except for the two inner intake valves (so I'm not pulling the exhaust cam), both of which are .004". Each shim size difference is .002", and as I want the upper end of the early spec (.008"), I need to go two sizes thinner. Both valves have 270 shims installed, so I'm going to use 260 shims for replacement.

    As a side note, I suspect that whoever adjusted these last had a hard time getting to these (the two hardest to work in the bike with the motion-pro tool) so they just skipped them. I'll also note that I'm doing this with the motor on a stand so it's a bit easier, but it's not that much tougher in the bike.

    Once you have all the shims replaced/moved to get your calculated clearance, assembly is pretty much the reverse with a few exceptions and things to check. First, lay the cams in so the dots will line up with the caps, although if the dots are a bit to the 'rear' of the cam marks that will help with getting the sprockets on. Once you get the cam caps reinstalled and torqued (again, tighten gradually) and are installing the sprockets back on the cams, make sure the cam chain is properly on the crankshaft sprocket and that the holes in the cam sprockets line up right. If you need to turn the cams slightly to line up the sprocket bolts, do so; don't turn the crank. Install the first two cam sprocket bolts (don't tighten them yet), then install the cam chain tensioner; this is so you can rotate the motor to get to the other two cam sprocket bolts without worrying about the chain jumping. Double-check your cam timing at this time; after rotating it once, make sure the cam dots line up with the caps when the timing pointer is at 'T'. If everything's good, final torque all the bolts, doublecheck to make sure your clearances ended up where you want them, and reassemble the rest...
    Last edited by crazy steve; 01-13-2012, 05:34 PM.

    Leave a comment:


  • GLoweVA
    replied
    Thanks Steve !

    Note the little 'points' by the second pair of bolt holes...

    ...as shown in close-up here. These holes must be on the same 'side' of the cam as the dots or your cam timing will be off.
    I didn't know about those mark near the cam bolts.
    When I put all mine back together, the dots did line up, but now I think I'll take the valve cover off again and check to make sure those marks on the cam sprockets indeed line up with the timing marks/dots.
    (Maybe I just got lucky and they are lined up correctly)

    Leave a comment:


  • EricHa
    replied
    Thanks Steve. I'm in the middle of shimming too, and I struggled with that Motion Pro piece of junk tool last night. I'm going to pull my carbs this weekend, and appreciate the tutorial!

    Leave a comment:


  • crazy steve
    started a topic Valve Adjustment Pictorial

    Valve Adjustment Pictorial

    With all this talk about valve adjusting and being in the middle of doing just that on my current project bike, I decided to post a 'how-to' on the 'cam removal' method. I'll note that it's very important that the bike/motor be level side-to-side. So, without further ado, here it is...

    [IMG][/IMG]

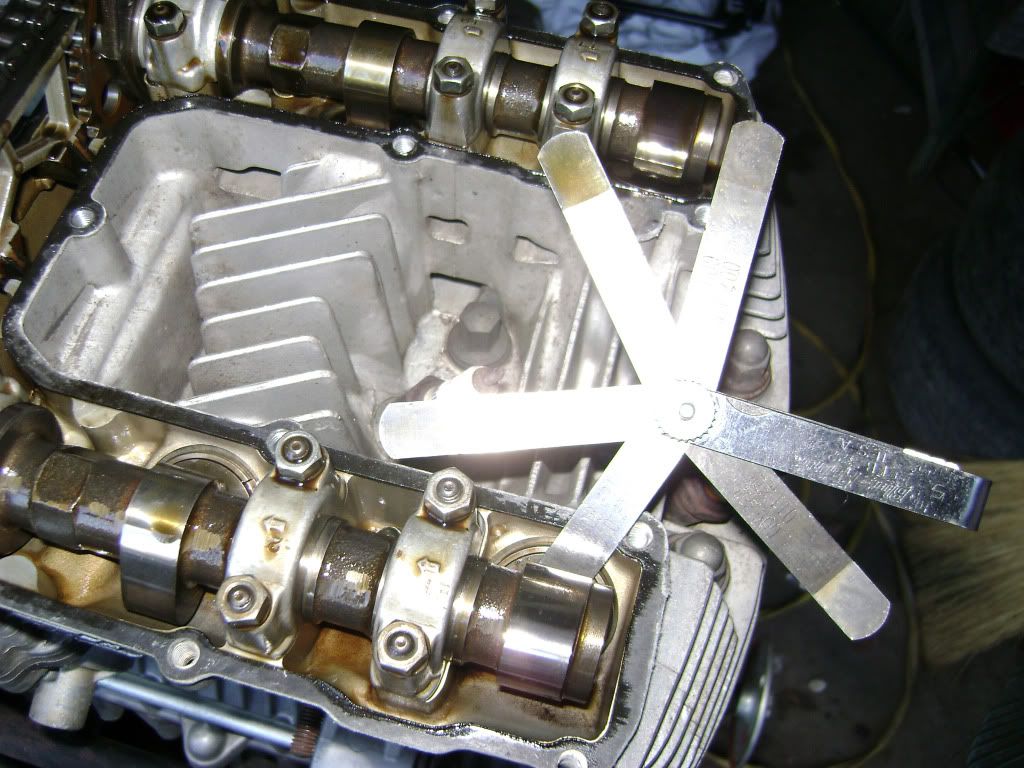
    First things first; check and record your clearances for all valves. Remove the cam and timing covers and rotate the motor clockwise while checking each valve. I use a go/no go set of feeler gauges, really handy...

    [IMG][/IMG]

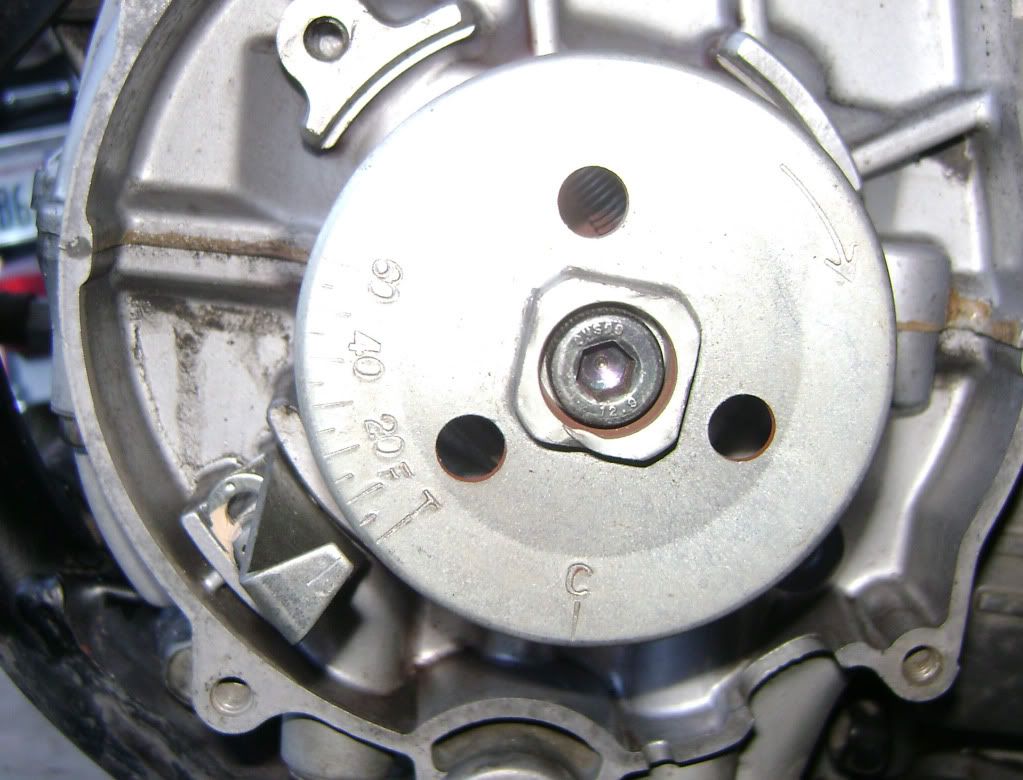
    Once you've got all the measurements, turn the crankshaft (always clockwise) until the pointer is on the 'T'.

    [IMG][/IMG]

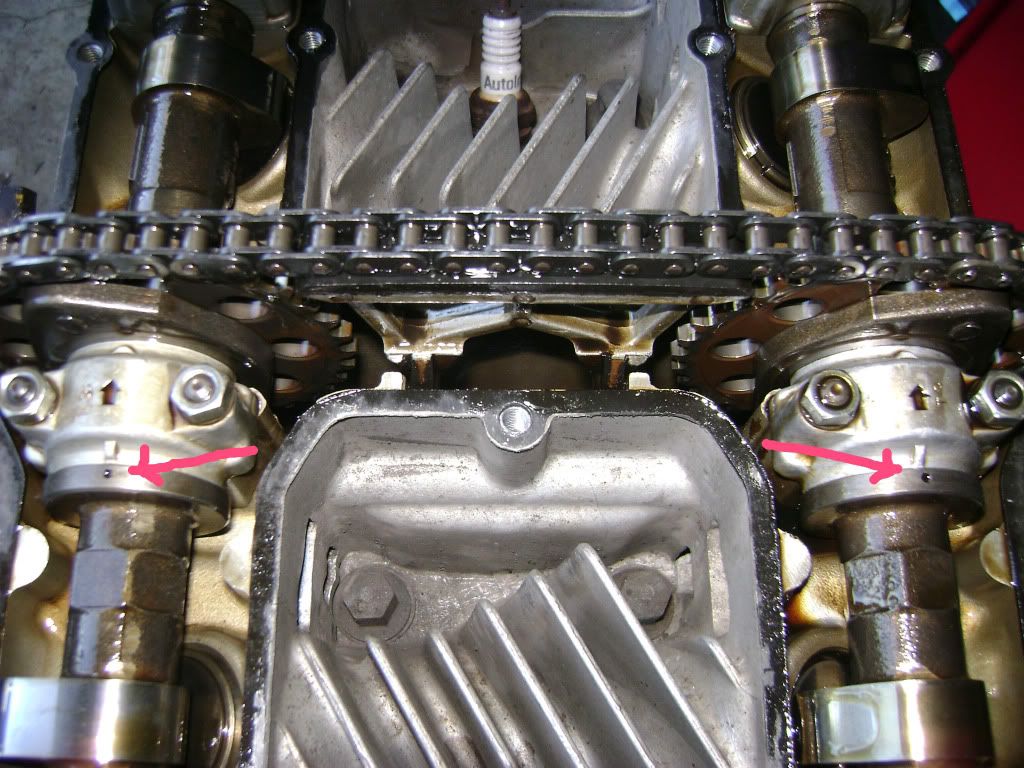
    Do you see these 'dots' on the cams? If you do, they both should line up with the marks on the cam caps, and then turn the crankshaft around one more time (so you can't see them)...

    [IMG][/IMG]

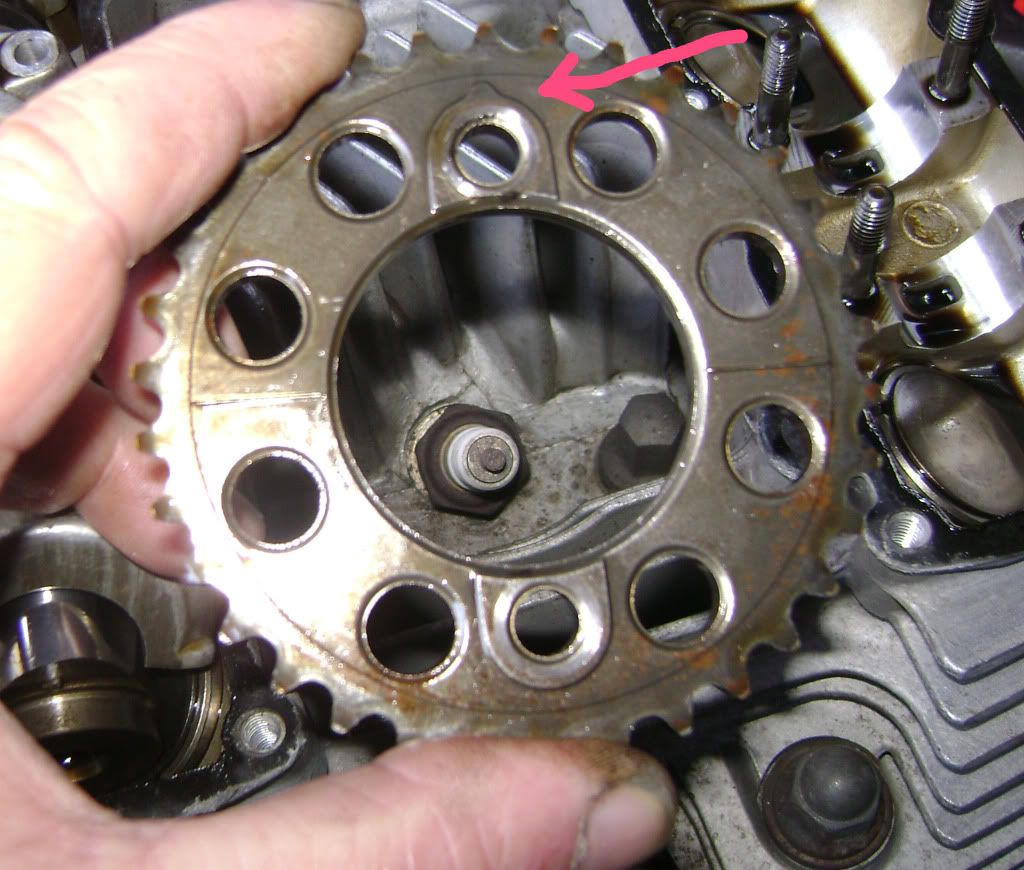
    ...then remove these two cam sprocket bolts. Turn the crank once more (so you can see the dots again and they line up with the marks on the caps) and remove the other two bolts. Note the little 'points' by the second pair of bolt holes...

    [IMG][/IMG]

    ...as shown in close-up here. These holes must be on the same 'side' of the cam as the dots or your cam timing will be off. DO NOT turn the crankshaft again until you get to the end of the reassembly process!

    [IMG][/IMG]

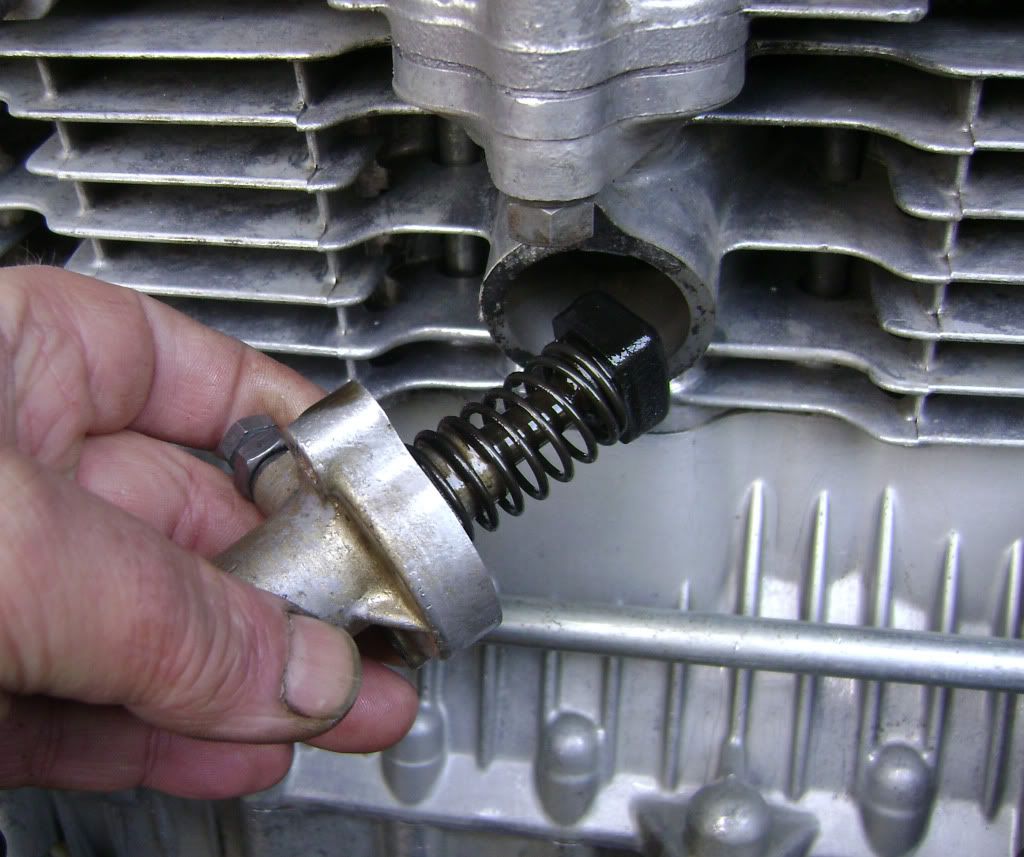
    Remove the cam chain tensioner...

    [IMG][/IMG]

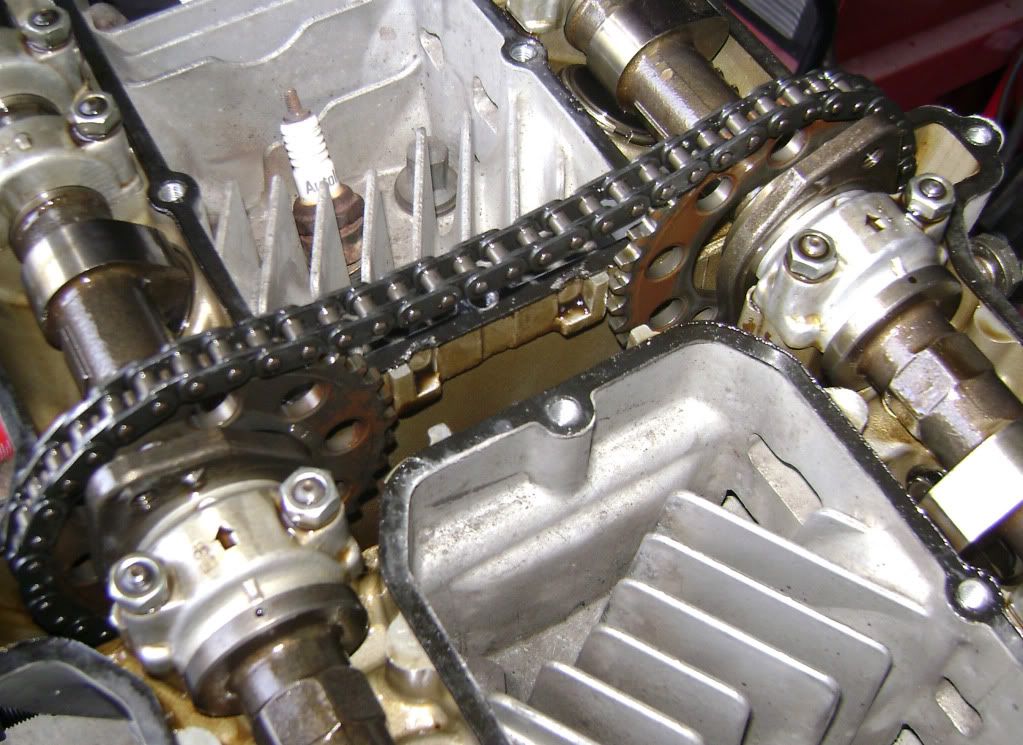
    ... which will give you slack so you can lift out the top chain guide. Lift/move the chain to one side and lift it out.

    [IMG][/IMG]

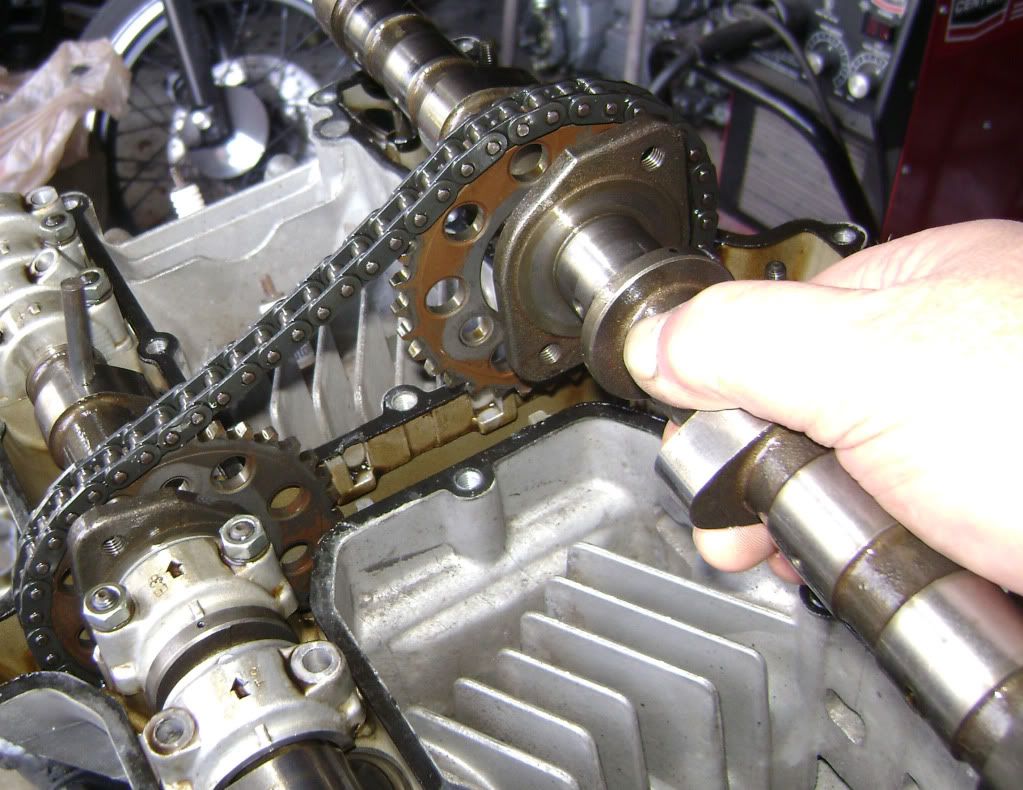
    Loosen/remove the cam caps, taking care not to just take them off, but to loosen them gradually so as to not 'cock' the cam as at least one lobe will be holding a valve open. Loosen the cap nuts on either side of those lobes about 1/4 turn at a time. Once you have the caps off, lift up and rotate the cam/sprocket until you can pull the cam out through the sprocket. TIP: use a magnet on/near the nuts/bolts so as not to lose any inside the motor; it really sucks trying to fish those out...

    [IMG][/IMG]

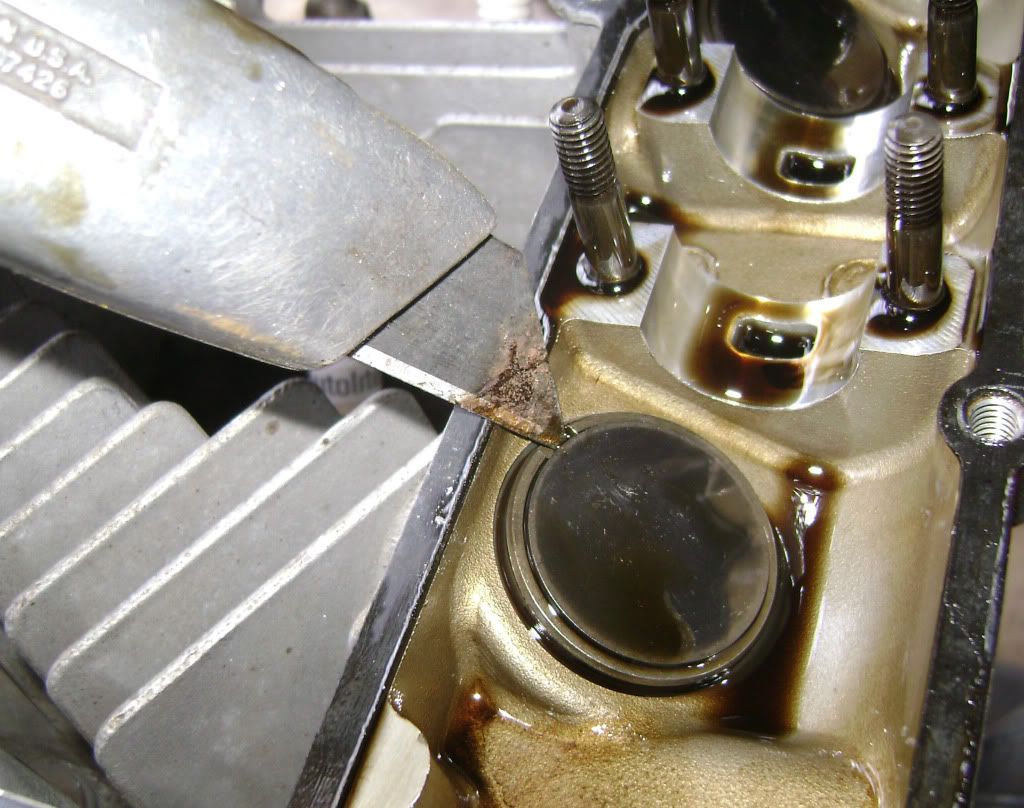
    You now have access to all the shims, simply pop them out. I use a knife edge, some use magnets (but I haven't had any luck with those, the oil 'stiction' is more than the magnet can overcome) to get them out.

    End of part 1.....
    Last edited by crazy steve; 01-13-2012, 04:13 PM. Reason: missed info
Working...