Valve Adjustment Pictorial

Collapse
X
 
  • Time
  • Show
Clear All
new posts

  • XS1100_OEM4ME
    replied
    Ba80

    "I must have just gotten one of the good ones when it came to the tool but after I figured out how to get just the little tip to catch on just the edge of the shim bucket it was quite easy and quick."

    I think the problem with the tool is it will not work like the manual says to use it. The OEM Yamaha tool might be different that way. You hit it right on the head If you only open the valve about 1/8th" the thing will drop right in and give you enough roon to R/I any shim

    Leave a comment:


  • STEPPENWOLF
    replied
    Excellent write up CRAZ.
    Not being a mechanic myself more of a pm type I had one of our SWOXS members do my valves and I think the most non sun sunday verbage came with getting the actual valve cover off


    But after all was said and done,valves set and new bolt put in.

    Leave a comment:


  • mack
    replied
    Shimming

    Very good Steve. I went and bought a box of surgical gloves and use one on my left hand and one of the flat fridge magnets down the inside of my left middle finger to keep anything from falling into the motor. Provides you with the same dexterity and catches everything if I get clumsy with my right. Tried having a regular magnet close but it stuck to everything and became a real pain.

    Leave a comment:


  • jetmechmarty
    replied
    Well, thanks guys! I learned something this week. I've checked my valves and I know how the reshim them. I'll likely reshim them next winter. I know of a couple shops that know my bike and have shim libraries. I may decide to do it that way for the sake of expedience. These are little one man operations that I can work with. Now, I am armed with options.

    A special thanks to Steve for taking the time to do the pictorial instruction.

    Leave a comment:


  • DGXSER
    replied
    Steve, very nice write up, and nice camera to. I will support the stated idea that a rag of soem type NEEDS to go into that cam chain tunnel in the head PRIOR to removing any bolts or nuts or washers in that area. I recall the thread where one of our members had to dig through his engine and remove every engine cover to find a lost nut or washer from this very same procedure.

    I am intrigued by this statement
    taking care not to just take them off, but to loosen them gradually so as to not 'cock' the cam as at least one lobe will be holding a valve open
    I only say this because I have never removed the cam, but I do remove the tensioner and all the caps. Once you get that far, the cam WILL be cocked to one side. At least always has been on my motors.

    Leave a comment:


  • BA80
    replied
    Nice pictoral Steve. However, I have to say that, IMHO, that method is a bit complicated and there are a LOT of ways to screw up.

    Such as, bolts that could come loose, loosing cam timing, not to mention time consuming.

    I must have just gotten one of the good ones when it came to the tool but after I figured out how to get just the little tip to catch on just the edge of the shim bucket it was quite easy and quick.

    When I first got the okieSPECIAL I had a top end noise it took a while to figure out. turned out all the cam cap nuts were loose and a few had actualy fallen off. I believe the PO had attempted to adjust the valves with this method and things weren't properly retorqued. Luckily there wasn't any mechanical damage.

    Just wanted to throw that out for those who may use this method. Be certain EVERYTHING is torqued properly and be CERTAIN the cams are in time before attempting to start the engine. Any of these could cause some expensive damage to your engine.

    Leave a comment:


  • Wildkat
    replied
    NICE write up Steve!
    Easy to follow
    Thank you!

    Originally posted by DAVINCI
    Nice work, steve. I would suggest to anyone new at this, only because it gives me more piece of mind...to tape a magnet to your socket when removing the cam cap nuts / washers and stuff a rag in the tunnel. I know there are magnetic sockets and insert magnets for sockets, but I've never quite gotten around to gettin a set of those
    Ummmmm... yeah
    I always seem to drop things in the hardest to get to places. Magnets are my friend...
    lol

    Leave a comment:


  • petejw
    replied
    depending on the number of shims that need replacing
    theres no real need to remove the cams or the tensioner,
    u can loosen the cam with the tensioner in place, that way
    theres no possibility of the chain slipping off the crank,
    if the chain is tight then the lock bolt can be loosened and the
    chain will still have the spring tension from the cct on it to prevent slippage.

    Leave a comment:


  • XS1100_OEM4ME
    replied
    6 of 8

    I adjusted 6 of 8 in about 1/2 hour with not knowing what the current shims were and a starter set of shims

    Leave a comment:


  • crazy steve
    replied
    Not me, a plain ol' 'mod' ain't got the HP for that... That's for a Admin...

    I'll add that if there's anything anybody thinks I missed, post it and I'll 'edit' it in...
    Last edited by crazy steve; 01-13-2012, 05:40 PM.

    Leave a comment:


  • dpotter58
    replied
    So are you going to make it a sticky in the maintenance section?

    Leave a comment:


  • DAVINCI
    replied
    I hate that f-in tool more than I hate my ex-wife.

    Leave a comment:


  • crazy steve
    replied
    Both methods have their pros/cons; if you know what size shims are in there before starting the adjustment and/or have a full set of them available (like a dealer would, or at least used to when the bikes were newer), then the MP tool is probably a bit faster method. Also faster if you only have one or two valves that need adjustment.

    But if you're doing an adjustment on a motor where the shim sizes are all unknown and the majority of the valves need adjustment, the cam removal method lets you see them all at once. A lot of times you can simply shift them around and only need to buy a few. Pulling the cams also lets you take a look at the cam bearing journals and check the cams for wear.

    With the MP tool, you'll need to remove/replace each shim just to find out what you have before you can figure out what you need if you need to buy some, so you'll end up doing them twice. You also have the possiblity of breaking the head if you boo-boo and turn a cam the wrong way and contact the tool.

    Like I said, both have their points...

    Leave a comment:


  • XS1100_OEM4ME
    replied
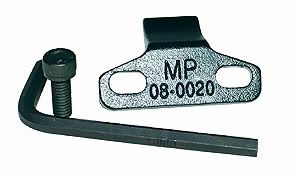
    Here is the one I use


    No grinding needed. Anouther way to discribe how to uss it without mods to the tool. Turn the came lobe all the way down. Slip the tool in to place as far as you can, turn the cam lobe away from the tool slowly while pushing the tool into place, it WILL drop into place when the lobe is far enough away from the tool. Tighten the bolt, turn the cam more, R/I shim, turn back till the tapet just starts to move down, remove tool The 1st time I used it it took me 2 hours till I figured out it wont go in if the valve is even half way open The 2nd time, knowing how to use it, it took me about 1/2 hour


    Originally posted by crazy steve
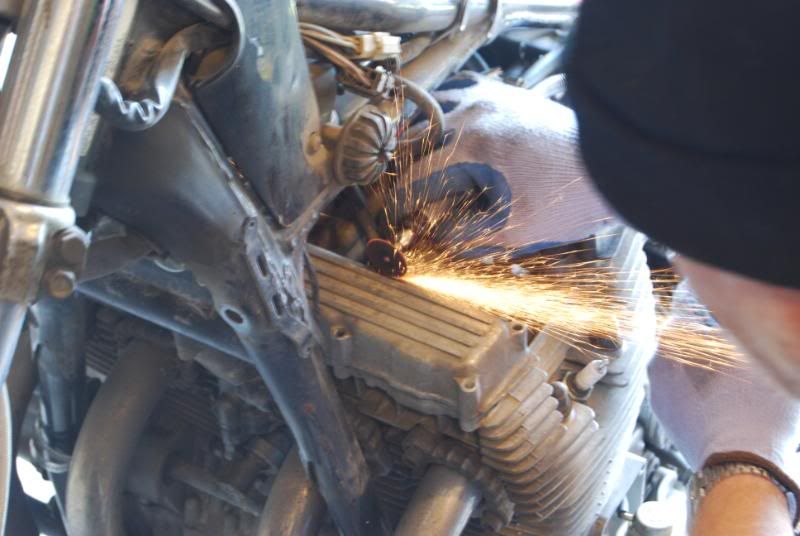
    The MotionPro tool seems to be a love it/hate it deal.. And one issue with them is the quality control on them seems to be pretty uneven, as more than a few have reported having to do some grinding on them to get them to fit. I've got one, and that's what it needs before it'll fit...
    Last edited by XS1100_OEM4ME; 01-13-2012, 03:57 PM.

    Leave a comment:


  • crazy steve
    replied
    The MotionPro tool seems to be a love it/hate it deal.. And one issue with them is the quality control on them seems to be pretty uneven, as more than a few have reported having to do some grinding on them to get them to fit. I've got one, and that's what it needs before it'll fit...

    Leave a comment:

Working...