Announcement

Collapse
No announcement yet.

Valve Adjustment Pictorial

Collapse
X
 
  • Filter
  • Time
  • Show
Clear All
new posts

  • Originally posted by James England View Post
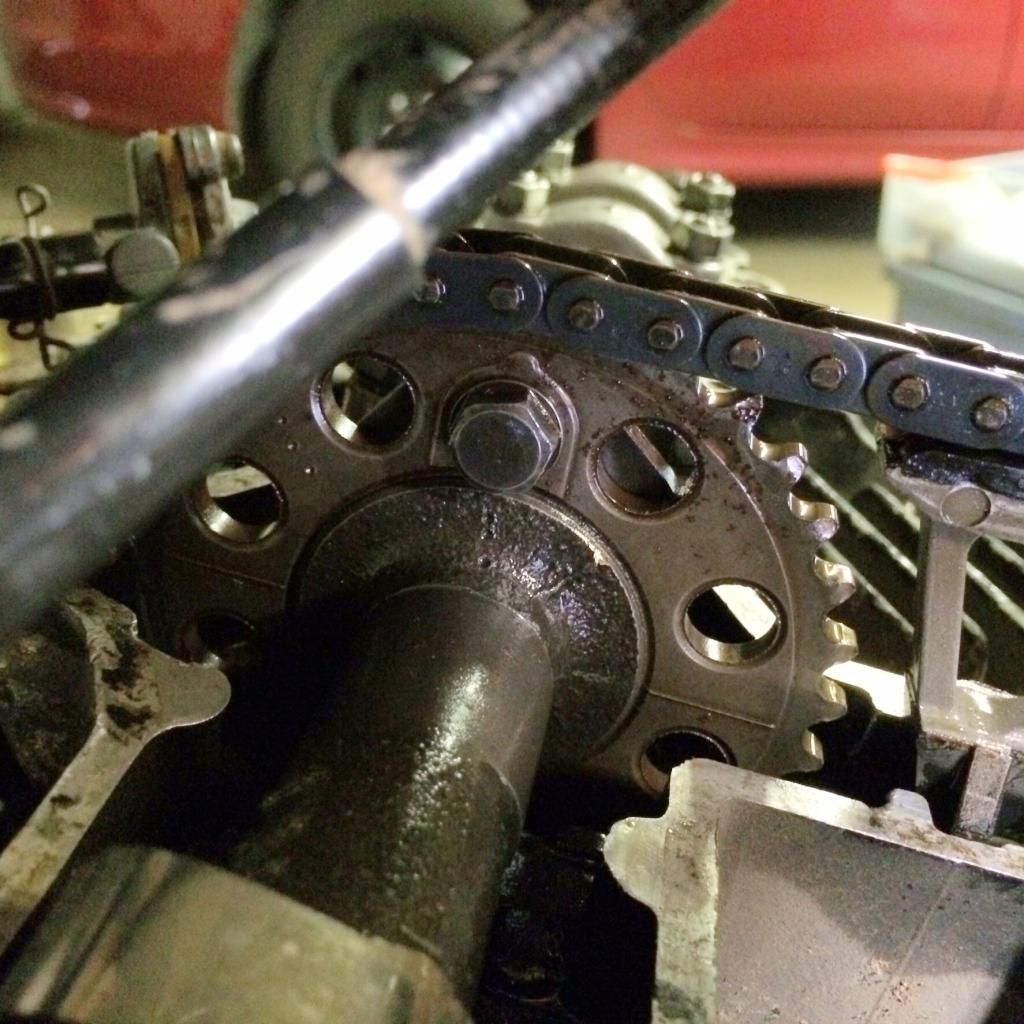
    Why are the pointers on the cam cogs so important? If the T Mark on the crank is lined up, the dots on the cams are in the right places, no slack in the chain.....why should it matter about the pointers on the cogs?
    James,
    My guess would be the sprocket teeth were indexed using that as a referance point during sprocket production. Never had them off myself, but from postings and pics with some havin' cam mark alignment issues, definitely would adhere to that assembly procedure.
    81H Venturer1100 "The Bentley" (on steroids) 97 Yamaha YZ250(age reducer) 92 Honda ST1100 "Twisty"(touring rocket) Age is relative to the number of seconds counted 'airing' out an 85ft. table-top.

    Comment


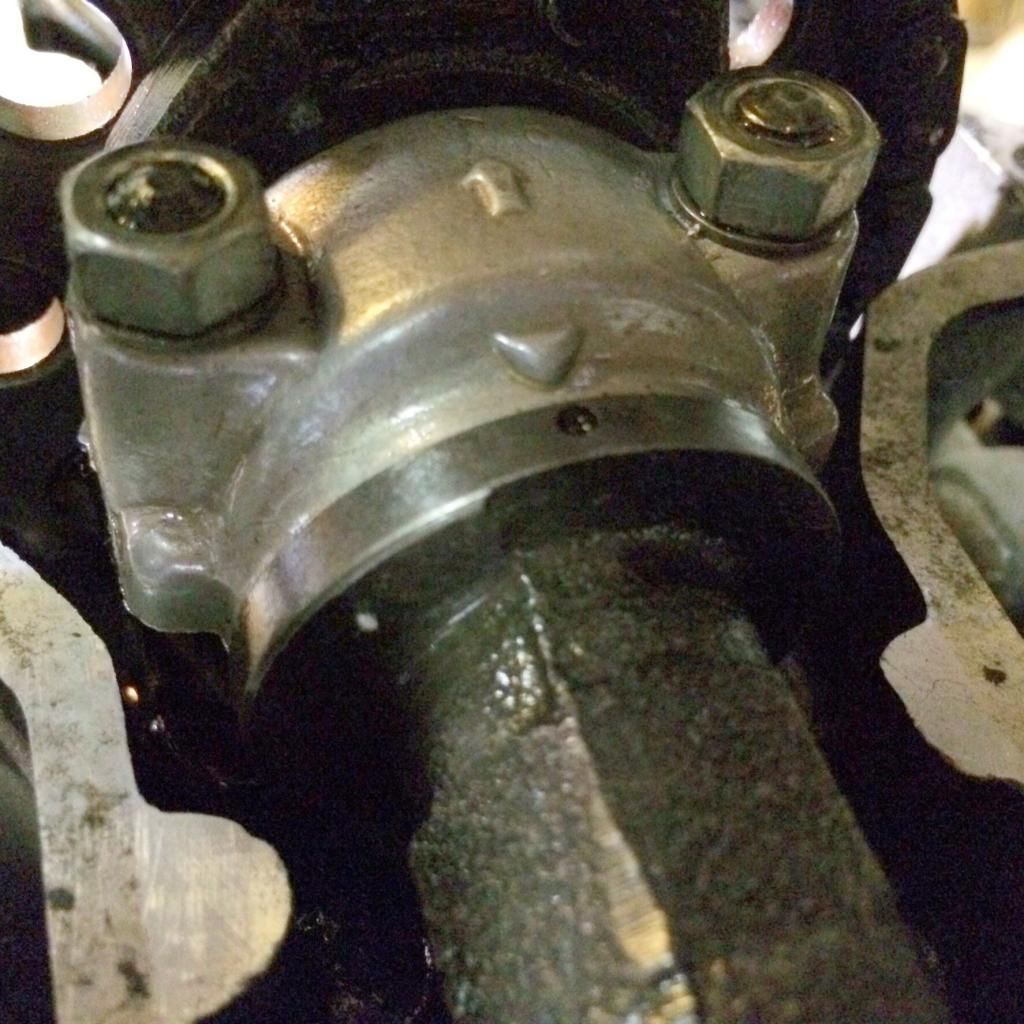
    • James, the FSM is silent on the significance of the 'tits' next to the bolt holes, but Yamaha went to the trouble of identifying them and does show them pictorially as being installed as noted. Just a tiny difference in the relationship between the bolts and cam chain teeth could throw cam timing off by several degrees or more. Remember that 'cam degrees' is 720 (360 X 2), so less than .020" difference will equal one 'cam degree'. Advancing/retarding a camshaft even a few degrees can have a significant effect on the power curve and in this case, even changing the overlap.

      Is that the case here? Don't know... but checking for this is fairly involved, requiring a degree wheel and a way to accurately check valve movement. Seems easier to install the cam sprockets as shown....
      Last edited by crazy steve; 05-13-2014, 01:30 AM.
      Fast, Cheap, Reliable... Pick any two

      '78E original owner - resto project
      '78E ???? owner - Modder project FJ forks, 4-piston calipers F/R, 160/80-16 rear tire
      '82 XJ rebuild project
      '80SG restified, red SOLD
      '79F parts...
      '81H more parts...

      Other current bikes:
      '93 XL1200 Anniversary Sportster 85RWHP
      '86 XL883/1200 Chopper
      '82 XL1000 w/1450cc Buell, Baker 6-speed, in-progress project
      Cage: '13 Mustang GT/CS with a few 'custom' touches
      Yep, can't leave nuthin' alone...

      Comment


      • I will second what steve said.
        I have put mine 180degrees out before and the dots were off by about the width of the dot itself.
        Then I remembered reading about the 'tits' and spun them around and the dots lined right up.
        Now that I've had cams out numerous times, It's second nature for me to put them in with the 'tits' up matching the dots.
        Hi, my name is George & I'm a twisty addict!

        80G (Green paint(PO idea))
        The Green Monster
        K&N A/F, TC's fuse block, '81 oil cooler, TC's homemade 4-2 w/Mac Mufflers, Raptor 660 ACCT
        Got him in '04.
        bald tire & borrowing parts

        80SG (Black w/red emblems & calipers)
        Scarlet
        K&N A/F, TC's fuse block, WJ5, Shoei bags, Raptor 660 ACCT.
        Got her in '11
        Ready for the twisties!

        81H (previously CPMaynard's)
        Hugo
        Full Venturer, Indigo Blue with B/W painted tank.
        Cold weather ride

        Comment


        • Mmm..strangely, my dots lined up perfectly, with the T bang on the pointer...absolutely 100%. All absolutely accurately, bang on. Despite that.....yep..I removed the cam gears and got the markers pointing where they should. I use the word 'markers' out of respect for Wildkat..... I don't want to offend any XSettes. Or is there only the one?
          XS1100F 1980 European model. Standard. Dyna coils. Iridium plugs. XS750 final drive (sometimes). Micron fork brace. Progressive front springs. Geezer regulator/rectifier. Stainless 4 into 2 exhaust. Auto CCT (Venturer 1300) SOLD. New project now on the go. 1980 European model.

          Comment


          • Help!....please!

            I think that I may have lined up my cams incorrectly...


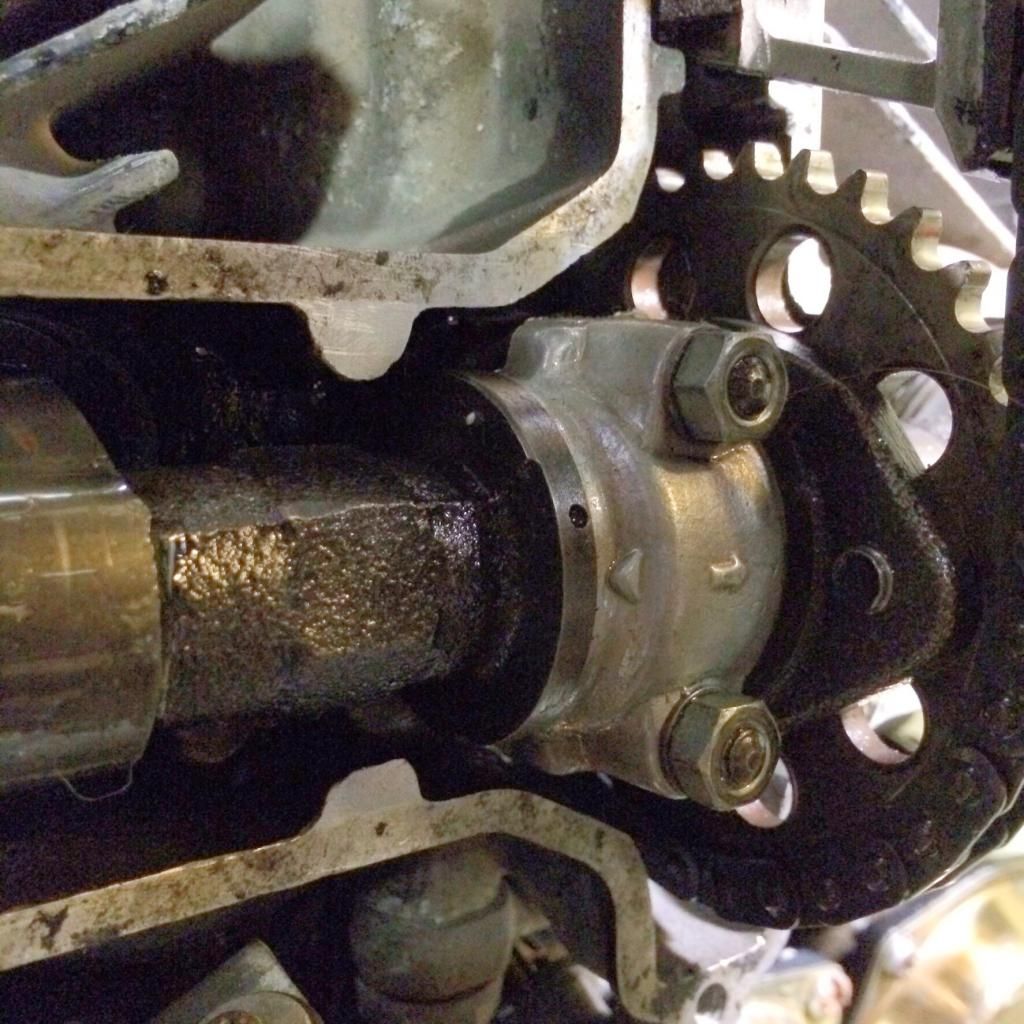
            This is where the cams are when I set the timer wheel to "T"


            The following photo shows when I have the Timer wheel set to "C"


            Obviously I have something wrong...


            The engine turned easily with no bumps...

            Will I need to flip the cams? I have the "nips" facing up with the dots...see photo...


            Your comments and suggestions are very much appreciated....

            Thanks,

            Tenorman
            Bikes that I have owned and enjoyed...
            1964 Allstate 250
            1970 Yamaha DT1
            1959 Mobylette
            1970 Yamaha JT1
            1995 Suzuki 80
            1978 Yamaha XS650
            1980 Yamaha XS1100LG
            2005 BMW R1150R

            Comment


            • You're off a few teeth on the cam sprockets. Make sure the timing pointer is on the 'T' mark, then remove the cam chain tensioner and at least one of the cam sprockets to get enough slack in the cam chain. Move the cams until the dots line up, adjust the sprockets on the chain until the bolt holes line up in the cams, then reassemble including the cam chain tensioner. Make sure any slack in the chain is at the front of the motor, not the back. DO NOT move the crankshaft until everything is reassembled. Rotate the motor twice by hand and verify that the dots still line up, then adjust the tensioner by using the 'C' mark. This is if you're still using the OEM tensioner; if you've swapped to an automatic tensioner, no adjustment needed.

              You probably didn't do any damage, but it can't hurt to check compression after you're done.
              Fast, Cheap, Reliable... Pick any two

              '78E original owner - resto project
              '78E ???? owner - Modder project FJ forks, 4-piston calipers F/R, 160/80-16 rear tire
              '82 XJ rebuild project
              '80SG restified, red SOLD
              '79F parts...
              '81H more parts...

              Other current bikes:
              '93 XL1200 Anniversary Sportster 85RWHP
              '86 XL883/1200 Chopper
              '82 XL1000 w/1450cc Buell, Baker 6-speed, in-progress project
              Cage: '13 Mustang GT/CS with a few 'custom' touches
              Yep, can't leave nuthin' alone...

              Comment


              • Many thanks!

                I'll give it a shot tomorrow...

                I know the chain didn't move on the sprockets because I placed a plastic wire tie on both of the sprockets to keep the chain on the sprockets. It must have skipped a beat on the crankshaft sprocket when I replaced the tensioner...how, I don't know...

                It looks to be one cog off...

                I'll keep you posted...

                Tenorman
                Bikes that I have owned and enjoyed...
                1964 Allstate 250
                1970 Yamaha DT1
                1959 Mobylette
                1970 Yamaha JT1
                1995 Suzuki 80
                1978 Yamaha XS650
                1980 Yamaha XS1100LG
                2005 BMW R1150R

                Comment


                • I finally got it...

                  It turns out that I left some slack on the intake side of the chain...

                  I used a bungee cord around the top frame to hold the chain up and removed the bolts from the cam sprockets along with the tensioner. I didn't loosen the camshafts...it was tight but I was able to spin the sprockets to their correct position. I had to make sure the chain was on the crank sprocket as once the tensioner is removed, the chain has a mind of its own.

                  Everything lines up correctly...I just hope all is OK inside...

                  Many thanks,

                  Tenorman
                  Bikes that I have owned and enjoyed...
                  1964 Allstate 250
                  1970 Yamaha DT1
                  1959 Mobylette
                  1970 Yamaha JT1
                  1995 Suzuki 80
                  1978 Yamaha XS650
                  1980 Yamaha XS1100LG
                  2005 BMW R1150R

                  Comment


                  • My valve shim experience

                    I thought I'd pass along my experience changing valve shims. This thread was very helpful for me deciding how to adjust the valves on my bike. The engine hadn’t been run in probably 20 years or more. The initial valve clearances were tight with only one exhaust valve within, but at the tight end of spec;all intakes were slightly more than ~.004” and exhausts were all ~.007-.008”.

                    After I initially got the engine running (new coils, oil, plugs, cleaning carbs, etc.) I had maybe 10 to 15 minutes of running time when I checked the clearances again. All the valves had tightened up even more. Anyway, changing the shims was in order. I have the Motion Pro tool and considered trying it but from a logistics standpoint, especially not knowing what shims were in the engine to begin with and needing all shims changed, I decided to remove the cams to give me access to all the shims at one time.

                    I used Crazy Steve’s pictorial (thank you!) from this thread as a guide but modified the procedure and did not remove the sprockets from the cams. Just removing the caps off the cams and taking out the CCT and top chain guide allowed me enough room to get out all the shims.

                    I was careful loosening the cam caps evenly because some of the cam lobes were holding valves open. All the cam caps came off easily except the ones closest to the sprockets because the back side of the bolts that hold the sprockets to the cams interfered with those caps being removed. I didn’t try very hard to remove these caps completely off the studs because I didn’t find it necessary.

                    One thing I noticed about the shims that I removed was that they were scored where the cam lobes made contact, perhaps due to dirty oil (???) (from the PO, of course!). The cam lobes themselves looked ok to me from my uneducated eyes.


                    I got the new shims installed, everything buttoned back up and as James E. might say, “Bob’s your Uncle.”

                    I’m no mechanical wiz and this operation was not without a little mental trauma for me. In fact, right out of the gate, just after I loosened the 1st nut a quarter turn on the intake cam cap nearest the sprocket, the ¼” drive 10mm socket I was using came off the extension as I pulled it away (the socket had caught a corner on the wiring harness). I heard a “tink” as it landed “somewhere.” I spent 20 minutes searching for the socket to no avail. I looked around the carb boots, top of the engine, around the sprocket and using a flashlight, looked down into the cam chain abyss, on the floor, etc. etc. Nothing!

                    I decided to deal with the search later and went on removing the caps (with a box end wrench this time instead of a socket). I was on the right side of the bike when I FINALLY SAW IT! That little socket had fallen onto the head outside the valve cover area and ended up in a little tunnel of the casting between the #3 spark plug and the carbs. Whew, I must be living right.

                    Even before dropping the socket I was nervous about dropping a cam cap nut or washer down into the engine. I “restuffed” paper towels in around the cam chain. Even with this done, I was careful but still a bit nervous.

                    So it looks like things ended up ok but I felt that there was a thin margin for me between success and things going south. I’m glad I did it this way this time but I'm not recommending anybody else do it this way (YMMV, etc.). Next time, since I know what shims are installed now and hopefully will only need to change one or two of them at a time, I’ll give the MP tool (or maybe the zip-ties-under-the-valve method!) more consideration.


                    TT
                    1979 XS1100F "Old General" (work in progress)

                    Comment


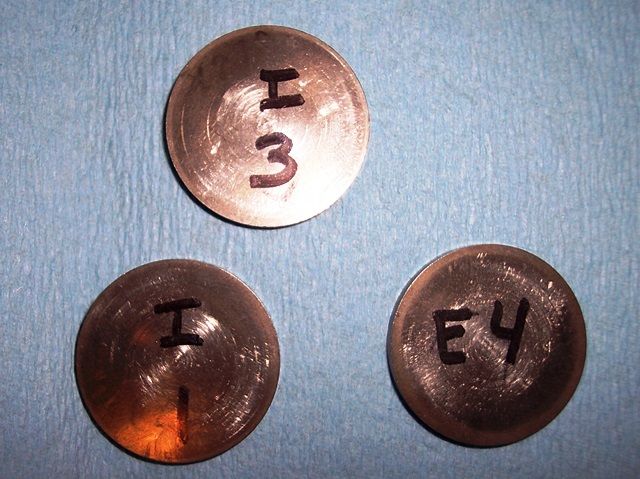
                    • I just did it with the MP tool for the first time. It was a piece of cake. Only two shims require replacing, so it's much easier to replace two this way than remove camshafts. To replace all of them? I might pull the cams.
                      Marty (in Mississippi)
                      XS1100SG
                      XS650SK
                      XS650SH
                      XS650G
                      XS6502F
                      XS650E

                      Comment


                      • It's easy once you figure out how to use it. Isn't it?
                        Greg

                        Everybody is a genius. But if you judge a fish by its ability to climb a tree, it will live its whole life believing that it is stupid.”

                        ― Albert Einstein

                        80 SG Ol' Okie;79 engine & carbs w/pods, 45 pilots, 140 mains, Custom Mac 4 into 2 exhaust, ACCT,XS850 final drive,110/90/19 front tire,TKat fork brace, XS750 140 MPH speedometer, Vetter IV fairing, aftermarket hard bags and trunk, LG high back seat, XJ rear shocks.

                        The list changes.

                        Comment


                        • Originally posted by BA80 View Post
                          It's easy once you figure out how to use it. Isn't it?
                          Yes! Exactly. Once I discovered the tool needed a little nudge with a small brass hammer, it couldn't be easier. Now, if I only had a shim library!
                          Marty (in Mississippi)
                          XS1100SG
                          XS650SK
                          XS650SH
                          XS650G
                          XS6502F
                          XS650E

                          Comment


                          • I never had to "nudge" it but what I did figure out after many failures and expletives was that you have to "feel" for the edge of the shim bucket with that little point. If you do that and just catch the lip of the bucket your golden.

                            Also........make sure the notch in the bucket is where you can get to it BEFORE you tighten the bolt on the tool.
                            Greg

                            Everybody is a genius. But if you judge a fish by its ability to climb a tree, it will live its whole life believing that it is stupid.”

                            ― Albert Einstein

                            80 SG Ol' Okie;79 engine & carbs w/pods, 45 pilots, 140 mains, Custom Mac 4 into 2 exhaust, ACCT,XS850 final drive,110/90/19 front tire,TKat fork brace, XS750 140 MPH speedometer, Vetter IV fairing, aftermarket hard bags and trunk, LG high back seat, XJ rear shocks.

                            The list changes.

                            Comment


                            • Good points! I didn't grind my tool as so many others have, but I had to get it tight against the cam. The 4 oz. brass hammer gets me there with a gentle tap. I stress, gentle.
                              Marty (in Mississippi)
                              XS1100SG
                              XS650SK
                              XS650SH
                              XS650G
                              XS6502F
                              XS650E

                              Comment


                              • I don't understand the grinding part. If it's mounted right and the bolt in the correct VC bolt hole there shouldn't be an issue.

                                Mine doesn't even touch the cam.
                                Greg

                                Everybody is a genius. But if you judge a fish by its ability to climb a tree, it will live its whole life believing that it is stupid.”

                                ― Albert Einstein

                                80 SG Ol' Okie;79 engine & carbs w/pods, 45 pilots, 140 mains, Custom Mac 4 into 2 exhaust, ACCT,XS850 final drive,110/90/19 front tire,TKat fork brace, XS750 140 MPH speedometer, Vetter IV fairing, aftermarket hard bags and trunk, LG high back seat, XJ rear shocks.

                                The list changes.

                                Comment

                                Working...
                                X