If this is your first visit, be sure to
check out the FAQ by clicking the
link above. You may have to register
before you can post: click the register link above to proceed. To start viewing messages,
select the forum that you want to visit from the selection below.
I wasn't laughing at you.
It's just a relief knowing I'm not the only that stuff happens to...
81 SH SomethingSpecial 81 frame, 80 tank and side covers, 79 tail light and carbs, 78 engine, 750 final drive mod, Geezer rec/reg, 140 mains, LH wheels
☺
79 SF MEAUQABEAUXS 81SHNor'eastah (Old Red) 80 LGBlack Magic 78 EStandard Practice
James 3:17
If I can make at least one person smile, or pee their pants a little, or maybe spit out their drink; then my day is not wasted.
I'm just getting the popcorn ready for your next installment.
Best of luck!
81 SH SomethingSpecial 81 frame, 80 tank and side covers, 79 tail light and carbs, 78 engine, 750 final drive mod, Geezer rec/reg, 140 mains, LH wheels
☺
79 SF MEAUQABEAUXS 81SHNor'eastah (Old Red) 80 LGBlack Magic 78 EStandard Practice
James 3:17
If I can make at least one person smile, or pee their pants a little, or maybe spit out their drink; then my day is not wasted.
I did a thread to find out about bolts/machine screws, and another one to vent about the petcocks. I have yet to get frustrated enough with the rebuild to switch to non - vacuum valves. I have a feeling I will.
"Venturered" 80 XS1100G - "DoraMax" getting sort of resto/destro ed.
Yeah it's a pretty blue, but just because you're old is no excuse to buy a bagger. Fortunately I have wrenches.
I did a thread to find out about bolts/machine screws, and another one to vent about the petcocks. I have yet to get frustrated enough with the rebuild to switch to non - vacuum valves. I have a feeling I will.
I don't blame you for venting but don't give up. There are no OEM vacuum diaphragm kits for the Standard fuel taps, just the rubber gaskets, o-rings, seals and screws and they're more than a little expensive. They're not as expensive as changing the engine or rebuilding it after you fill the oil pan with fuel but yeah, they're expensive:-
$43.05 per side, $86.01 for the three main rubber parts on both sides and you still haven't touched the assortment of screws, sealing washers and other hardware you may need after you take everything apart.
If you get bored there is a good tutorial with pictures on the xjbikes.com site about rebuilding the fuel taps and vacuum valves. I think chacal has the parts to rebuild the vacuum valves on the XS11 Standards but the ones in my '80G are still working so I haven't checked:- http://xjbikes.com/forums/threads/re...-w-pics.25058/
FWIW Yamaha still lists the complete vacuum valve assembly for the 'Specials and the XJ11 but it's expensive too. I like the octy so I ordered a new one instead of fooling with any of the half-fast aftermarket kits and then still dumping fuel all over everything after doing a bunch of work. http://www.boats.net/parts/search/Ya...ING/parts.html
39 DIAPHRAGM ASSEMBLY 3H3-24520-01-00 $94.48
I'll see if it's really available in a timely manner, not stored in that Yamaha warehouse they have out on Jupiter and will have to be shipped sunward on the next available comet heading for Earth.
-- Scott
_____
♬
2004 ST1300A: No name... yet
1982 XJ1100J: "Baby" SS Brakes, '850 FD, ACCT
1980 XS1100G: "Columbo" SS Brakes, '850 FD, ACCT
1979 XS1100SF: "Bush" W.I.P.
1979 XS1100F: parts
2018 Heritage Softail Classic 117 FLHCS SE: "Nanuk" It's DEAD, it's not just resting. It is an EX cycle.
♬
I have a 1980 G and got Suddco kits from MikesXS and had no problems with them working but there are things you have to pay attention to when rebuilding there are several threads that have picture tutorials. The main issues are that the plunger goes in and seals correctly and then does not stick. If the plunger is too corroded to where cleaning and mild polishing can not clean it or the orifice it goes into can not be polished to where the O ring seals it will leak gas. If the spring is severely corroded it will not work properly. There is a vent that must be cleaned and all ports should be cleaned. The internal seal that seals the ports must mate against the back of the assembly and the outside rotatable cock valve must be polished to assure a smooth fit it can be sanded with fine paper and then polished. The wafer washer must be put in correctly and there must be unbinding movement of the valve. To test you can put a hose on the vacuum and lightly suck to test it opens port. Put fluid in a bottle with a hose coming out attached to the gas port to test flow and leaks backwards I know but still tests function. Assembly with a little fine smear of grease just rubbed on seal can help with the cock valve seal . Do it right look at the videos and you can get it done if you really want to its no more complicated than changing a tire correctly.
To fix the problem one should not make more assumptions than the minimum needed.
No, it's not particularly difficult to rebuild and maintain the Standard taps but you do have to be careful or you'll rip the vacuum diaphragm(s). I don't want an engine full of fuel so I try as much as possible not to mess with them and I won't use aftermarket parts in them: many horror stories and few success stories. I do keep them clean and lubricated but other than that I just leave them alone except during maintenance.
Mine still have the vacuum diaphragms that were in them when I bought the bike back in 2008 and they were probably the original parts. I finally had to add new vacuum valve o-rings and replaced the other rubber fuel parts last month when I was trying to put Columbo together because they were on their third or fourth time around. You can only flip the cookie-cutter gaskets and massage the fuel tap handle v-rings so many times before they won't work any more, darn those worthless parts that only last 36 years!
The o-ring seats for the vacuum valves do have to be clean and polished and then kept that way, they're not making any more of them.
-- Scott
_____
♬
2004 ST1300A: No name... yet
1982 XJ1100J: "Baby" SS Brakes, '850 FD, ACCT
1980 XS1100G: "Columbo" SS Brakes, '850 FD, ACCT
1979 XS1100SF: "Bush" W.I.P.
1979 XS1100F: parts
2018 Heritage Softail Classic 117 FLHCS SE: "Nanuk" It's DEAD, it's not just resting. It is an EX cycle.
♬
The original scope of the project included R/R of the rounded oil filter bolt. While my petock work is still in progress, it's nevertheless time for the torching and wrenching. I'm pulling exhaust headers to provide clearance. Four retention nuts off, to be replaced with stainless (what thread are they anyway?)
Header number Two is loose, and Three pulled completely off, but I finger there's a clamp at the end of each header I have to conquer.
"Venturered" 80 XS1100G - "DoraMax" getting sort of resto/destro ed.
Yeah it's a pretty blue, but just because you're old is no excuse to buy a bagger. Fortunately I have wrenches.
The original scope of the project included R/R of the rounded oil filter bolt. While my petock work is still in progress, it's nevertheless time for the torching and wrenching. I'm pulling exhaust headers to provide clearance. Four retention nuts off, to be replaced with stainless (what thread are they anyway?)
Header number Two is loose, and Three pulled completely off, but I finger there's a clamp at the end of each header I have to conquer.
pairs. Four PAIRS of nuts off. eight
"Venturered" 80 XS1100G - "DoraMax" getting sort of resto/destro ed.
Yeah it's a pretty blue, but just because you're old is no excuse to buy a bagger. Fortunately I have wrenches.
Well then. I left the motorcycle unattended for about thirty minutes, and I see a pan of oil under it, some splashes around said pan, and a filter, housing and o-ring sitting near my exhaust nuts.
Body Shop mgr tells me my filter was oil was full of gas but the crankcase was clean as brand new. Repeats it twice. Still seems surprised that I am not (surprised). then he shows me the filter housing. The nut welded to the filter bolt appears to be welded to the housing as well. I'm thinking this is not a standard feature. This is the first time I've had mine off. When i took posession the bolt was rounded off. Now the whole rig looks like a spinon filter. With a removable element. Do I need to get ahold of Andreas and take that filter housing off his hands?
"Venturered" 80 XS1100G - "DoraMax" getting sort of resto/destro ed.
Yeah it's a pretty blue, but just because you're old is no excuse to buy a bagger. Fortunately I have wrenches.
Be careful if you buy an aftermarket bolt. I haven't had it happen to me personally but in some of them the bypass valves have stuck.
-- Scott
_____
♬
2004 ST1300A: No name... yet
1982 XJ1100J: "Baby" SS Brakes, '850 FD, ACCT
1980 XS1100G: "Columbo" SS Brakes, '850 FD, ACCT
1979 XS1100SF: "Bush" W.I.P.
1979 XS1100F: parts
2018 Heritage Softail Classic 117 FLHCS SE: "Nanuk" It's DEAD, it's not just resting. It is an EX cycle.
♬
Body Shop mgr tells me my filter was oil was full of gas but the crankcase was clean as brand new. Repeats it twice. Still seems surprised that I am not (surprised). then he shows me the filter housing. The nut welded to the filter bolt appears to be welded to the housing as well. I'm thinking this is not a standard feature.
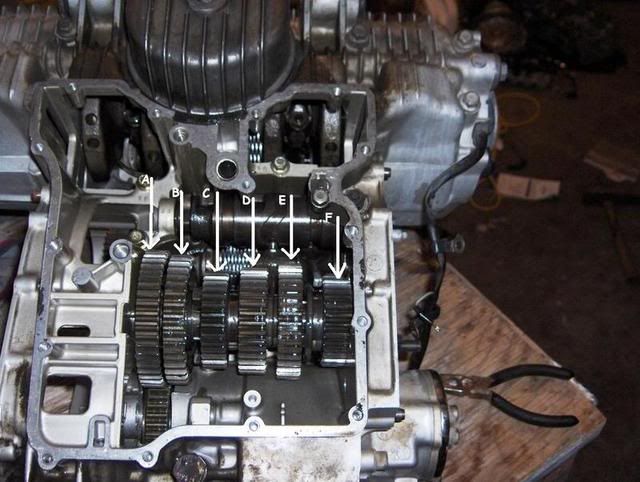
Here's the best photo I could find showing the engine bottom and at the top is most of the oem filter cup.
The bolt is Steel, but the cup is aluminum, so it should have been difficult if next to impossible to weld the nut to the housing along with the actual steel filter bolt head.
Yep, some photos of what you have would be nice to see.
T.C.
T. C. Gresham
81SH "Godzilla" . . .1179cc super-rat.
79SF "The Teacher" . . .basket case! History shows again and again,
How nature points out the folly of men!
Unless someone broke or ground off the locator tabs on the housing I didn't think it was possible to tighten or remove the oil filter if the bolt wouldn't turn in the housing. Hmm....
It's not likely the bolt's welded to the cup but you never know. I'm pretty sure the oil filter bolt threads are pipe threads so if it will fit, put a pipe coupler on the threaded end of the oil filter bolt to protect the threads,
Heat the aluminum cup with a torch or heat gun, then spray some of that compressed air in a can on the bolt to chill it. Just hit the bolt, not the aluminum housing or you'll have to start over.
Set the filter housing on a couple of boards to protect the fins. Keep the bolt head between the boards and make sure it's well above the table.
Rap the bolt/pipe coupler with a rawhide mallet or a large chunk 'o wood and see if that will drive the bolt down and out. Stop if it really doesn't move or if the bolt starts to drop so you don't try to drive it through the table.
If it's not pipe threads, be a little more circumspect and tap around the body of the bolt with a hammer and wooden dowel. Try to work it back and forth to loosen it, then work it down and out.
You could also try flipping it so the bolt threads are on a board, then put an oversized socket or pipe over the entire bolt and try to tap the housing down and off the shoulder of the bolt.
Last edited by 3Phase; 09-30-2016, 04:29 PM.
Reason: Forgot the last step.
-- Scott
_____
♬
2004 ST1300A: No name... yet
1982 XJ1100J: "Baby" SS Brakes, '850 FD, ACCT
1980 XS1100G: "Columbo" SS Brakes, '850 FD, ACCT
1979 XS1100SF: "Bush" W.I.P.
1979 XS1100F: parts
2018 Heritage Softail Classic 117 FLHCS SE: "Nanuk" It's DEAD, it's not just resting. It is an EX cycle.
♬
Comment