-
Thanks Cat. Moisture drain does make more sense than electronics. Since I've baited you into the exhaust conversation, what am i looking for to release my header pipes from the mufflers and/or various plumbing? (I think I'm going to wrap the pipes) -
Hey there,
The bypass valve in the filter bolt is just secured by a spring, so you should be able to see the spring, and take a phillips screw driver and insert it into one of the holes just below the valve ball opposite of the spring, and gently pry up against the ball to verify that the ball will move towards the spring. IT's designed so that IF the filter gets totally clogged so that oil won't flow thru it into the filter bolt, then the oil pressure will push the ball up by entering into the filter bolt BELOW the fitment point of the oil filter, and will push the ball valve up to allow the oil to get past it so that the engine keeps being lubricated....albeit with UNFILTERED oil, but that's better than NO OIL at all.
Yeah, bolt O-ring probably did get melted a bit and glued to the filter housing, I would have thought just some turning of the bolt with a wrench and some spray lube/penetrating oil would have been sufficient to get the bolt spinning and then allow it to be worked out of the cup.
The OEM pipes are double walled, and I've read that the bolt was to seal it up and to allow drainage of condensation or such. The size of the hole/bung that it's bolted/screwed into is probably way too small for an actual O2 sensor.
T.C.Leave a comment:
-
I never expected to run into this, but on one (probably more, when i get to them) of my exhaust headers, there is a small fitting with a hex head screw sticking out of it. I dont reckon there's probably an emission control system on my G, but it looks suspiciously like an Oxy sensor tap. Whats upLeave a comment:
-
I'm glad you got the bolt out of the housing!
Now check the steel bolt, you should be able to see any thread damage and it should thread back into the engine without any resistance at all so it doesn't rip the aluminum threads. Don't keep turning if it starts to bind, just back it out and stop.Leave a comment:
-
aLRIGHTY THEN....
i dont know if it's pipe threads or not, but it is now
I tried to go slow so as to feel the threads aligning or not, but after about a quarter turn with resistance, I figured I'd probably buggered up the threads. About that time, the bolt broke free. Now then....I have a replacement if my threads do turn out to be damaged. It's aftermarket. How do I verify check valve operation?
For those keeping score, I think the small O-Ring that seals the hole to the bypass valve assembly (bolt) melted when the nut was being welded to the bolt head.Last edited by puskrat; 10-01-2016, 08:37 AM.Leave a comment:
-
so we're sure this bolt should be loose, right? Everyone I talk to here in real life thinks the bolt should have shrunk away from the housing as soon as it cooled.Leave a comment:
-
Unless someone broke or ground off the locator tabs on the housing I didn't think it was possible to tighten or remove the oil filter if the bolt wouldn't turn in the housing. Hmm....
It's not likely the bolt's welded to the cup but you never know. I'm pretty sure the oil filter bolt threads are pipe threads so if it will fit, put a pipe coupler on the threaded end of the oil filter bolt to protect the threads,
Heat the aluminum cup with a torch or heat gun, then spray some of that compressed air in a can on the bolt to chill it. Just hit the bolt, not the aluminum housing or you'll have to start over.
Set the filter housing on a couple of boards to protect the fins. Keep the bolt head between the boards and make sure it's well above the table.
Rap the bolt/pipe coupler with a rawhide mallet or a large chunk 'o wood and see if that will drive the bolt down and out. Stop if it really doesn't move or if the bolt starts to drop so you don't try to drive it through the table.
If it's not pipe threads, be a little more circumspect and tap around the body of the bolt with a hammer and wooden dowel. Try to work it back and forth to loosen it, then work it down and out.
You could also try flipping it so the bolt threads are on a board, then put an oversized socket or pipe over the entire bolt and try to tap the housing down and off the shoulder of the bolt.Leave a comment:
-
The newly manufacturered filter housing assembly.
 LOOKING FOR SOMETHING TO ACCOUNT FOR THE ATTACHMENT.
 LOOKING INSIDE FOR SOMETHING TO SPLEEN THE NEW FUSION
 THE NEW NUT IS WELDED TO THE OLD ROUNDED HEAD, NOT TO THE HOUSING.
WHAT AM I MISSING HERE? (besides the ability to use a website?)Leave a comment:
-
Here's the best photo I could find showing the engine bottom and at the top is most of the oem filter cup.
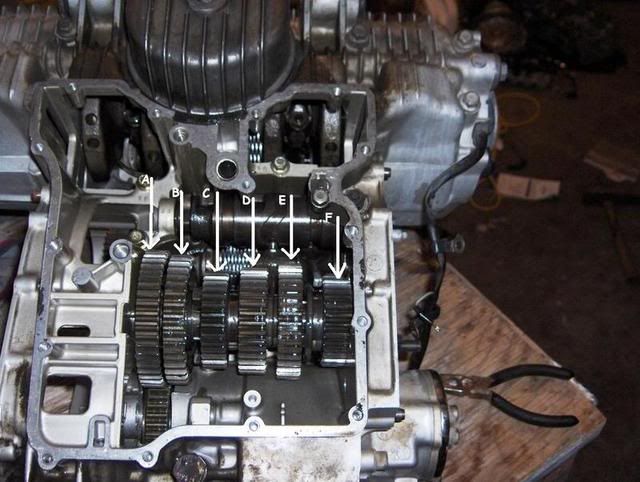
The bolt is Steel, but the cup is aluminum, so it should have been difficult if next to impossible to weld the nut to the housing along with the actual steel filter bolt head.
Yep, some photos of what you have would be nice to see.
T.C.Leave a comment:
-
Got a picture?
Here's an example of normal oil filter bolts:
Partzilla.com
Oil Filter Bolt
Price:$12.86
List Price $15.95
You Save $3.09 (19%)
Quantity: 1

Be careful if you buy an aftermarket bolt. I haven't had it happen to me personally but in some of them the bypass valves have stuck.Leave a comment:
-
Uhoh
Well then. I left the motorcycle unattended for about thirty minutes, and I see a pan of oil under it, some splashes around said pan, and a filter, housing and o-ring sitting near my exhaust nuts.
Body Shop mgr tells me my filter was oil was full of gas but the crankcase was clean as brand new. Repeats it twice. Still seems surprised that I am not (surprised). then he shows me the filter housing. The nut welded to the filter bolt appears to be welded to the housing as well. I'm thinking this is not a standard feature. This is the first time I've had mine off. When i took posession the bolt was rounded off. Now the whole rig looks like a spinon filter. With a removable element. Do I need to get ahold of Andreas and take that filter housing off his hands?Leave a comment:
-
Oil filter retainer
The original scope of the project included R/R of the rounded oil filter bolt. While my petock work is still in progress, it's nevertheless time for the torching and wrenching. I'm pulling exhaust headers to provide clearance. Four retention nuts off, to be replaced with stainless (what thread are they anyway?)
Header number Two is loose, and Three pulled completely off, but I finger there's a clamp at the end of each header I have to conquer.Leave a comment:
-
No, it's not particularly difficult to rebuild and maintain the Standard taps but you do have to be careful or you'll rip the vacuum diaphragm(s). I don't want an engine full of fuel so I try as much as possible not to mess with them and I won't use aftermarket parts in them: many horror stories and few success stories. I do keep them clean and lubricated but other than that I just leave them alone except during maintenance.
Mine still have the vacuum diaphragms that were in them when I bought the bike back in 2008 and they were probably the original parts. I finally had to add new vacuum valve o-rings and replaced the other rubber fuel parts last month when I was trying to put Columbo together because they were on their third or fourth time around. You can only flip the cookie-cutter gaskets and massage the fuel tap handle v-rings so many times before they won't work any more, darn those worthless parts that only last 36 years!
The o-ring seats for the vacuum valves do have to be clean and polished and then kept that way, they're not making any more of them.Leave a comment:
-
I have a 1980 G and got Suddco kits from MikesXS and had no problems with them working but there are things you have to pay attention to when rebuilding there are several threads that have picture tutorials. The main issues are that the plunger goes in and seals correctly and then does not stick. If the plunger is too corroded to where cleaning and mild polishing can not clean it or the orifice it goes into can not be polished to where the O ring seals it will leak gas. If the spring is severely corroded it will not work properly. There is a vent that must be cleaned and all ports should be cleaned. The internal seal that seals the ports must mate against the back of the assembly and the outside rotatable cock valve must be polished to assure a smooth fit it can be sanded with fine paper and then polished. The wafer washer must be put in correctly and there must be unbinding movement of the valve. To test you can put a hose on the vacuum and lightly suck to test it opens port. Put fluid in a bottle with a hose coming out attached to the gas port to test flow and leaks backwards I know but still tests function. Assembly with a little fine smear of grease just rubbed on seal can help with the cock valve seal . Do it right look at the videos and you can get it done if you really want to its no more complicated than changing a tire correctly.Leave a comment:


Leave a comment: