Announcement

Collapse
No announcement yet.

Journey of my 79 XS1100F

Collapse
X
 
  • Filter
  • Time
  • Show
Clear All
new posts

  • #16
    shifter cover

    I'd pull the shifter cover and look at the alignment dots and both return springs before going too deep. Could be a c clip on the shift fork shaft, but check the easy to get at stuff first. Block it up and have a friend rotate the rear wheel and watch the action while you move the shifter by hand. That will tell you plenty.
    mack
    79 XS 1100 SF Special
    HERMES
    original owner
    http://i946.photobucket.com/albums/a...ps6932d5df.jpg

    81 XS 1100 LH MNS
    SPICA
    http://i946.photobucket.com/albums/ad305/mack-055/2.jpg

    78 XS 11E
    IOTA
    https://youtu.be/wB5Jfbp6SUc
    https://youtu.be/RaI3WYHSuWA


    Have recovery trailer and shop if you breakdown in my area.
    Frankford, Ont, Canada
    613-398-6186

    Comment


    • #17
      Originally posted by mack View Post
      I'd pull the shifter cover and look at the alignment dots and both return springs before going too deep. Could be a c clip on the shift fork shaft, but check the easy to get at stuff first. Block it up and have a friend rotate the rear wheel and watch the action while you move the shifter by hand. That will tell you plenty.
      Sadly the shifter wont budge at all. I tilted the bike on to a 2x4 with one end cut at an angle so it would dig into the ground. That gave me enough tilt to pull the left cover off without losing any oil. once in there it all looked very clean. I even took out the peg for the shifter and tried to move the mechanism manually and it wouldn't budge. And yes I had the clutch all the way in...I used a bungy cord to keep it open. The manual says something about the lines but without it budging I can't move it back to lined up.

      I cleaned edges on the case and threw it back on...I know I will need back in there again once I have this figured out so I will seal it then. So now I have it back on the kickstand and all of the bolts out of the right side but for the life of me can't get the seal to break between the two. Any suggestions for getting the right side off without damaging anything?
      79F with two parts bikes (78E and a 79F). Ran it for the first season all the way through the summer. more work to do this Spring!

      Comment


      • #18
        I use a rubber mallet to tap on the cover all the way around. If you have never had the cover off you have no idea what the previous person sealed it with. You may try putting a screwdriver in the hole the clutch cable goes threw and apply a little tension while taping. Do not pull real hard or you will snap the aluminum cover. If that does not do it I have used a sharp putty knife and at a strong part at the bottom of the cover tap the putty knife in-between the cover and motor. It will damage the gasket but will break the seal. You may need to break the seal in a few places before it lets go. Be patient doing this you do not want to crack the cover.
        To fix the problem one should not make more assumptions than the minimum needed.

        Rodan
        https://www.youtube.com/watch?v=khm6...liHntN91DHjHiS
        1980 G Silverbird
        Original Yamaha Fairfing and Bags
        1198 Overbore kit
        Grizzly 660 ACCT
        Barnett Clutch Springs
        R1 Clutch Fiber Plates
        122.5 Main Jets
        ACCT Mod
        Mac 4-2 Flare Tips
        Antivibe Bar ends
        Rear trunk add-on
        http://s1184.photobucket.com/albums/z329/viperron1/

        Comment


        • #19
          Originally posted by nzemke View Post
          all of the bolts out of the right side but for the life of me can't get the seal to break between the two. Any suggestions for getting the right side off without damaging anything?
          Pull in on the clutch lever, the force should pop the cover right off.
          2H7 (79)
          3H3

          "If it ain't broke, modify it"

          Comment


          • #20
            Well in the end it appears to be that I am just hit the dang thing to hard and jammed shift lever #2. after pulling the circlip I was able to put it back where it should have gone and everything appears to be back to normal. The new gasket is curing right now, and I will tighten it down when I get home today. I figure while I have it low on gas, I will drain it all the way and put in the petcock repair kits.

            While changing over the handle bars I stressed the metal on the clutch a little to much while being lazy :S When I put the handle bars on I was already frustrated with the bike and didn't want to spend more time on it then absolutely necessary...lesson learned...Lucky me I have a spare still on the parts bike so I will take my time and do this one right.

            Otherwise I'm now considering doing the custom battery/electrical cage again. That however will be another week or two off, as I need to work on some other projects to keep the wife happy.

            [IMG]http://i301.photobucket.com/albums/nn61/nzemke/20150424_182719_zp
            s1z8ou26g.jpg[/IMG]

            79F with two parts bikes (78E and a 79F). Ran it for the first season all the way through the summer. more work to do this Spring!

            Comment


            • #21
              Re-adjusted the clutch lever for a bit more comfort.

              I couldn't get the blinkers on the left to work so I took apart the switch assembly and found that the solder had failed. So I went through it and cleaned all the points and re-soldered her up. Now they work very nicely

              I am also attempting to fine tune the bike a little better. I tried to color tune it but the color never changed from blue 
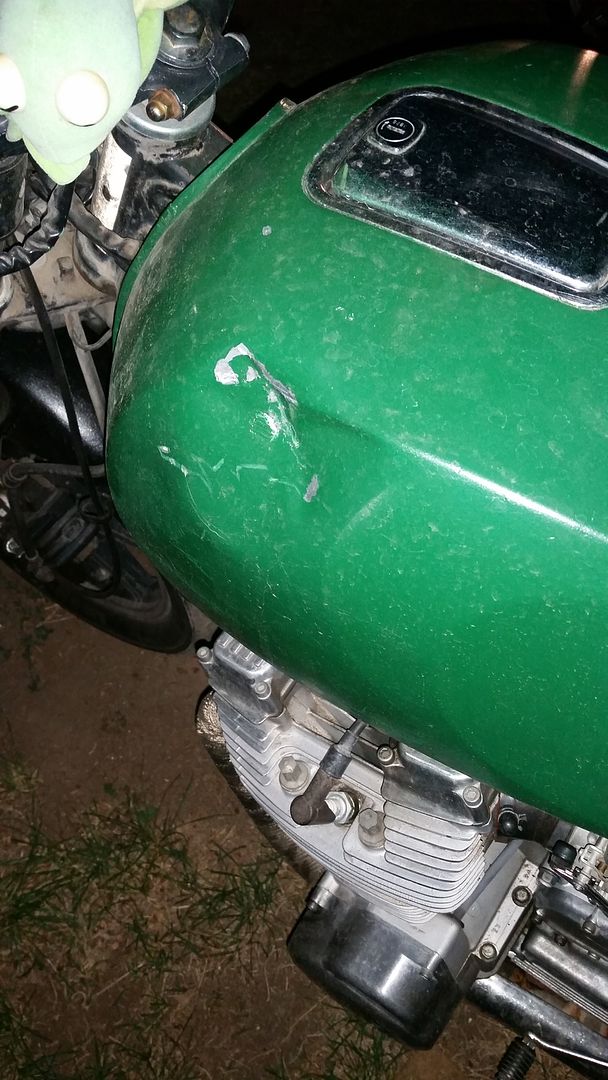
I have the carbs perfectly synced...but as you can imagine... it is running way to lean. It pops a lot under 2K so I am trying something a little different. I broke out the wife's nail polish and filled up 2 of the fins. From there I tested it and it was a little better. So I filled in two more fins, but it started to rain so I covered up for the day. I will see how it is tomorrow. Really hoping I can find a balance that will un-lean it. Not sure how many of these fins will need to be filled to bring it to normal.
              79F with two parts bikes (78E and a 79F). Ran it for the first season all the way through the summer. more work to do this Spring!

              Comment


              • #22
                Lean bike filling fins I am confused some one set me straight.
                To fix the problem one should not make more assumptions than the minimum needed.

                Rodan
                https://www.youtube.com/watch?v=khm6...liHntN91DHjHiS
                1980 G Silverbird
                Original Yamaha Fairfing and Bags
                1198 Overbore kit
                Grizzly 660 ACCT
                Barnett Clutch Springs
                R1 Clutch Fiber Plates
                122.5 Main Jets
                ACCT Mod
                Mac 4-2 Flare Tips
                Antivibe Bar ends
                Rear trunk add-on
                http://s1184.photobucket.com/albums/z329/viperron1/

                Comment


                • #23
                  Originally posted by ViperRon View Post
                  Lean bike filling fins I am confused some one set me straight.
                  ++
                  81H Venturer1100 "The Bentley" (on steroids) 97 Yamaha YZ250(age reducer) 92 Honda ST1100 "Twisty"(touring rocket) Age is relative to the number of seconds counted 'airing' out an 85ft. table-top.

                  Comment


                  • #24
                    Holy moly Batman we have brand new terminology for something, Just not sure what?
                    2-79 XS1100 SF
                    2-78 XS1100 E Best bike Ever
                    80 XS 1100 SG Big bore kit but not fully running yet.
                    Couple of more parts bikes of which 2 more will live!

                    Comment


                    • #25
                      it is running way to lean. It pops a lot under 2K so I am trying something a little different. I broke out the wife's nail polish and filled up 2 of the fins. From there I tested it and it was a little better
                      I think he sealed/covered up a few pleats on the pod filters to restrict the air flow to try to richen it up some.
                      2H7 (79)
                      3H3

                      "If it ain't broke, modify it"

                      Comment


                      • #26
                        Never mind the dirt splatters from last nights rain storm.....

                        Does anyone have any suggestions for removing the ding in the tank? I laid her down a couple weeks ago when the kickstand wasn't as out as I thought it was and I was monkeying with the brakes...
                        79F with two parts bikes (78E and a 79F). Ran it for the first season all the way through the summer. more work to do this Spring!

                        Comment


                        • #27
                          I'd try taking the tank off, get all the gas and fumes out. Take the fuel sending unit out on the inner left side and you may be able to rap the dent out some to make it a bit smaller, then fill it with bondo and repaint.
                          2H7 (79)
                          3H3

                          "If it ain't broke, modify it"

                          Comment


                          • #28
                            well the attempt to bang out the bulge was fruitless...so I spent yesterday evening applying layers of bondo. And spent this morning put on coats of paint. And the tint is slightly different from the original color I had on it...still not sure about it lol...needs a coat of wax or something to make it shine...The rest of it just needs a good wash and buff...


                            The wood under it was just to center it better...still need to take the center stand off the parts bike and move it over.
                            79F with two parts bikes (78E and a 79F). Ran it for the first season all the way through the summer. more work to do this Spring!

                            Comment


                            • #29
                              Looks 100% better, yep sometimes those dents don't bang out so easy, especially on the crease. I've put bondo in a dent as large as yours was a few years back and it is still holding. If you put some 2 part clear coat on there it will shine and you won't have to worry about accidental gas spillage. If you do this, don't forget to wet sand the base coat super smooth.
                              Last edited by bikerphil; 07-04-2015, 07:56 AM.
                              2H7 (79)
                              3H3

                              "If it ain't broke, modify it"

                              Comment


                              • #30
                                Well I found a parts bike for $100, all that's missing is the carb bank. So I should be able to pull the parts I need to get this beast running. Its a 79 special so I'm hoping the coils will slide right over...and I'm tempted to use the tank off of it on my bike. I will also be pulling all the shims so I can go through my bike again and re-shim it. Then lots of parts for the shelf

                                Otherwise I finally took the center stand off of my current parts bike, cleaned all the rust and paint yesterday and primed then painted it black. Then got it on the bike before the heat hit 100+.

                                Once I get her running again I have some green led running lights to go under the tank and fenders. Plus I picked up an LED strip for on the license plate to add additional brightness for braking and the turn signals. If this doesn't work I will have to look hard and long for a single replacement...last thing I need is getting rear ended because some jackass behind me didn't see me...and FYI I had that happen on the last bike and its tail light was bright as all hell (2002 yzf600r yamaha)!
                                79F with two parts bikes (78E and a 79F). Ran it for the first season all the way through the summer. more work to do this Spring!

                                Comment

                                Working...
                                X