-
Marty (in Mississippi)
XS1100SG
XS650SK
XS650SH
XS650G
XS6502F
XS650E -
BUT! Yamaha had the ORIGINAL boot installed with NO GASKET! The boots had an "o" ring as part of the mold, and sealed between the head an intakes...
And yes, I use Yamabond #4 on boots when I install replacement boots....Ray Matteis
KE6NHG
XS1100 E '78 (winter project)
XS1100 SF Bob Jones worked on it!Comment
-
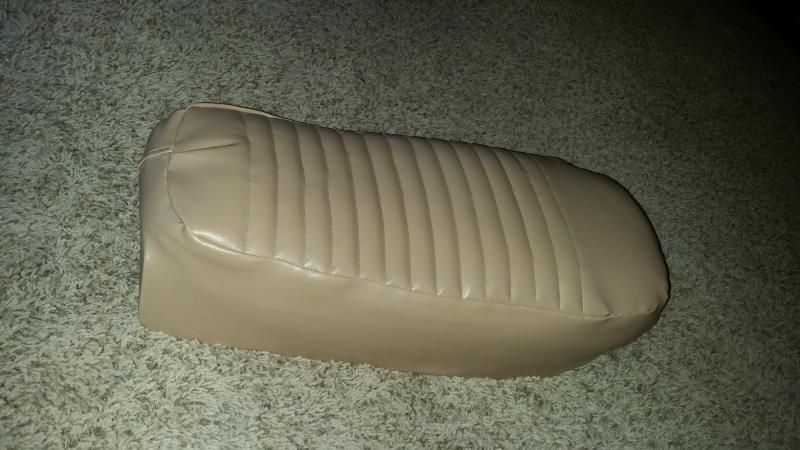
Reshaped the seat on the XS11 for a cafe racer look. I prefer the single seat without the weird bump cap at the end of the seat. So I basically took the plastic off and reshaped the metal to form above the tire and then filled it in with several layers of foam. Then cut a huge chunk out of the seat foam to make it uniform and remove the second hump in the back. Originally this started as a need to replace the worn out and ripped upholstery...and ended up as so much more I had hoped to sew this thing as a pleated seat...but can't find what I need locally to make it. So I figure I will stretch what I have now so I can get back on her and order what I need through snail mail. She would enjoy a new seat cover either way
  79F with two parts bikes (78E and a 79F). Ran it for the first season all the way through the summer.
 more work to do this Spring!
Comment
-
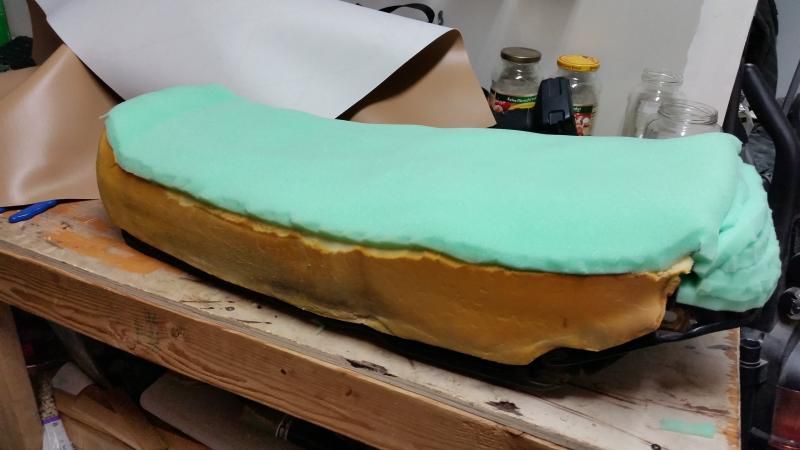
Will throw another photo up tomorrow when I get it on the bike in some day light. This is my first attempt at making anything like this. I noted all the issues that I had and next time around will make it look even better


 79F with two parts bikes (78E and a 79F). Ran it for the first season all the way through the summer. more work to do this Spring!
Comment
-
Use Upholstery wadding on your foam sponge before fitting the cover, it smooths out all the lumpiness of the sponge
http://www.ebay.co.uk/sch/i.html?_fr...Text=&_sacat=0Tom
1982 5K7 Sport, restored to original from a wreck
1978 2H9 (E), my original XS11, mostly original
1980 2H9 monoshocked (avatar pic)http://i145.photobucket.com/albums/r...psf30aa1c8.jpg
1982 XJ1100, waiting resto to originalComment
-
Wish I had seen that before finishing the seat last night. Threw it on the bike....and the more I keep staring at it the more I realize I just might have to make a second one.
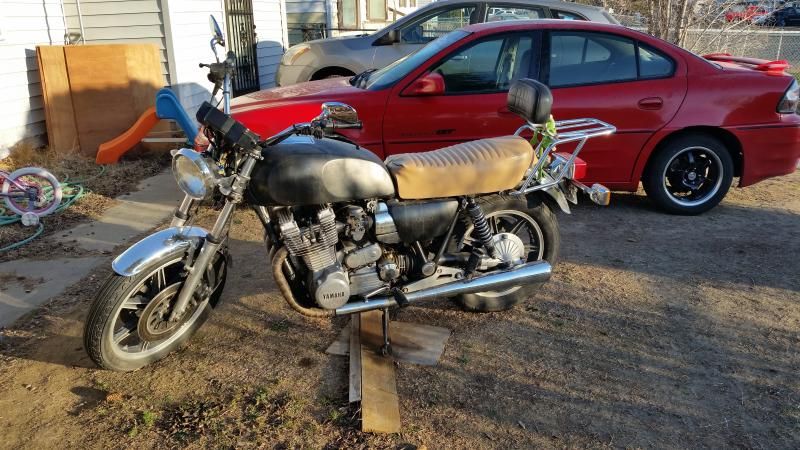
In the photo you can see the brain hanging out on the back end. That is temporary just so I could take a couple photos of the bike. The plan is to tuck that into the "tool" compartment next to the battery. And also to remove the sissy bar from the back and trim the fender up. And also in the process of prepping a second tank for painting a green color (currenlty undecided on the final tone of green).

 79F with two parts bikes (78E and a 79F). Ran it for the first season all the way through the summer. more work to do this Spring!
Comment
-
What I DID with my bike
A little late on posting but everyone likes pictures - right?
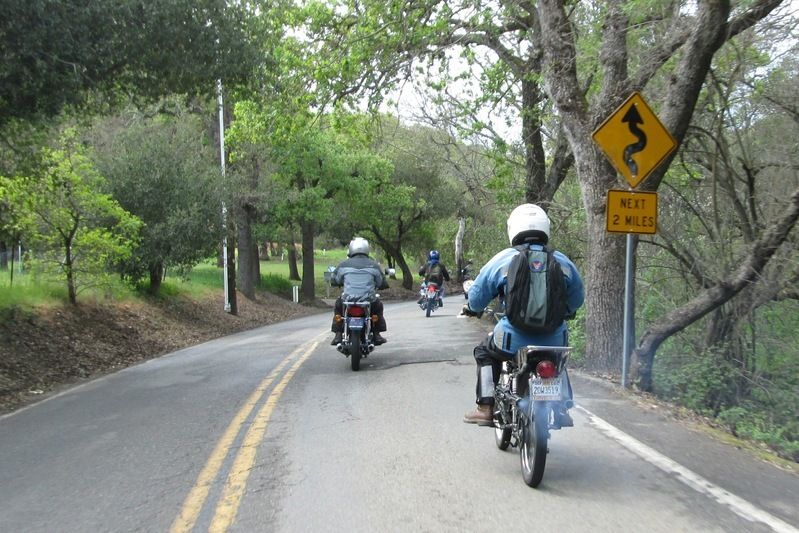
Last weekend I attended the annual kick-off meeting for the Classic Japanese Motorcycle Club (cjmc.org and also a yahoo group).
A bunch of great folks. Went for a short ride to lunch after the meeting.
The weather threatened rain all day until I was stopped 3 stop lights from home upon my return. The sky opened up and I got drenched!
Some pictures...
The collection of machines in attendance
(channel 11 represented in the foreground)
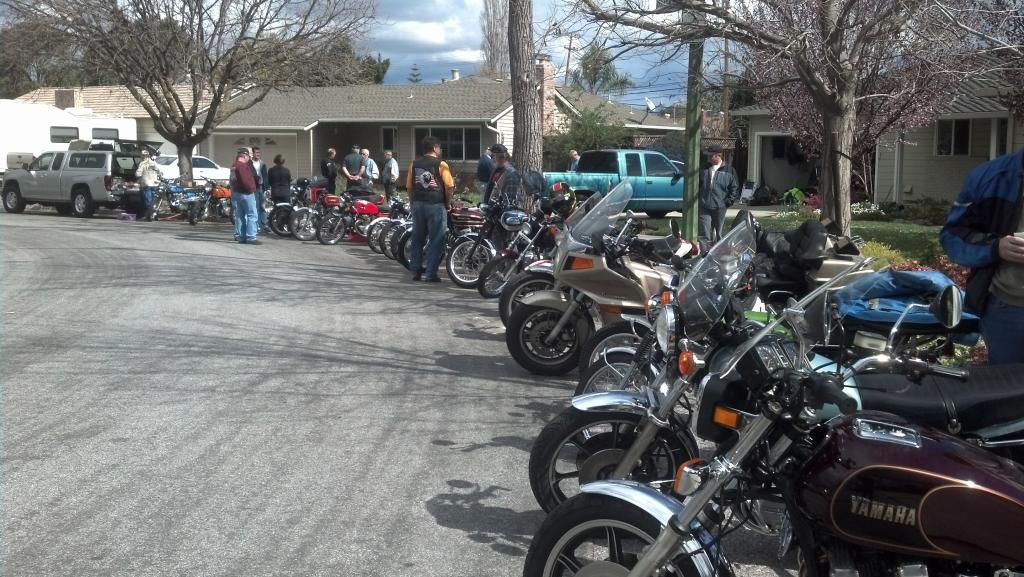
During the ride
And for those having electrical carb problems...
 1980 XS1100 Standard (G)
Original Owner
Stock plus:
K&N air filter, Supertrapp 4x1, Techna-fit SS brake lines, TC Fuse Block, TKAT Fork Brace
...dirt and grime from several states.
-------------------
2011 FJR1300
1978 SR500Comment
-
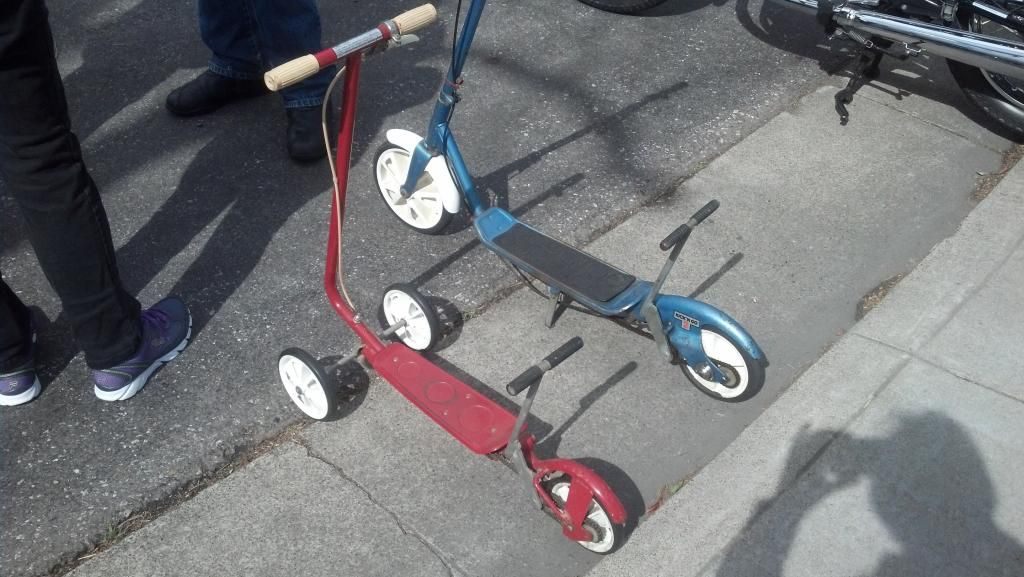
I had a kick-powered scooter like that when I was a kid! The 2-wheeled style, and I seem to remember it being the same color blue as that one!1980 XS850SG - Sold
1981 XS1100LH Midnight Special (Sold) - purchased 9/29/08
Fully Vetterized and Dynojet Kit added, Heated Grips, Truck-Lite LED headlight, Accel Coils, Irridium plugs, TKAT Fork Brace, XS850LH Final Drive & Black SS Brake lines from Chacal.
Here's my web page devoted to my bike! XS/XJ User's Manuals there, and the XJ1100 Service Manual and both XS1100 Service manuals (free download!).
Whether you think you can, or you think you cannot - You're right.
-H. FordComment
-
Rolled Addie outside and fired up on the second try. Ran for 15+ minutes.
Needs lots of little things doing once temps rise.
Phil1981 XS1100 H Venturer ( Addie)
1983 XJ 650 Maxim
2004 Kawasaki Concours. ( Black Bear)Comment
-
Added dyna coils, got it to fire up with full choke and it would only run with the petcocks on PRI. Turns out you need to hook up those vacuum lines. For whatever reason it was idling at 9000 RPM so I fixed that too.
Replaced front brake lines with stainless steel. Still have to refill the lines.
Is there a tutorial / video / tech tip on how to reach the rear master cylinder? It looks a little too involved to just "go for it." I have the manual, but I needed supplements for everything else so far.
Lastly, why are the front brake wires IMPOSSIBLE to get off. That would have been so much easier if I could have gotten those off.78 EComment
-
The rear master cylinder is perfectly accessible on the right side of the bike. There are 2 bolts that hold it there. You shouldn't have any issue reaching it. Since you're not dealing with the LH/XJ linked brakes, you only have one line from the rear MC to the rear brakes, so that makes things even easier!
The front brake wires (for the brake light) are not impossible to remove. There is a spring-loaded plastic insert with a locking tab that keeps everything pressed into the hole. All you need to do is press that locking tab up from the bottom, and everything should come out.1980 XS850SG - Sold
1981 XS1100LH Midnight Special (Sold) - purchased 9/29/08
Fully Vetterized and Dynojet Kit added, Heated Grips, Truck-Lite LED headlight, Accel Coils, Irridium plugs, TKAT Fork Brace, XS850LH Final Drive & Black SS Brake lines from Chacal.
Here's my web page devoted to my bike! XS/XJ User's Manuals there, and the XJ1100 Service Manual and both XS1100 Service manuals (free download!).
Whether you think you can, or you think you cannot - You're right.
-H. FordComment
-
Can you post a picture of the locking tab? I tried pushing on everything that looked movable. None of it was.78 EComment
-
Look on the bottom of the master cyl. In front, under the wires is a square hole. Push a screw driver that will fit inside up, and pull on the wires. The brake light switch will come out.Ray Matteis
KE6NHG
XS1100 E '78 (winter project)
XS1100 SF Bob Jones worked on it!Comment
-
Help!!
Chased an electrical ground problem – for two days now and no joy. I turn on the main switch and everything looks good until I hit the starter button, the starter relay clicks but the starter does nothing and the neutral and oil lights go very dim. The lights stay dim after I let go the button for a short while and brighten back up. The battery stays around 12.75 – 13.5 volts. I have pulled and cleaned every connection and ground. I have collected lots of spare parts over the years and have swapped out the starter, relay, volt regulator, igniter and metered the alternator. Makes no difference.
Any ideas from the XS11 masters?
Thanks.1979 XS 1100 Special - Nicknamed "MONSTER"
ATC fuse box
Braded stainless brake lines
4/2 aftermarket exhaust(temp until stock is re-chromed )
V-Max auto cam chain adjuster
Brake light modulator with reserve brake light bypass
Vetter Windjammer III faring
Tkat Fork Brace
"Americans have the right and advantage of being armed; unlike the citizens of the countries whose governments are afraid to trust the people with arms”
James Madison, The Federalists PapersComment
-
You either have a bad battery or a bad battery connection. Possibly the ground wire from the frame to the engine. That should be from the frame by the battery on the left side to the engine attached to one of the middle drive bolts.Greg
Everybody is a genius. But if you judge a fish by its ability to climb a tree, it will live its whole life believing that it is stupid.”
― Albert Einstein
80 SG Ol' Okie;79 engine & carbs w/pods, 45 pilots, 140 mains, Custom Mac 4 into 2 exhaust, ACCT,XS850 final drive,110/90/19 front tire,TKat fork brace, XS750 140 MPH speedometer, Vetter IV fairing, aftermarket hard bags and trunk, LG high back seat, XJ rear shocks.
The list changes.")
Comment
 Tweet
Tweet


Comment