Announcement

Collapse
No announcement yet.

Godzilla Resurrection: Re-build thread

Collapse
X
 
  • Filter
  • Time
  • Show
Clear All
new posts

  • That's very, erm "Green," you need sun glasses for that paint. It looks good!


    The crank seals are semi-pressurized by the bearing juice pressed out of the #1 and #5 bearings; some goes into the case, some goes into the seal gallery. The gallery has to to be able drop the pressure and drain the oil back into the case or it'd just build up and squirt out around the crankshaft past the seal like a very expensive supersoaker. Eeewww.
    -- Scott
    _____

    2004 ST1300A: No name... yet
    1982 XJ1100J: "Baby" SS Brakes, '850 FD, ACCT
    1980 XS1100G: "Columbo" SS Brakes, '850 FD, ACCT
    1979 XS1100SF: "Bush" W.I.P.
    1979 XS1100F: parts
    2018 Heritage Softail Classic 117 FLHCS SE: "Nanuk" It's DEAD, it's not just resting. It is an EX cycle.

    Comment


    • good to see your having progress T.C. For the kill switch assembly, toss all the pieces including the switch itself in shot glass full of Evaporust overnite......once rinsed off with water, even the switich itself will look as new.
      81H Venturer1100 "The Bentley" (on steroids) 97 Yamaha YZ250(age reducer) 92 Honda ST1100 "Twisty"(touring rocket) Age is relative to the number of seconds counted 'airing' out an 85ft. table-top.

      Comment


      • Cam Chain

        Originally posted by TopCatGr58 View Post
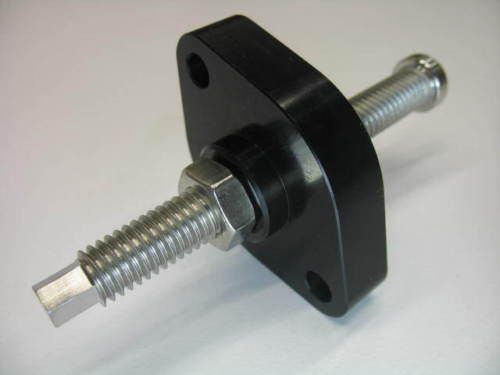
        ~75K miles, ~55K was the original, and some 20K with the new topend, but same cam chain, and was near the end of the OEM CCT adjustment range. I had converted to the Modded Manual CCT, but I had checked the plunger after had set the final adjustment and took it off, and it was at the end of the play.

        I have measured the shaft on my manual CCT and know how far out it sticks out from the housing, and know how far in it can go before it reaches the same distance equaling the end of the adjustment range as set by the OEM CCT plunger.

        T.C.


        Wow. Looks like you are on your way to wearing out your 3rd chain. That is a lot of seat time. I have seen an aftermarket manual adjuster offered on eBay recently.


        http://www.ebay.com/itm/NEW-1978-198...9SFjn1&vxp=mtr
        Last edited by MPittma100; 09-05-2016, 12:15 PM.
        1981 XS1100H Venturer
        K&N Air Filter
        ACCT
        Custom Paint by Deitz
        Geezer Rectifier/Regulator
        Chacal Stainless Steel Braided Brake Lines
        Chrome Front Rotor & Caliper Covers
        Stebel Nautilus Horn
        EBC Front Rotors
        Limie Accent Moves On In 2015

        Mike

        Comment


        • Hey Mike,

          Spread out over 30 years, not so much seat time, did a lot the first 2 years once I got it back from Japan, my car died, and so I had to commute on it, was a 35 miles one way trip, so put a lot of highway miles then. Once got the money and the car fixed, the bike then became a leisure machine again. And this is just the 2nd chain....I did NOT replace the cam chain when I did the big bore in 2000, and then only put like 2k a year max since then. Yes, I've seen those eBay manual CCT's, but I just did the conversion of the OEM that was posted a few years ago.

          Thanks Brant, I guess I'm making progress, but taking 1 step foward and 2 steps back!

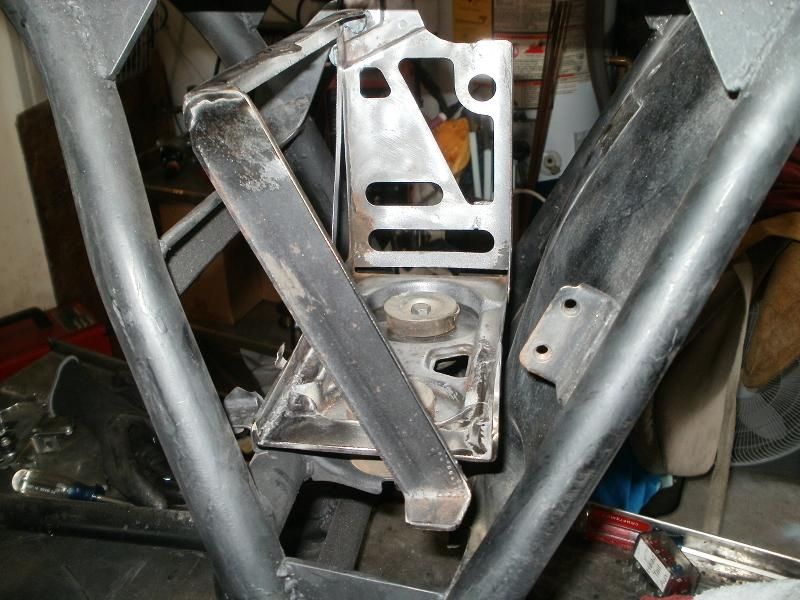
          Pulled the battery box and started to derust it with my assortment of wire brushes(have torn up several already ) and found some cancerous rust on the vent tube side/end! So...after getting as much rust as I could off, I then cut out the rotted section as per the BLUE LINE.
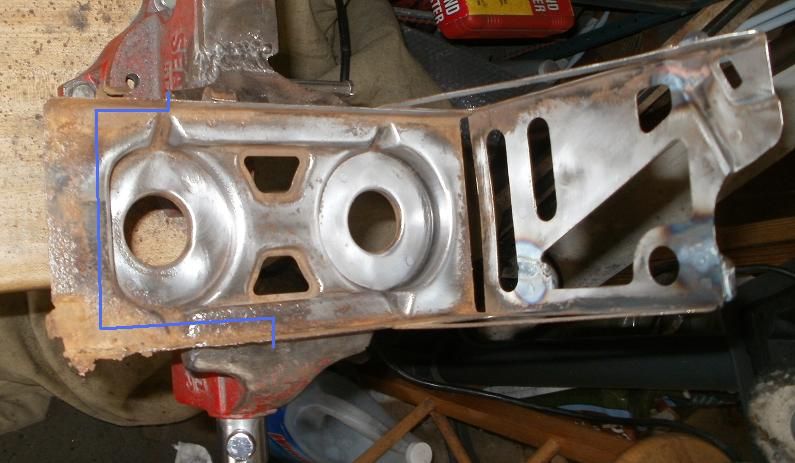


          I then grafted some slightly thicker plate material onto it. Also, because of the reduced width spacing of the custom side covers, so I had to mod the hold down bar, changing the bolt joint at the top to a solid corner, put a screw/bolt on the other end that will secure thru the battery box and a stabilizing bar. I'll then add a tightening bolt and anchor nut down at the bottom corner...but haven't fabricated that yet.


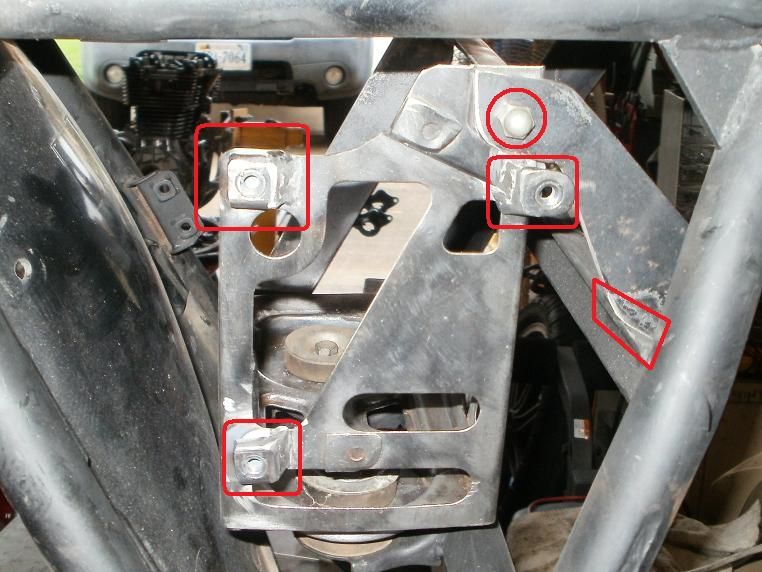
          Here's the other side of the battery box, showing the shortened/narrowed fuse panel mounting bracket/nuts, along with the anchor nut and stabilizing bracket for the top of the battery box. I had cut out the rubber stabilizing rings that were above the battery lock down bar.


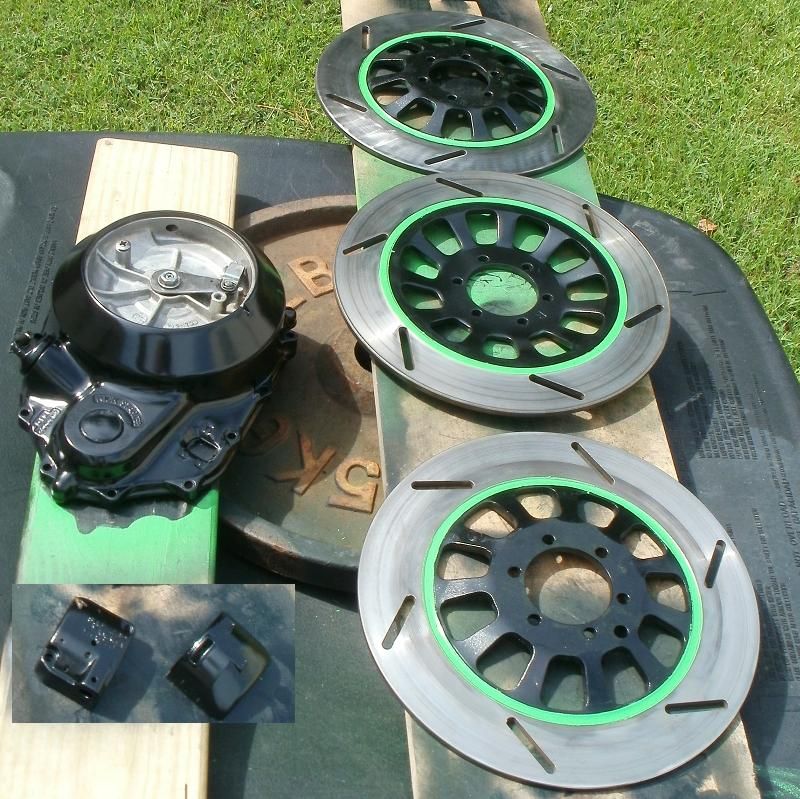
          And here is a shot of some of the BLING, wanted to get the rotors painted before they flash rusted. Also shows the clutch cover and one of the handlebar switch control boxes.


          Here's hoping YOUR Labor Day wasn't as Laborious as mine!

          T.C.
          T. C. Gresham
          81SH "Godzilla" . . .1179cc super-rat.
          79SF "The Teacher" . . .basket case!
          History shows again and again,
          How nature points out the folly of men!

          Comment


          • I see you found a good use for those barbell weighs.
            Greg

            Everybody is a genius. But if you judge a fish by its ability to climb a tree, it will live its whole life believing that it is stupid.”

            ― Albert Einstein

            80 SG Ol' Okie;79 engine & carbs w/pods, 45 pilots, 140 mains, Custom Mac 4 into 2 exhaust, ACCT,XS850 final drive,110/90/19 front tire,TKat fork brace, XS750 140 MPH speedometer, Vetter IV fairing, aftermarket hard bags and trunk, LG high back seat, XJ rear shocks.

            The list changes.

            Comment


            • Looking Good TC Just be patient putting it all back.
              To fix the problem one should not make more assumptions than the minimum needed.

              Rodan
              https://www.youtube.com/watch?v=khm6...liHntN91DHjHiS
              1980 G Silverbird
              Original Yamaha Fairfing and Bags
              1198 Overbore kit
              Grizzly 660 ACCT
              Barnett Clutch Springs
              R1 Clutch Fiber Plates
              122.5 Main Jets
              ACCT Mod
              Mac 4-2 Flare Tips
              Antivibe Bar ends
              Rear trunk add-on
              http://s1184.photobucket.com/albums/z329/viperron1/

              Comment


              • TC its looking good... love the green... you are both patient and professional... "wonderful my friend, simply wonderful..."
                79_xs1100special

                Comment


                • Hey George,

                  Thanks for checking, no problem, went to Casey Cycle City at lunch, they exchange shims...for a nominal fee of $5.00 PLUS giving them a shim. But I got the 270 needed, installed and it's good to go!

                  I completed the battery box, reinstalled/welded one of the upper rubber stabilizer rings on the left side along with the alignment pin back onto the tie down bar. The right side has that other welded bracket for the right side. Also put the lock down nut in the bottom edge of the tray. Yesterday I also welded the VIN # plate onto the frame neck.

                  Have only 10 days to get it to a point to where it will run and can get inspected, but these are just 8 evenings of 2-3 hours each, and the coming weekend.

                  Still need to do the rear MC and caliper rebuild and painting. Engine cleaning, painting. Valve cover cleaning/painting with custom accent. Paint the gas tank, fenders, side covers, as well as the frame, install the steering bearings and races. Have to adjust the grab rail some more for better fitment, will probably involve cutting off the rail's mounting brackets and welding them back on repositioned. Also need to customize the saddle bag frames and mounts moving them forward a few inches, and a new backrest built in with the trunk frame support. Also still need to fab/weld the side cover mount tabs.

                  I want to trim a lot of fat off of the wiring harness, I have the 1 wire ALT with built in Reg/Rect. I don't want/need the light checker stuff, also the automatic headlight relay....will be using a regular relay instead with a separate handlebar switch.

                  Also want to clean and paint the rims, swap out the rear tire, install the new tire valve, and of course reassemble the rims/rotors. Yeah, I'm liking the green accents, have plans for a few more here and there, just hope it matches the body panel Synergy paint.

                  Once everything is ready to go, assembling the bike surprisingly won't take that long, it's just all of the PREP stuff!

                  Yeah, Greg, it keeps the raccoons from getting into the trash!

                  T.C.
                  T. C. Gresham
                  81SH "Godzilla" . . .1179cc super-rat.
                  79SF "The Teacher" . . .basket case!
                  History shows again and again,
                  How nature points out the folly of men!

                  Comment


                  • a magic "man"... TC... you are introducing the next "gen"... nice...XSing, play the music.... forward.... wonderful... here is where we find tomorrow.... nice job "guy's...." for the record, can I get an "amen"!..? 11SX interface..! (green is a Momentum), black is best but hey its a shared world.... Nice "TC"... you are in the world of black and bright green.. (wonderful)... internally shafts to the pavement... "If we are not rolling then someone has a word to share..." peace on brothers... Me'Man...
                    79_xs1100special

                    Comment


                    • A little more progress

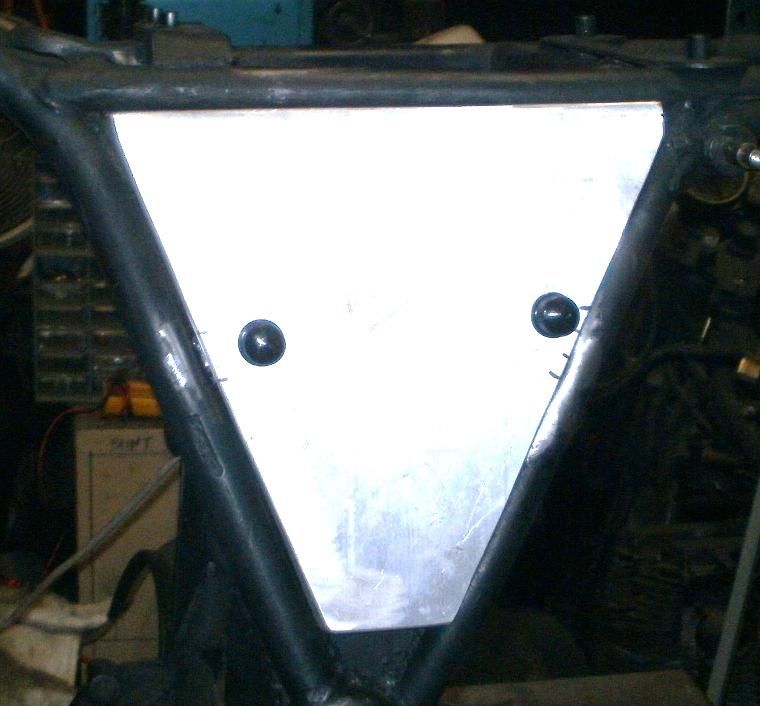
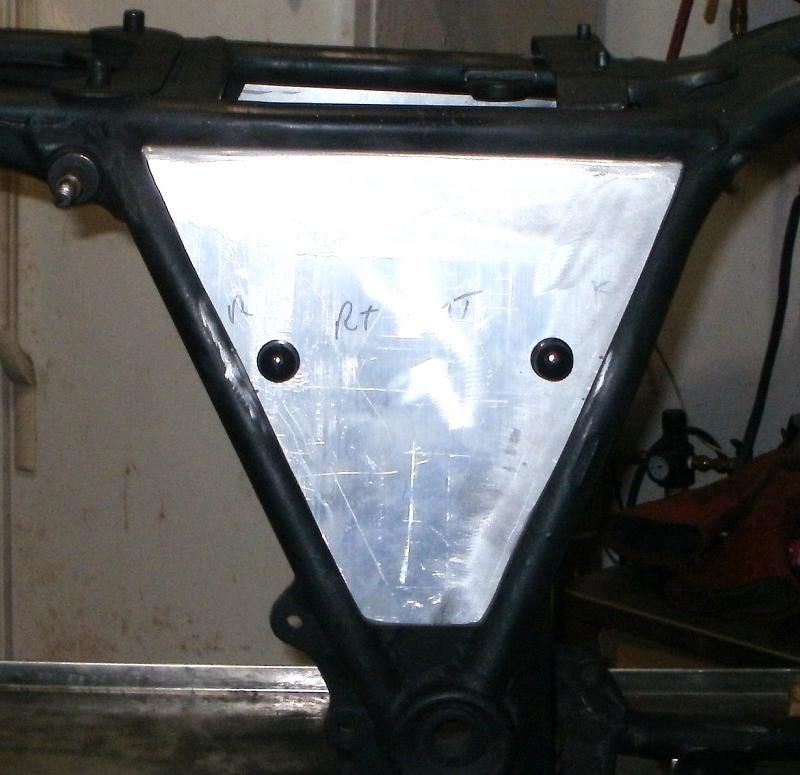
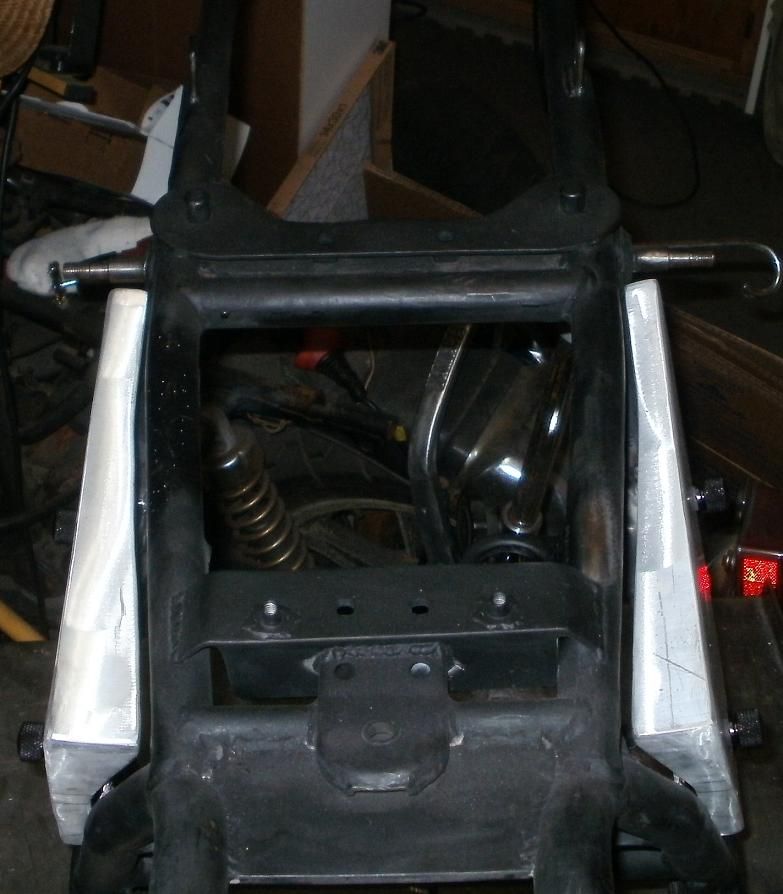
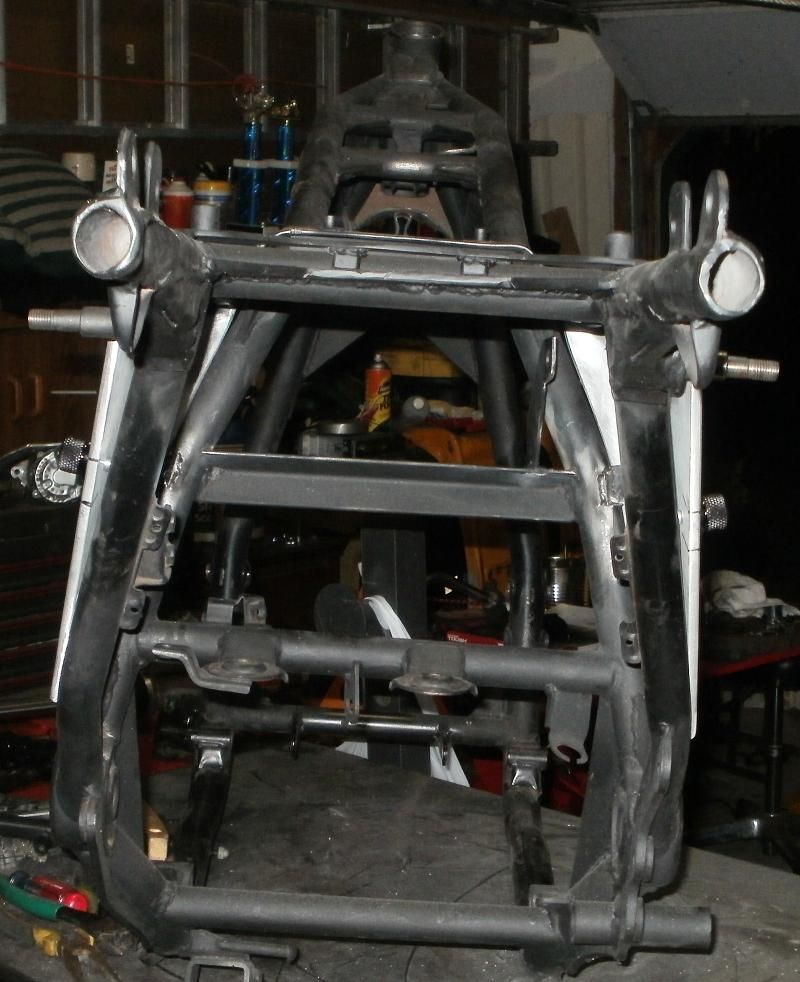
                      Okay, got the side cover brackets made/mounted. I had described in a much earlier post my plans on how I wanted to mount and secure the sidecovers using more than just basic screws/bolts. I had ordered 6 black knurled knobs that are usually used for securing a Harley Seat, but thought the solid black would be a nice contrasting accent to the green covers(they aren't painted YET). BTW Rich....let me have some of what you're smokin'! Thanks for the comments, just trying to make it functional and aesthetically appealing as well.

                      So...here's tonight's photos:


                      T.C.
                      T. C. Gresham
                      81SH "Godzilla" . . .1179cc super-rat.
                      79SF "The Teacher" . . .basket case!
                      History shows again and again,
                      How nature points out the folly of men!

                      Comment


                      • TC Clean off the marker on the aluminum as it will bleed though your paint.
                        I would use acetone or alcohol.
                        Phil
                        1981 XS1100 H Venturer ( Addie)
                        1983 XJ 650 Maxim
                        2004 Kawasaki Concours. ( Black Bear)

                        Comment


                        • Originally posted by TopCatGr58 View Post
                          Okay, got the side cover brackets made/mounted. I had described in a much earlier post my plans on how I wanted to mount and secure the sidecovers using more than just basic screws/bolts. I had ordered 6 black knurled knobs that are usually used for securing a Harley Seat, but thought the solid black would be a nice contrasting accent to the green covers(they aren't painted YET). BTW Rich....let me have some of what you're smokin'! Thanks for the comments, just trying to make it functional and aesthetically appealing as well.

                          So...here's tonight's photos:


                          T.C.
                          lol... sometimes I do get a touch'excited when it comes to these older bikes, and to see the care/professionalism that you and the others here put out to share... and yes, I did find another 79special, she needs to be cleaned up but she has my junkie heart strings... you can see her at my profile page...
                          79_xs1100special

                          Comment


                          • Apparently a 50:50 mix of household ammonia and simple green makes one hell of a great grease cutter. The guys at www.owwm.org use it sometimes for stubborn stuff. That and blue Dawn with hot water are popular there for restoration paint prep work.

                            I've not tried it, but will try it soon when i work on my xj and my new 75 year old bandsaw...
                            __________________________
                            Jon Groelz

                            '82 XJ1100J-John
                            '78 XS1100E-Name Forthcoming (It's a Girl!)

                            Comment


                            • Dawn works great but do not let it get to a dry point while in sun shine it can discolor the paint. Any thing harsh enough to cut grease can be ruff on paint just thought I'd make sure people here understand so they do not damage their paint like my girl friend did her vehicle.
                              To fix the problem one should not make more assumptions than the minimum needed.

                              Rodan
                              https://www.youtube.com/watch?v=khm6...liHntN91DHjHiS
                              1980 G Silverbird
                              Original Yamaha Fairfing and Bags
                              1198 Overbore kit
                              Grizzly 660 ACCT
                              Barnett Clutch Springs
                              R1 Clutch Fiber Plates
                              122.5 Main Jets
                              ACCT Mod
                              Mac 4-2 Flare Tips
                              Antivibe Bar ends
                              Rear trunk add-on
                              http://s1184.photobucket.com/albums/z329/viperron1/

                              Comment


                              • Originally posted by ViperRon View Post
                                Dawn works great but do not let it get to a dry point while in sun shine it can discolor the paint. Any thing harsh enough to cut grease can be ruff on paint just thought I'd make sure people here understand so they do not damage their paint like my girl friend did her vehicle.

                                Simple Green will etch paint too. To avoid this, mix 30% Simple Green to 70% water.
                                1981 XS1100H Venturer
                                K&N Air Filter
                                ACCT
                                Custom Paint by Deitz
                                Geezer Rectifier/Regulator
                                Chacal Stainless Steel Braided Brake Lines
                                Chrome Front Rotor & Caliper Covers
                                Stebel Nautilus Horn
                                EBC Front Rotors
                                Limie Accent Moves On In 2015

                                Mike

                                Comment

                                Working...
                                X