-
81H Venturer1100 "The Bentley" (on steroids) 97 Yamaha YZ250(age reducer) 92 Honda ST1100 "Twisty"(touring rocket) Age is relative to the number of seconds counted 'airing' out an 85ft. table-top. -
Now you tell me after all of my major welding is done!
So you're saying to backtrack on the weld seam I just created at the end...kinda like when sewing to backtrack to LOCK the stitch! Are you saying the extra filler/heat helps to release the tightening stress that would normally be there at the end of the bead??
Hey Skids, I'll be monitoring it to see how it holds up!
T.C.T. C. Gresham
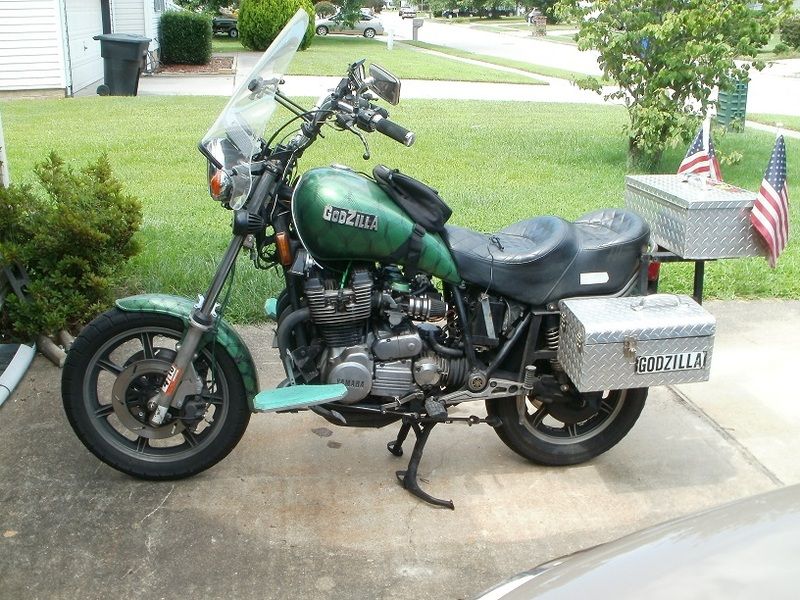
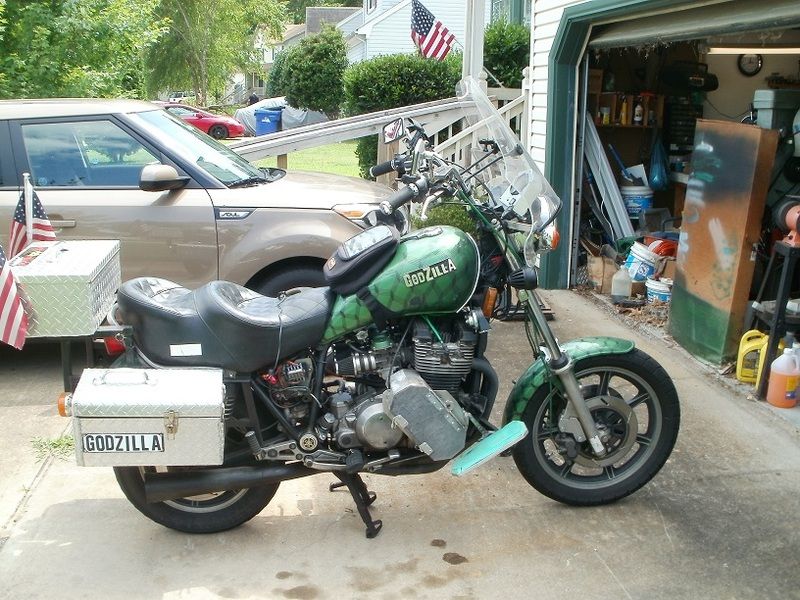
81SH "Godzilla" . . .1179cc super-rat.
79SF "The Teacher" . . .basket case!
History shows again and again,
How nature points out the folly of men!Comment
-
Weekend Update
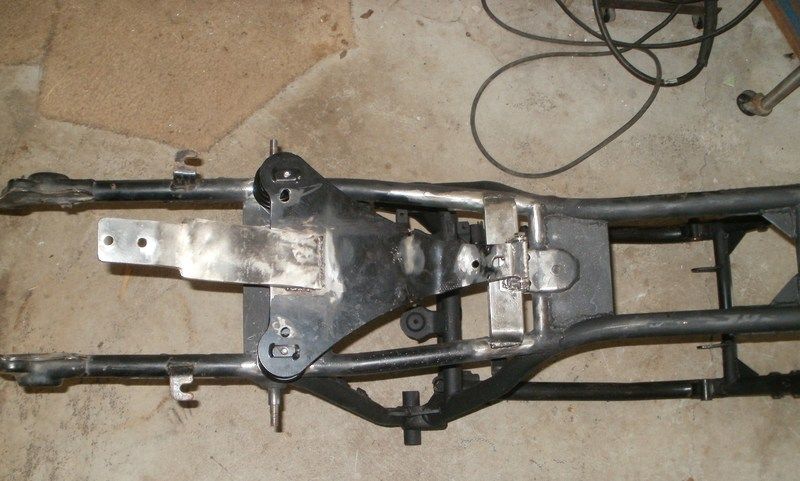
Okay, as I stated in my previous post, have done some more frame welding/reinforcing! Don't pay any attention to the RUST, I've already wire brushed it off, and threw a quick dose of that Rust converter primer on it!
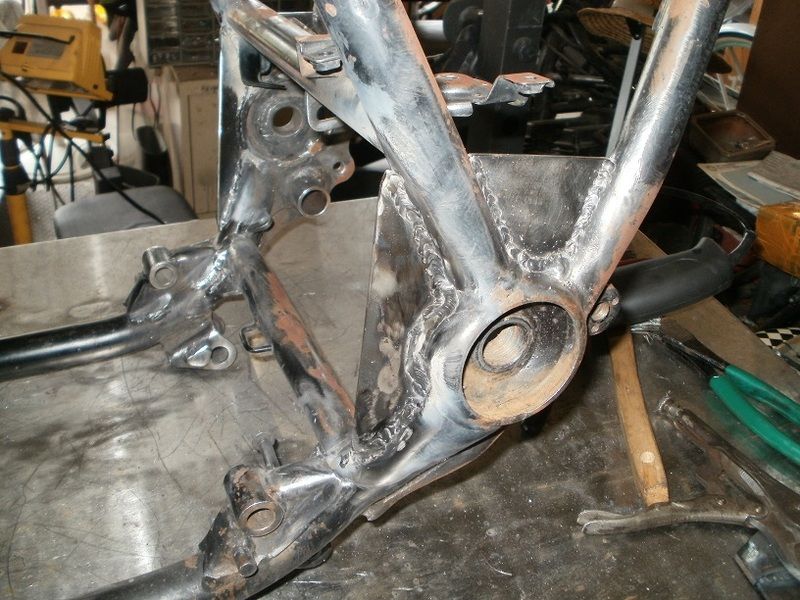
Lower Front of frame
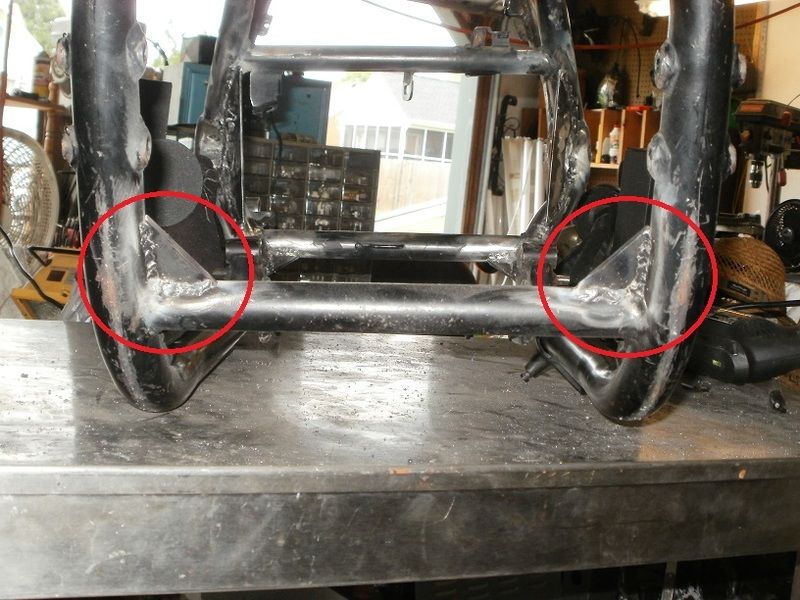
Bottom rear of frame.
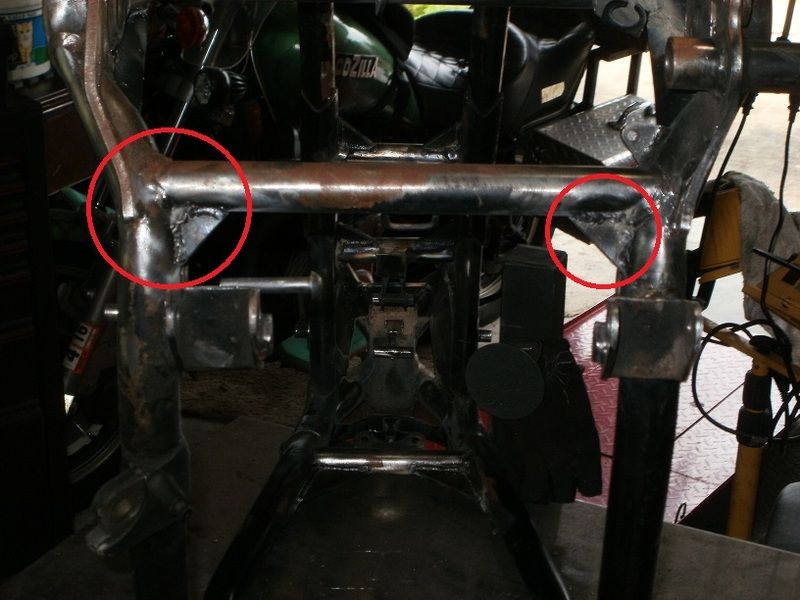
The leading edge of the swing arm openings/joints.
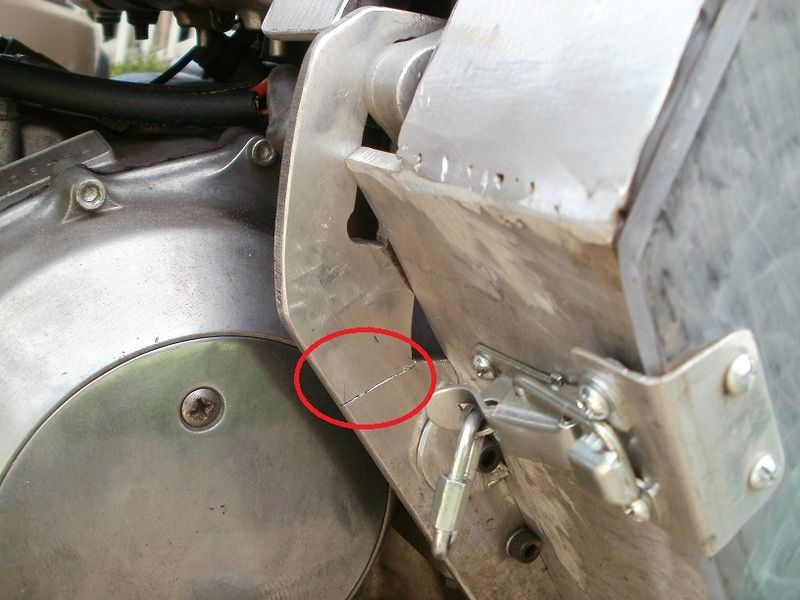
Looks like I'll be doing some more aluminum welding, as well as fixing the CENTRATION of the crank pulley for my ALT! Note the stress fracture of the bracket. Fortunately the newer beefier COVER I made helped to stabilize it.
I didn't get the crank pulley EXACTLY centered on the Crank Rotor, and so it had a "slight" vibration that caused the mounting bracket to flex too much and eventually cracked it completely through!
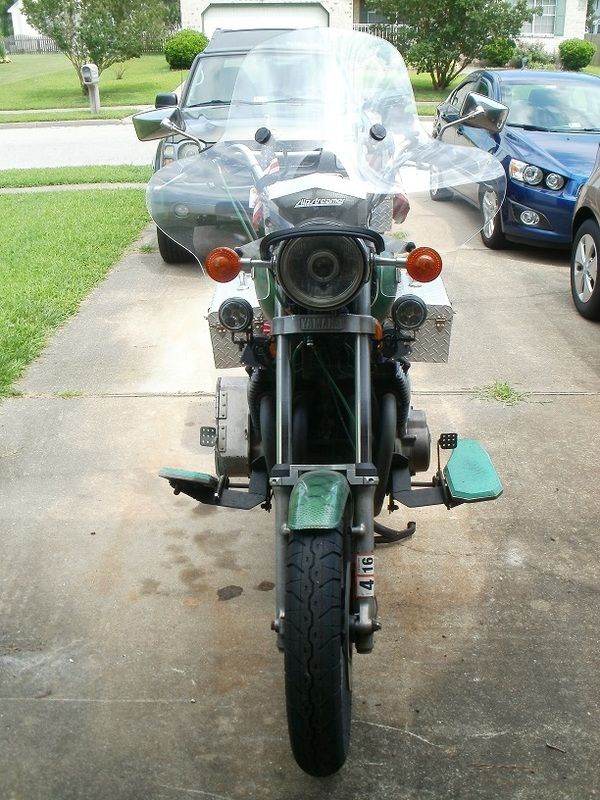
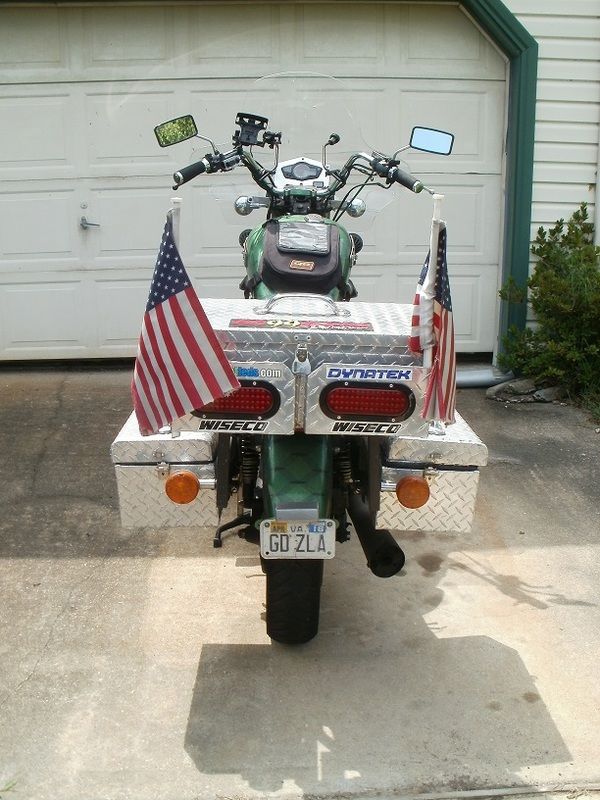
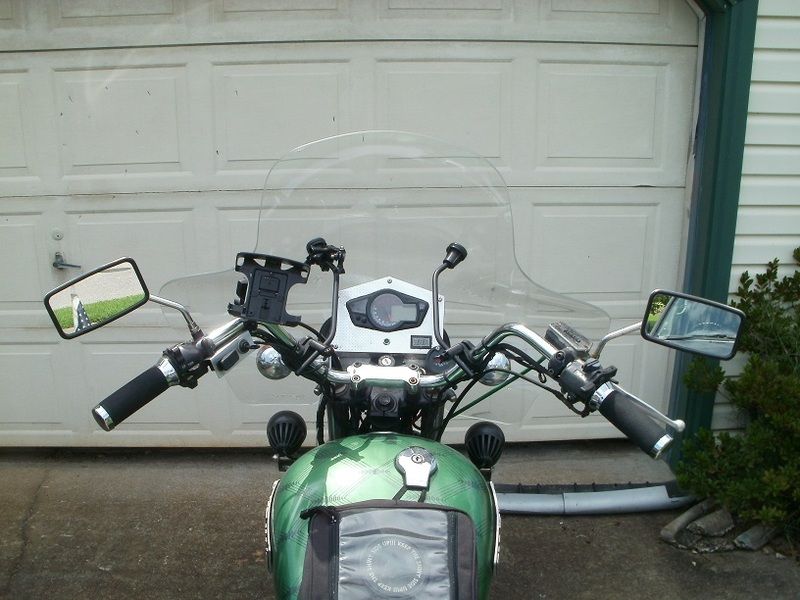
Okay, these are the BEFORE photos everybody likes to be able to see! The engine paint is faded, as well as the wheel/rotor paint, gas tank, etc!
Now to show you that I've been doing some SHOPPING in preparation for this project!")
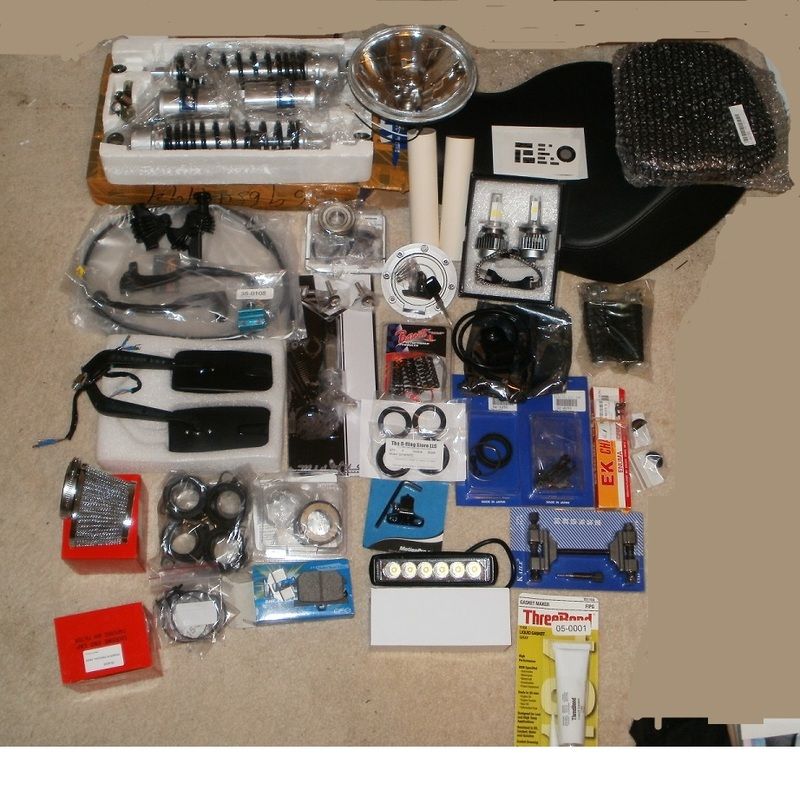
New rear gas shocks, headlight reflector and HI POWER LED bulbs, Harley Seat, backrest, Polyurethane cylinders to make into engine mounts bushings,
New controls decals/stickers, throttle/clutch cables/luber, rubber lever covers, clutch/brake levers, wheel bearings, gas cap-tank not shown, tire valves, petcocks, Barnett Springs, Aux Handlebar switches, Virago pedals, LED mirrors/turn signals, crankshaft seals, rear caliper and MC rebuild kits, cam chain/link, Valve cover halfmoons, Oval Pod Filters, Intake Boots, clamps, Motion Pro Valve tool, Cam chain tool, steering neck bearings/seals, rear brake pads/hardware, LED aux light bars x 2, and of course ThreeBond.
There's more I'll be getting like SS bolts/nuts/washers and such.
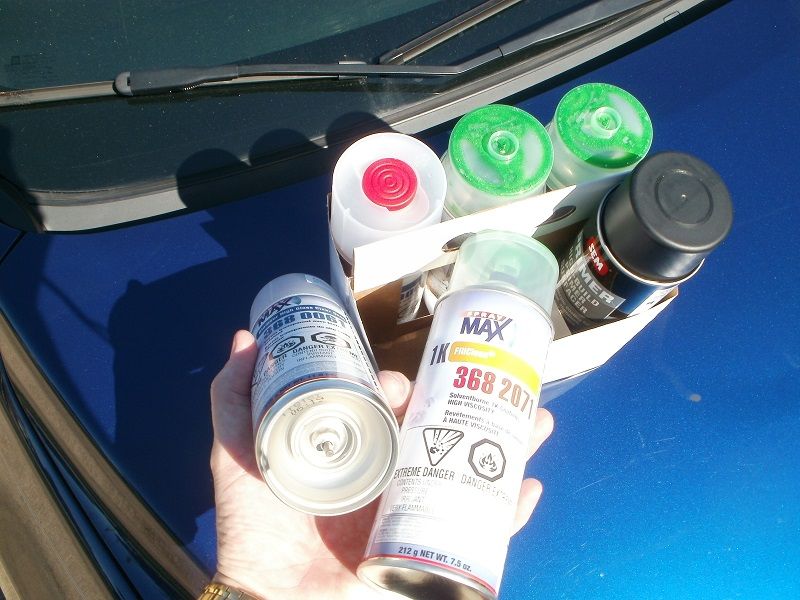
And here's the PAINT....3 cans of the Synergy Green, buildable primer, 2 cans of CLEAR....note the mixing pin on the bottom!
Aside from the frame work, I started taking Godzilla apart, removed the trunk, saddlebags....found one of the slots for the bags mount was also cracked! Removed Seat, Fender, drained tank and removed, also the bags/trunk mounting hardware frame....that must have weighed ~10lbs alone! Also pulled battery...on tender!
That's all for now!
T.C.T. C. Gresham
81SH "Godzilla" . . .1179cc super-rat.
79SF "The Teacher" . . .basket case!
History shows again and again,
How nature points out the folly of men!Comment
-
Sorry bout' that T.C. .........guess just assumed anyone who has welded a bit already knew that...........and kinda sorta' what your sayin', but mostly just ending the weld leaves a bit of a crater, which I've seen become the weak place for a fracture to start. This type of application related to any stress, which is minimal anyways, imagine your gusset welds should be just fine. I used to see this more often associated with loader bucket bottoms and other heavy equipment applications........know our XS's are a bit heavy, but would likely never see that kind of stress as the frames are already stress relieved by design and existing cross pieces
 . BTW, same goes for meeting of two welds(need new rod to continue)... Welds should overlap each other, and not just end butted to each other.
Last edited by motoman; 07-03-2016, 11:25 PM.81H Venturer1100 "The Bentley" (on steroids) 97 Yamaha YZ250(age reducer) 92 Honda ST1100 "Twisty"(touring rocket) Age is relative to the number of seconds counted 'airing' out an 85ft. table-top.
. BTW, same goes for meeting of two welds(need new rod to continue)... Welds should overlap each other, and not just end butted to each other.
Last edited by motoman; 07-03-2016, 11:25 PM.81H Venturer1100 "The Bentley" (on steroids) 97 Yamaha YZ250(age reducer) 92 Honda ST1100 "Twisty"(touring rocket) Age is relative to the number of seconds counted 'airing' out an 85ft. table-top.Comment
-
Your welds visually look fairly decent for this not being your everyday job. From visually looking at them, the travel speed is a bit erratic.......slow that down a bit and watch the molten puddle more closely and the weld beads will be more constant with each other...........and like anything else, practice, practice, practice. Might wanna turn up the welder voltage a tad, then do a 'practice' pass on a scrap piece of approx. same thickness......adjust voltage till weld agrees with your style and beads look evenly layed according to travel speed..
81H Venturer1100 "The Bentley" (on steroids) 97 Yamaha YZ250(age reducer) 92 Honda ST1100 "Twisty"(touring rocket) Age is relative to the number of seconds counted 'airing' out an 85ft. table-top.Comment
-
What I can say made all the difference in the world for me to get even beads as far as arc welding, was the cerified welder/metalurgest/ occasional instructor in our CDOT main shop was he would have me weld up holes in our large pipe cutting bench for hours on end using a torch and welding rod. This REALLY helped me to actually stay with molten puddle.........and just slow down a bit! A year or so later I took the certification test for up to 1" metal thickness. The certification allowed me to legally(OSHA) make any necessary repairs to roll-over structures on heavy equip., along with trailer fabricatrion, etc..........and obviously did tons of it over a fifteen yr. period in the main maintenance shop, in the welding, fabrication portion of the shop. OJT in the CDOT maint. shop was pretty much how I acquired majority of my knowledge, and was eventually certified welder, certified air brakes specialist, hydraulics system certification and fabricator, certified automotive/heavy equip. tech.....and more certificatons I've since tried to forget since I retired 11yrs. ago. Other than that, I was already a gear-head, building high performance engines for the drag strip, and building suspension systems for that same application................now just gotta argue with these ole' XS11's.....they can be trying at times...lol .
81H Venturer1100 "The Bentley" (on steroids) 97 Yamaha YZ250(age reducer) 92 Honda ST1100 "Twisty"(touring rocket) Age is relative to the number of seconds counted 'airing' out an 85ft. table-top.
.
81H Venturer1100 "The Bentley" (on steroids) 97 Yamaha YZ250(age reducer) 92 Honda ST1100 "Twisty"(touring rocket) Age is relative to the number of seconds counted 'airing' out an 85ft. table-top.Comment
-
Weekly Update.
Hey Brant,
Well, believe it or not, when I would make a run I would usually HOLD for second at the END of the bead so that more wire would feed into the spot so that it had similar thickness to rest of bead. I vary the power of my welder dependent on the thickness of the material I am working with....used the "D" max setting for that 3/16" plate, but dropped down to "C" for the 1/8" plate...I think the frame tubes are also ~1/8" thick. I appreciate all of the tips you are providing, I totally accept and honor your years of training and experience.
Okay, now for the next update. I didn't get as much done this weekend as I had hoped, both HoneyDo stuff.....LAWN....and of course the 5 y/o Troy Built FWD 21" mower died just a few minutes into it....grass was thick and slightly moist.....high humidity...and had the side discharge open, but was getting clogged occasionally......I had pulled the mower back away from the uncut grass, and then was just bouncing it on the lawn to try to shake loose the grass from the output port....then mower just starting sputtering, and then died!? I checked and cleaned the filter, spritzed the carb with cleaner, pulled and cleaned the plug...and checked/verified spark....still NO GO!
  SO...ran off to Lowes and picked up a NEW one...similar model/features....put it together, filled with oil/gas and fired it up....finished the lawn....nice new SHARP blade!! Was interesting mowing the lawn in the DARK...had to get the shop lights out so I could see! Then today, edged most of the lawn....but let the edger run out gas. Filled back up, but it would NOT START....acted like it wanted to a few times....sputtered....even ran a bit, but wouldn't take any throttle?? Don't know if it got overheated....or if the plug just got fouled.....was running it with the choke partly on......I run about a foot of string off the end....and it won't take/accept throttle to spin fast enough when NOT on PARTIAL CHOKE? SO...left a few feet on one side of the driveway to the house uncut.
  The LeafBlower worked flawlessly though!
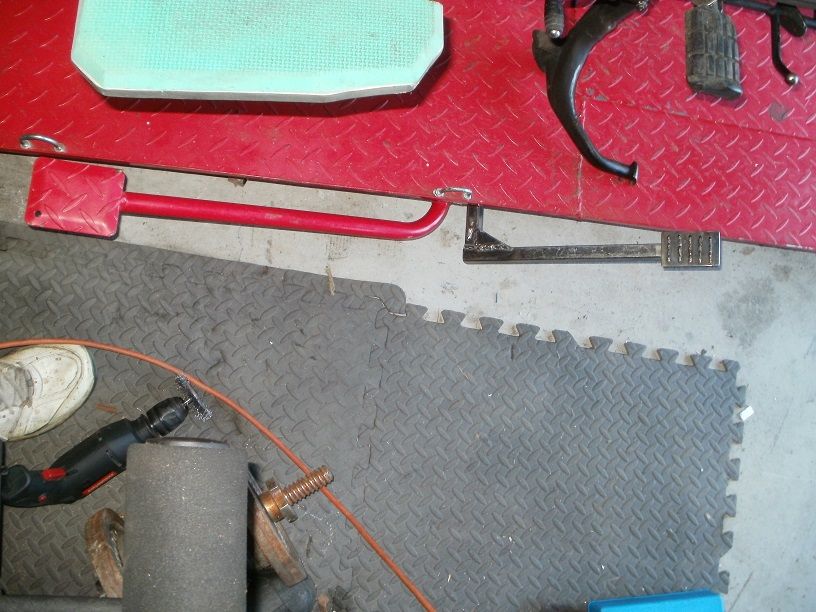
Okay, when I had gotten the bike LIFT from RichV last year, he had helped me load it on my bike trailer, and didn't remember that the raise and lower pump pedals were just slipped onto the shaft...not secured or pinned?? It was night time, and while I drove home, they FELL OFF. Rich found one..the larger raising lever, but we never could find the smaller drop/let down lever. Well I finally got around to getting the 3/4" square tubing I needed to fit onto the actuator shaft, and used it to make the lever. So...now I can both raise and lower the bike stand! I needed to get it working so that I could put the bike on it to start really disassembling it.
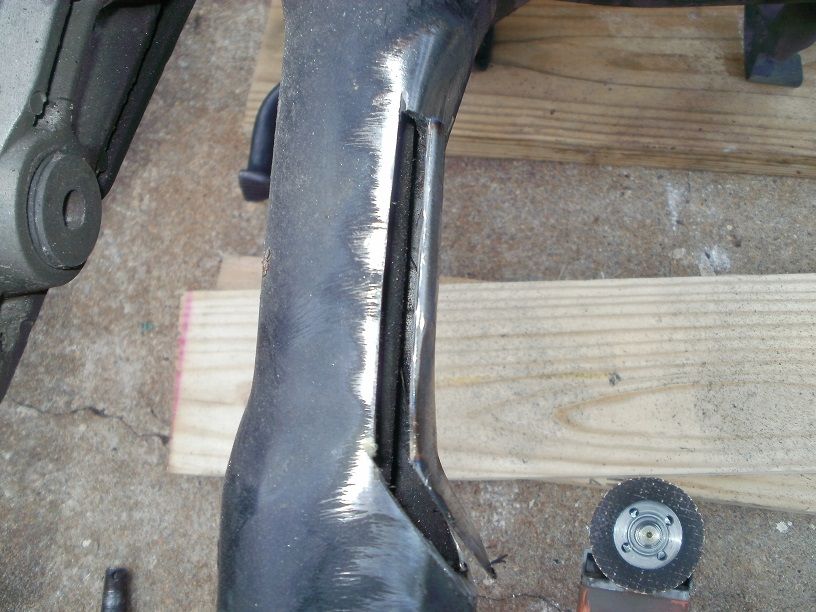
Got the rear wheel off, cut into the swingarm on the wheel side.
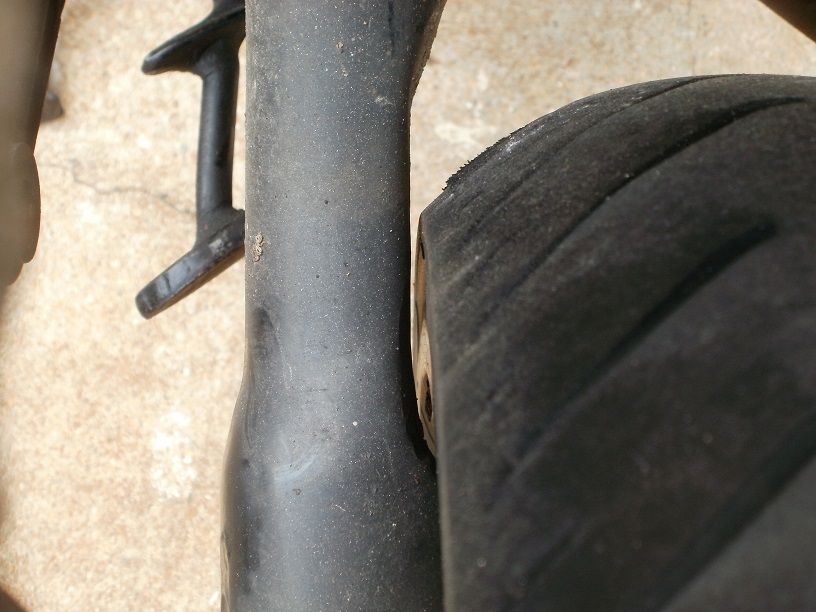
Here's the clearance before cutting. Remember, I run the 140/90-16 and this is the E-3, and there's evidence of slight rubbing the sidewall...again not sure why or how...this looks like enough clearance, but the tire might not be up to full 40psi, as well as possible flexing during turning, etc.!?
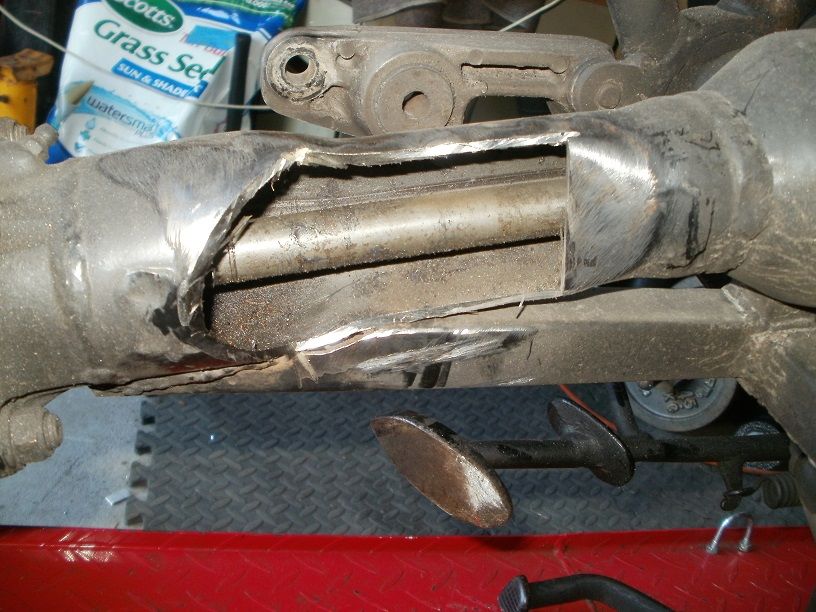
Here is the swingarm after cutting the area away, surprised at how close the driveshaft was behind it!?
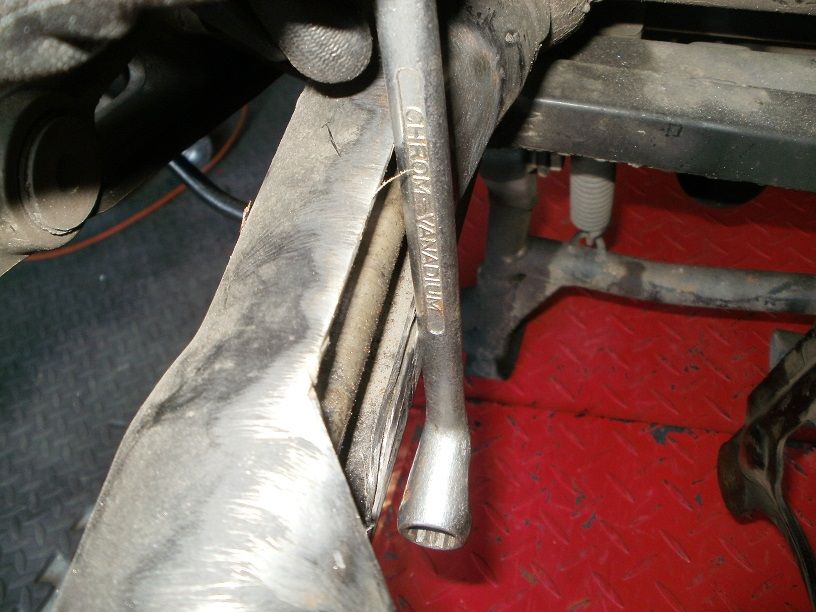
Here you can see the extra square tubing attached to the bottom of the swingarm for reinforcement I had done a few years ago. I think that was also rubbing a bit. I cut a section away from it as well. I'll be then welding the piece back to the swingarm, but since the cutfoff wheel removed a 1/8" thick layer, it will be 1/8" farther away from the wheel. Same for the square tubing section as well. I know it may seem like a lot of work for such a little bit of room, but I really want to keep using my 140/90-16!
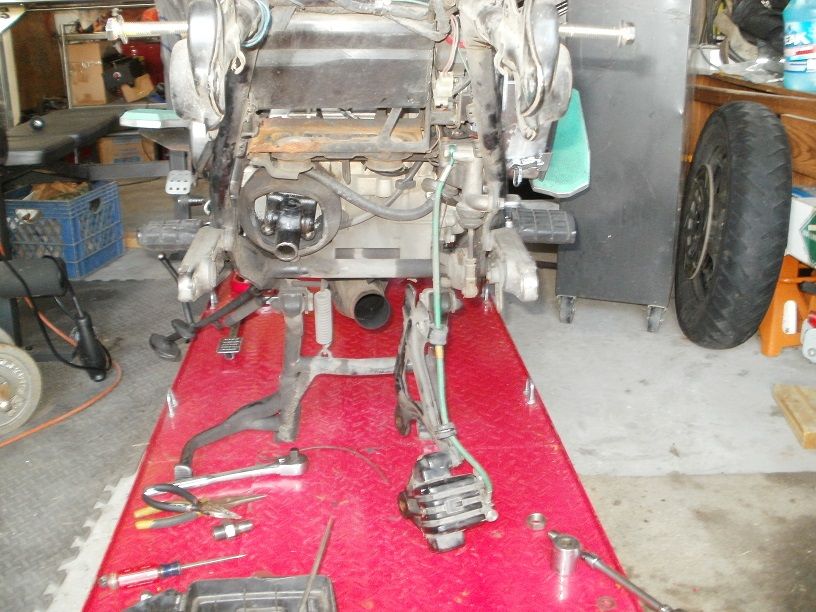
This shot just shows the a$$ end of the bike with what I've gotten off it, tank, seat, bags/trunk, fender, wheel, swingarm, shocks, muffler, and up on the bike stand/lift!
Here are a couple of shots of the new Shinko Tourmaster 140/90-16 rear next to the tourmaster 110/90-19 front!
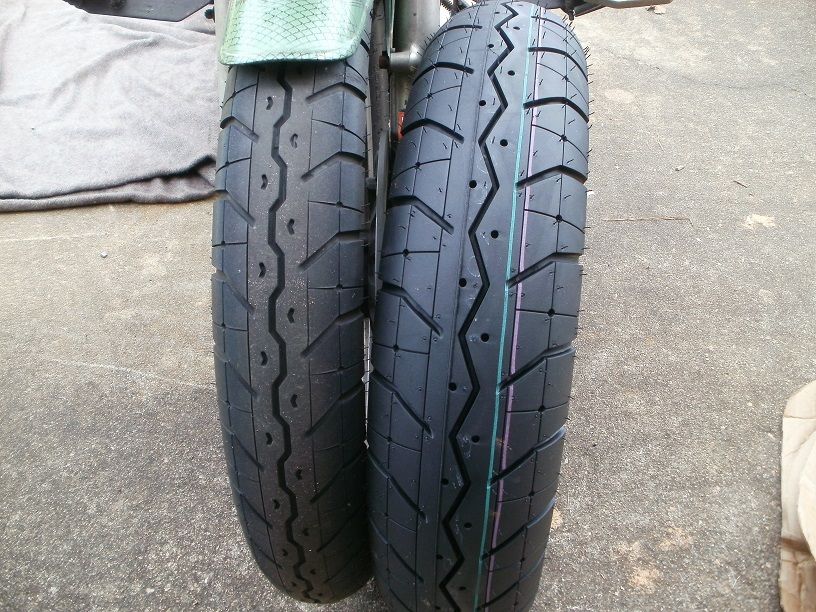
And here's comparing the Dunlop E-3 to the Tourmaster...both same size. The Tourmaster may not look as wide...but it's not mounted or inflated...the E-3 a while back also didn't measure as wide unmounted vs. mounted. BTW, the Tourmaster LABEL is right side up, but the tire is positioned in OPPOSITE from Rotation view...that's why the tread stripes might look backwards vs. the E-3...I didn't realize that until well after I uploaded the photos!

I knew I had some comparison photos....here they are from the Rear Wheel Tire changing tech tip:
This is the OLD Dunlop Elite II 140/90-16

Here's the E-3 unmounted showing it's width.

And then here it is mounted and inflated showing the final width!

Well, that's about it. Since I'm going to be essentially completely disassembling my bike to swap frames, I decided to document ALL of the bolts, nuts, their thread/size/pitch/length to make a chart for quicker reference later on so when folks want/need to know the size of a particular bolt/nut...hopefully I'll have it listed in a tech tip!
T.C.T. C. Gresham
81SH "Godzilla" . . .1179cc super-rat.
79SF "The Teacher" . . .basket case!
History shows again and again,
How nature points out the folly of men!Comment
-
As for the driveshaft tube T.C., tack weld every two inches that piece back in. When fully welding it in, start the weld on straight section, and end on a straight section. Weld half of top section, and then on bottom side, weld half of that section. Have each of those weld sections opposite end of each other. Then weld other halfs of modification. This method helps allow heat to pull at opposite ends of shaft tube and eliminates any distortion. Also a ctrical area for strength, so run a smooth consistant bead.
Last edited by motoman; 07-10-2016, 09:37 PM.81H Venturer1100 "The Bentley" (on steroids) 97 Yamaha YZ250(age reducer) 92 Honda ST1100 "Twisty"(touring rocket) Age is relative to the number of seconds counted 'airing' out an 85ft. table-top.Comment
-
81H Venturer1100 "The Bentley" (on steroids) 97 Yamaha YZ250(age reducer) 92 Honda ST1100 "Twisty"(touring rocket) Age is relative to the number of seconds counted 'airing' out an 85ft. table-top.Comment
-
Sorry, no photos for this update.
Sorry, no photos for this update, not much done this weekend. Brant, I followed your advice when I welded the driveshaft cover back on, so hopefully it didn't induce any bending? Having the other braces already attached may also have helped to keep it stable!
Along with sealing the driveshaft/swingarm, I also was able to pull the bearing seals, then the bearings, cleaned and repacked, and was able to reuse the seals, they came out fairly easy and were not worn since the parts just swivel in them instead of rotating all the way around.
I also was able to adapt the solo spring seat pan to fit to the Harley seat, took some modification/fabrication to fit it. Then I added an extra piece off of the back end of the spring pan to support the back half of the Harley seat. I've still got to add mounting bracket and plate to the FRAME, but it should work well to provide me a little extra cushion affect aside from the thin layer of foam of the seat itself.
I also was able to cut out the filler spout/gas cap area of the R1 Donor tank, was a little trouble getting the 2 drain pipes from underneath the cap area cut! Next I need to remove the paint from the XJ tank, and then cut out the old cap area. IT's amazing how curved the metal around the R1 tank cap is, hoping it will come close to matching the curve of the XJ tank, so like Kurt, I hope not to have to do too much bond/buildable primer to get a smooth contour and look!?
I pi$$ed away a few hours yesterday and today trying to get my edger running, replaced the spark plug...it was looking quite carboned/fouled, got it to fire a few times, but just would not keep running? Cleaned the filter, the fuel bulb/pump button was intact and working, so the fuel line isn't clogged. I even tried using the Turbo Start mode with my drill and a custom made 5 sided driver shaft! What company makes their recessed drive slot a 5 sided slot instead of a standard 6 sided screwdriver type shaft?
But it didn't work anyways??
T.C.T. C. Gresham
81SH "Godzilla" . . .1179cc super-rat.
79SF "The Teacher" . . .basket case!
History shows again and again,
How nature points out the folly of men!Comment
-
Tig Welding is DIFFICULT!!!!
Hey folks,
Tried to do some work this past weekend, but that dang heat dome just got too hot!!!
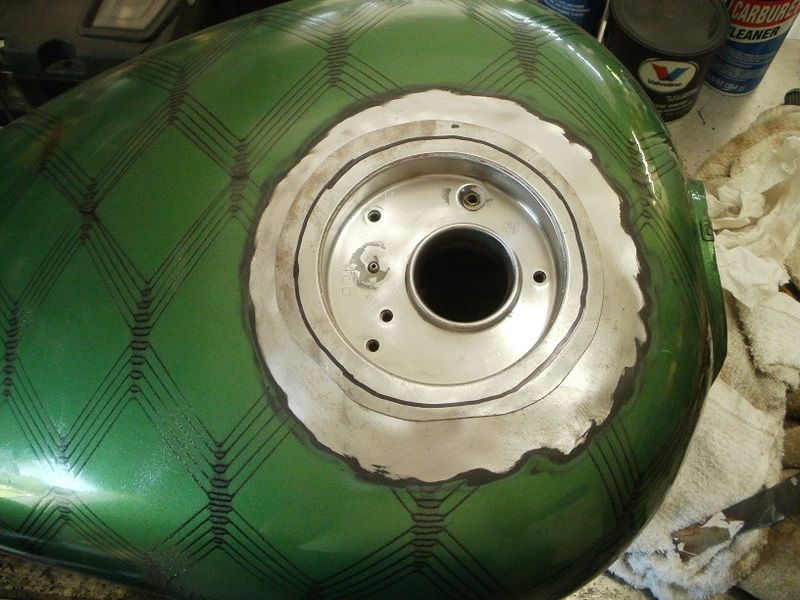
Here's my XJ tank with the OEM cap area cut out....love that Dremmel cutoff disc!
This also shows the cleaned up newer cap section laying on top.
This show my ATTEMPTS to Tig weld the dang thing together!
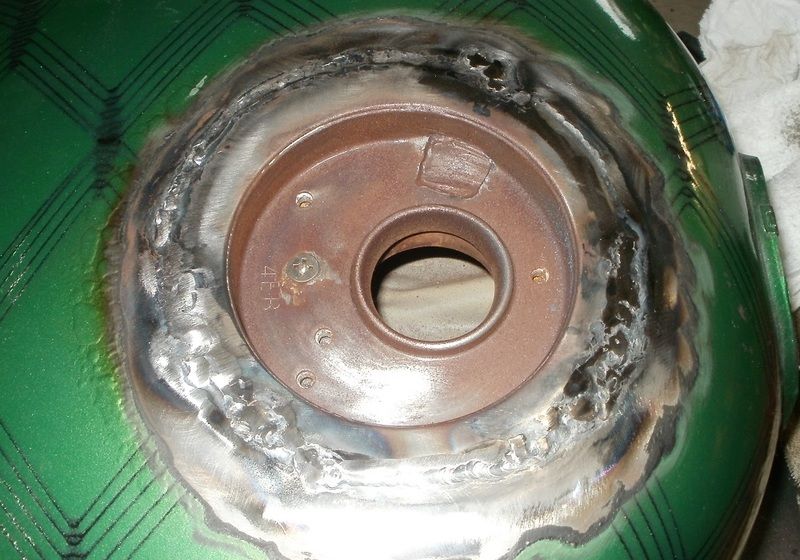
I did a TEST using my Tig rig, with some spare pieces from the RF tank, cleaned them up top and bottom, and was able to run a decent section of bead without even having to add filler rod!! I did the same preparation of the XJ tank, and the new cap area both top and bottom. Had a few inches of PERFECT tig bead and then hit a section where the new piece was apparently a little to far away/above the surface of the XJ tank, and the upper piece just kept melting away before the bottom XJ tank portion would melt! I then ended up burning thru the XJ layer at times, had to add a bunch of fillter rod to repair, etc, but still ended up with spots that seemed POROUS, and I'm afraid they may LEAK.
SO...I'm planning on running across and around it with my MIG/wire feeder to try to make a better complete sealing bead between the 2 layers...and then I can grind off the excess slag to get it back relatively flat/smooth before trying to bondo/filler primer it to try to blend the edges!!
These images were taken a few days later, amazing how quickly flash rusting occurs with these hi humidity levels!!
T.C.T. C. Gresham
81SH "Godzilla" . . .1179cc super-rat.
79SF "The Teacher" . . .basket case!
History shows again and again,
How nature points out the folly of men!Comment
-
It looks kind of like Sonic Hedgehog. Maybe you could paint a Godzilla head with a flaming open maw around the filler.
When you finish the welding you can grind and braze the rough spots. Use your propane torch to heat the tank and use some plain old lead, a grater and a sanding block to finish up and smooth over over the area so a pinhole or several won't leak through, dissolving any Bondo and the paint.
.-- Scott
_____
♬
2004 ST1300A: No name... yet
1982 XJ1100J: "Baby" SS Brakes, '850 FD, ACCT
1980 XS1100G: "Columbo" SS Brakes, '850 FD, ACCT
1979 XS1100SF: "Bush" W.I.P.
1979 XS1100F: parts
2018 Heritage Softail Classic 117 FLHCS SE: "Nanuk" It's DEAD, it's not just resting. It is an EX cycle.
♬Comment
-
TC do not take it too hard you had the burn threw have seen it before. These tanks are old and you really do not know how much solid metal you had there to begin with. They can rust nearly threw and when the heat hits them they melt like tin foil. In fact I have known welders that would not do work on tanks because of issues like this. When you do get it to where you feel the weld, braze, or leading is good you can do a low pressure leak test like you do in a radiator or a vacuum test if you have a vacuum pump. Air will leak threw the easiest. Actually as hot as its been lately you can put it in the sun seal it and take it inside and that will create a vacuum.To fix the problem one should not make more assumptions than the minimum needed.
Rodan
https://www.youtube.com/watch?v=khm6...liHntN91DHjHiS
1980 G Silverbird
Original Yamaha Fairfing and Bags
1198 Overbore kit
Grizzly 660 ACCT
Barnett Clutch Springs
R1 Clutch Fiber Plates
122.5 Main Jets
ACCT Mod
Mac 4-2 Flare Tips
Antivibe Bar ends
Rear trunk add-on
 http://s1184.photobucket.com/albums/z329/viperron1/
Comment
-
One trick the hot rodders use to keep rust at bay is paint EVERYTHING with a clear coat after welding. They use a paint that's made to be welded over, but I don't have the info handy. Probably able to get it at a welding or GOOD paint shop.Ray Matteis
KE6NHG
XS1100 E '78 (winter project)
XS1100 SF Bob Jones worked on it!Comment
-
Really, I AM working on this thing!!!!
Hey again folks,
It's been a couple of weeks, been difficult to get much done with these 95+ degree days, 85+% humidity, 105+ heat indices, and my non-climate controlled garage! And then there was the busted tire incident as well.
But I made myself get out there yesterday and again today, sweating profusely, trying to keep myself hydrated with PowerAde drinks and such...but it's amazing how much energy it drains out of you as well as fluids!
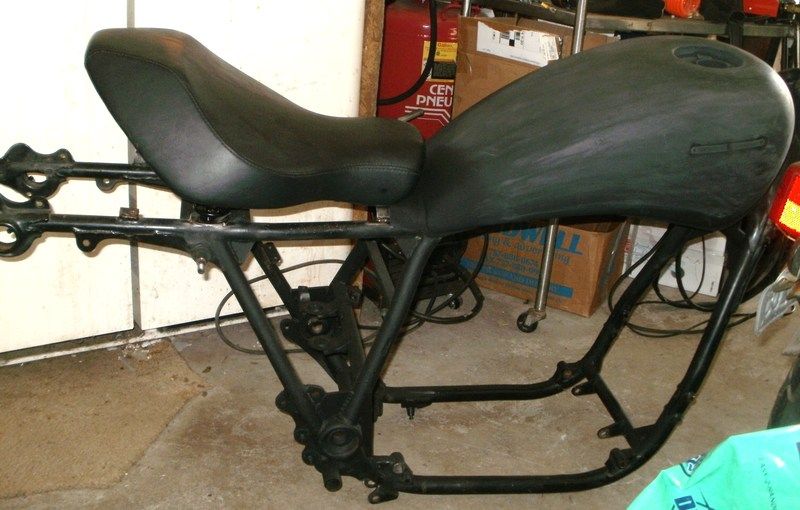
I think I had mentioned about the special seat pan I was modding to mount the Harley seat onto, didn't want to just bolt the seat to the frame, and wanted to possibly add a little extra cushion affect with a small spring pan. SO...here's a shot from on top of just the actual metal pan, had to fabricate a swivel mounting bracket, as well as cross frame bracket for both the seat and for the tank. With the old seat, I had the forward TANG kinda holding the tail of the tank in place, but it was loose otherwise.
The Tank has also been primed, built up, sanded, and primed again, hopefully will look okay, I'm sure it won't look as SMOOTH as Kurt's! These photos don't show it, but I have since drilled a couple of small holes in the tail piece of the tank, will be welding some weldable nuts to the frame section, and I'll be using some nifty black knurled finger bolts to secure it. I'll be using the same type for the side panels as well.
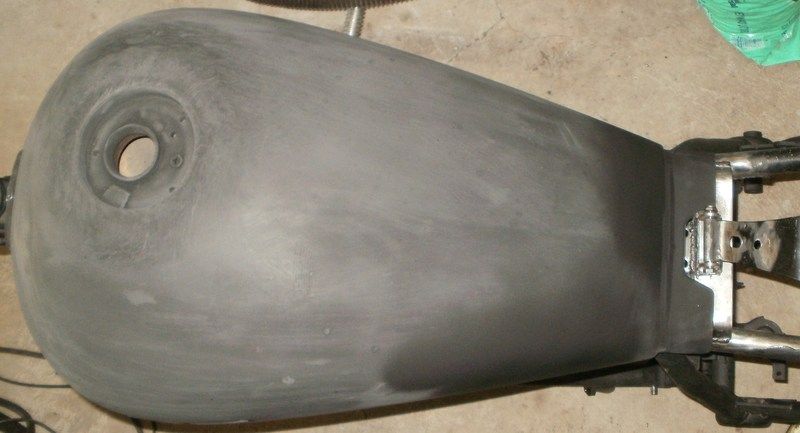
I know this looks a little funny, but the seat isn't actually tightly bolted down to the pan, so that's why there's so much of a gap between it and the frame rails, but at least it's all mocked up, and the parts welded in place for later final assembly! That's what seems like it takes the most time, all of the thought, trying out, fabricating, etc.!
And today, I was trying to weld some spacers to the bottom of the bottom seat pan part, when the wire wouldn't advance!? Finally checked out the inside of the welding machine...I had actually run out of wire....had used up a whole pound of wire on all of my frame bracing mods! SO..a welcome rest/trip to the LOWES for another spool of flux core wire!
I'm concerned about trying to put on the actual COLOR layers on the tank in this heat/humidity! Thankfully the weather is supposed to break near the end of the week, and I'm going to have at least 1 extra day off...Friday, if not also Thursday due to one of my doctor's/bosses being on vacation, too many techs for not enough patients/work...but I have plenty of PTO, so I'm looking forward to the time off....albeit I'll be working in the garage, not just lounging around the house! :P
T.C.
 T. C. Gresham
81SH "Godzilla" . . .1179cc super-rat.
79SF "The Teacher" . . .basket case!
History shows again and again,
How nature points out the folly of men!Comment

 Tweet
Tweet

Comment