
I think that tank looks fantastic, Kurt. Nice work.
And by the way, I bought a pair of those Yamaha stick on emblems for my SG tank. Not to replace anything, but to cover a small ping-dent in the top of the tank next to the gas fill. Annoyed the hell out of me, cause every time I looked at it I remembered dropping the wrench on the tank.
Now all I see is a pretty yamaha emblem that reminds me how much money I saved not repainting the whole tank.
-
Now I like it....
I couldn't figure out why it wasn't living up to my expectations. Then I realized I was giving up a nice shiny new chrome cap for this DULL finish R1 cap. I LIKE SHINY stuff. All my side covers are polished up, nice chrome mufflers, etc. The stock dull finish of the R1 cap looked out-of-place.Now, I'm not 100% sure I like it? Probably one that will grow on me with time.
NOT ANYMORE! I polished the dickens out of it.... Looks like a mirror and NOW I love it too. Now, it looks like it goes with the rest of the bike's shiny stuff.
Probably one that will grow on me with time.
NOT ANYMORE! I polished the dickens out of it.... Looks like a mirror and NOW I love it too. Now, it looks like it goes with the rest of the bike's shiny stuff.
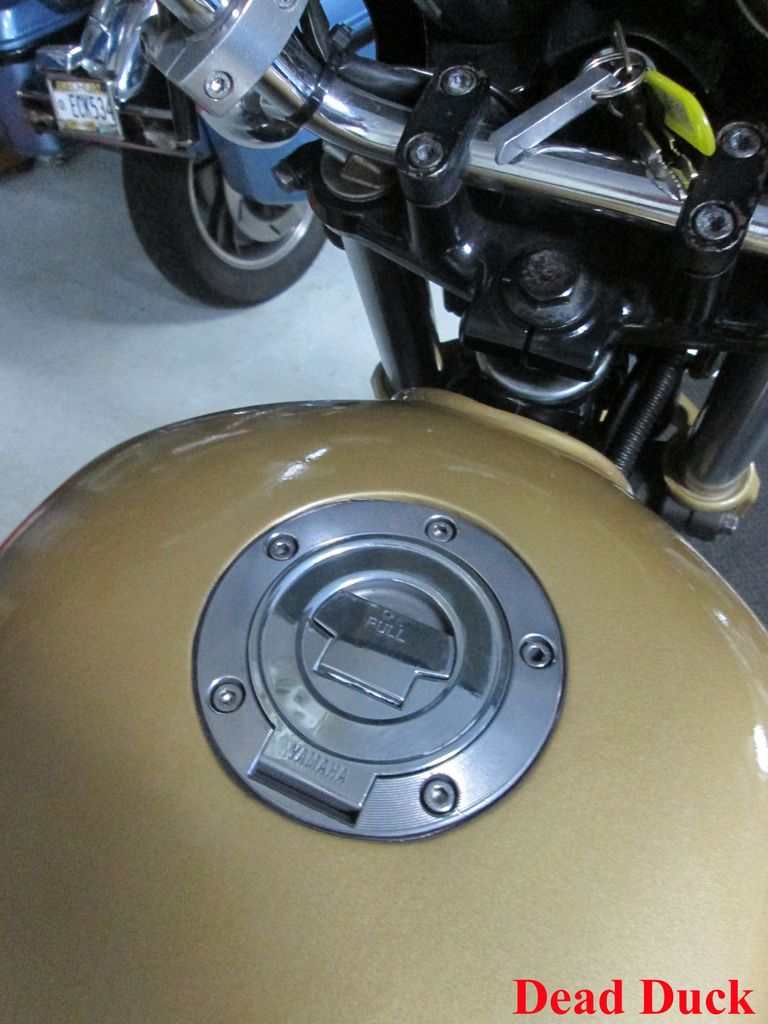
The Dead Duck is DONE....No more mods, only a little bit of fine tuning, some SS Brake Lines, and a lot of POLISHING and it's Ready for XSSE!
KURTLeave a comment:
-
-
XS-R1 Tank Done..... Second thoughts...
The XS-R1 Super Tank is done. I painted it today....
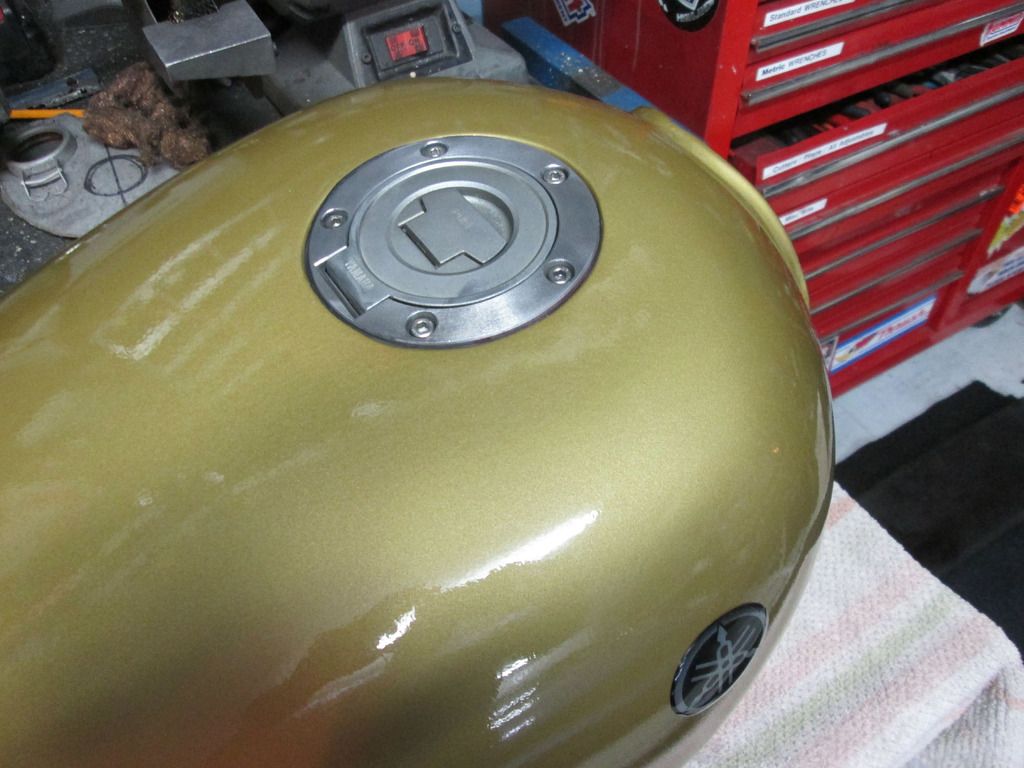
Side-By-Side with the stockish one......
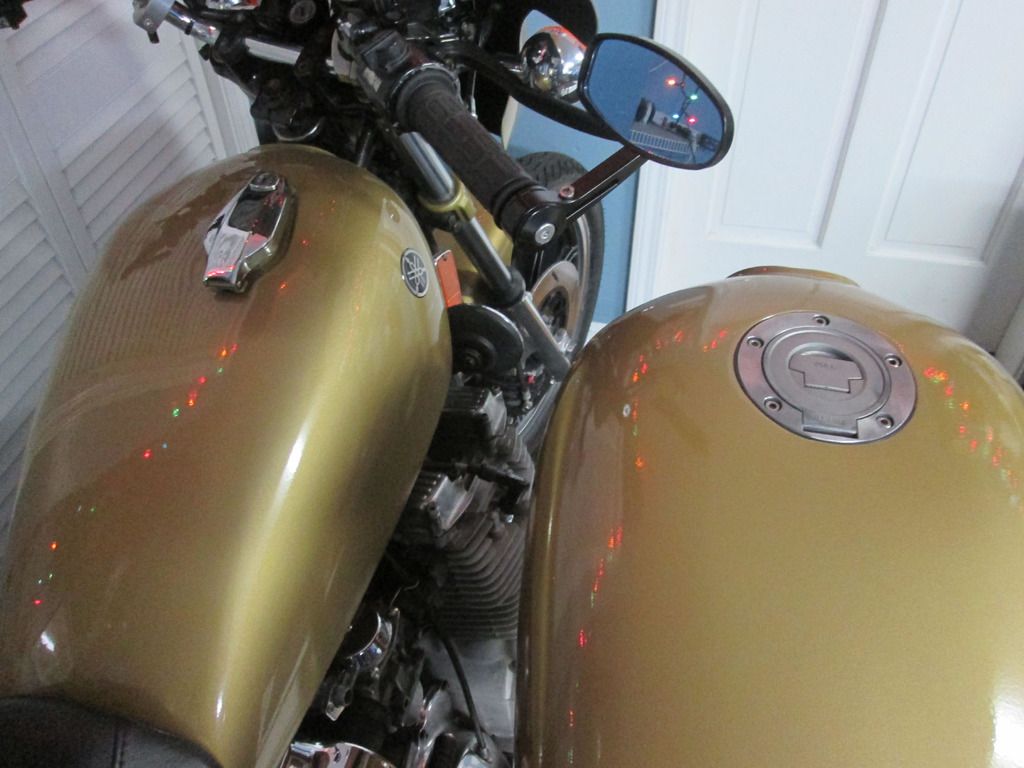
Just swap over the petcocks and its done.....
Now, I'm not 100% sure I like it? Probably one that will grow on me with time. My son loves it.
KURTLeave a comment:
-
Hey Fred,
Thanks for the info/lesson on brazing. I'm not familiar with silver soldering either, just regular electrical type soldering. There is a welding store near where I work, that's where I picked up my Tig rods and replacement liner for my wire feeder. I'm sure they have some silver solder or brazing rods. I'll just have to pick up a Mapp gas torch. But I still like the idea of just drilling out the hole down to bare steel, tap and cap it with a bolt/fuel resistant sealing epoxy.
Kurt, thanks for the offer on the panels, but please don't. I have plans of using some 1/4" aluminum plate for mine. I'm looking closely at your fender setup to figure out how to modify mine. Since I'm going to a single seat, I'm going to be moving the saddlebags and trunk bag a little higher and more forward to help balance the load more over and in front of the rear wheel....this along with the new frame with the proper trail will help to reduce the tendency of my bike to wheelie so much!
T.C.Leave a comment:
-
Supplies on the way within a day.
Fredintoon pretty much covered that very well.... But, I think it's even easier than that. I just used a MAPP gas and flux covered rod. The area MUST BE spotless clean as Fred mentioned. If you have ANY residue of the braze near the tin and you attempt a weld it will be a disaster weld. Much easier to just continue the braze Yamaha did and fill the hole(s). It's basically the same as Silver Soldering. I will send you a rod or two, I have your address.
YES (and no). The sheet metal I used was scrap from work it is actually pieces of a metal beam from one of those quick-build structures. I was able to retain a SMALL portion of a fold which is at the top edge. The sides & bottom do not have it. I MAY have a couple pieces of this stuff left and it will also be mailed to your address, if I have it.
I really didn't know until your post how they mount the rear of the seat on an HD. My seat didn't even have the tab so that was fabricated of SS in-house too. I had a SS hex and since hex heads are all over the bike in one style or another I used it. That bolt also goes all the way through and helps to pull the plastic inner fender up into firm contact with the chrome fender (nice big fender washer on the bottom).
KURTLeave a comment:
-
Hi TC,
FWIW, brazing ain't rocket science.
All you will need is a Bernz torch, brazing flux and brazing rod.
Buy the flux and rod at a welders supply shop, ask for low temperature rod.
Cleanliness is the beginning and end of the procedure.
Polish the area squeaky clean, mix up a thick slurry of the flux powder and water, slather it over the area and apply heat.
As the area heats to dull red the flux slurry will boil off it's water content and the powder will melt and flow over the area like molten glass.
Dab the brazing rod's end onto the area and it will melt and flow into the joint. Take the flame away and let the molten braze metal cool and solidify.Leave a comment:
-
Hey Kurt,
Got the R1 tank. I don't have any brazing stuff, don't know HOW, so I will either cut off the tube, then tap thread the hole for a sealing bolt, or drill it out to remove any brazing stuff so I can then tig/weld the hole shut.
On a different subject, reviewed this thread regarding the side panels, and how they are mounted, saw the cross brace and threaded part for the screws. How did you make the side panels? Are they sheet metal with folded edges or what, they look so smooth?
Was also curious about the rear seat mounting, saw you used a hex head screw. Why didn't you get one of those fancy knurled knobs like on a Harley for easier removal??
T.C.Leave a comment:
-
The hole at 9:30 is the cap area drain (rain, spilled gas). On the underside there is a pipe brazed to it that will run through and then out the bottom of the tank. I brazed it closed. Welding with braze on the other side could contaminate the weld and cause issues.
KURTLeave a comment:
-
Hey Kurt,
Thanks, yes, the new cap shows 3 long screws/bolts and 1 small short screw/bolt.
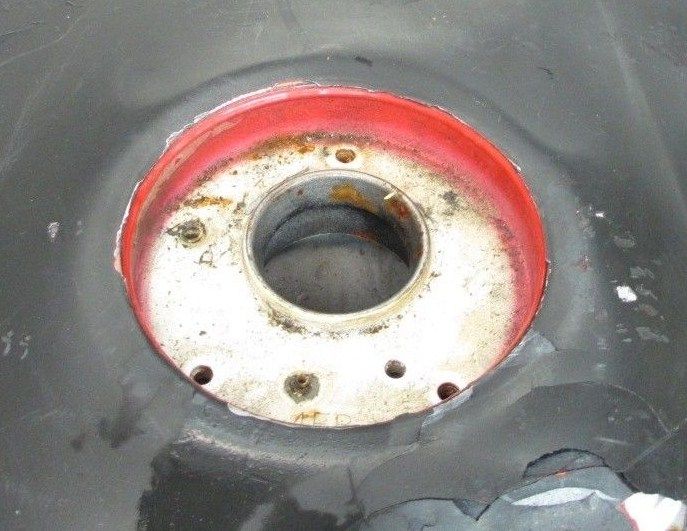
Here's a shot of the gas cap area of the tank I bought! I see the 2 beside the hinge area, the 1 at 12 o'clock, the 1 that would be under the hinge, plus what looks like another one around the 9:30 position. But that hole shouldn't be a problem, can probably seal it with a screw, or even weld it fill it in!?
T.C.Leave a comment:
-
FOUR attachment bolts + Two Decorative.
T.C.,
Actually, it should have FOUR(4). You probably didn't notice it. There is ONE additional screw UNDER the cap assy. as seen in this pic.
Here you can clearly see the vent hole from the cap is linked via rubber boot to a tube brazed to the underside of the recess. The tube exited my R6 tank at the bottom. I was TOLD that in the early bikes it just attaches to a hose run all the way to the center stand area. I was also TOLD the newer bikes run it to some sort of evap. canister or some other emissions device. I removed the tube, brazed the hole shut and just removed the rubber boot. Should vent just like the OEM XS11 cap.
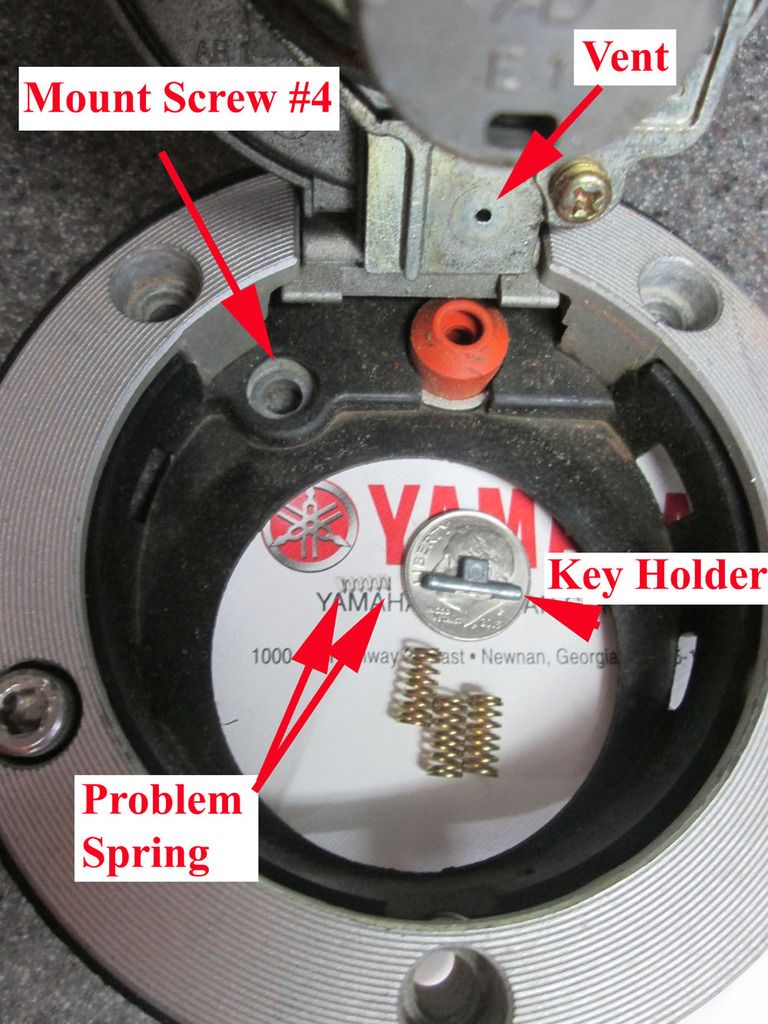
In this photo you will also see the TINY SPRING that causes all the "Can't get my key out" issues. I placed a dime in the photo for size reference. It is absolutely TINY and sooooo small it barely shows on the photo. That spring pushes the little gizmo that is on top of the dime in/out of position HOLDING the key.
Can you imagine, stopping for gas, fillin' 'er up and not being able to get the key back out of the lock and not being able to start the bike? Getting stuck somewhere because of a broken spring inside the gas cap? I love YAMAHA's machines but this seems like a "Crappy" set-up to me. I bet there are a bunch of R1/R6/FJR guys that would agree.
KURTLeave a comment:
-
Hey Kurt,
As HalfCentury posted, his has the 5 bolt pattern. I've seen the other caps with the 7 bolt pattern as well. However, looking at the actual TANK mounting holes, there are only 3, the 2 down beside the hinge, and then the 1 at 12 o'clock position opposite the hinge. The other bolts are merely cosmetic just narrowing the spacing by using 2 bolts one each side between the actual mounting bolts vs. only 1.
The tank I ordered also has only 3 mounting holes in it.
T.C.Leave a comment:


 T.C.
T.C.

Leave a comment: