
 I know the newer R1/R6 uses a 7-bolt cap. This cap came from a '99 R1 but the donor metal is from an '01 R6.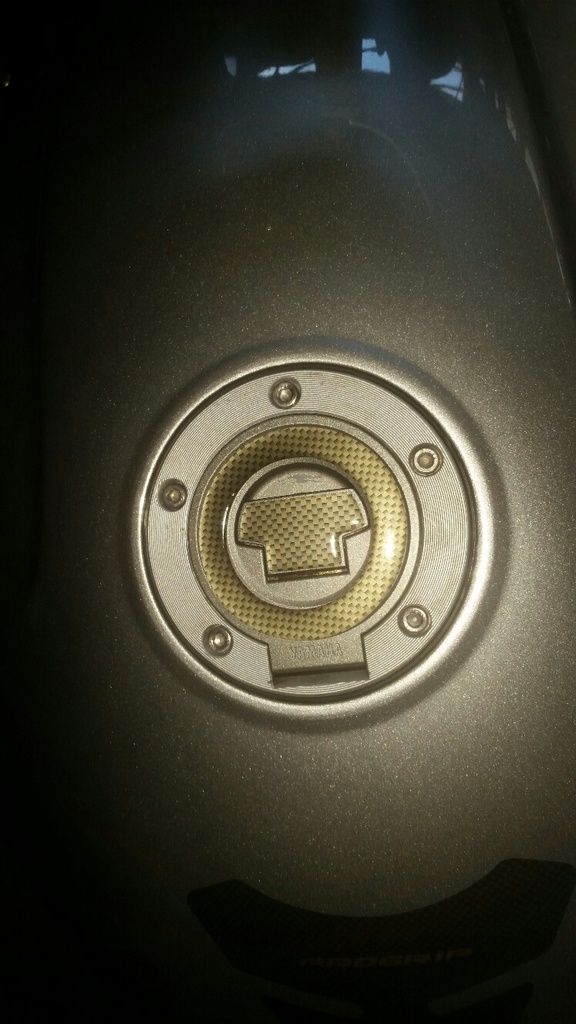
-
A troublesome MOD.
OOOOps... Ya' Caught Me! I LOVE my sporty seat and will help all I can! But HD has 'bout 10000 different seat designs for their sporty. Much nicer on the buttocks than any OEM XS11 seat!
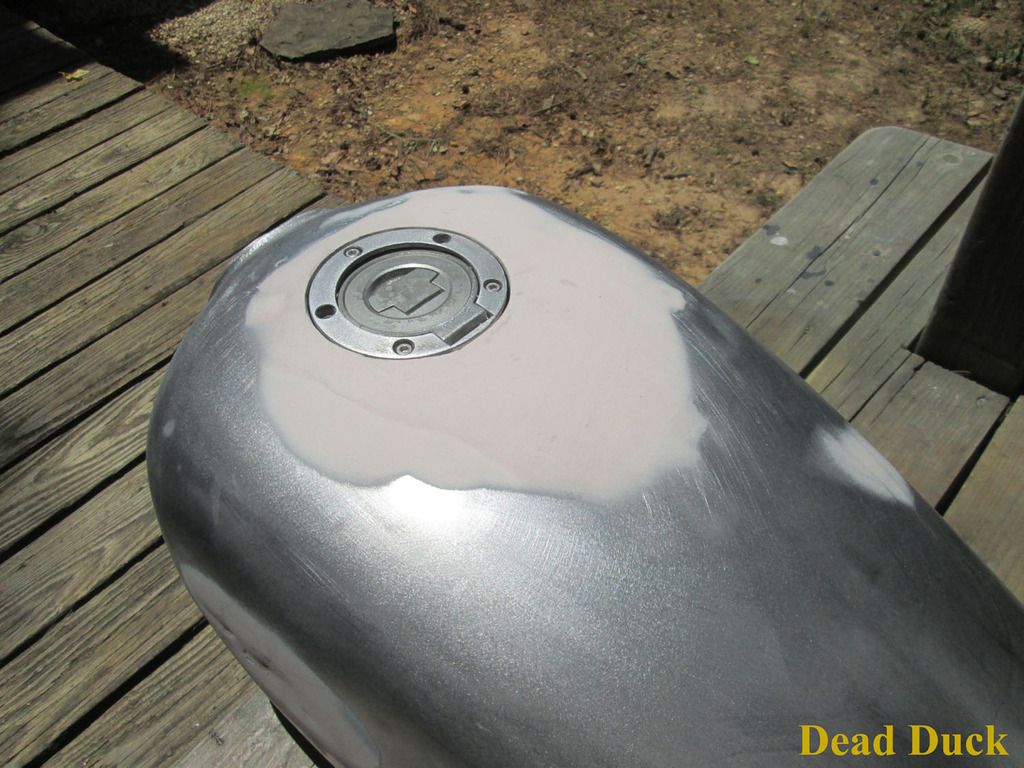
I really struggled with fitting that section. The R6 tank is a little (not a lot) flatter in the area around the cap than the R1 BUT it has a chin recess in the front. I thought it would be easier to FLATTEN. The forming process for that OEM tank makes it nearly impossible to flatten so I made that donor section as small as possible. I also did not want to change the "LINES" of the OEM XS11 tank with a HUMP or something like that. Flattening the curves remaining from the R6 caused the tank metal to separate from the recess so there is like 30 pounds of MIG & Braze (exaggerating) under there.
I placed the inset as far forward as possible without causing any more pain or reducing fuel level. I think it's a wash on fuel level...maybe get an extra ounce or two.....
The R1 & R6 vent out the BOTTOM of the tank and they DRAIN out the BOTTOM. I really WANTED to plumb a drain out the bottom but could not find a clear area under the tank to attach the steel line (and then braze it in). It's plugged with braze. The cap will vent basically the same as the stock XS11. The vent "line" is brazed shut into the tank and I just removed the rubber seat from the cap hinge area so it will just vent to atmosphere above. We don't have emissions requirements like they do on the newer bikes....
This MOD is REAL PITA!!!!
I saw some of the China caps but I wanted the "YAMAHA" imprint on the cap. The Chinese caps don't have that.
My crap tank came without a key and with a cracked outer ring on the cap assy. (parts donor). Although some are asking ridiculous prices for used caps I found a nice one (without key) for $10. The DAY AFTER I found one for $15 WITH A KEY so I grabbed it too. When I got the one WITH key I couldn't get the key OUT. That's when I found out about the LITTLE SPRING! Now I have three caps... I'm gonna mess around with the spares and see if I can modify the tumblers to accept the ignition key!
Take a CLOSE look at the cap areas of the R6 & R1 (maybe others) to see if you can find the flattest spot AROUND the cap area. The R6 is better (in my opinion) than the R1 for this mod.
ALSO.... Be aware the differences in years... They have 7-bolt and 5-bolt versions.... MAKE SURE the parts you buy match... I almost screwed up.
It's soooooooo tiny it's almost invisible! If it gets rusty all the WD40 in the world sprayed down the key hole ain't gonna fix it and it won't let the key go! They talk about cap problems on all the R1/R6 boards....
KURTLeave a comment:
-
Hey Kurt,
You STOLE my idea!  But it's only fair, since I'm borrowing your Sportster seat idea. Have you seen my thread about that, would like your input about it?!
I have found a bit more expensive R6 tank for ~$30.00 to salvage the gas cap area from!? I'm surprised you did a large rectangular weld section, but I guess that makes it easier to smooth out later , vs.trying to trace around in a circle??
Also, eBay sells BRAND NEW CAPS for like $13.00 free S&H, so curious about why you got a used one???
I haven't actually purchased the tank yet, will have to do another search for an R1 tank to see if I can find a trashed one cheaper!?
I didn't know about the small spring in the cap.
T.C.Leave a comment:
-
-
R1/R6 Tank Mod. - OUCH Difficult
Marty & Dean,
Thanks, this is a tough one to do.... But, I'm making progress.
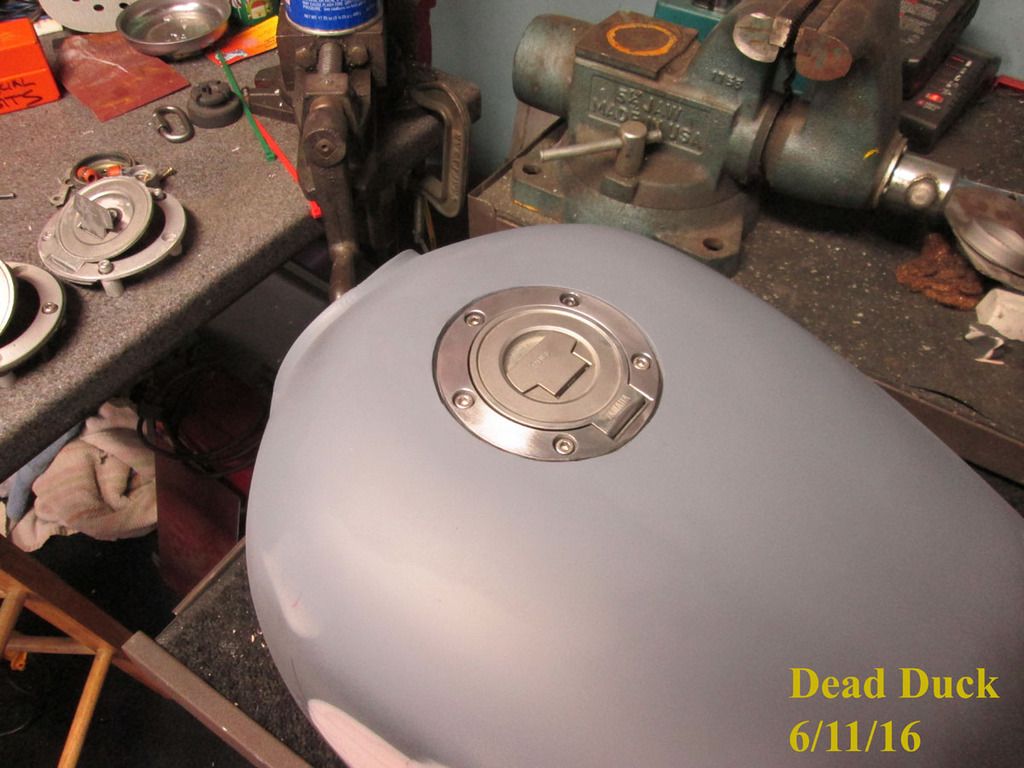
Basic Details:- I found a SEVERLY damaged R6 tank on Evil-Bay for $15 ($25 Shipped).
- The TOP of the tank was basically fine, the rest including cap was JUNK.
- I chopped out the cap recess and did the obvious....
- All the heat of welding and brazing had some effect on the recess and the tank that have made blending the two a bit more than moderately difficult.

- These older 5-bolt R1/R6 caps are apparently troublesome and frequently cause problems. There is a TINY little spring that gets keeps the key from being removed when the cap is unlocked. The spring gets rusty and sticks and won't release the key. I bought a couple and now have a properly operating cap.
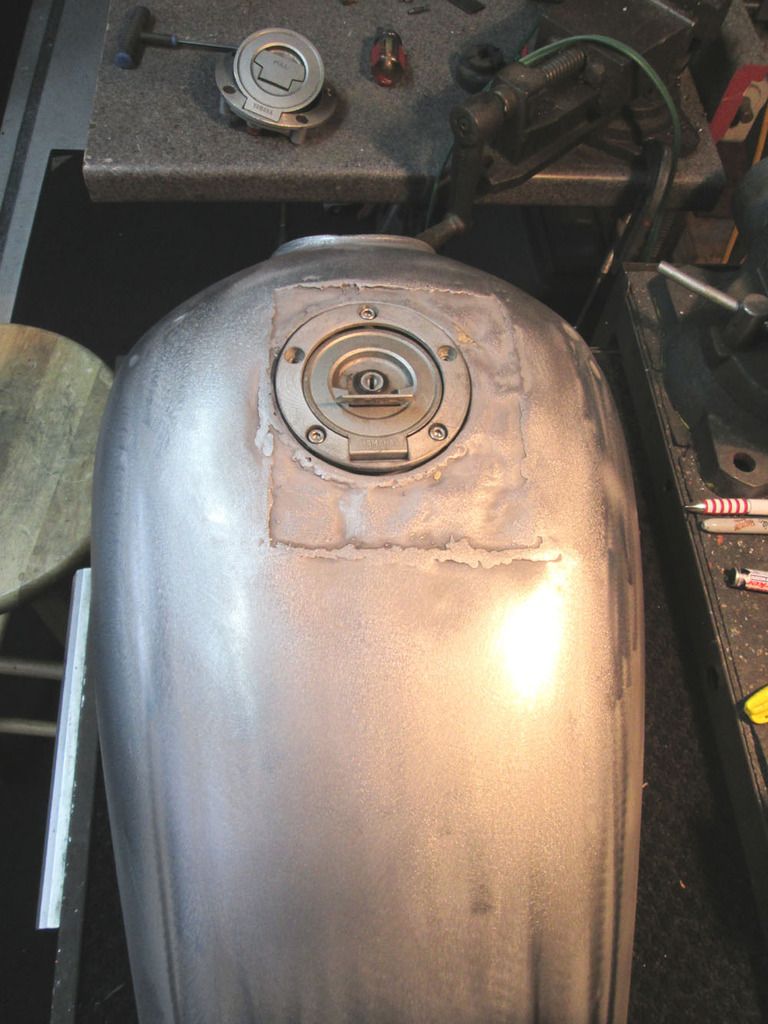
It will probably take me a couple weeks to get this properly completed, painted, and installed on DEAD DUCK .
KURTLeave a comment:
-
-
Can
I can't leave well enough alone.... R1-XS1100?Leave a comment:
-
Hi Kurt,
In my opinion LED should only be used in addition to the original style incandescent light. As already stated in other threads on the topic LED are very directional. A glow of red visible through a wide arc is a very useful warning to following traffic that is not directly behind you. There are LED that have a flash pattern built in which are real attention magnets without being too obnoxious to follow behind.
PhilLeave a comment:
-
You need to ride behind that tail light and get a good look at it. Remember, your son is driving it. That Triumph we rode south with had a hardly visible Lucas light. Your old one was no where near that good. I'm glad you swapped it.Leave a comment:
-
Link to vendor....
http://www.ebay.com/itm/172122141777...%3AMEBIDX%3AIT
Phil,
There is the link to the vendor "AUTODABY" on e-bay. These took 16 days to receive which is longer than I've experienced with other sellers from China. The Advertisement says U2 lamps but I received U3 lamps. Not sure what the difference is, maybe a newer model? Regardless, for less than $20 I think this purchase was a good deal. I just purchased another set......
I will probably go an install another lamp on the other side as others have suggested. HOWEVER, that's gonna be a while! I have to remove: Pull Bar, Seat, Tank, Fairing, Headlamp, etc. I'm not too excited about doing that again any time soon.... I need to drive a little first!
Since this bike will be driven regularly by my son Karl, these couple lighting improvements make me feel a LITTLE better about that. He's 20 (soon 21) and is certain he knows more about everything than me. My 40++ years of mini-bikes, motocross racing, trail bikes, 20++ street bikes, mean nothing to a 20 year old with a motorcycle license less than a year old and a grand total of less than 4 years of driving experience!
Sincerely,
KurtLeave a comment:
-
Hi Kurt,
I agree with Ben. a second one on the left side. Some states do not permit flashing lights that could be mistaken for Police.
How about a link for the vendor of your driving light.
PhilLeave a comment:
-
Damn fine work...LOL... Love that little fairing...if it were me i would add another of those cree LED lights to the left side...as people oncoming or to the left of you might not get as good an angle on the visibility of the the right side light...more is better...plus it looks more in balance or symmetrical...now its asymmetrical...
Leave a comment:
-
Safety Improvements - Lighting Upgrade x2
XS Friends,
When I wasn't washing & waxing cars this weekend , I was working on a couple upgrades to the Dead Duck.
At the suggestion of Marty, I ditched the mostly clear tail lamp in favor of a red one that will be more visible in the daytime. Marty spent a little time behind me in North Carolina and said the clearish one was junk.
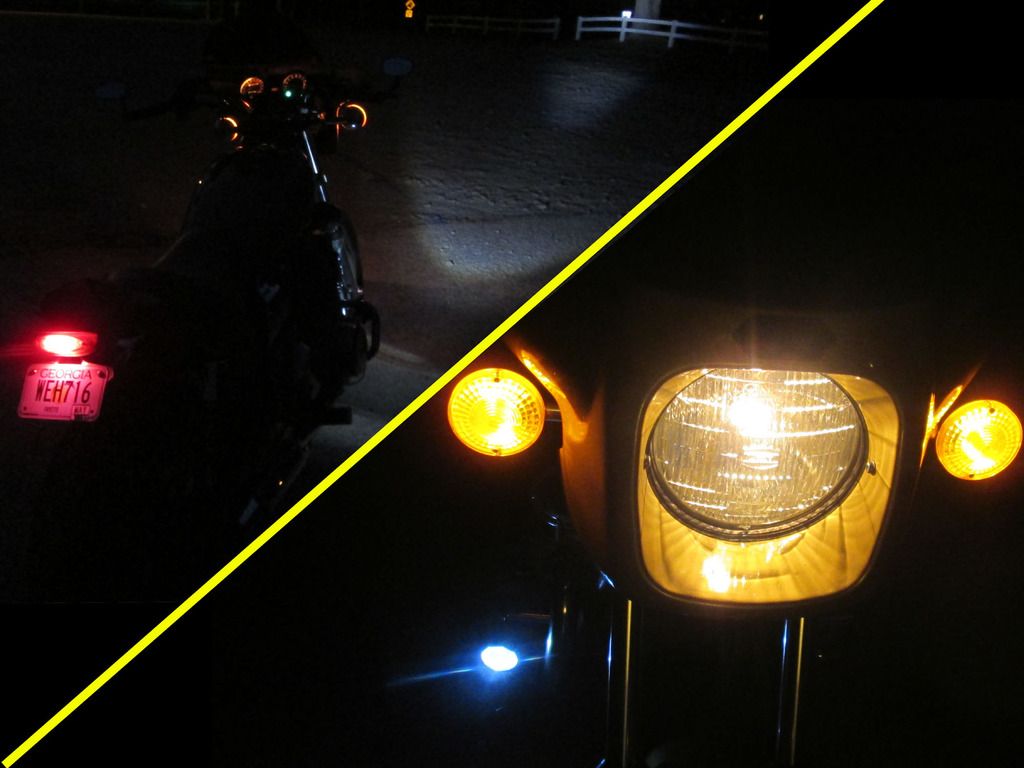
I also converted the OEM Yamaha front signals to 1157 dual-filament bulbs to allow for constant lighting from the signals, like many of the newer bikes have. I tied them into the lighting circuit and they come on LOW anytime the key is on. The bright side of the 1157 is for the turn signals.
In addition, I purchased a couple of these CREE U3 LED driving lamps from China. They were pretty cheap ($20 pair) and I want to grab some more attention as suggested by Navy John months ago for my other bike.
These lamps have three modes: High, Low, & Flashing. Turn 'em off & on and they change modes. The flash mode could be pretty handy in ATL traffic in the day, or maybe even in the night. I only mounted one on the right as the intention was to just GET ATTENTION not light my driving path and I figured one would get some attention just fine.
I'm amazed at how darn bright this thing is! Makes my headlamp look like a 25w bulb! They claim this thing is good for 200 meters and it is all of that and MORE. I'm hopeful these changes will make the bike a little more visible and EYE CATCHING....
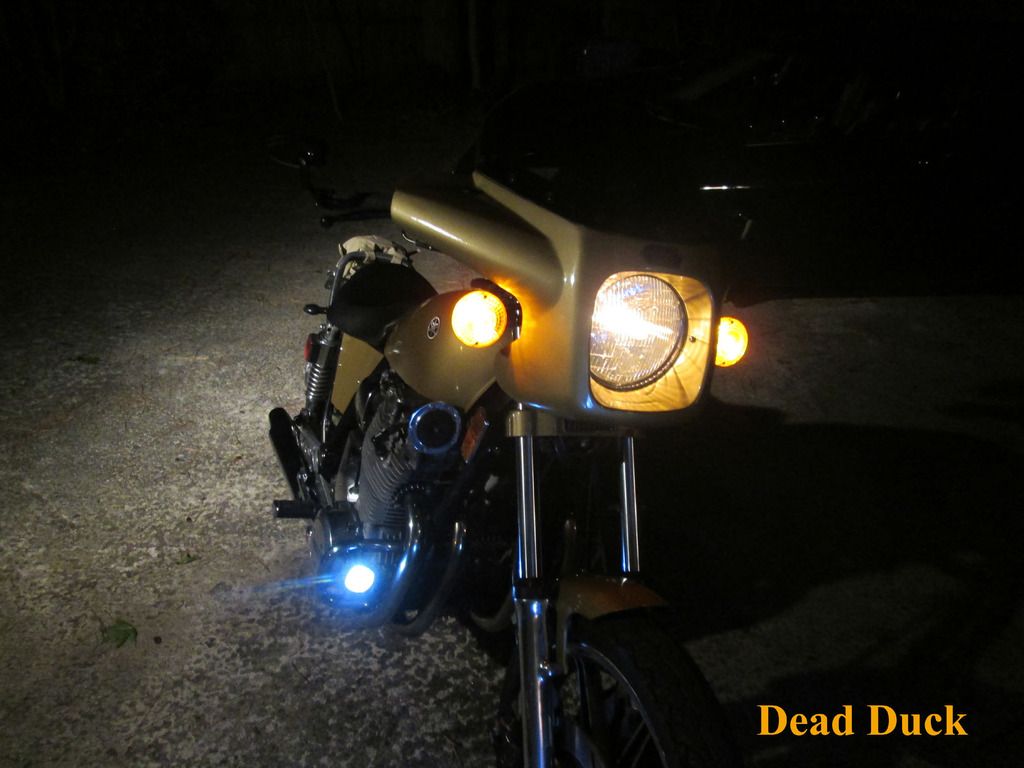
Thoughts?
KURTLeave a comment:


Leave a comment: