1981 XS11 Special - DEAD DUCK Cafe

Collapse
X
 
  • Time
  • Show
Clear All
new posts

  • kboehringer
    replied
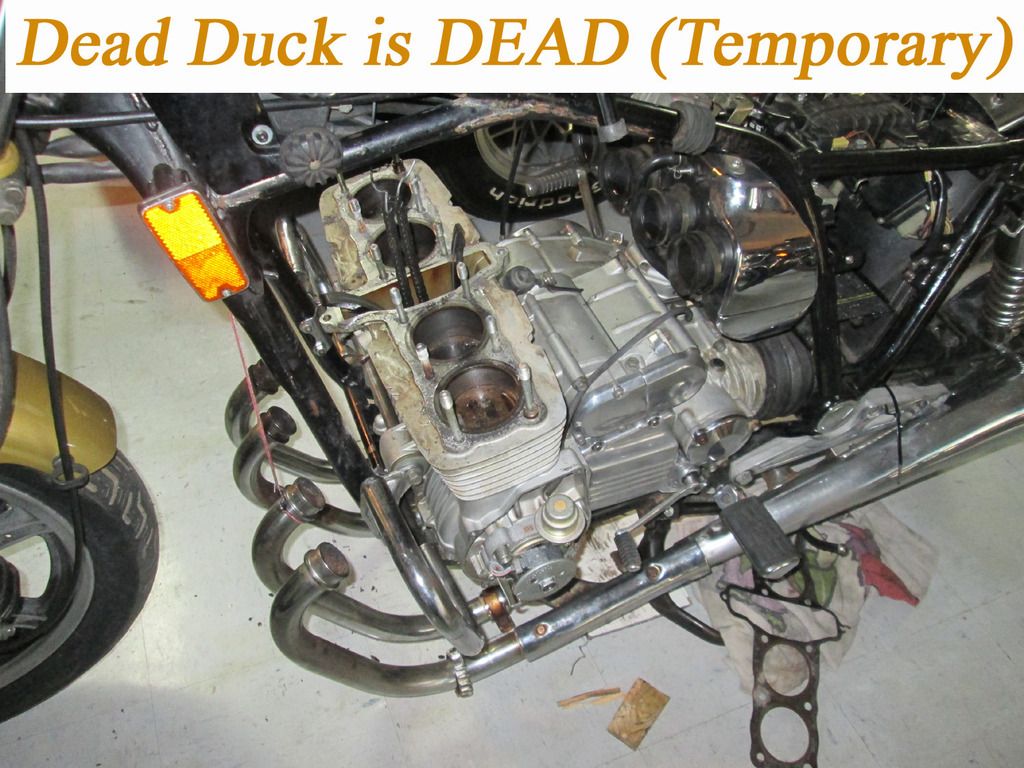
    Dead Duck is DEAD! - For a week or two...

    XS Friends,
    I'm rushing to get the DEAD DUCK ready for prime time and she's fightin' me all the way. Got a date with a event in North Carolina at the end of April I just gotta' make with THIS bike. I couldn't get 'er started as the compression is crappy and Marvel's Mystery just and gettin' it done.

    Pulled the head to do a leak check.... FAILED. That's the pretty good news.
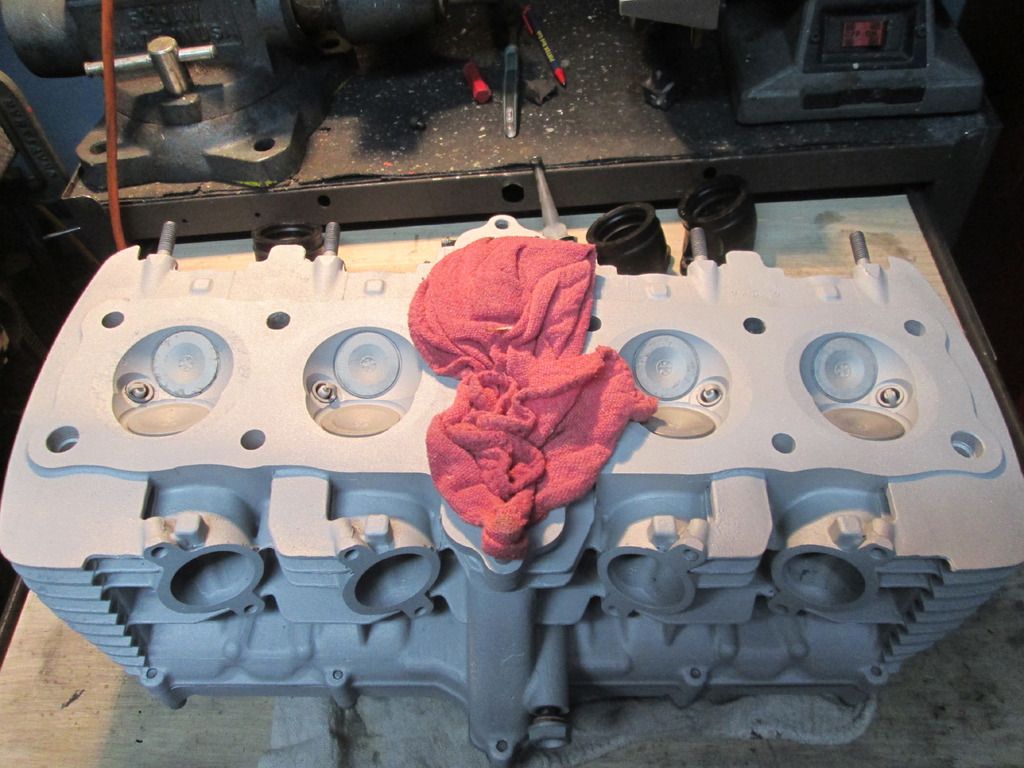

    Took the head to work today and BEAD blasted the dickens out of 'er.
    Found that there was some serious water damage within the motor. Probably sat outside for some significant period of time and got water in it....Is this the new Swamp Thing? (only kiddin' MadMax).
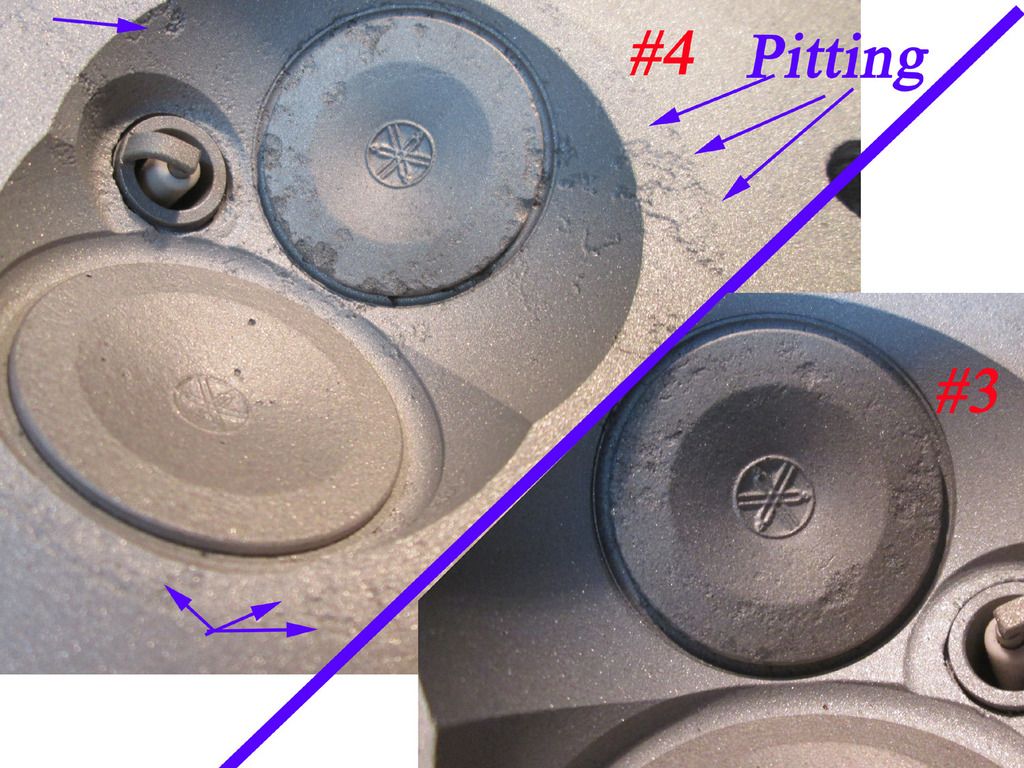

    There is some strong pitting within a couple of the combustion chambers AND a couple of the valves have a bit of pitting too. Unfortunately, this is a '79 motor and I don't believe my spare valves (1980) are the same sizes?????

    I'm gonna re-lap all these valves, replace the seals and get this head "As good as I can". It will PROBABLY be ok...

    Since I ordered some new rings a day or so back it doesn't make much sense to re-assemble this DUCK without installing them. The rings are all probably complete crap after sitting in water for some long period of time. I'll have to wait on the post from JAPAN.

    Got a TON of other stuff to keep me busy with this one including new Pirellis front & rear, new bearings front & rear, and a few wiring gremlins yet to address...

    Hopefully, ready to run at North Carolina at the end of APRIL!
    Fingers are crossed and I'll be burning the midnight oil.....


    KURT

    Leave a comment:


  • kboehringer
    replied
    Compression stinks....Marvel mystery aint fixin it.

    Originally posted by fredintoon
    I know the real reason you converted the bike to solo seating. To stop your kid from picking up chicks. Ain't gonna work.
    Fredintoon,
    Thanks for the compliment. The color was something my son picked out and I've come to like it a lot.

    The kid has a GEORGOUS girlfriend and I am happy he can't get her on the back of this thing. Riding with a passenger is best left for those of us with a good bit of driving experience, he doesn't have enough for that!
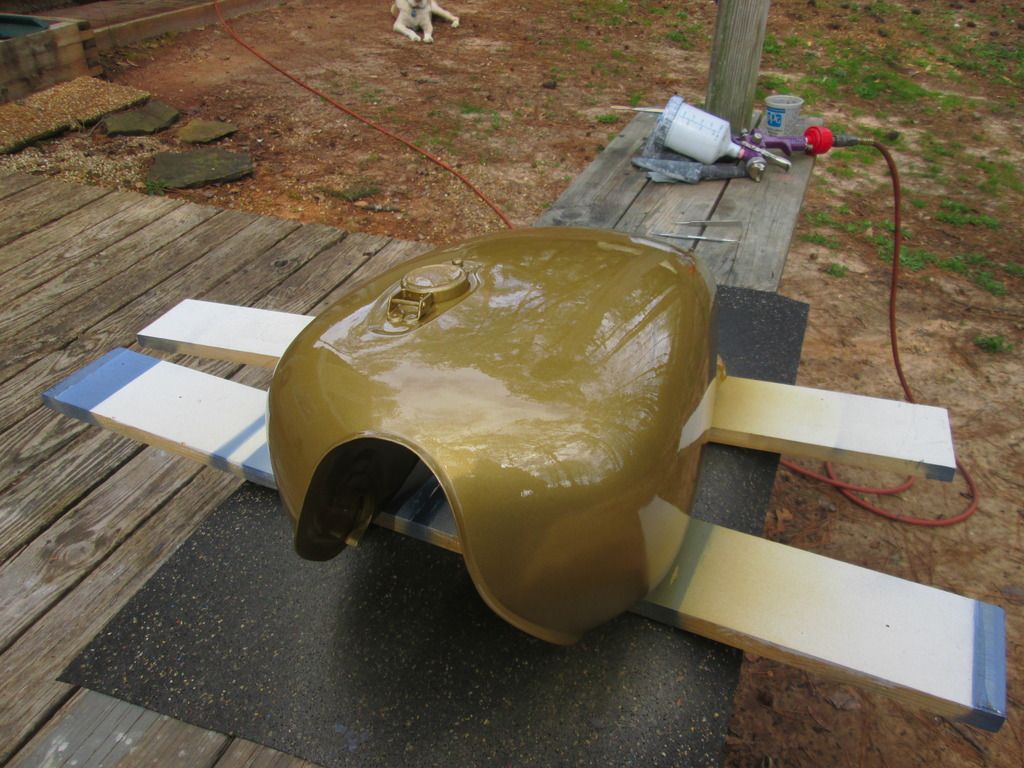
    Unfortunately, it seems compression is in the dumper on this one so it won't run. I've got to rip the head off, do a leak check (hope it fails), and then rebuild the head with new seals and re-lap all the valves. If it passes a leak check it's gonna need a set of rings. UGH!

    I had hoped to take this on a trip next month but that seems a little out of the question at the moment. Even if I rework the head promptly there are still a few wiring gremlins to kill and not enough time for a proper shake-down....UGH

    It'll be done in a month or two but not nearly as fast as I had hoped for...

    KURT

    Leave a comment:


  • fredintoon
    replied
    Hi Kurt,
    that's a real nice resto you have and Oh! The nostalgia!
    That paint looks to be the same as on my 1953 BSA Gold Flash.
    Mind you, that ol' BSA had mebbe nine wires in it's harness (OK, if we'd had signals back then it'd have needed twelve) not that nasty rats nest the XS11 seems to need.
    And I know the real reason you converted the bike to solo seating.
    To stop your kid from picking up chicks.
    Ain't gonna work.

    Leave a comment:


  • kboehringer
    replied
    Close to running.... I HOPE!

    XS Folks,
    Just a QUICK update... Hopefully I will be posting later today that the bike is running good and 2nd gear is good too....

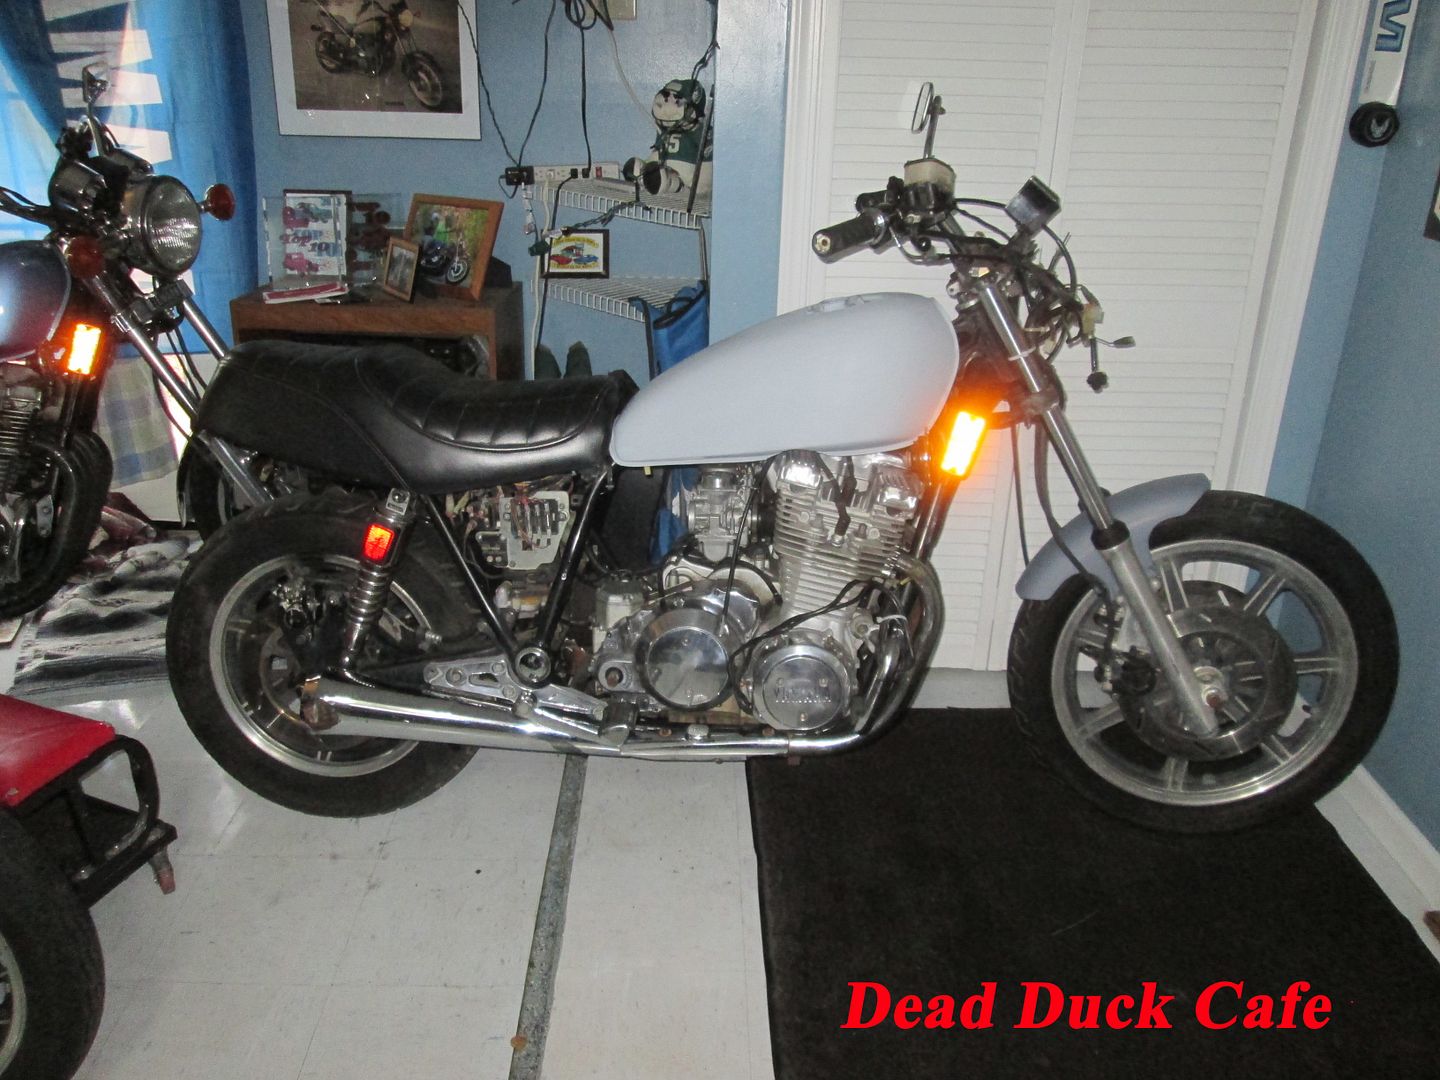
    Decent morning here in Georgia with temps already above the 70 degree mark so it was time to get the FINAL coat on the tank...

    Had a bug problem too already this morning some sort of knat landed on the side. Made a little mark but it'll buff out.

    Still struggling with the wiring on this pig as the PO really made a mess... The diode was bypassed so I had to get one from RadioShack and create a new piece. A bunch of stuff started working once it was replaced correctly!


    Got her firing and sputtering a couple days ago but as usual the carbs are peeeing all over the place so it's float check and cleaning time for these AGAIN!

    Keeping my fingers crossed we can get this thing running TODAY!!!!!!!!

    Kurt

    Leave a comment:


  • JRealHEMC
    replied
    Originally posted by kboehringer
    JRealHEMC,
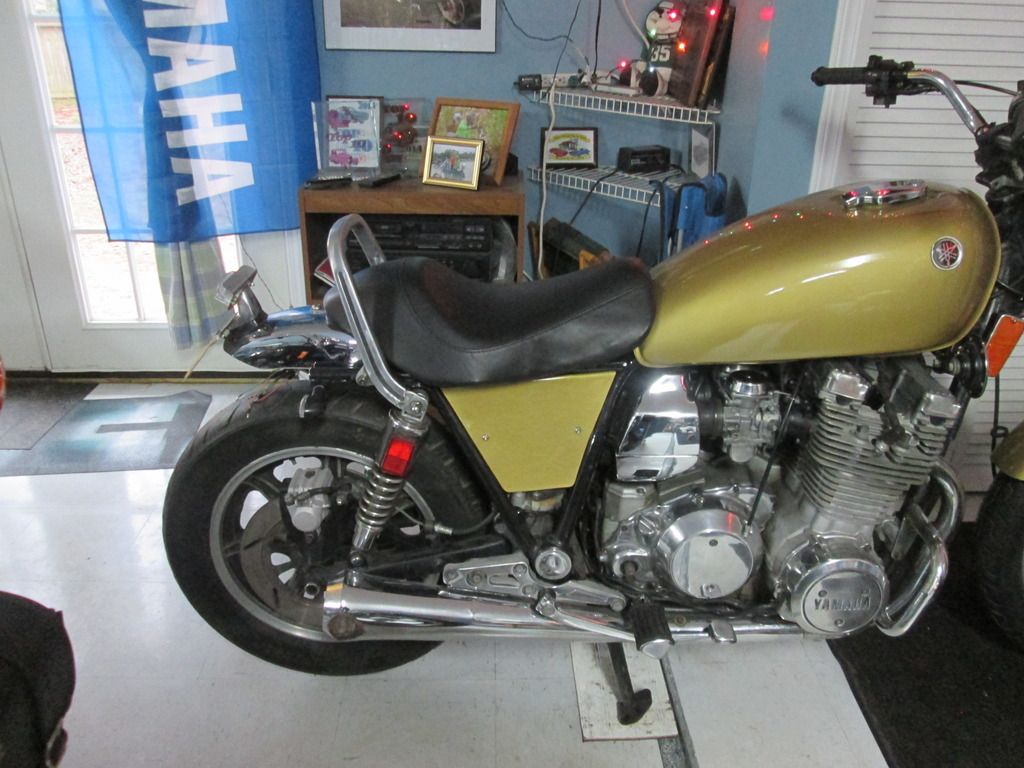
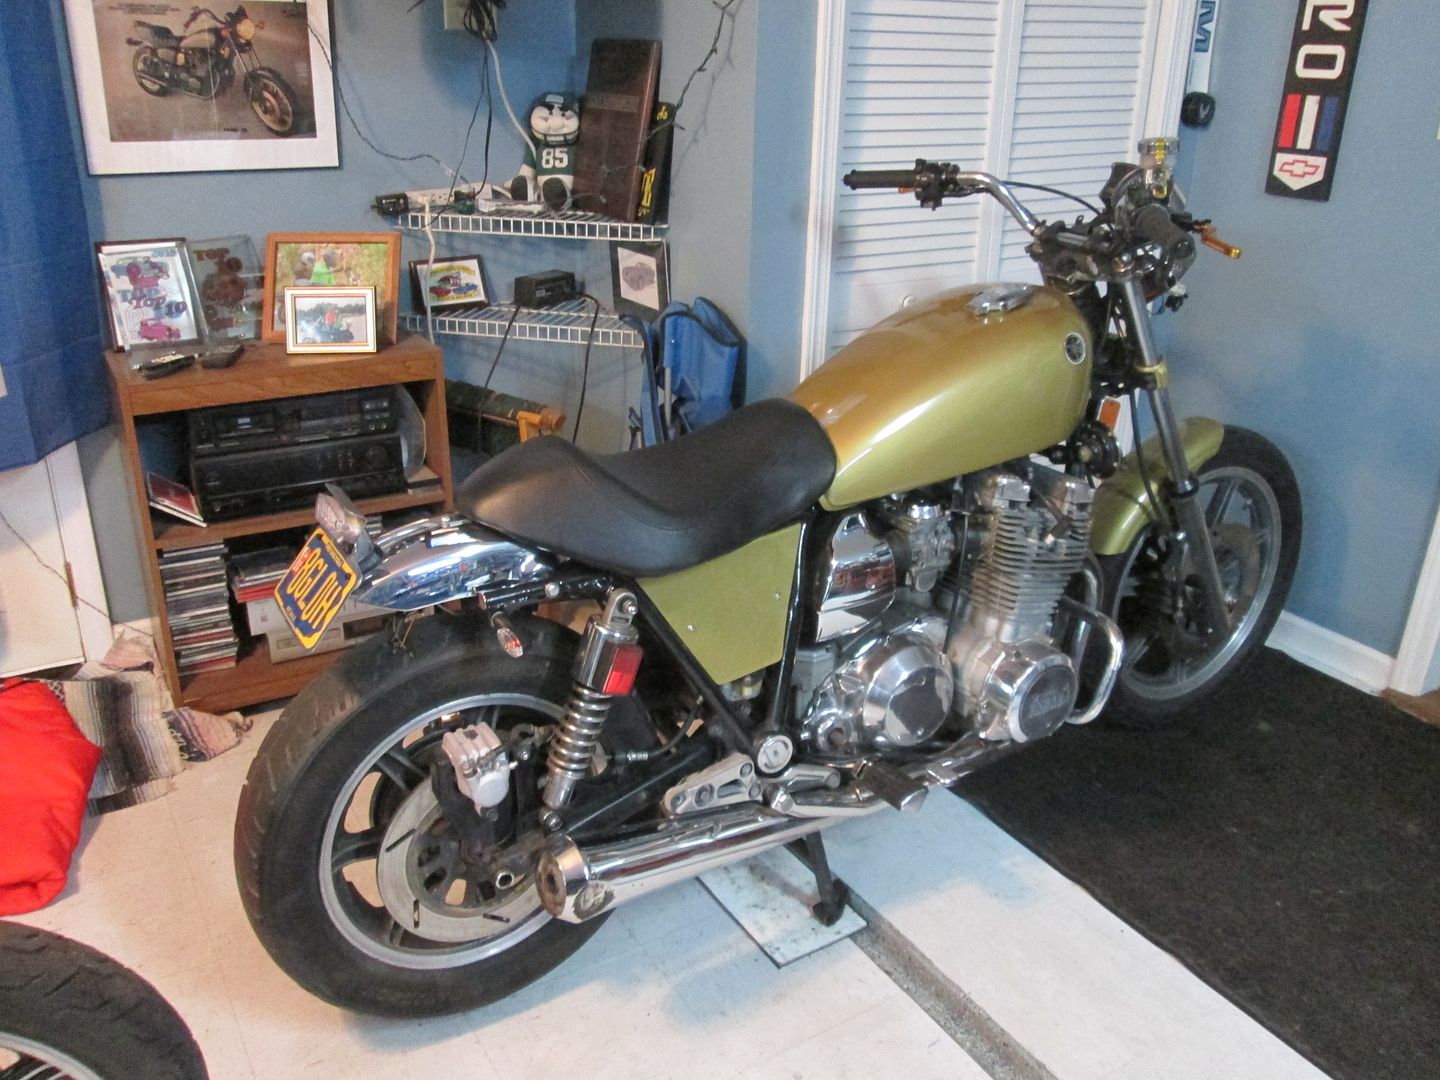
    Moving all the wiring is one of the things the "Café Guys" don't usually think about when they start HACKING AWAY. You'll also notice I don't have OEM side covers either. Much of the wiring on the RIGHT side is covered by that covers. I didn't have any and wasn't interested in buying a set for $100 either.

    Everything does fit in my set-up and is properly mounted in locations SIMILAR to OEM. None of the wiring was really re-done just re-positioned a little. ALL the factory features are WORKING! This is one time that taking your time is VERY VERY VERY important. I placed the various pieces in locations and zip tied them there moving pieces around a couple times till everything fit nicely and all the wiring reached the new locations. Then, I re-welded several of the old mounting tabs (which were cut off and SAVED!!! ) to the new locations.

    HOWEVER, the OEM battery (N18L) will not fit with this set-up. Fortunately, one of my other bikes came with a new slightly smaller/wrong battery that is more than adequate for the job and fits nicely (??N14??). There are also Gel batteries available that are VERY SMALL and VERY EXPENSIVE that would be a nice fit too...

    I'm going to install the carbs back into my other bike tonight but I will post pics of the various pieces and the underside of the Harley seat as quickly as possible. I'll help you anywhere I can.

    Sincerely,
    KURT
    Thank you VERY much for that. I have a MUCH better understanding on what it is I'm trying to do now, and whatever pictures you have will top it off... Thanks again!

    Leave a comment:


  • kboehringer
    replied
    Take your time.... It will pay off!

    Originally posted by JRealHEMC
    I see the tab. Guess I'll have to see the groove you're talking about when I find a Sporty seat... My only question right now is what did you do with all of the electronics that were under the original seat? Did it take a lot to relocate them? Was there any rewiring involved?? Special mounting??? Etc...
    JRealHEMC,
    Moving all the wiring is one of the things the "Café Guys" don't usually think about when they start HACKING AWAY. You'll also notice I don't have OEM side covers either. Much of the wiring on the RIGHT side is covered by that covers. I didn't have any and wasn't interested in buying a set for $100 either.

    Everything does fit in my set-up and is properly mounted in locations SIMILAR to OEM. None of the wiring was really re-done just re-positioned a little. ALL the factory features are WORKING! This is one time that taking your time is VERY VERY VERY important. I placed the various pieces in locations and zip tied them there moving pieces around a couple times till everything fit nicely and all the wiring reached the new locations. Then, I re-welded several of the old mounting tabs (which were cut off and SAVED!!! ) to the new locations.

    HOWEVER, the OEM battery (N18L) will not fit with this set-up. Fortunately, one of my other bikes came with a new slightly smaller/wrong battery that is more than adequate for the job and fits nicely (??N14??). There are also Gel batteries available that are VERY SMALL and VERY EXPENSIVE that would be a nice fit too...

    I'm going to install the carbs back into my other bike tonight but I will post pics of the various pieces and the underside of the Harley seat as quickly as possible. I'll help you anywhere I can.

    Sincerely,
    KURT

    Leave a comment:


  • JRealHEMC
    replied
    Originally posted by kboehringer
    JRealHEMC,
    The OEM fender holes on the sides of the fender were used but I had to drill holes in the frame to mount through to them, I think they were 3/16". The holes in the front(2) were drilled in the fender to mate to the tabs I welded in.

    If you look closely at that PIC you will see another larger tab welded forward of the frame cross rail. That tab accepts a LARGE socket head bolt which will nicely slip into the groove provided on the bottom of the Sporty seat.

    If you need any other specific photo let me know.

    Sincerely,
    KURT
    I see the tab. Guess I'll have to see the groove you're talking about when I find a Sporty seat... My only question right now is what did you do with all of the electronics that were under the original seat? Did it take a lot to relocate them? Was there any rewiring involved?? Special mounting??? Etc...

    Leave a comment:


  • kboehringer
    replied
    Originally posted by JRealHEMC
    Aside from welding on tabs to mount the front, were the side mounts factory holes? Or did those have to be drilled out? Also, were any modifications needed to the Virago fender to make it fit like that, or was it just all about mounting?
    JRealHEMC,
    The OEM fender holes on the sides of the fender were used but I had to drill holes in the frame to mount through to them, I think they were 3/16". The holes in the front(2) were drilled in the fender to mate to the tabs I welded in.

    If you look closely at that PIC you will see another larger tab welded forward of the frame cross rail. That tab accepts a LARGE socket head bolt which will nicely slip into the groove provided on the bottom of the Sporty seat.

    If you need any other specific photo let me know.

    Sincerely,
    KURT

    Leave a comment:


  • JRealHEMC
    replied
    Originally posted by kboehringer
    XS Folks,
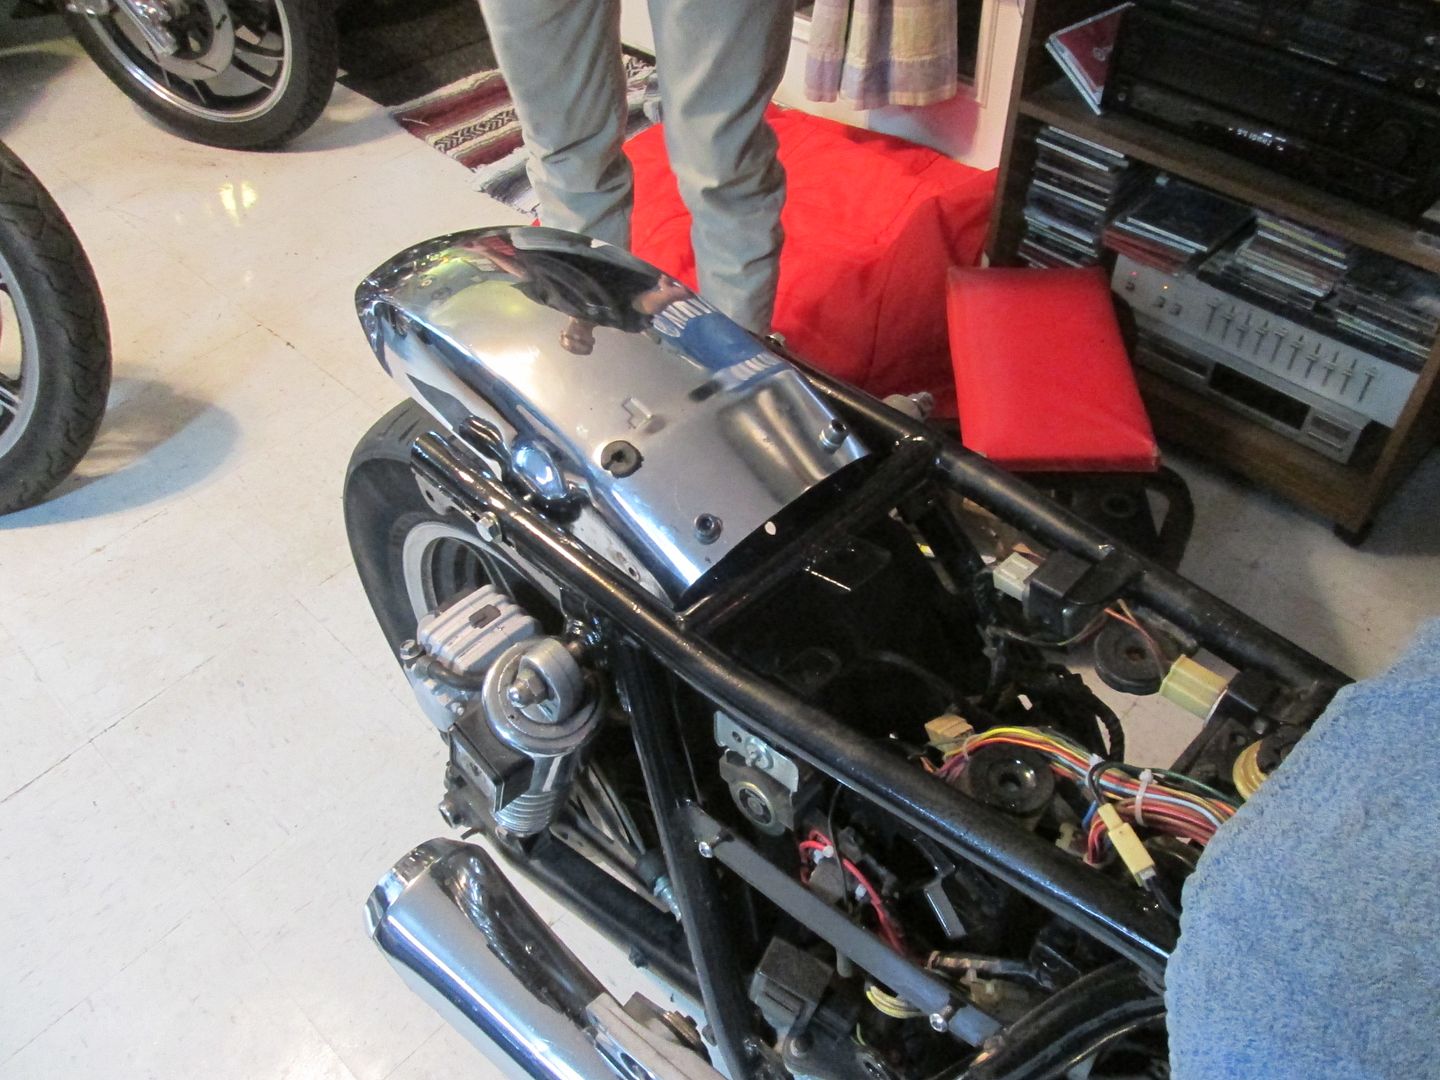
    Following the example above, I purchased an XV920 fender. The fender is much shorter and has a unique shape that is quite appealing compared to the OEM bulky XS11 fender. Unfortunately, I could not find all the specifics on how the other XS11.com members mounted theirs.

    We welded in two tabs to allow a firm/rigid install. Although our Harley seat is missing the rear tab (we'll find or make one), the seat rear will eventually be bolted down to the fender which will also close the small gap. Seemed wise to create a solid mounting....

    Fender mounted....
    Aside from welding on tabs to mount the front, were the side mounts factory holes? Or did those have to be drilled out? Also, were any modifications needed to the Virago fender to make it fit like that, or was it just all about mounting?

    Leave a comment:


  • motoman
    replied
    Originally posted by kboehringer
    XS Folks,
    I’m working on bike #3 of my XS11 collection and have a wiring question.


    BACKGROUND INFORMATION:
    The bike is an ’81 frame & harness with a ’79 motor. It was initially purchased as a parts donor but my son and I have decided to resurrect it as a Café style bike. We’ve started making a few MINOR mods (tank ready for paint emblems shaved, front fender shortened, some parts ordered).

    I would like to keep the OEM frame Structure in-tact and limit any significant “Hackery” of the harness to make future troubleshooting a bit easier. The PO of the bike converted the ignition system to the ’81 version (no mechanical advance, 4 series box, etc.) He also had some “Oddball” coils installed that were from a Kawasaki. Although the bike did have "Spark" I've never seen it start nor have I tried to YET!

    It is my plan to convert the bike back to a PRE ’81 ignition system to create commonality with the other XS’s in my collection. I have a very good set of earlier coils, proper ignition unit, proper pick-ups, a mechanical advance, etc.

    We hope to make big progress together on DEAD DUCK during his XMas break from College.

    HERE’S THE BIG QUESTION:
    The ’81 harness in THIS bike does not include any provision for the BALLAST RESISTOR. The Clymer Manual’s wiring diagram indicates that it should (Clymer is frequently wrong). There is no evidence the PO removed it. I THOUGHT I read somewhere here that Yamaha eliminated the Ballast Resistor in ’81??? I have a POS SG donor harness where I pulled the necessary wiring from to modify into the ’81 harness. Seems pretty straight forward with a little soldering and heat shrink it shouldn’t cause any unforeseen issues to tie this in exactly as it is wired in ‘80?

    Obviously, the easy move would be to find a pre-’81 harness that’s not hacked to heck (good luck! ). This ’81 harness includes the clutch safety switch which is a feature I like since this will be used by my son and he doesn’t have the same level of experience I have.

    Any additional thoughts on this wiring issue?

    Sincerely,
    Kurt
    81's and later(XJ) have NO ballast resistor and have 3ohm(not 1.5) coils..

    Leave a comment:


  • timktm
    replied
    Looks good!

    Leave a comment:


  • kboehringer
    replied
    We like this much better......

    Originally posted by TopCatGr58
    Hey Kurt,
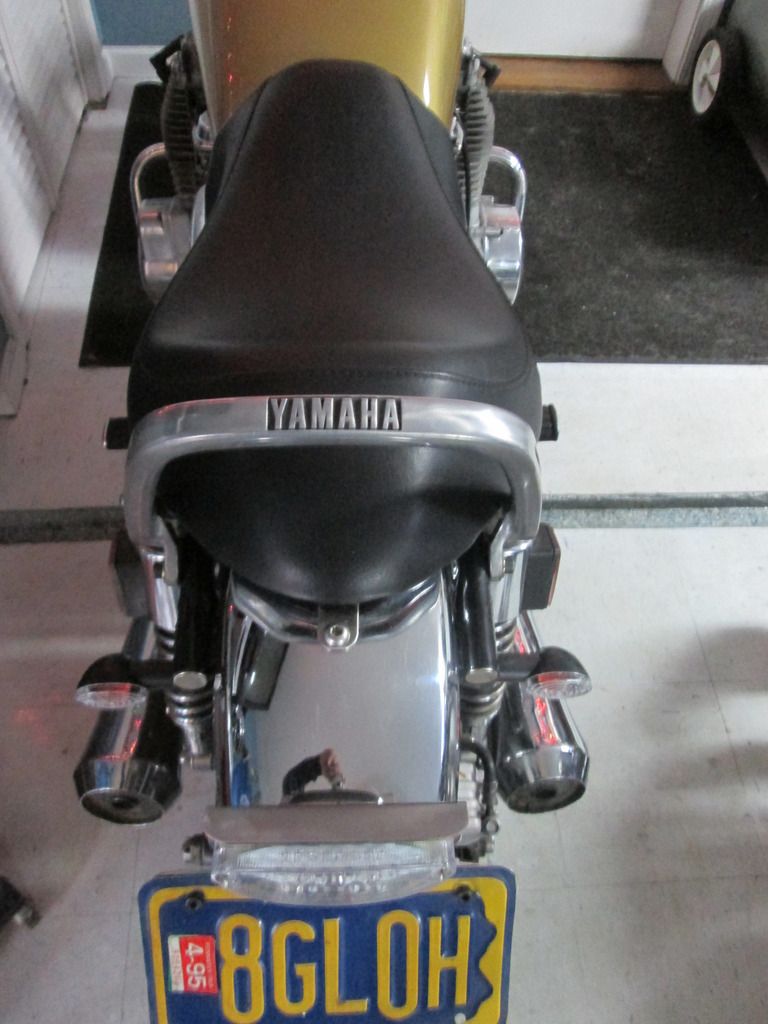
    SNIP.....cut off some more where it BENDS, ...SNIP......then it will match the seat lines, and the Yamaha name will actually be facing more rearward.....
    T.C.
    TC,
    I think we'll like this way a lot more!

    (Can't cut any more off or we won't have enough width to get around the frame)

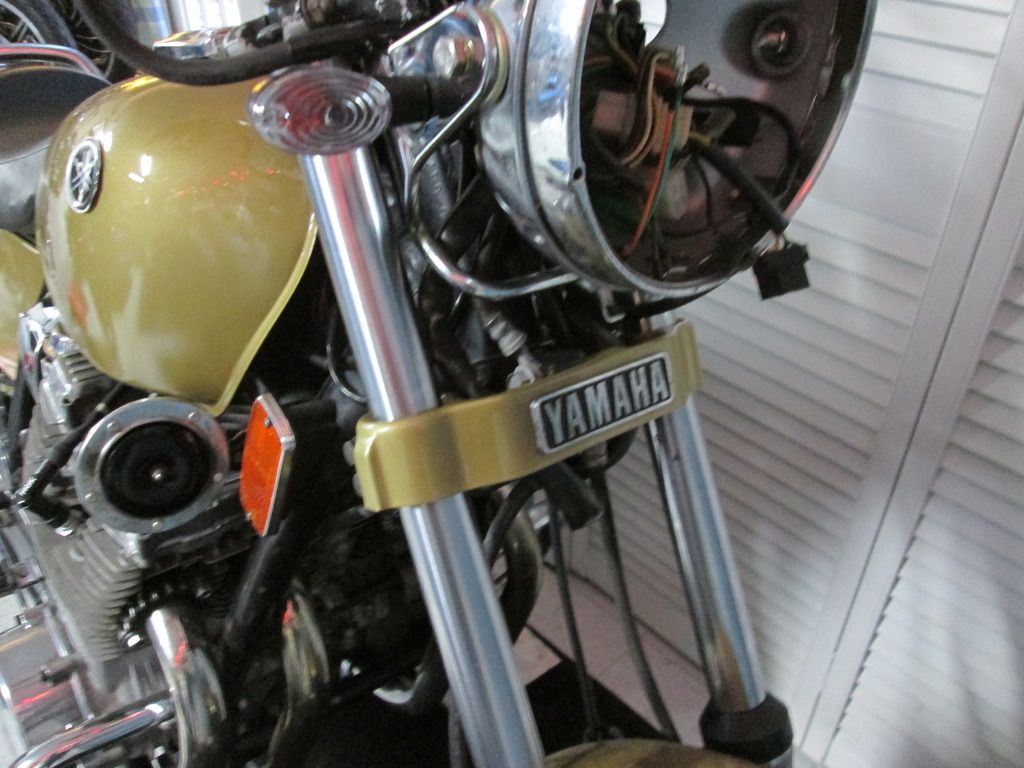
    We also fixed the front fork emblem....

    KURT

    Leave a comment:


  • TopCatGr58
    replied
    Hey Kurt,

    That polished up nicely! Yeah, I agree, cut off some more where it BENDS, and then position the mounts so that it is at about the same angle as the bottom side of the rear seat....then it will match the seat lines, and the Yamaha name will actually be facing more rearward so can be seen from behind it instead of just standing over it!

    T.C.

    Leave a comment:


  • kboehringer
    replied
    Pull Bar (Attempt #1)

    Originally posted by madmax-im
    Its not a bad thing at all...y'all do fine work and i think this looks bitchin"...
    Thank you MadMax!

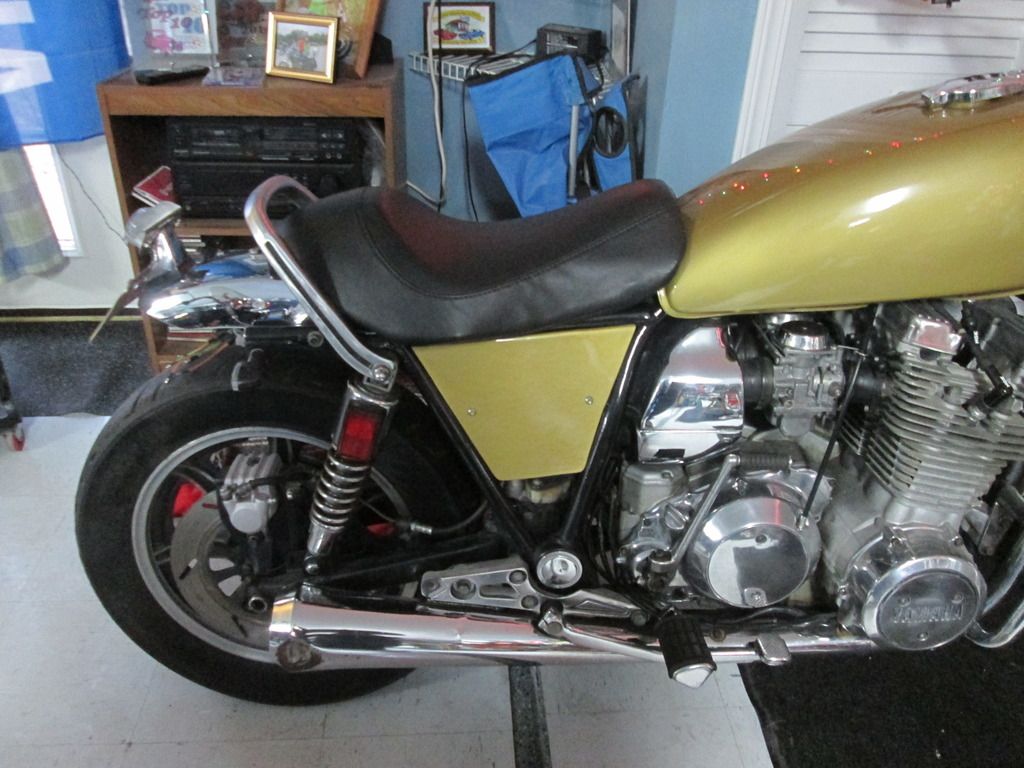
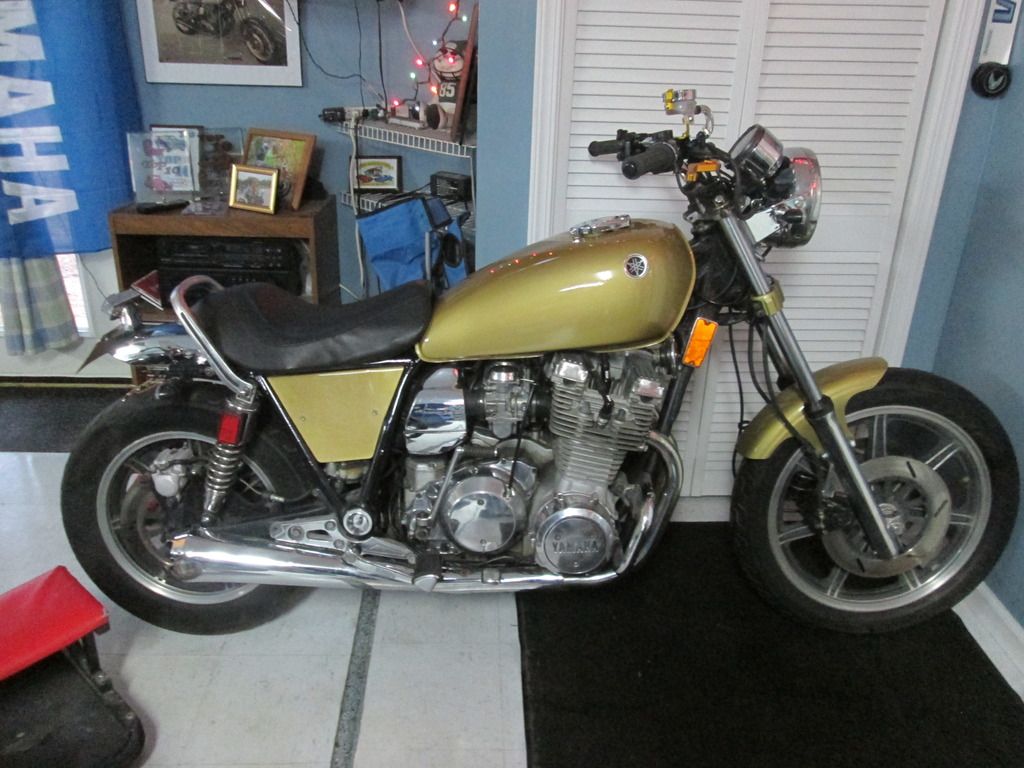
    The other day my son and I installed a MODIFIED pull bar on the machine donated to the project by our friends TC & Rich. At first glance we didn't like it. I told my son we should leave it alone for a couple days and look at it again.


    After a couple days it looks a LITTLE better but seems to mess up the "FLOW" of the bike as it's a bit too high and too vertical? I can't visit with my new grandson due to a head cold so we're going to get to play with the Dead Duck some today....

    To move the bar down further we will cut off the mounting points, cut another couple inches off the bar, pull the bar downward and forward and then weld the OEM mounting flanges back on to the bar...

    Can you see where we're TRYING to go with this? We like the Special Pull Bar with the YAMAHA lettering and it will be easier to get the bike on the center stand with SOMETHING to grab. I think it also gives a little "Bling" to an otherwise slightly bland tail? Thoughts?

    Sincerely,
    KURT (& Karl)

    Leave a comment:


  • madmax-im
    replied
    Originally posted by kboehringer

    We think it looks better with the AirBox. Besides, don't have a couple hundred bucks for K&N filter assemblies we like anyway.
    This is becoming more of a slightly modified XS11 than the typical "Café" bike... Not sure that's a bad thing?
    Its not a bad thing at all...y'all do fine work and i think this looks bitchin"...

    Leave a comment:

Working...