-
Thank you as always for the good ideas. I had been looking through the Dyno switch out and decided that was going to wait for next years tax return...the little lady doesn't protest as much when there is a large lump in the bank. What size of bike and year range should I be looking for when getting coils from a Honda? -
Hey Nzemke,
Brant keeps talking about having to get the 1.5 ohm coils for your/early model XS11, but that's not entirely so. The later model XS's went to the 3.0 ohm coils and got rid of the ballast resistor, so the TCI still sees the total 3 ohms resistance on the triggering side.
SO...as we have stated many times, just get some 3 ohm coils and BYPASS/REMOVE the ballast resistor and you'll be good to go, and you'll have coils that will provide full spark power ALL the time. The 1.5 ohm coils with the ballast resistor in circuit only run on 12 volts during startup, once the bike is running, the power is directed thru the B.R. which drops the voltage down to about 9 volts. This was to keep from frying/overheating the OEM 1.5 ohm coils, but also causes them to produce less/weaker spark energy since running on lower volts. Bypassing the B.R. sends 12 volts to the coils ALL of the time which will provide a stronger spark ALL OF THE TIIME, not just during starting.
The 1.5 ohms coils are so passe`, just find some newer 3.0 ohm coils whether they be used Honda VFR coils or new aftermarket, bypass the B.R. and you'll be good to go. You'll be surprised at how quickly/easily the bike starts....mine actually felt like it would ROAR to life and not just "start" because of the extra strong spark energy!
T.C.Leave a comment:
-
The OEM coils, getting a bit notrorious from heating/cooling cycles over the decades of use is a risky way to go for replacement. New aftermarket coils(Accel,etc.) being on the pricy side, I'd seriously consider bringing onto the property a used set of 1.5ohm Honda VFR coils. They are plug'n'play for fitment, plus the plug wires being separate, you have a type choice there also.( I opted for a 5ft. 7mm high temp multi steel wire core cut into 4 correct lengths).
I've had a set of VFR coils on my Venturer for a few yrs. now with not so much as a hiccup. You have to check across the poles of coil with a multi-meter in order to get correct ohm ones. Designation of the two different ohm VFR coils are not marked as such. My 81 Venturer uses 3ohm coils as opposed to your year bike which uses the 1.5ohm coils.Leave a comment:
-
So I have been bouncing my head off this bike for the last year thinking that i just didn't know how to sync carbs...turns out I got be one of the very luck 1 in a million whos coil stops working once it warms up. So now I'm waiting on word back from the guy I got the bike from to see if he has a spare laying around (the 1 & 4 coil). I have a line on two parts bikes that have the coils...but they won't let it go unless I take the entire bike...and the wife has threatened me with death and divorce if I bring one more none running bike onto the property....
Leave a comment:
-
-
Arrrrggggg!!!! So when I was trying the pods last year I'm pretty sure I decided to use the jet needles from the carb rebuild kit. Well it would appear that the issue with my carbs were them...I switched back to the original ones and things appear to be back to normal. God I have wracked my head over this for the 8 months!!!!Leave a comment:
-
-
So after rebuilding the top end of the engine I have found that I'm still having a few if the issues I was having before. First things first, I have it idling like a champ. I found out I have two left sided cockpets. But also found that the right side seems to barely give any gas...so no wonder I was running lean. So now I have to take the carbs off again and change the needles to dead center and try this again. I also went through and cleaned it and could not find any reason why no gas flows for prime until I turned it to reserved...and it flowed like crazy. But at least one more thing over with. And then I can start the long process of getting the float levels balanced for each needle. So after reading the extensive write up on carbs I will leave the air/mixture screws alone and focus on the float levels.....someone please correct me if I'm wrong there?Leave a comment:
-
Thanks for the compliments! Sadly I have heard some bikes just won't run pods...and mine seems to be one of them. After all of the posts that I have read through, there is a chance that the issue lays in the design of the rubber fitting for the boot. So if I ever try it again I will make sure to read through those posts again and get the right Pods. For the time being I'm using the stock air filter. Only modification I made to it is removing the rubber boot that comes out from the back side of it. With the custom seat on, it pinches it down and restricts the air flow.Leave a comment:
-
btw how's it running with the nail polish on the pods? did you ever get that dialed in?Leave a comment:
-
beautiful bike, looking forward to updates!
definitely gonna pick up a fine wire wheel to clean my motor up with. thanks for sharing that infoLeave a comment:
-
I really appreciate the compliments! Some times I feel like I'm spinning my wheels with this project. When I have time I try to punch out as much as possible.
Last night I finished the conversion for the new blade style fuse box. Finished painting and sanding the new side panels. Fixed the cabling at the front for the turn signals so they are grounded back to the frame. Tucked it all in tight and took her for a ride around the block. She needs some additional tuning that I will do tomorrow. I need to find a shorter screw driver with a bigger head on it for adjusting the carbs. That's the plan for lunch time tomorrow! And I was slightly disappointed to not hear from the guy who is bending up the steel for my hoop. I think I may have to make a visit to his house after he gets off work tomorrow.... Otherwise here is a walk around for how she is right now
Enjoy!
Leave a comment:
-
Looks Good!!
Sharp looking machine.
Should be a good runner for many years to come.
Enjoy the ride.Leave a comment:
-
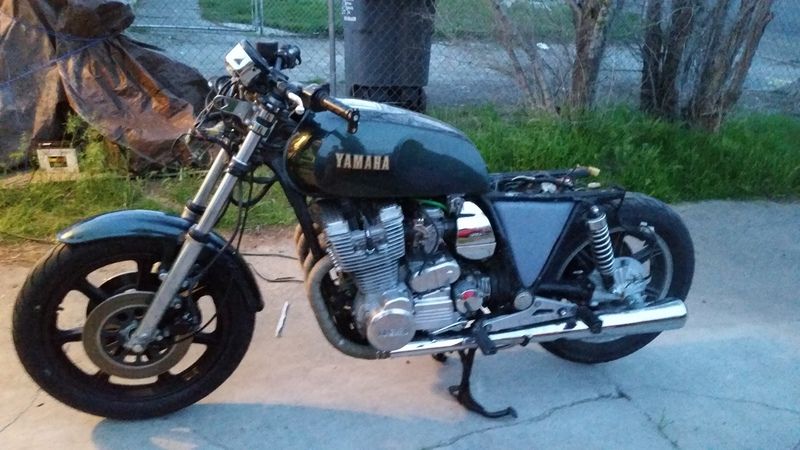
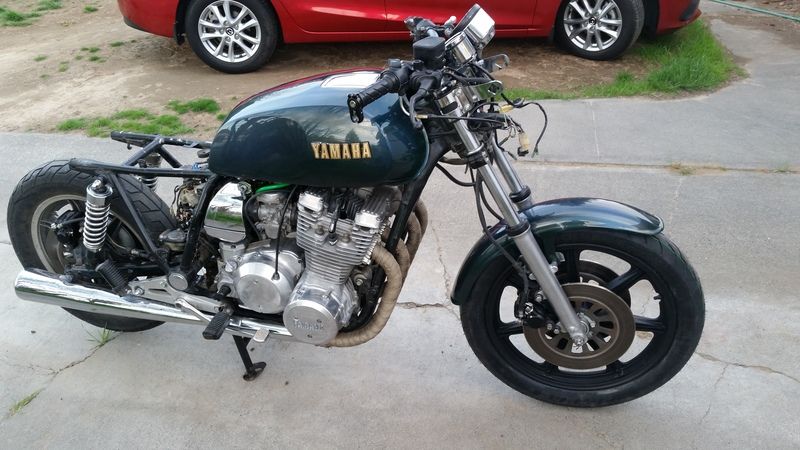
Update: Getting there
I wanted to update the thread with some new photos. I am cleaning up the cabling mess so I can get the battery and everything in with the new side panels. I have about 6-8 hours into each panel :S and the right side still needs a little work before I get them painted. Once I have these looking how I want them to then I will sand out the frame a little and proceed with the most amount of taping I will more then likely ever do so I can give the frame a new coat without removing everything...it sounds scary lol! But I guess I kind of need to do it once the rear hoop is wielded on. I just got a new tire put on the front and used some of the rubber coating for the front rim...and really digging it. Once the back tire comes off I'll do the same thing. I have heard of this spring compression tool...will need to look into one. Tired of replacing exhaust gaskets >.< Really happy with how responsive the brakes are now after full rebuilding them all. I have installed all of the LED's and can't wait to share the new tail light MOD once I put the rear fender and all back on! The rear of the bike lights up almost blindingly!! And the switch for the green lights that light up the whole engine!! This has been a lot of fun building.



Leave a comment:


 .
.


Leave a comment: