Announcement

Collapse
No announcement yet.

A project Begins....Picture intensive

Collapse
X
 
  • Filter
  • Time
  • Show
Clear All
new posts

  • #16
    Rick and Ray, thanks for the encouraging suggestions. Been working at it alot of today, but feeling abit like I am polishing a turd because of the low compression. Reading experienced and smart fellows like you feel it should come back gives me alot of hope.

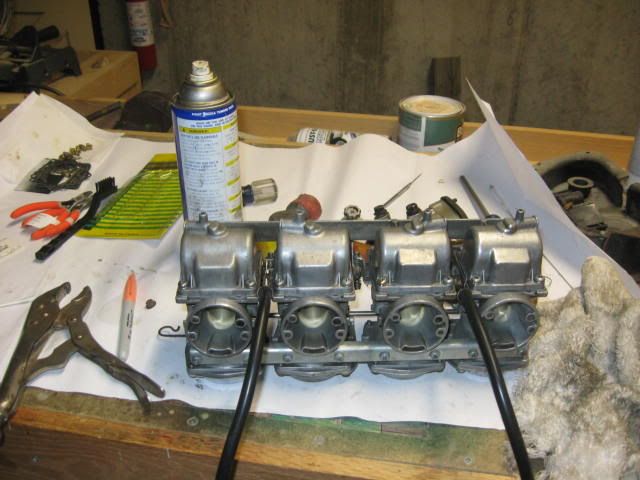
    Carbs are almost back together now. Waiting on new pilot air jets to finish them off. I think I know another reason why the carbs were jetted so rich, the floats were set at the 25-26mm level on the newer style carbs. So, floats are set to 23 mm, 42.5 pilot jets 110 mains across the board, waiting for my 185 pilot air jets to come in. I also found a hole in the diaphram to no 1 carb and patched it up with RTV silicone. Looks like it rubs on a rough spot in the JB weld someone used to patch an uh-oh in the diaphram area of the carb. So I shaved the JB down with a sharp chisel to make it smooth as well.

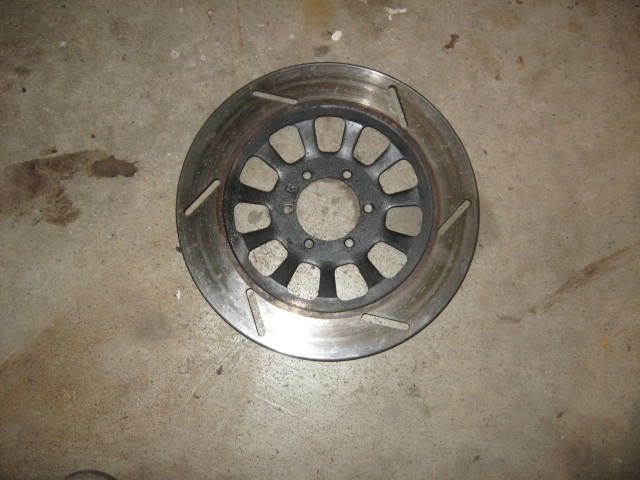
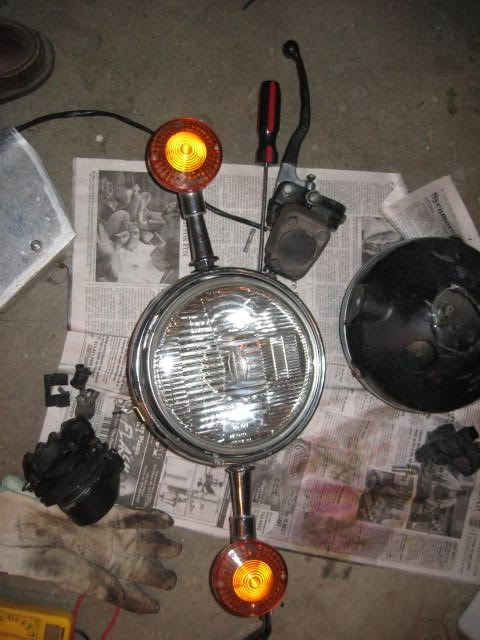
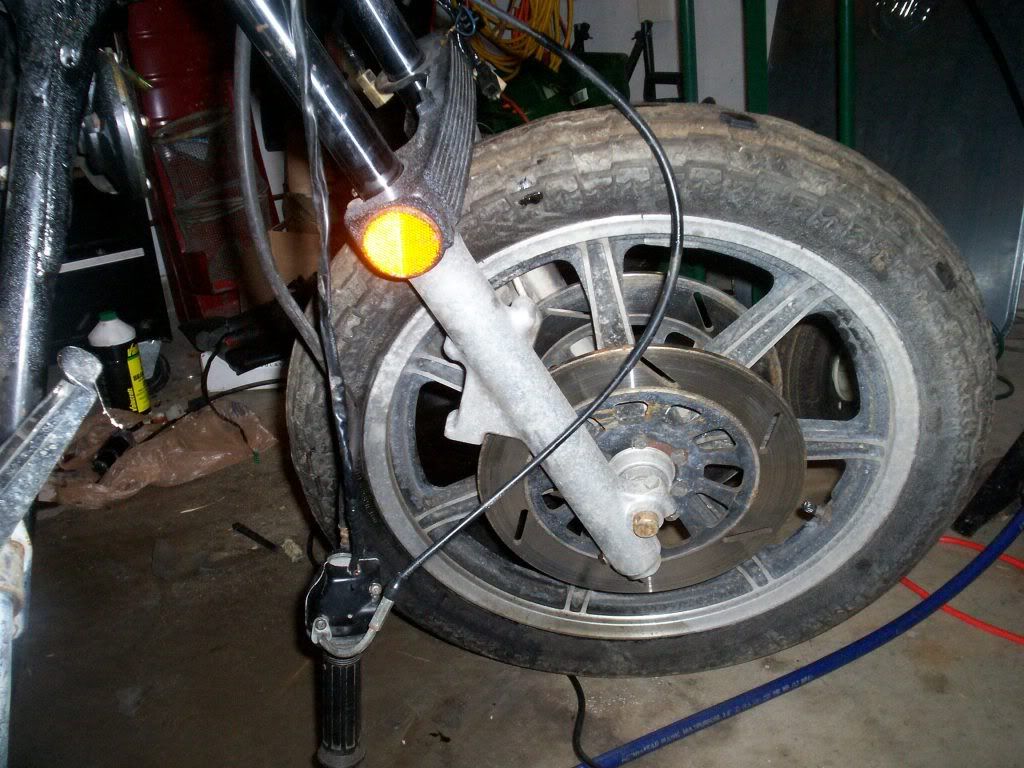
    Also cleaned the front MC out and blew out all the lines with brake cleaning fluid. So the front stoppers are almost ready to go to work. The front pads are bit on the slim side, may wait till spring to buy new ones though. Or at least until I complete my shopping list for PNM parts.
    Life is what happens while your planning everything else!

    When your work speaks for itself, don't interrupt.

    81 XS1100 Special - Humpty Dumpty
    80 XS1100 Special - Project Resurrection


    Previously owned
    93 GSX600F
    80 XS1100 Special - Ruby
    81 XS1100 Special
    81 CB750 C
    80 CB750 C
    78 XS750

    Comment


    • #17
      DGXSER, just a word of advice unless you want unburned fuel go where it's not wanted. Since those are the later carbs(81), better set those floats at a 28mm, unless you want to attach a clear hose to bottom of each carb. run up beside each bowl to get a 3/16" below bowl top. Who knows how many times you'll have to pull carb bank changing to end up correct and same on all four, A REAL PITA to say the least. Ken T. got me squared away on this with the 81 carbs so I wasn't playing a trial and error game. I aslo found with curiosity that at that setting once you compress needle spring by lightly pushing down on float they will measure at 24mm..........hmmm, kinda interesting I thought. Just did this two weeks ago to get mine dialed in dead-on. Once running, your engine (and plugs) will thank you. Keeping the stock air box which I HIGHLY reccomend and stock jetting(110mains,etc.) will put a smile on your face when it comes to tuning, carb sync,etc. Anyway, glad I was reading and saw what was taking place with the scoot, lots of tedious work for sure.
      81H Venturer1100 "The Bentley" (on steroids) 97 Yamaha YZ250(age reducer) 92 Honda ST1100 "Twisty"(touring rocket) Age is relative to the number of seconds counted 'airing' out an 85ft. table-top.

      Comment


      • #18
        Also, that measurement WILL end up being at the bottom rounded part of float because of relationship of float to pinned pivot point. That extra bit of drop makes the measuring point different than on the 80 carbs, which is at the flat part of floats where they attach to metal piece. I would assume that's PARTLY why book reccomends doing the hose thing on the 81's while bike is running. Boy, I can see some real frustration doing that. Guess you could do it that way if your just bored to tears, and want alot of practice pulling a carb bank....lol.
        81H Venturer1100 "The Bentley" (on steroids) 97 Yamaha YZ250(age reducer) 92 Honda ST1100 "Twisty"(touring rocket) Age is relative to the number of seconds counted 'airing' out an 85ft. table-top.

        Comment


        • #19
          Hey Motoman, thanks for the insight. I have another '81 special (Thunderstruck, I have a few names for this one but none are acceptable here at XS11 so far ) I completed the carbs on just about 10 months ago. It was a major torture session due to a stuck mixture screw that I broke an easy out in. Anyway, I set those floats at 23mm +/- .5 mm and the mixture screws are out 2 turns or there abouts. She runs dang good just like that. One day I will get Doug to let me use his colortune and carbtune to see how close I am with my single synch gage and ear/plug color tuning.

          Fortunately this set went alot easier in alot of ways. I was smart enough this time to spray everything generously with PB Blaster BEFORE trying to disassemble and it all came out pretty well. This set was way screwed up by the PO though, had the N151 pilot jets with no holes in them and they were 47.5. Had 112.5 mains, and 170 pilot air jets. Floats were set at 25 mm or more. 
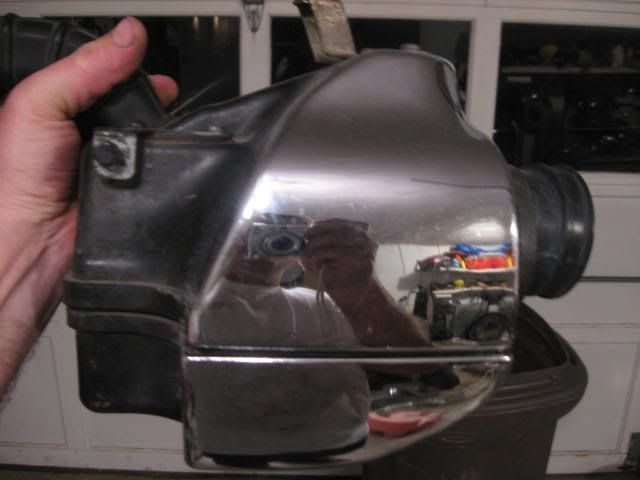
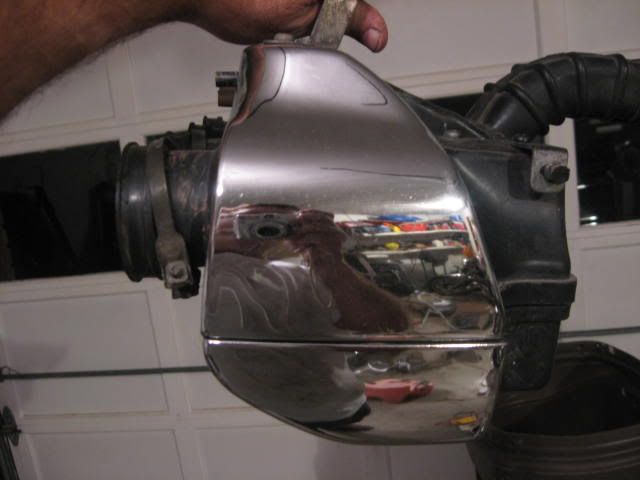
No idea what the heck they were playing at since half of these pieces would make it run rich and the others lean it out. Anyway, I got kits form Georgefix and corrected everything, just waiting on my new pilot air jets to get it all back to stock. And yes, I keep the stock airbox.
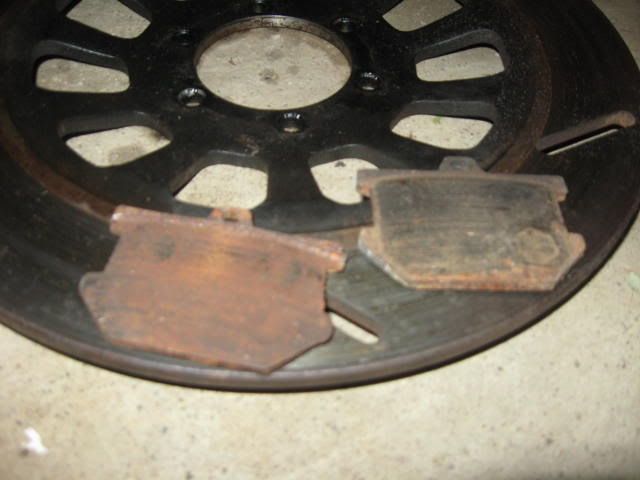
          Gonna go upload pics and post an update on three days or so of effort.
          Life is what happens while your planning everything else!

          When your work speaks for itself, don't interrupt.

          81 XS1100 Special - Humpty Dumpty
          80 XS1100 Special - Project Resurrection


          Previously owned
          93 GSX600F
          80 XS1100 Special - Ruby
          81 XS1100 Special
          81 CB750 C
          80 CB750 C
          78 XS750

          Comment


          • #20
            OK, so since I took a couple vacations days and had no SWMBO around, I spent a good amount of time on the project the last four days and tonight. I have now completed removing, disassembling, cleaning and reassembling all of the braking systems components front and rear. I just need to get some new nuts to cap the top of the rear MC, old ones were rounded off and rusted to the point I will not re-use them. Also pulled the FD off and greased everything up in there, since I had to pull the rear axle (more like drive it out due to rust) to get the caliper assembly off since that stupid phillips head screw would NOT come out. I eventually drilled it out and will not replace it. Worst thing I have seen ( or close to it anyway) so far was the rear brake pads and the rotor. Check out the pads for wear. Yep, that left one is half way through the metal part of the brake pad!! Other one is right at the metal!


            See if you spot the crack in the rotor. There is one there form the edge to the top of one of the slots.


            But, the carbs are almost finished.


            And I have polished up the front and rear fenders reasonably well, I wont be ashamed to ride it to the car wash once I get new brake pads and have it running. They look much worse in these pictures though. Maybe painting is the best option here.


            Front has some deep scratches though, may end up painting them.


            Air box cleaned up pretty good.


            And here is a pic of my score on a headlight and signals, makes the rest of the bike look like trash they are sooo nice. Note the cleaned up front MC and left front caliper. Of course right next to it is the headlight that was on the bike when I got it.


            And here is the backrest and luggage rack the PO had installed by drilling holes in the seat rail and in the back, tied it to the seat rail with hose clamps, but made them look good by wrapping them up in electrical tape!! Anyone want a POS luggage rack and back rest??


            Note the broken flange at the weld!


            Well although it seems like I did more, I can not recall it now! Time for rest and back to work.
            Last edited by DGXSER; 10-26-2009, 09:13 PM.
            Life is what happens while your planning everything else!

            When your work speaks for itself, don't interrupt.

            81 XS1100 Special - Humpty Dumpty
            80 XS1100 Special - Project Resurrection


            Previously owned
            93 GSX600F
            80 XS1100 Special - Ruby
            81 XS1100 Special
            81 CB750 C
            80 CB750 C
            78 XS750

            Comment


            • #21
              Progress has occurred

              Well I have come a long way, but there is so much left to do.

              She really cleaned up well I think


              Ok, so that is Thunderstruck. But the seat is the one form this project bike and it DID clean up quite well, well enough to earn a place on Thunderstruck.


              So, I also started stripping down the exhaust to paint it but found the baffles from one of the mufflers was falling our of the pipe in pieces, so exhaust shopping we go. Varnae has been a great help as he has donated a main switch, shift forks, and the old exhaust off his bike!! What a guy! Will have see about the exhaust though. When I get that far, I'll mount it up and see what I think.

              For now, I went ahead and completed the dremel fix on the gears. As has become typical on this machine, the PO of course used the shift forks to try to hold the bike in gear. I think this may have been the cause for finding the c-clip and washer that holds the oil pump drive gear on in the oil pan!! Fortunately, it did not slide out and get eaten up. The shift forks, well...those are another story, I wondered what was the cause of the metal flakes in the oil pan.


              As mentioned Carl (aka Varnae) to the rescue!! So after much fussing I got the beast to acceot the replacement shift forks. After doing this same repair three times now, it is funny how every time I do it something different becomes the torture session. This time the gears slid in fairly easily, but the shift forks were a long torture session.

              Anyway, I also checked all clutch components and all were within spec including the springs. So, I now have all the pans back on and realatively cleaned up. I also changed all the fluids out from fork oil to final drive oil including the middle drive and engine oil of course.


              I also got the front end torn down for the most part. I will pull the forks out when my headlight brackets arrive so I can mount them, I have both fenders off.

              Front end broken down


              Front wheel , no fender or brakes


              Rear wheel with no fender. I also pulled the rear wheel off and lubed up the Finl drive splines.


              And here are the tins/fenders primed and ready for color selection.


              Well, so far so good. Carbs are ready for the beast, still need to flush the tank out to get rid of the old varnish. Lots of stuff left to do, like clean up the rust spots on the frame and touch up the paint. No bad spots, but more than a couple with mild surface rust.

              Enjoy the pics, will show more as the beast develops.
              Life is what happens while your planning everything else!

              When your work speaks for itself, don't interrupt.

              81 XS1100 Special - Humpty Dumpty
              80 XS1100 Special - Project Resurrection


              Previously owned
              93 GSX600F
              80 XS1100 Special - Ruby
              81 XS1100 Special
              81 CB750 C
              80 CB750 C
              78 XS750

              Comment


              • #22
                Good progress.Did you sand blast the fenders or scuff sand them?
                80 SG XS1100
                14 Victory Cross Country

                Comment


                • #23
                  Rick,

                  I took my palm sander to them with 220 grit, then hand sanded with 220 to get all the nooks and crannies.

                  Waiting to pick a color. My sis-in-law is talking about buying it when I am done for my great nephew (her grandson). If she is serious about it, I want to let them pick the color.
                  Life is what happens while your planning everything else!

                  When your work speaks for itself, don't interrupt.

                  81 XS1100 Special - Humpty Dumpty
                  80 XS1100 Special - Project Resurrection


                  Previously owned
                  93 GSX600F
                  80 XS1100 Special - Ruby
                  81 XS1100 Special
                  81 CB750 C
                  80 CB750 C
                  78 XS750

                  Comment


                  • #24
                    Mighty nice looking head light assembly
                    '80 XS1100 SG
                    Don't let the good times pass you by..grab all you can
                    https://www.youtube.com/watch?v=x_Z4cjUlIo4

                    Comment


                    • #25
                      Very Very nice looking Bill, and thank you for it!! It will make the rest of the front chrome look bad, but not so bad I feel the need to paint it.
                      Life is what happens while your planning everything else!

                      When your work speaks for itself, don't interrupt.

                      81 XS1100 Special - Humpty Dumpty
                      80 XS1100 Special - Project Resurrection


                      Previously owned
                      93 GSX600F
                      80 XS1100 Special - Ruby
                      81 XS1100 Special
                      81 CB750 C
                      80 CB750 C
                      78 XS750

                      Comment


                      • #26
                        The answer comes......

                        Well, after spending today working on another members fine example of XSive machinery, I decided it was time to face my demon on this project and see if she would indeed breath fire from her lungs.

                        I had the carbs mounted and an exhaust that was donated by Varnae mostly mounted. All of the studs are bolted up save one that has a stripped out allen socket. The mounting bolt at the muffler of the four to one is not really close to bolting up, so it is hung from the headers for the time being. I'm still searchingg for new set of bars, so I was postponing mounting the old ones and the needed controls to fire it up.

                        Well, today I got a burst of energy and decided to take the plunge and answer the nagging question, and...........SHE LIVES!!!! Fired up pretty quick and easy on all four!!! Then the hot wire shook loose and it died, but she did run. I also discovered I need to go back into the carbs as one float is leaking. So I turned off the fuel and started it back up and she still ran and throtteld up to 4k without issue and stayed there once I released the throttle...so.. there is work to do yet. But she has proven worthy of the efforts to date! The turd seems more worth polishing today!!

                        Here are a couple picks of her a day or two ago...


                        The front controls prior to remounting the crap bars.....

                        Life is what happens while your planning everything else!

                        When your work speaks for itself, don't interrupt.

                        81 XS1100 Special - Humpty Dumpty
                        80 XS1100 Special - Project Resurrection


                        Previously owned
                        93 GSX600F
                        80 XS1100 Special - Ruby
                        81 XS1100 Special
                        81 CB750 C
                        80 CB750 C
                        78 XS750

                        Comment


                        • #27
                          amazing! i am doing pretty much the same thing!! i am hoping my bike isn't in as rough of shape, but as soon as the weather turns for good, i am tearing into my 1980. should be a ton of fun, new tank, new seat, new bars, going for the bobber look, but i gotta get it to start first...inspiring, please keep adding pictures, i am sure i'll need them for moral support to show it can be done!!!
                          1980 XS 1100 Special (working to be my daily ride)

                          Comment


                          • #28
                            I am looking forward to updates on this project. This is my future with my 1981 Special.
                            dontlikeoc
                            1981 XS1100 Special Edition
                            Alhambra, CA

                            Comment


                            • #29
                              Will keep them rolling as the progress proceeds. Right now I am in waitign for some parts.


                              Speaking of which, does anyone know a source for the 5GLZ34 needle? I have one that is bent and would like to replace it.

                              Thanks for any help.
                              Life is what happens while your planning everything else!

                              When your work speaks for itself, don't interrupt.

                              81 XS1100 Special - Humpty Dumpty
                              80 XS1100 Special - Project Resurrection


                              Previously owned
                              93 GSX600F
                              80 XS1100 Special - Ruby
                              81 XS1100 Special
                              81 CB750 C
                              80 CB750 C
                              78 XS750

                              Comment


                              • #30
                                Don..just think...this will be your baby soon

                                '80 XS1100 SG
                                Don't let the good times pass you by..grab all you can
                                https://www.youtube.com/watch?v=x_Z4cjUlIo4

                                Comment

                                Working...
                                X