Announcement

Collapse
No announcement yet.

Repair Tach and LED bulb conversion

Collapse
X
 
  • Filter
  • Time
  • Show
Clear All
new posts

  • Repair Tach and LED bulb conversion

    This is a copy of the whole tech tip, posted here for any other discussions you guys might want to make!?
    **************************************************

    Okay folks, here's an attempt at a new tech tip! I had the indicator needle break off on my tach, and also due to severe exposure, the face on my tach had gotten quite faded and aged!

    So I decided to try to take it apart and see if I could fix it! With much help from other Xsives, found out how to pry up the lip on the back of the bezel to get the front off! This would be helpful in getting spiderwebs out, fixing a cracked/broken glass, etc.!

    Here's the original gauge, note the broken needle and faded dial!


    Here's the back showing the small lip, and then prying it up with a narrow flatblade screwdriver and finally apart!


    There is a base rubber gasket against the shell, then a plastic spacer, then the rubber mounted glass plate and the bezel.


    Thankfully the neede and spindle STOP internally, there is no surface pin that the needle rests against. To get the needle base off, I used a fork to evenly pry up from beneath it!


    Here are the insides of the gauge after the face plate was removed, note the rotten foam rubber used to separate the light from the fuel/highbeams/neutral indicator lights!


    Next, I took the faceplate and scanned it at 600dpi into my computer, and then used paint to edit it...took quite a while!! This photo shows that the plastic faceplate is transluscent, and the printing easily comes off with alcohol!


    Here's the plate with a new piece of foam rubber attached, and the needle..bottom side showing the little metal counter weight!
    I cut off the old plastic needle, and then fashioned a new one out of clear model car parts plastic, shaped it with my grinding wheel, and had to thin it out a fair amount. The first one I made was too thick...and hit the glass!! I used clear plastic cause light comes out from around the faceplate up thru the needle base to illuminate the needle at night.


    Again, here's the old face plate after it was scanned.


    And here's the new face plate already printed on Full Coverage styled CD sticky labels, then I used a single hole punch to punch out the openings for the lights and center hole! I made both a black version and the dark green!


    And here's the gauge finally assembled and put back together with bezel reinstalled. I used a pair of pliers with lots of duct tape wrapped around one of the jaws to prevent dent marks on the face of the bezel as I was recrimping it back down around the lip/base of the gauge body! I'll clean up the over paint on the gauge glass, but wanted to get it documented quickly! I printed a red strip of sticky label to attach to the top of the indicator needle. I used a dark green color for MY GAUGE since my color scheme is green, and I have a matching green faced 650 140 Speedo. I'll add another few shots of it installed on the bike next to the speedo soon! Hope this helps someone to save some $$ in fixing their own gauge!
    T. C. Gresham
    81SH "Godzilla" . . .1179cc super-rat.
    79SF "The Teacher" . . .basket case!
    History shows again and again,
    How nature points out the folly of men!

  • #2
    TC,
    Your resourcefullness never ceases to amaze me. It's nice to see that you were able to repair and reuse a gauge that most other riders would have given up on and started a search on E-bay or this list for a replacement. Technology is our friend and ally in helping us preserve our antique motorcycles. As a fellow VA native, you know that the 1981 XS-11 qualifies for an antique plate this year, and I will be getting one for my full-dresser as soon as I get the carbs back on. Also, thanks for sharing your solution.
    _________________
    John
    78E
    79 SF (2)
    80 G "The Beast"
    81 H "The Dresser"
    79 XS650 II
    82 650 Maxim
    70 DT-1 Enduro
    66 Honda CL-77 Scrambler
    96 H-D Road King

    "The road to hell is paved with good intentions."

    Comment


    • #3
      Well done! I tried that a couple of years ago - I got to the narrow flat blade screw driver part and that was the end of that.
      Marty in NW PA
      Gone - 1978E - one of the first XS11 made
      Gone - 2007A FJR - the only year of Dark Red Metallic
      This IS my happy face.

      Comment


      • #4
        Great idea. I have a new original speedo addon made in the 80's that turns your speedos into a 160mph unit
        A cd label and paint shop pro sounds like a great idea.
        "We are often so caught up in our destination that we forget to appreciate the journey." "

        Comment


        • #5
          "Bah!... that looks tacky"

          Another fine job there, T.C!
          "Damn it Jim, I'm a doctor, not a mechanic!' ('Bones' McCoy)

          Comment


          • #6
            Geez... what a lousy photo this turned out to be!"

            As I mentioned in a tach post last year....now that the glass plate is off...nice time to put in the everpresent "Skull and
            Crossbones" sticker, or a pic of your dog. (Or SWMBO, if she's still talking to you after you failed to impress her sufficiently on Valentines Day)
            [IMG][/IMG]
            "Damn it Jim, I'm a doctor, not a mechanic!' ('Bones' McCoy)

            Comment


            • #7
              really nice work TC
              Yamaniac
              '79 xs11 sf - WidowMaker, 750 final drive
              '80 xs1100 sg- ENEMY#1 parts bike no title(free)
              '79 f- frame and swingarm (and title)
              '82 yz 490- needs a cylinder, head, & new piston, etc. Got one for sale?
              '88 Honda cbr600- Running, finally! Training bike for swmbo, maybe a stunt bike for me eventually.

              Comment


              • #8
                Great tip, gave me a few interesting ideas. When you pulled the needle off, did the pin come out as well or did the needle come off the pin? I looked at a set of spare gauges (82 XJ with 80MPH speedo) I have at home and there are certainly differences in how they are put together. I was able to get to the gauge faces pretty easily and an now looking at removing the needles. I tried your fork method and I was able to get the needle to move, but the pin seems to be coming up with it. Any ideas on this ?
                1984 XJ1100 - 79 cams, XS850 FD, XS triple tree/euro cafe bars, hydraulic clutch, bar end mirrors, yamaha R1 rear mono-shock
                1972 CL350 - clubmans, Mike's XS coils/condenser, '98 Yamaha R1 rearsets (If I can find some at a decent price)

                Comment


                • #9
                  On Pins and Needles!

                  Hey Rubin,

                  The Pin does slide up a bit, but stops, and the needle hub does come up off the pin, but again, this is the TACH!!!

                  Others have posted about the SPEEDO, and that you will need to mark the pin to ensure it's alignment when you put the needle back on.

                  AND BE VEWY, VEWY CAREFUL removing the needle, it is very delicate plastic. Mine broke during the process, but it was already sunbaked, and extra brittle anyways!

                  The tach has an internal stop point, so once you gently put the needle back on, you can rotate the needle left a full revolution that ensures the pin has stopped turning left, and then realign the needle to zero before pushing all the way down onto the pin!
                  T.C.
                  T. C. Gresham
                  81SH "Godzilla" . . .1179cc super-rat.
                  79SF "The Teacher" . . .basket case!
                  History shows again and again,
                  How nature points out the folly of men!

                  Comment


                  • #10
                    LED bulbs for Gauges!

                    Hey there folks,

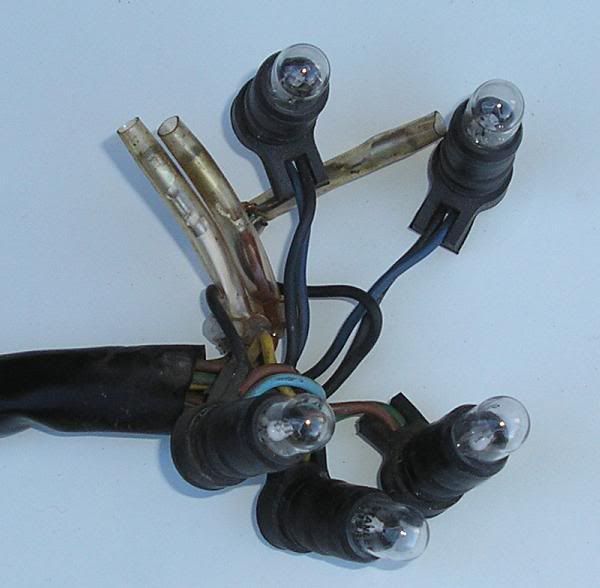
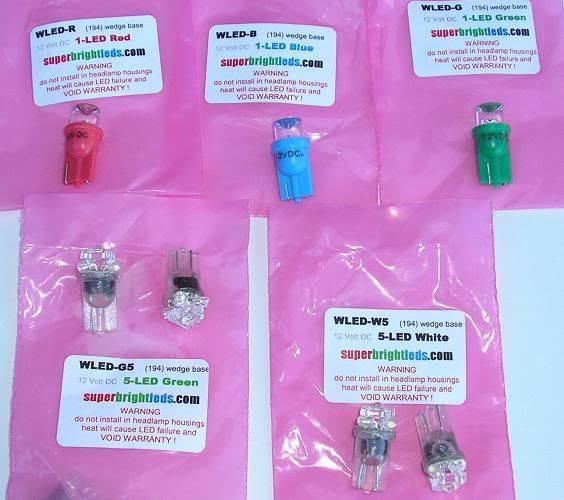
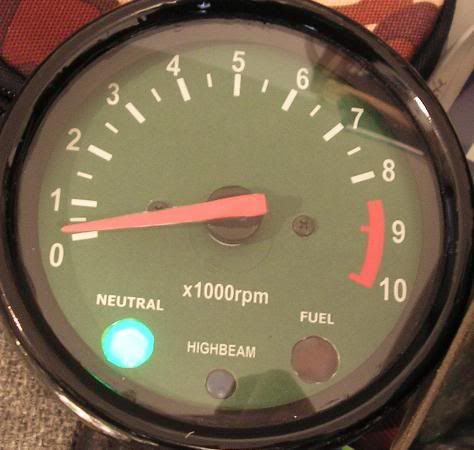
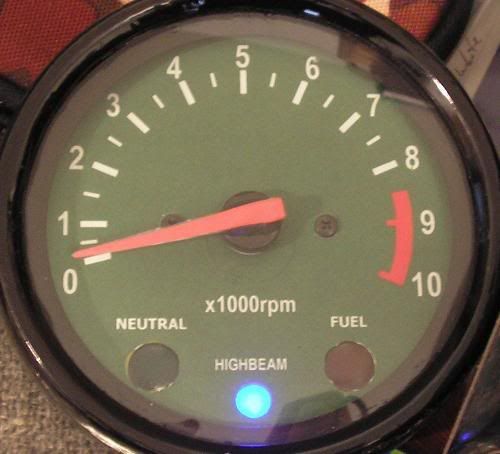
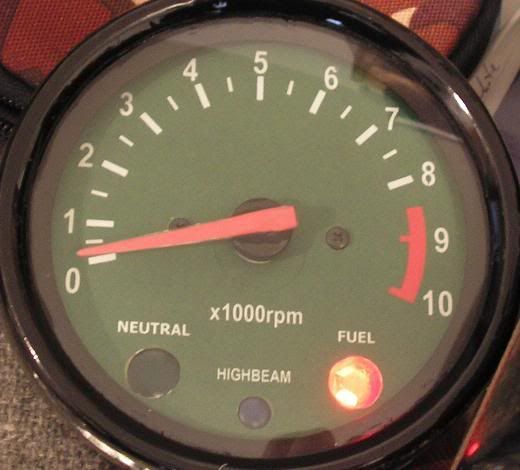
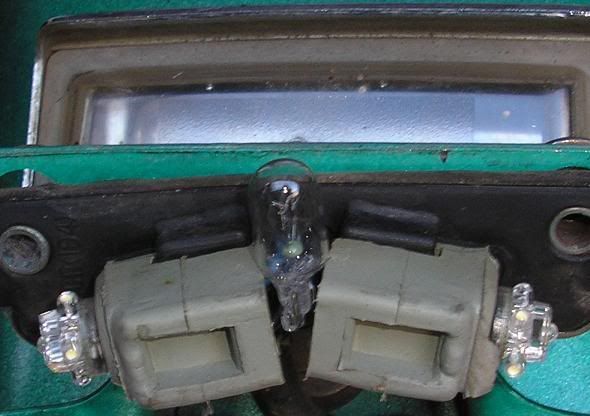
                    I wanted to post a followup to my repair of my tach! With all of this talk about LEDs, I decided to get some to replace the small bulbs in my gauge, the main illumination, the neutral, highbeam, fuel, as well as the license plate lights. Each one draws 4.5 watts, there are a total of 4 main bulbs in the gauge housings, and 2 in the license plate light....for models with one! That's 27 watts, 2.25amps, every little bit helps!

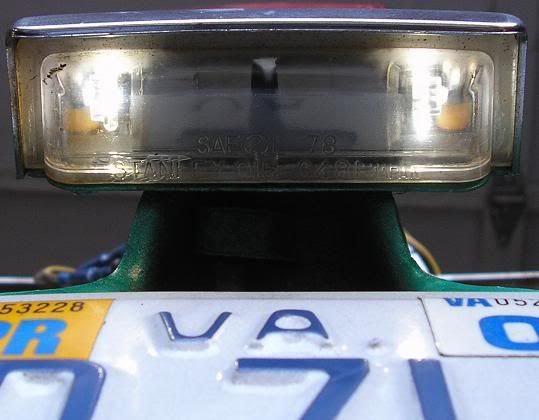
                    These bulbs are from Superbright LEDS. The ones for the neutral, highbeam, and fuel light are single wide viewing angle models. The ones for the main illumination bulbs in the gauges as well as the license plate are 5 leds in one, positioned in a radial pattern to better shine to the side, along with 1 on the end! MY gauge lights are GREEN, but they make this same bulb pattern in white which are what I used in the license plate reflector. The combination of the angled bulbs, and the reflector housing caused plenty of light to be shined onto the plate!

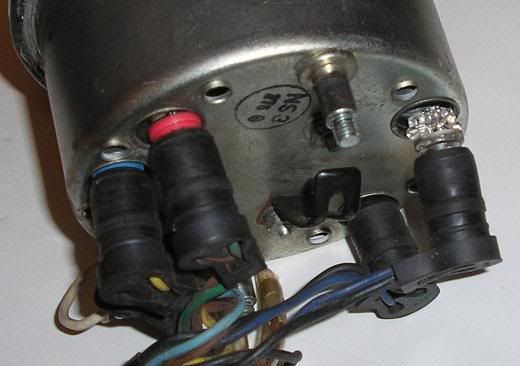
                    The main bulbs sockets are a little smaller than the bulb, but will go into the gauge socket with a modest amount of tilting!


                    The 5LED bulbs are Non-polarity, can be positioned any way and will lite, the smaller single bulbs ARE Polarized, just jumped a 12V source to them to determine which pole was positive, you can tell which pole in the sockets by the colored wires!


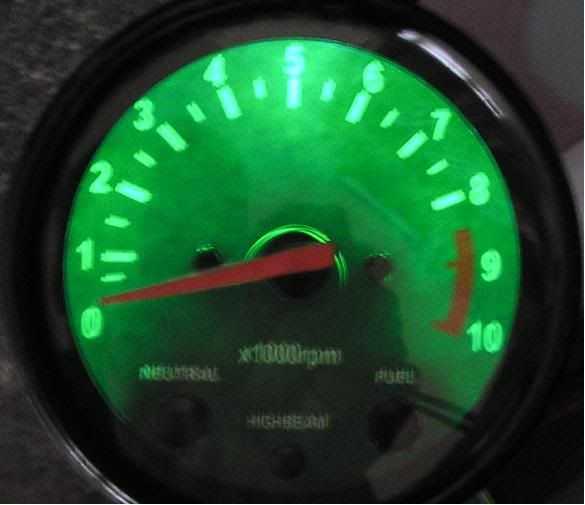
                    This first picture is a tad blurry, had the lights in the room off, camera set itself on slow shutter speed, didn't bother getting the tripod. Notice that niceGREEN GLOW!

                    These others were taken with the room lights on, and you can see how bright they look!


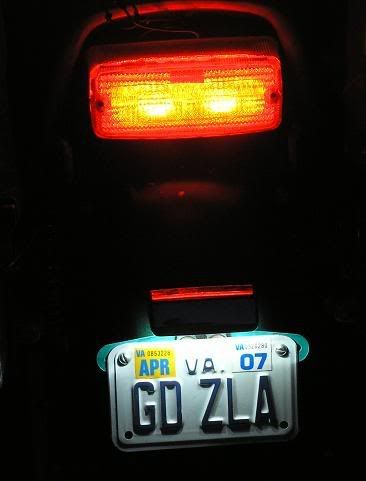
                    Here are the license plate photos.


                    This last one may also be of interest to Webbcraft, the tail light has the large 56bulb LED Truck Array in it, what's interesting is that the clear inner reflector has a dual circular pattern that makes it look like it has 2 bulbs in it, but the rest of the tail light section is fairly well lit as well!
                    T. C. Gresham
                    81SH "Godzilla" . . .1179cc super-rat.
                    79SF "The Teacher" . . .basket case!
                    History shows again and again,
                    How nature points out the folly of men!

                    Comment


                    • #11
                      A Tip for replacing the rubber gauge gasket!

                      Well,
                      First I'm surprised there were no comments on my last entry regarding the LED bulbs for the gauges!?

                      But, being the cheap bast....er .... I mean Frugal owner that I am, I sought a way to repair the gauge rubber Vibration damping O-rings, that sell for $14.99 EACH!!

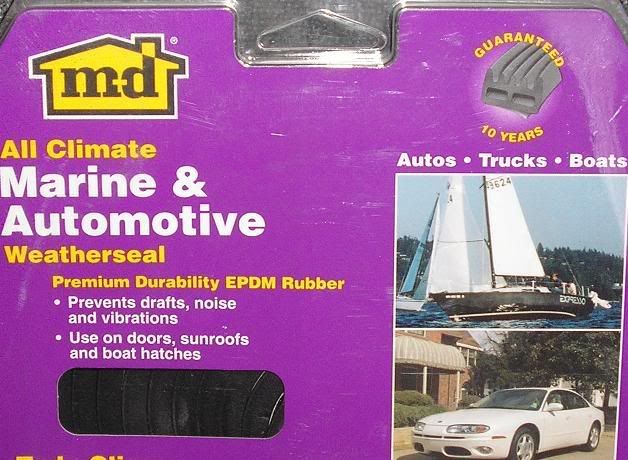
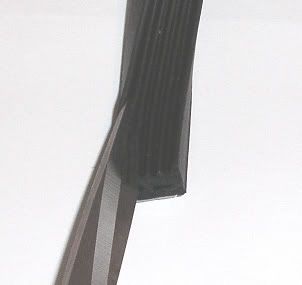
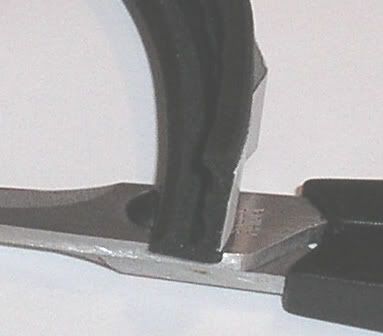
                      Did some shopping at LOWE's, and found this, some EPDM black rubber Auto/Marine WeatherStrip/seal, with self adhesive backing!

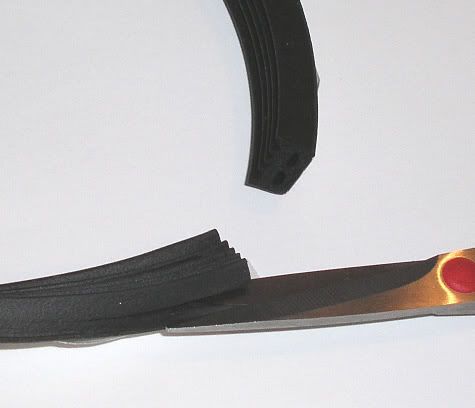
                      If you'll closely at the design you can see 2 channels that run thru it! Well, I realized that I could cut thru the end of the connector to end up with an "L" shaped layer of gasket material!


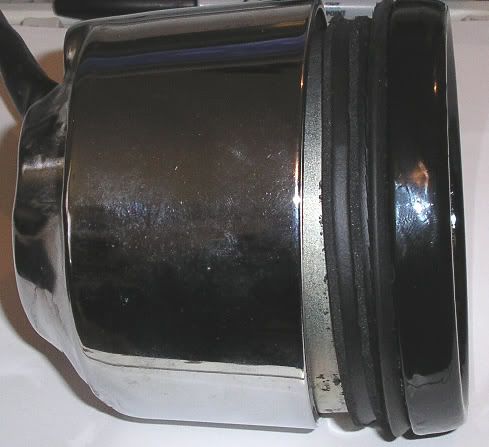
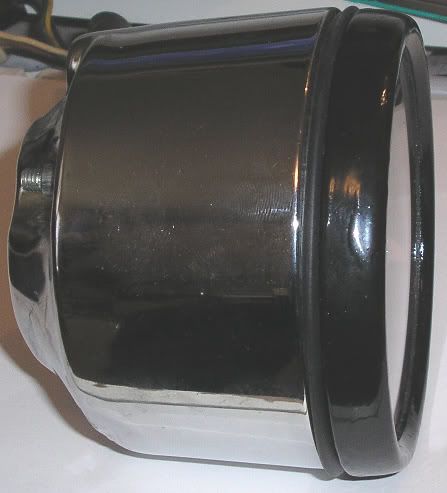
                      Here it is attached to the gauge housing, that self adhesive strip makes it easy to put in place.

                      And here is the gauge snugged down into the chrome cover, with just that nice clean lip sticking out inbetween, which makes a nice cushion, along with the layer that's inside!!


                      Forgot to mention, this stuff was only about $9.00 for a 50' roll!
                      It's guaranteed for 10 years against the weather!! And you have plenty left over for repeated repairs!
                      T.C.
                      T. C. Gresham
                      81SH "Godzilla" . . .1179cc super-rat.
                      79SF "The Teacher" . . .basket case!
                      History shows again and again,
                      How nature points out the folly of men!

                      Comment


                      • #12
                        I forsee a choppers East shop in Portsmouth

                        "Godzilla Choppers"
                        You can have it in any color as long as its green!
                        For the distunguishing TALL rider.

                        Something like that...

                        Gawgeous TC!
                        Marty in NW PA
                        Gone - 1978E - one of the first XS11 made
                        Gone - 2007A FJR - the only year of Dark Red Metallic
                        This IS my happy face.

                        Comment


                        • #13
                          That is just freakin' clever! Nice job!

                          Comment


                          • #14
                            Gremlin bell working overtime!

                            Just an Update,

                            Finally got the headlight and gauge buckets and gauges, turn signals all remounted today. I had a problem with my new Ignition switch I got from PNM! It was the 4 wire style they say will fit the 81SH! The wires were of a much smaller gauge for the 2 MAIN wires, like 16-18ga vs. the 10-12 of the OEM!

                            It is also not wired correctly, the running lights would not work! I then removed it and took the key switch cylinder off of the main base, and was able to remove the bottom wire/connector contact plate, and did the same with my OEM switch. My OEM lock set was damaged, but the wires and contact plate was in perfect condition. I swapped the contact plate with the new one into the new housing, put it back together, and it worked perfectly, lights and all!! AND, I got the heavier gauge wires as well, made me feel much more secure not having to worry about overloading the small wires!

                            I also realized that I had gotten the polarity for 2 of the LED gauge bulbs reversed, cause my neutral light and fuel lights weren't lighting! There's a protective diode in the bulb to protect it from reverse polarity! I noted that when I put it into gear, and then back to neutral, that the light would blink for an instant, and then go off! I could also hear a clicking under the seat! Pulled the seat, found a 4 wire relay, 2 red and white wires, 1 light blue...figured it was from the neutral light, and a black/white wire! I reviewed 2 different wiring diagrams, and could not find this relay anywhere, but it is the neutral light engine NO Start IF clutch not pulled relay! I was able to pull the gauge, reverse the bulbs, and then they both worked as they should! PHEW!!

                            Also, installed the EMGO Pod Filters, the ones with that prominent lip, but due to a little shoulder/rim on the outer edge of the carb inlet bell, the pods only slide on so far, and there's a good 1/4" gap between the ports and that filter lip! I took it out for a short ride, and it seemed to respond properly, and was able to crank it up to redline, so wasn't getting any of the reported choking symptoms that had been reported with this style of pod filter!?

                            I've taken some photos, and after I pull my plugs to verify that I'm not running artificially rich, I'll post the photos showing that gap, and as long as the filters are mounted only up to that little ridge around the outside of the carb inlet bell, then the inner lip should be far enough away to not cause the choking syndrome!

                            Oh, got to actually road test the SS brake lines, and they are AWESOME!!! Almost felt like I would bend my front forks a couple of times when I decided to try to really make them grab!!
                            T.C.
                            T. C. Gresham
                            81SH "Godzilla" . . .1179cc super-rat.
                            79SF "The Teacher" . . .basket case!
                            History shows again and again,
                            How nature points out the folly of men!

                            Comment


                            • #15
                              Oh... lighten up!"

                              First I'm surprised there were no comments on my last entry regarding the LED bulbs for the gauges!?
                              Geez... I didn't see this post 'till tonight.
                              Another outstanding job from the Master Innovator!
                              (Yeah... another damn project I'll have to do just to keep up with him!)
                              This first picture is a tad blurry,
                              's'all right... I've been drinkin' this eve. Looks fine to me.
                              I've already LED'ed me turnsignals and brake lights... what was the cost of the bulbs fer the speedo?
                              "Damn it Jim, I'm a doctor, not a mechanic!' ('Bones' McCoy)

                              Comment

                              Working...
                              X