If this is your first visit, be sure to
check out the FAQ by clicking the
link above. You may have to register
before you can post: click the register link above to proceed. To start viewing messages,
select the forum that you want to visit from the selection below.
If you want to see if the valves are bent, shine a flashlight down the throat of the port, and you will see The Light. Don't need to prostrate youself tho.
Place the head on it's side, and pour some gas in the intake ports. If you have fuel gushing past the valves, they're bent. If some valves just seep a little, they weren't hit and can probably be saved by just lapping them in. Do the same with the exhaust side.
Some machine shops, when doing valve jobs, don't lap them in anymore unless you specifically ask for it. Had to take a head back to one. In front of the kid, I poured a little gas into a port and watched it run all over his bench. "Now... lap them, pinhead."
"Damn it Jim, I'm a doctor, not a mechanic!' ('Bones' McCoy)
See the recent thread VALVES, Andreas may be able to help you out far cheaper than buying new!? As for lapping them, I did mine myself, after I bent a couple fartin' around with the head off, laying on the bench, I had 1 cam in, and was rotating it around to check clearances. I had some rags under the head to keep it protected. I then got the "smart" idea to install the other cam whilst the first was still installed, and rotate it around to check the clearances!! It was off the bike, so NO CHANCE of the valves hitting the pistons, I should be safe! Put the new one in, and used the wrench section of the cam to turn them, didn't feel any resistances during the process. Then, pulled both cams, installed the head, and then the cams, chain, timed it up. And "THEN" noticed that 1 valve seemed to have too much clearance. Looked like I had bent a valve . Pulled the head, ordered the valve, replaced it. Put it back on the engine, torqued, etc.. Then, just for giggles, I did a bench compression test "Just in case".........
found another cylinder from the one I had replaced the valve in had a "BIG FAT ZERO" Pulled the head again. Inspected that cylinders valves, and with the springs out, I spun the valve in the seat......wobble, wobble So....ordered another Valve, replaced it. Reassembled engine 3rd time, finally got good comps across all four.
I had slightly bumped one of the valves with the opposing valve while turning the cams UNSYNCHED....appears there's not enough room between valves for both to open fully at the same time!!!
Mine had around 50K when rebuilt, and was able to get good 1/8" thick grey sealing line around each seat and valve after lapping them. Got 180psi on all four after rebuilt=big bore !!
So....you should be able to lap them yourself easily. I made a valve spring compression tool out of a piece of pipe and a large C-clamp. There are photos in the tech tips on different types you can fashion cheaply. So...you may NOT NEED to replace ALL of the valves, just the ones that are truly bent!!! You can do it!!
T.C.
T. C. Gresham
81SH "Godzilla" . . .1179cc super-rat.
79SF "The Teacher" . . .basket case! History shows again and again,
How nature points out the folly of men!
You can do it... allll night long! lol.
I didn't have time to mess with it tonight. For some reason, wife thought I needed to go to my son's Christmas program. She getting a little miffed that she can't park her car in the garage right now.... YammerHammer parts all over. I don't know how or when, but every valve has been against the pistons. If they (The cams) weren't turning... how did I get em all?? It had to be at some other point in the process, and I don't know when.... and it has me a little nervous to do the next one. I don't happen to have any other spare heads lying around after this one. Everything in the bottom end looks new.... Cam gear, chain guides, ... so I am going to assume the mileage of 6200 miles on the bike is right. Very little carbon on the pistons or exhaust ports. So... screwed up a new head! lol. I had no idea valves were as high as they are. Roughly 400 bucks just for valves and shipping... when I bought a whole motor for $130?? lol. Kinda like how you can buy an old boat and motor waaayyy cheaper than just trying to buy a motor.
I am going to just set the old head aside for now and worry about that later. I want to get this thing back together while I still remember where all the nuts and bolts go.... I think. lol. . Just waiting on the cam chain from PartsnMore, and I need to check the shim clearance on the new head before I take off the cams. If it's ok.. I may not even remove them... worried about not knowing how I bent the others. Just spent 30 bucks on new shims for the junk head too... sigh. On top of all that... my frikkin computer crashed last night. Had to steal the wifes...
Tod
Try your hardest to be the kind of person your dog thinks you are.
You can live to be 100, as long as you give up everything that would make you want to live to be 100!
Current bikes:
'06 Suzuki DR650
*'82 XJ1100 with the 1179 kit. "Mad Maxim"
'82 XJ1100 Completely stock fixer-upper
'82 XJ1100 Bagger fixer-upper
'82 XJ1100 Motor/frame and lots of boxes of parts
'82 XJ1100 Parts bike
'81 XS1100 Special
'81 YZ250
'80 XS850 Special
'80 XR100
*Crashed/Totalled, still own
All this talk about lappin' valves has me thinkin' ... Do I dare provoke a discussion on lapping techniques? (No drawings this time, I promise)
Got tired of spitting on the suction cup (that never sticks), and then spinning the stick like a Boy Scout trying to earn his Merit Badge for firestarting.
Here goes... Put some fine lapping compound on the valve and pop it in the head. Slide a coupl'a inches of fuel line over the top of the valve stem. Slide the other end of the fuel line over a drill bit, and with one finger holding the valve to the seat, zap the drill a few times. (Note: I said "zap"... not "Spin the B'Jesus out of it) Push the valve out, clean and inspect. Repeat as necessary till the face looks right. (Doesn't take much) Take the valve out... clean it and the valve seat. Reinstall the valve, and holding it in place with your finger, pour some fuel in the port and check for leakage.
Thoughts? Comments? Poisoned darts?
"Damn it Jim, I'm a doctor, not a mechanic!' ('Bones' McCoy)
Well.... poisoned darts first... cause we like to watch ya dance around. My book has a pretty detailed section on lapping that I can type here if anyone is interested. I like the gas line trick though. It talks about getting the width of the seat hitting the valve just the right width, and using either the 30 degree or 45 degree grinder to get the seat right on.
So Pro..... ya mean we don't hook the gas hose to the valve stem and spin it till we see sparks fly?? Or until your finger is bleeding from the valve spinning on it while you hold presure? Man, you know how to take the fun outta turning a wrench.
Tod
Try your hardest to be the kind of person your dog thinks you are.
You can live to be 100, as long as you give up everything that would make you want to live to be 100!
Current bikes:
'06 Suzuki DR650
*'82 XJ1100 with the 1179 kit. "Mad Maxim"
'82 XJ1100 Completely stock fixer-upper
'82 XJ1100 Bagger fixer-upper
'82 XJ1100 Motor/frame and lots of boxes of parts
'82 XJ1100 Parts bike
'81 XS1100 Special
'81 YZ250
'80 XS850 Special
'80 XR100
*Crashed/Totalled, still own
Everytime I cut myself, I make sure to drip a little blood down the carbs... sacrificial offering to the Gods, sort of. This appeases their anger, and brings their favor. Bikes always fire first time after that!
"Damn it Jim, I'm a doctor, not a mechanic!' ('Bones' McCoy)
I just took the head off of the extra motor I had, and it has 3 extra studs and bolts on the backs side that screw the head down to tohe jugs that my XJ didn't have. The motor is from an XS. Is there any problem with just removing these studs from the head? They look the same besides that, and there's no room on the cooling fins of the jugs for them to go.
Besides that, this head was in decent shape. A little rust in one cylinder and more carbon than mine had, but nothing excessive and the shims were pretty close. I happened to have all that it needed except for one. When I pulled the bucket out of the #1 intake, it had some slight scoring on the sides. Think I should just leave it alone, or try to use one of the ones out of my first head? I didn't know how much of a matched set these things are. I didn't have any extra gas to pour down the throats and see if they leak, but I will do that tomorrow.
I had TC in mind when I checked the shims. I took the exhaust cam out... checked the intakes. Took the intakes out...installed the exhaust and checked them. Being extra careful this time... paranoid. Not gonna even put them back in until I get that chain and the head put on. Was sure hoping that chain would get here today... oh well.
Tod
Try your hardest to be the kind of person your dog thinks you are.
You can live to be 100, as long as you give up everything that would make you want to live to be 100!
Current bikes:
'06 Suzuki DR650
*'82 XJ1100 with the 1179 kit. "Mad Maxim"
'82 XJ1100 Completely stock fixer-upper
'82 XJ1100 Bagger fixer-upper
'82 XJ1100 Motor/frame and lots of boxes of parts
'82 XJ1100 Parts bike
'81 XS1100 Special
'81 YZ250
'80 XS850 Special
'80 XR100
*Crashed/Totalled, still own
.. trbig, if it were me in your position, i would put all of the valves from your parts head into your newer head, using all of the parts that i could from the motor with the least miles on it, on the motor i'm going to use.. make sure you lap them in good and put in new valve seals, you were going to change the valve seals weren't you?
I just reviewed the parts fiche for the XJ and the XS. I don't remember any extra studs for the XS head, aside from the one in the center of the front and rear, where you have to put nuts on from underneath to secure it there, vs. the rest of the head cap acorn style nuts on the top!? The XJ show the 4 ports between the head and the jugs which are for the YICS system! So..I don't know what 3 extra studs you're speaking of, a photo would be helpful!
Prom, sounds like a nice technique, but I didn't have much if any trouble keeping the rubber suction cup against the valve. And when doing it by hand, I could feel the grit slowly reducing with the successive rotations of the lapping tool, which helped me to know to stop, then pull up on the valve to draw more lapping compound down inbetween the valve and seat, and then reapplied the tool and a second round of lapping. Then pull the valve and inspect the seat and valve for evidence of that nice smooth even "grey" line created by the lapping process. Also, hand lapping allows for easy direction reversing, which I think would make the grinding process more evenly destributed, whereas it's a bit more difficult to reverse the drill direction that quickly. Then again, same direction lapping/ grinding may be totally alright!?
Unless the XS head is from the later year models, 80-81, then the valves wouldn't fit the XJ head. But if it is, I agree that it might be better to use the XJ head!
T.C.
T. C. Gresham
81SH "Godzilla" . . .1179cc super-rat.
79SF "The Teacher" . . .basket case! History shows again and again,
How nature points out the folly of men!
Unless the XS head is from the later year models, 80-81, then the valves wouldn't fit the XJ head.
.. oops yeah, what TC said, i forgot to mention the part about the 78-79 heads have smaller valves.. i hope you got lucky.. if you didnt check with Andreashweiss, he probably has the ones you need, i hear he is a really good person to deal with.
.. i use the fuel hose on the valve stem way to lap in the valves also but not the power tool, i just like to feel whats going on
OK TC.
I have no problem with pictures, but have no idea how to get them on here. I read the posts about posting to another website that they let you use, but also see the pics directly in some posts.
Is there a way to measure the valves by just measuring the bottoms of them... width wise?
I guess I need to look more closely at the head. In my XJ manual, it mentioned the 3 studs that I talked about... saying to remove them, but mine didn't have them. I thought maybe just somewhat of a generic thing and didn't pay it much attention. Maybe a mess up at the factory? I have an old 88 GMC 4x4 that has several things that don't match it. U-joints and front brakes are from 2 wheel drive models.... someone get bored or running out of parts on the assembly line and got an "acceptable replacement"?
Honestly, I had just planned to run the head as-is. I have no knowledge of breaking down a head. Almost sounds like I need to though. There is an XJ head on Ebay for 50 bucks right now.. but can't get the guy to email back with a shipping quote yet.
If all the ports line up, I just thought about slapping it on. Doesn't sound like that is the general consensus on here though.
Try your hardest to be the kind of person your dog thinks you are.
You can live to be 100, as long as you give up everything that would make you want to live to be 100!
Current bikes:
'06 Suzuki DR650
*'82 XJ1100 with the 1179 kit. "Mad Maxim"
'82 XJ1100 Completely stock fixer-upper
'82 XJ1100 Bagger fixer-upper
'82 XJ1100 Motor/frame and lots of boxes of parts
'82 XJ1100 Parts bike
'81 XS1100 Special
'81 YZ250
'80 XS850 Special
'80 XR100
*Crashed/Totalled, still own
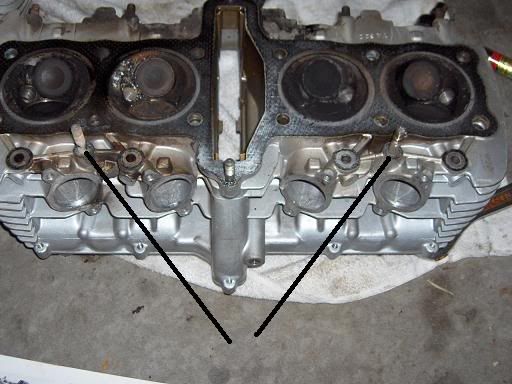
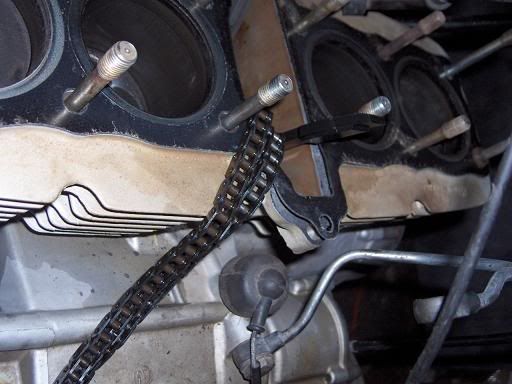
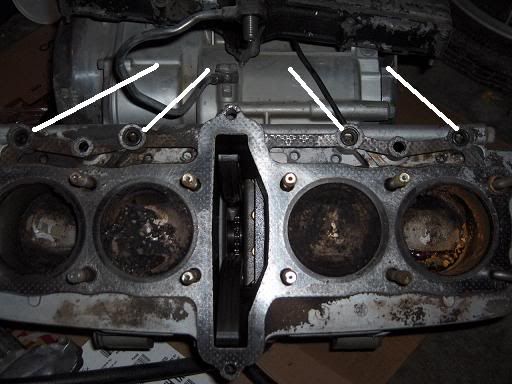
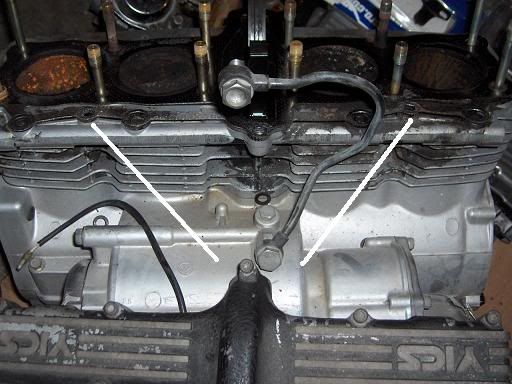
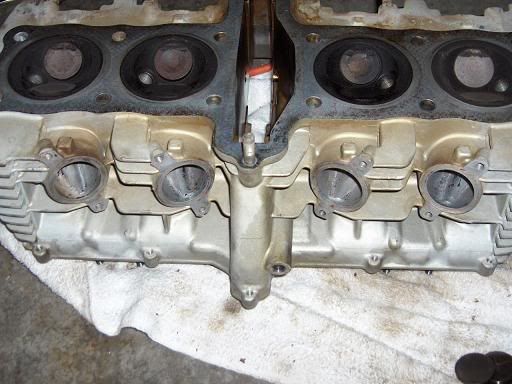
I Hope I get this right. It looks like I have a problem. I measured the faces of the intakes, and the valves on my XJ are slightly smaller than the ones on the 2nd head, so... no swapping valves. I looked closer at the head and it was immediately noticeable what the 2 other (Sorry I said 3 before) studs are for.
Orig Head:
2nd Head
The 2nd motor has a tube connecting the intakes between the carb and the head.... burning fumes from the head?
Original Motor
2nd Motor
So now what?? Punt? Can the head be used still? It doesn't look they would go to anything or hurt anything by puting them on the original motor. Just rebuild my original head? Funds getting low... so when answering, keep that in mind. I don't like the looks of all the rust in the cylinders of the 2nd motor, so don't wanna swap them. Looks like it got rained on without spark plugs. Mic the jugs, hone and swap them then use 2nd head? with matching jugs?
Tod
Try your hardest to be the kind of person your dog thinks you are.
You can live to be 100, as long as you give up everything that would make you want to live to be 100!
Current bikes:
'06 Suzuki DR650
*'82 XJ1100 with the 1179 kit. "Mad Maxim"
'82 XJ1100 Completely stock fixer-upper
'82 XJ1100 Bagger fixer-upper
'82 XJ1100 Motor/frame and lots of boxes of parts
'82 XJ1100 Parts bike
'81 XS1100 Special
'81 YZ250
'80 XS850 Special
'80 XR100
*Crashed/Totalled, still own
The tube you're looking at is the YICS (Yamaha induction control system) apparatus. It serves to balance out the vacuum between the four intakes so each carb pulls the same. That's why these XJ motors need a YICS tool for syncing the carbs. The tool blocks off the YICS passage, isolating each carb so it can be sync'd to its brothers. Notice the YICS stamping in the valve cover! You can still mount an XJ head and cylinders onto an XS crankcase.
Comment