Announcement

Collapse
No announcement yet.

saddlebags

Collapse
X
 
  • Filter
  • Time
  • Show
Clear All
new posts

  • #16
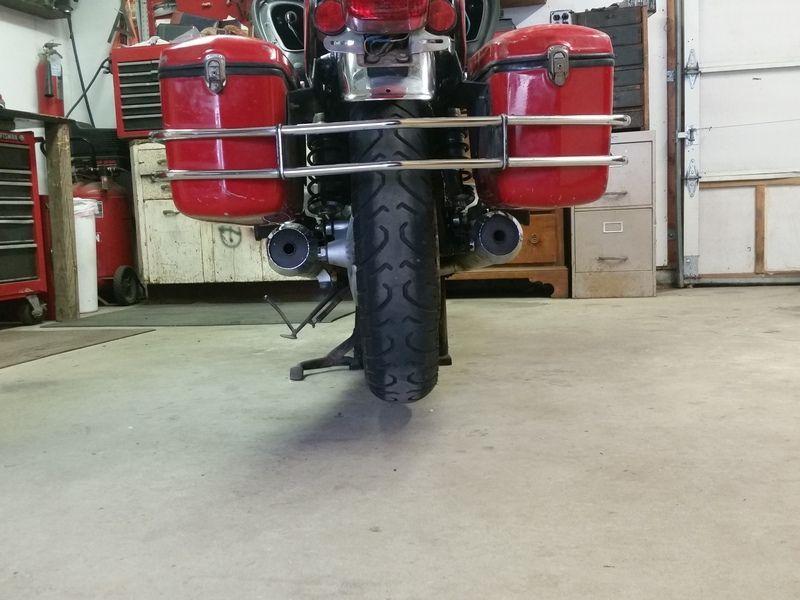
    Well I got them mounted up. Not too bad, not perfect but will work.

    1979 xs1100sf black.
    1973 Harley fx.
    2005 Honda 450x.

    Comment


    • #17
      [IMG][/IMG]

      Odd how they fit on the standard perfectly.....

      -=Phyber
      78 E XS11
      69 CB450 K1
      69 TR6c Triumph (650)
      69 Norton Commando S (750)
      99 Moto Guzzi V11 Bassa
      75 XS650 chopped (board track racer)
      2014 VStar 950 tourer

      Comment


      • #18
        Congratulations!

        Originally posted by kboehringer View Post
        It can NOT be done with the brackets you have there.
        Tim,
        Obviously you've made it work in a way that you like.

        It would seem clearance was maybe just a little bit better for the chrome pull bar on the '79 than it is on the aluminum bar of the '80+. Mine had a bit of a droopy look that several had commented on. Once I pushed the bags upward as much as was possible, I realized I could no longer get the seat off without significant trouble (removing the entire bag system).

        If I didn't already toss it out, I may have one of those turn signal bars that are typically used with that style bag..... Unless you have another plan for the turn signals?

        KURT
        Kurt Boehringer
        Peachtree City, Georgia

        1970 - CT70K0 - Mini-Trail
        1978 - SR500 - Thumper
        1979 - CT70H - Mini-Trail
        1979 - XS1100SF - Pensacola
        1980 - XS850SG - Rocky
        1980 - XS1100SG - The Ugly Duck
        1980 - XS1100SG - Mayberry Duck
        1981 - XS1100SH - DEAD Duck Cafe'
        1981 - XJ550 Maxim - Nancy's Mini-Max
        1982 - XJ650 SECA - Hurricane
        1986 - FJ1200 - Georgia Big Red
        1992 - FZR1000 - Genesis
        2016 - FJR1300A - Montgomery

        Comment


        • #19
          Thanks Kurt for the offer but I made a bracket that mounts off of the tail light and license plate mount.
          Now that I have them fit, it is time for paint. I have always been horrible at paint, rattle can. I have never really attempted a professional job. Can anyone give me a detailed tutorial on how to paint these. From the type of gun to get,( cheap harbor freight) to the type of paint materials to get. I want them to look good. And then if it turns out OK, maybe attempt to paint the tank and side panels some time down the road.
          Tim
          1979 xs1100sf black.
          1973 Harley fx.
          2005 Honda 450x.

          Comment


          • #20
            PPG Paint

            Originally posted by timktm View Post
            From the type of gun to get,( cheap harbor freight) to the type of paint materials to get.
            Tim,
            I do all my own painting with PPG Automotive Paints. My skills are better than MOST amateurs but not nearly as good as 90% of the professionals. I would be happy to provide the necessary pointers....BUT.... you will spend about $200.00+ on supplies (assuming you already have a decent air compressor) just to be ready to paint. That includes a cheapo gun from Harbor Freight. Honestly, HF has a couple "DECENT" guns that I use regularly for about $15 each. They are NOT great quality but it costs less to use 'em a couple times and toss them in the trash when they get a little dirty. The chemicals needed to clean the gun cost more than the guns!

            It is very possible some small body shop in your area would shoot these for you for about that price or even less. Might want to check that first?

            KURT
            Kurt Boehringer
            Peachtree City, Georgia

            1970 - CT70K0 - Mini-Trail
            1978 - SR500 - Thumper
            1979 - CT70H - Mini-Trail
            1979 - XS1100SF - Pensacola
            1980 - XS850SG - Rocky
            1980 - XS1100SG - The Ugly Duck
            1980 - XS1100SG - Mayberry Duck
            1981 - XS1100SH - DEAD Duck Cafe'
            1981 - XJ550 Maxim - Nancy's Mini-Max
            1982 - XJ650 SECA - Hurricane
            1986 - FJ1200 - Georgia Big Red
            1992 - FZR1000 - Genesis
            2016 - FJR1300A - Montgomery

            Comment


            • #21
              I have to tell you, in the past when I had small projects I needed painted I never found anyone in my area willing to do it. Painters are a weird bunch from what I have experienced. I do have a compressor, a place to paint, etc.
              Tim
              1979 xs1100sf black.
              1973 Harley fx.
              2005 Honda 450x.

              Comment


              • #22
                Kurt,
                I wasn't calling you weird, hahaha. Seriously I would like your advise on paint work.
                Tim
                1979 xs1100sf black.
                1973 Harley fx.
                2005 Honda 450x.

                Comment


                • #23
                  PPG ShopLine Paints

                  Originally posted by timktm View Post
                  Kurt,
                  I wasn't calling you weird, hahaha. Seriously I would like your advise on paint work.
                  Tim
                  Tim,
                  Don’t worry, I wasn’t insulted. I don’t consider myself a painter, just a guy that paints his own stuff fairly well.

                  Now I’m going make some suggestions that some with disagree with and others would like to expand upon. That’s fine either way. I’ll tell you how “I” would go about this in an economical way with good results. I know some paint stores will mix your paint for you and put it in a spray can. Seems easy but the results I’ve seen are NOT on the level of work I have been able to do with the few items necessary to use a spray gun with all the control not available from the rattle can.

                  First, I prefer PPG paints. They have a sub-line called “SHOP LINE” this is economical and designed for smaller shops and do-it-yourselfers. It’s not too complicated and not too expensive.


                  Assuming you don’t have any BARE metal and the base paint is FAIR (no chips or dings, no significant deep scratches) you CAN get away without the cost of primer. Stay Far Far away from trying to prep with “RATTLE CAN PRIMER” you’re better off without any than to mix professional top-coat paints with some B.S. canned off-the-shelf primer. Been there, done that, won’t EVER do it again!

                  I also prefer SINGLE STAGE paint. Yes, base/clear is better in many ways but is also nearly double the price. I’ve done both. For a tank, side covers, and a couple bags it’s not worth it to me. AT THIS TIME. That’s the beauty of PPG single stage, you CAN use the clear over it at a later time if you prefer…….

                  Here’s what you need and some approximate costs. These are the BARE essentials:
                  1. Respirator – NOT A F’N Dust Mask a RESPIRATOR! - $25. use it, keep in bag when not in use. After 90 days toss it in the trash & get another. You do NOT want to breathe auto paint.
                  2. PPG ShopLine Paint – PINT – About $35 depending on color selected (reds are more $). This is enough paint to do the job 3 times!
                  3. PPG ShopLine – MEDIUM Top Coat Hardener ½ Pint – About $20
                  4. PPG ShopLine – MEDIUM Reducer – 1 Quart (Used for clean-up Too) $25
                  5. Mixing Cups, Stirs, Misc. $10
                  6. Harbor Freight – HVLP GUN (Photo) $15 on sale
                  7. Harbor Freight – Moisture Trap (Red attachment) $5
                  8. Wet Sand Paper (600) $5


                  I'll continue this in a bit.....

                  Sincerely,
                  KURT
                  Kurt Boehringer
                  Peachtree City, Georgia

                  1970 - CT70K0 - Mini-Trail
                  1978 - SR500 - Thumper
                  1979 - CT70H - Mini-Trail
                  1979 - XS1100SF - Pensacola
                  1980 - XS850SG - Rocky
                  1980 - XS1100SG - The Ugly Duck
                  1980 - XS1100SG - Mayberry Duck
                  1981 - XS1100SH - DEAD Duck Cafe'
                  1981 - XJ550 Maxim - Nancy's Mini-Max
                  1982 - XJ650 SECA - Hurricane
                  1986 - FJ1200 - Georgia Big Red
                  1992 - FZR1000 - Genesis
                  2016 - FJR1300A - Montgomery

                  Comment


                  • #24
                    Excellent so far, I think I may need to do the primer step though. At least when I get to doing the tank.
                    Tim
                    1979 xs1100sf black.
                    1973 Harley fx.
                    2005 Honda 450x.

                    Comment


                    • #25
                      Painting 101.

                      Originally posted by timktm View Post
                      Excellent so far, I think I may need to do the primer step though. At least when I get to doing the tank.
                      Tim
                      Tim,
                      The primer stage will add three more items (the Top Coat reducer can be used with the under coat as well)
                      1.) High Build Primer - Quart - About $35 (Typically a LITTLE more than the paint)
                      2.) Under Coat Hardener - Pint - About $20.
                      3.) ANOTHER GUN - $15 I have a gun for paint and a gun for primers. To avoid contamination and because the PRIMER is much harder to clean.... I don't use the same guns. The primer is also faster drying.....

                      The most important part of painting yourself (you've heard it before) preparing the surface! Now, I suggested you could get away without primer and you CAN.
                      • The biggest problem is OILY fingers and contamination from other sources.
                      • Clean the surface with mild soap & water, I Prefer DAWN dish liquid as it really cuts the crap off. You should clean to the point of having a WATER BREAK FREE SURFACE. What that means is when you hose it down the water falls off the piece in a sheet without stopping anywhere on the surface.
                      • Once cleaned, wet sanding with 600 going with the contours of the piece. Not in circles and funny designs. Try to sand with the contours/lines of the piece(s). Your NOT trying to remove all the paint just give your Top Coat the ability to grab.
                      • Throughout this sanding you're still watching the water roll off making sure there is no breaks in the sheeting of the water off the piece.
                      • Once dry, look for areas that you missed (they're still shiny). Repeat until it's all had a little bit of sanding to promote good adhesion.
                      • Don't touch them again without rubber gloves on!

                      MORE PREP:
                      • You need a bare MINIMUM of 70 degrees for a couple hours warmer is better.
                      • Personally, I paint OUTSIDE on the back porch. Painting in the Garage/house makes for a real mess (been there, done that, won't do it again!) A nice sunny day and you're all set!
                      • Get your pieces where you can get 'em all without moving them. Once sprayed you're gonna need to leave 'em alone for a couple hours. They will be dry to the touch in an hour of so (depending on temps) but won't be completely dry for A WEEK before you can consider buffing them.

                      PAINT:
                      • You'll mix the paint (4:1:1) Paint: Reducer: Hardener - PPG mixing cups are indispensable for this. I'd mix a TOTAL of 6oz. That's PLENTY for those bags.
                      • Get a piece of paper, old box or something to PRACTICE on.... The HF guns have a CRAPPY regulator screw (on the bottom) and the thing changes on its own constantly... Get the thing set so you get a nice smooth even pattern with about 10# pressure.... It's just a mild HISSSSSS. Play with it! You've got plenty of paint so you can always mix a little more.... The pattern width is adjusted on the side of the gun, the screw on the bottom adjusts overall pressure. You want about a 8-10" wide pattern....
                      • It's better to put on TOO little than too much!!!!!
                      • ALWAYS maintain the SAME relative distance from the pieces. NO Swinging the gun in an arc. SMOOTH EVEN Strokes. Usually about 12" from the piece. Keep the distance consistent.... UNLESS YOU LIKE RUNS AND UNEVEN PAINT.
                      • Spray all the edges of your pieces LIGHTLY.... you can always go back in 15 minutes.
                      • Spray the main body LIGHTLY.....
                      • Wipe the gun tip with a rag with some reducer on it & WALK AWAY....Get a Coke... whatever...... 15 minutes BREAK
                      • DOUBLE-CHECK the gun on your scrap piece to make sure it didn't change... This is absolutely necessary for a HF Gun!
                      • Hit it again..... LIGHTLY..... If it doesn't cover to your satisfaction. WALK AWAY again for 15.
                      • You can continue to go back & forth until it's nice. The 15 minute breaks give the paint time for the reducer to evaporate off and reduce the possibly of drips & runs due to trying to put on too much at one time.
                      • Once you're happy.... GO AWAY for two hours and leave it the heck alone....


                      More later........

                      Kurt
                      Last edited by kboehringer; 03-26-2016, 07:14 AM. Reason: spells
                      Kurt Boehringer
                      Peachtree City, Georgia

                      1970 - CT70K0 - Mini-Trail
                      1978 - SR500 - Thumper
                      1979 - CT70H - Mini-Trail
                      1979 - XS1100SF - Pensacola
                      1980 - XS850SG - Rocky
                      1980 - XS1100SG - The Ugly Duck
                      1980 - XS1100SG - Mayberry Duck
                      1981 - XS1100SH - DEAD Duck Cafe'
                      1981 - XJ550 Maxim - Nancy's Mini-Max
                      1982 - XJ650 SECA - Hurricane
                      1986 - FJ1200 - Georgia Big Red
                      1992 - FZR1000 - Genesis
                      2016 - FJR1300A - Montgomery

                      Comment


                      • #26
                        Very good write up, I have a moisture remover at the filter, but I think I will get a small one at the gun like you showed too.
                        79 XS11

                        Comment


                        • #27
                          Air Filtration....

                          Originally posted by Bartman View Post
                          Very good write up, I have a moisture remover at the filter, but I think I will get a small one at the gun like you showed too.
                          Bartman,
                          Those little eliminators have saved my butt a couple times. 
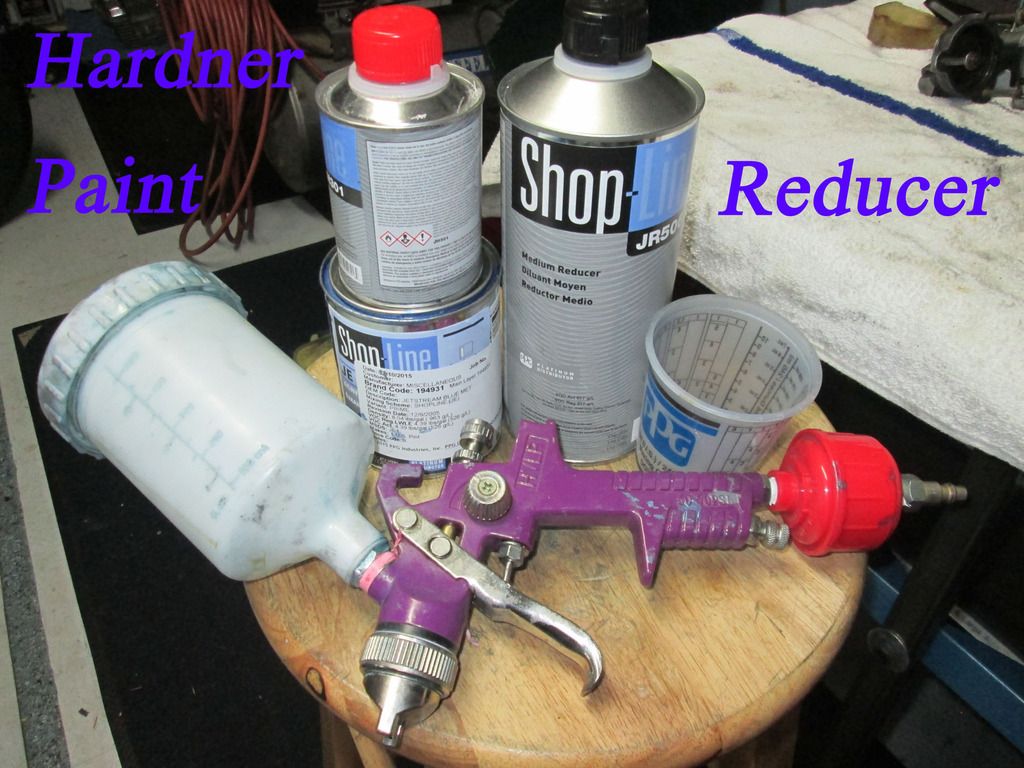
They are disposable and should get tossed and replaced after a couple uses. Once they trap a little water there is no place for it to go...

                          Also, most small compressors have a bottom drain.... Many people NEVER drain 'em. These must be drained IMMEDIATLEY before any painting is attempted.

                          In a perfect world, we'd all have refrigerated air dryers (have them all over the place at work). A refrigerated dryer cools the air & allows the water to drop out. Pretty expensive for a home shop so we'll have to do the best we can with filters and draining the compressor to limit any moisture.

                          KURT.
                          Kurt Boehringer
                          Peachtree City, Georgia

                          1970 - CT70K0 - Mini-Trail
                          1978 - SR500 - Thumper
                          1979 - CT70H - Mini-Trail
                          1979 - XS1100SF - Pensacola
                          1980 - XS850SG - Rocky
                          1980 - XS1100SG - The Ugly Duck
                          1980 - XS1100SG - Mayberry Duck
                          1981 - XS1100SH - DEAD Duck Cafe'
                          1981 - XJ550 Maxim - Nancy's Mini-Max
                          1982 - XJ650 SECA - Hurricane
                          1986 - FJ1200 - Georgia Big Red
                          1992 - FZR1000 - Genesis
                          2016 - FJR1300A - Montgomery

                          Comment


                          • #28
                            Kurt, one thing I think you forgot is about a $35 bottle of fish eye reducer. I had a major problem on the quail bike because I tried to skip it. I DID have everything clean, but the old paint does have the cracks and pits that allow oils in, and only the paint brought them back out.
                            Great writeup for a first or second time painter to follow!
                            Ray Matteis
                            KE6NHG
                            XS1100 E '78 (winter project)
                            XS1100 SF Bob Jones worked on it!

                            Comment


                            • #29
                              Primer or not to Primer?

                              Originally posted by DiverRay View Post
                              $35 bottle of fish eye reducer....SNIP....cracks and pits that allow oils in...
                              Ray,
                              Honestly, I've never bought it or used it.

                              Aside from the chemicals I mentioned, the only other thing I've ever added to my paint is Flex Additive for the rubber bumpers on my T/A & Z-28. The guy at the PPG store told me the value of FLEX additive is questionable at best & I could get the same effect my using the SLOW Reducer & SLOW hardener (I always use MEDIUM not SLOW or FAST).

                              Did you primer that cracked & pitted surface that gave you trouble?

                              For me, painting without primer is limited to otherwise serviceable paint that is: faded/weathered with only minor scratches or is just the wrong color. Once the paint is degraded with cracks, pits, big chips, peeling, or large scratches it must get primer. In my experience, a properly applied and prepared primer surface will eliminate any fish-eye problems.

                              KURT
                              Kurt Boehringer
                              Peachtree City, Georgia

                              1970 - CT70K0 - Mini-Trail
                              1978 - SR500 - Thumper
                              1979 - CT70H - Mini-Trail
                              1979 - XS1100SF - Pensacola
                              1980 - XS850SG - Rocky
                              1980 - XS1100SG - The Ugly Duck
                              1980 - XS1100SG - Mayberry Duck
                              1981 - XS1100SH - DEAD Duck Cafe'
                              1981 - XJ550 Maxim - Nancy's Mini-Max
                              1982 - XJ650 SECA - Hurricane
                              1986 - FJ1200 - Georgia Big Red
                              1992 - FZR1000 - Genesis
                              2016 - FJR1300A - Montgomery

                              Comment


                              • #30
                                No, it was a new DuPont primer/paint over almost bare tank. In California we cannot get anything but water based now. I don't know if that was my problem, but it was probably part of it.
                                Ray Matteis
                                KE6NHG
                                XS1100 E '78 (winter project)
                                XS1100 SF Bob Jones worked on it!

                                Comment

                                Working...
                                X