Announcement

Collapse
No announcement yet.

Jeffs rebuild lol

Collapse
X
 
  • Filter
  • Time
  • Show
Clear All
new posts

  • Jeffs rebuild lol

    Hey all figured I would start a rebuild lol
    Found the bolt I dropped and finally found it. Well came home today and got the cams installed does this look right?
    Top dead center
    [IMG][/IMG]

    Intake cam
    [IMG][/IMG]
    Exhaust cam
    [IMG][/IMG]
    But did discover this....
    [IMG][/IMG]

    and here it is tore down lol

    [IMG][/IMG]
    Last edited by Jeffintampa; 06-29-2015, 04:37 PM. Reason: photos
    Bike History:1980 XS 1100 special current bike
    1980 XS 850 special wife sold

  • #2
    Um... your timing pointer needs to be on the line not the "T" symbol...I also see you have not installed the sprocket bolts the arrows on them need to point up as well when dots line up... this is not real clear to you i'm sure so if pics needed holler.
    1979 F worst one i could find
    to convert into a bobber/ streetfighter!
    _________________________________

    We can't all get along!

    Comment


    • #3
      Slow way down do not rush this timing alignment procedure.....it takes a lot of understanding (not hard) to get it right....Slow down enjoy the ah ha moments
      1979 F worst one i could find
      to convert into a bobber/ streetfighter!
      _________________________________

      We can't all get along!

      Comment


      • #4
        Send pictures

        Because now I'm confused.

        Congratulations on finding the roaming FOD, hate it when that happens to me.
        79 SF & 80 LG MNS
        73 & 74 RD 350's
        73 Honda CL 450
        Graveyard - '81 XS850 Special

        All of my bikes are projects, maybe one day I'll have them running.

        Comment


        • #5
          Oh, sure, anyone can get the cam dots to line up if they do it one cam at a time and don't put the bolts back in the timing gears! No, really, it looks good except for missing bolts and the timing pointer pointing at the letter 'tee' on the Timing Plate instead of the TDC mark.


          Anyway, all teasing and kidding aside, take your time putting it all back together. After you get the exhaust welded, use some wooden blocks and a scissor jack to support the pipes as you work.

          Seat the #2 and #3 headers into their joints but don't tighten the clamps. If the clamps are already tight then loosen them enough to let the pipes rotate in the packing.

          Put the exhaust gaskets into the head, then lift the headers into place and slide the collars up the headers so you can slip the collars onto the studs. Thread the exhaust nuts onto the studs just far enough to hold the collars so the gaskets and headers can't fall out of the head.

          Seat the crossover pipes together in the crossover joint but don't tighten the clamp.

          Line up the muffler supports and start the bolts. The supports should line up so do not force the mufflers forward, backward or sideways and the crossover pipe should stay seated. You can wrap a bungee cord around the right and left exhaust to hold the crossover pipes together but it's not necessary, just make sure you do not force the crossover pipes together.

          Watch the header joints and the crossover pipe joint as you move back and forth between the header nuts and the bolts on the muffler supports. Wiggle and tap assembly as you tighten the fasteners to help draw the entire assembly into place and seat it without stressing it so it's less likely to crack again.

          Tighten the #2 and #3 header joint clamps and the crossover pipe clamp, then remove the wooden blocks and jacks and go for a test ride or tw...enty.

          Check the nuts, bolts and clamps after running the engine and riding but don't force any of the parts together or it will crack again.

          .
          -- Scott
          _____
          ♬
          2004 ST1300A: No name... yet
          1982 XJ1100J: "Baby" SS Brakes, '850 FD, ACCT
          1980 XS1100G: "Columbo" SS Brakes, '850 FD, ACCT
          1979 XS1100SF: "Bush" W.I.P.
          1979 XS1100F: parts
          2018 Heritage Softail Classic 117 FLHCS SE: "Nanuk" It's DEAD, it's not just resting. It is an EX cycle.
          ♬

          Comment


          • #6
            Originally posted by 3Phase View Post
            Oh, sure, anyone can get the cam dots to line up if they do it one cam at a time and don't put the bolts back in the timing gears! No, really, it looks good except for missing bolts and the timing pointer pointing at the letter 'tee' on the Timing Plate instead of the TDC mark.


            Anyway, all teasing and kidding aside, take your time putting it all back together. After you get the exhaust welded, use some wooden blocks and a scissor jack to support the pipes as you work.

            Seat the #2 and #3 headers into their joints but don't tighten the clamps. If the clamps are already tight then loosen them enough to let the pipes rotate in the packing.

            Put the exhaust gaskets into the head, then lift the headers into place and slide the collars up the headers so you can slip the collars onto the studs. Thread the exhaust nuts onto the studs just far enough to hold the collars so the gaskets and headers can't fall out of the head.

            Seat the crossover pipes together in the crossover joint but don't tighten the clamp.

            Line up the muffler supports and start the bolts. The supports should line up so do not force the mufflers forward, backward or sideways and the crossover pipe should stay seated. You can wrap a bungee cord around the right and left exhaust to hold the crossover pipes together but it's not necessary, just make sure you do not force the crossover pipes together.

            Watch the header joints and the crossover pipe joint as you move back and forth between the header nuts and the bolts on the muffler supports. Wiggle and tap assembly as you tighten the fasteners to help draw the entire assembly into place and seat it without stressing it so it's less likely to crack again.

            Tighten the #2 and #3 header joint clamps and the crossover pipe clamp, then remove the wooden blocks and jacks and go for a test ride or tw...enty.

            Check the nuts, bolts and clamps after running the engine and riding but don't force any of the parts together or it will crack again.

            .
            You'll have good days with that exhaust installation, and bad days where you want to kick that bike over and beat it with a 20 lb. sledge. I have yet to make an art of it. Not sure if the Special is any easier than the Standard, but a jack and supports are a must! I have always done it by myself, and obviously always succeeded. Patience is a must. It came off, it'll go back on.
            1979 XS1100F
            2H9 Mod, Truck-Lite LED Headlight, TECHNA-FIT S/S Brake Lines, Rear Air Shocks, TKAT Fork Brace, Dyna DC-I Coils, TC Fuse Block, Barnett HD Clutch Springs, Superbike Handlebars, V-Star 650 ACCT, NGK Irridium Plugs, OEM Exhaust. CNC-Cut 2nd Gear Dogs; Ported/Milled Head; Modded Airbox: 8x8 Wix Panel Filter; #137.5 Main Jet, Viper Yellow Paint, Michelin Pilot Activ F/R, Interstate AGM Battery, 14MM MC, Maier Fairing, Cree LED Fog Lights.

            Comment


            • #7
              Originally posted by IanDMacDonald View Post
              You'll have good days with that exhaust installation, and bad days where you want to kick that bike over and beat it with a 20 lb. sledge. I have yet to make an art of it. Not sure if the Special is any easier than the Standard, but a jack and supports are a must! I have always done it by myself, and obviously always succeeded. Patience is a must. It came off, it'll go back on.
              Not trying to be a smart arse here Ian, But do you recognize this fellow to be an earlier version of yourself? I kind of do, and I hope he turns out to be as good with these bikes as you did.
              2-79 XS1100 SF
              2-78 XS1100 E Best bike Ever
              80 XS 1100 SG Big bore kit but not fully running yet.
              Couple of more parts bikes of which 2 more will live!

              Comment


              • #8
                see that is why

                My Chiltons said put the cams in line them up with TDC so thank you all for showing me the right point to go over, shouldn't be to tough to turn the cams to get them back lined up.

                Gonna play with the chain and sprockets tomorrow night after work. The Chiltons said to get to were I am at and then the chain and sprockets are next. You can bet your a$$ I stuff a towel down in the hole case I drop a bolt.
                Bike History:1980 XS 1100 special current bike
                1980 XS 850 special wife sold

                Comment


                • #9
                  Originally posted by IanDMacDonald View Post
                  You'll have good days with that exhaust installation, and bad days where you want to kick that bike over and beat it with a 20 lb. sledge. I have yet to make an art of it. Not sure if the Special is any easier than the Standard, but a jack and supports are a must! I have always done it by myself, and obviously always succeeded. Patience is a must. It came off, it'll go back on.
                  I don't need blocks or jacks any more. I've done it so many times it doesn't matter which bike I'm working on, Standard or Special, I can use my leg to lift and my foot to guide and align everything but that's after a lot of practice that I didn't really want.

                  You do need patience and you have to carefully check every single solitary part of the exhaust system before you work on it because -- every single solitary part of the exhaust system can and will slice you and it's a filthy, nasty slice because there's a little bit of everything in it that you've ridden on or through since the last time you worked on it.

                  So it may not look sharp, heck it probably was not sharp the last time you checked it but 'stuff' happens to low-hanging metal that's inches above the asphalt at up to 130MPH.

                  .
                  -- Scott
                  _____
                  ♬
                  2004 ST1300A: No name... yet
                  1982 XJ1100J: "Baby" SS Brakes, '850 FD, ACCT
                  1980 XS1100G: "Columbo" SS Brakes, '850 FD, ACCT
                  1979 XS1100SF: "Bush" W.I.P.
                  1979 XS1100F: parts
                  2018 Heritage Softail Classic 117 FLHCS SE: "Nanuk" It's DEAD, it's not just resting. It is an EX cycle.
                  ♬

                  Comment


                  • #10
                    chain tonight

                    Here is what the Chilton says about putting the sprockets in and timing

                    page 69 number 19
                    Carefully lift the cam chains off the intake cam sprocket. Make sure it properly engages with the sprocket on the crankshaft. Align the holes in the sprocket with the holes in the cam flange. Pull up on the chain to remove any slack and place the chain onto the sprocket.
                    20 Repeat for exhaust cam. (question here is do I pull the chain up from the main or from the intake)
                    21 Hold onto each sprocket and chain and place them up onto the shoulder on each cam. Maintain tension on the cam chain between the crankshaft and intake cam sprocket. Slightly rotate the sprockets to align them with the bolt holes.

                    Note Make sure that the cam chain rollers are centered in both the front and rear chain tensioner slippers located in the cylinder chain cavity.

                    22. Install one bolt into the intake cam sprocket, only finger-tight at this time.
                    Caution The cam sprocket bolts are specially hard yada yada (Compliant)
                    23. Push in on the cam chin with your finger through the tensioner hole in the cylinder. This will help align the bolt hole in the exhaust sprocket. Install on bolt see caution after 22
                    24. Rotate the crankshaft clockwise approximately 45 degrees and align the "C"mark on the timing plate with the fixed pointer.
                    25. Loosen the cam chain tensioner holding bolt, compress the tensioner and tighten the bolt to lock it in the retracted position.
                    26 Push in again on the chain with your finger to make sure the chain is properly seated.
                    27 Install the cam chain tensioner with a new gasket.
                    28 Loosen the holding bolt on the chain tensioner. There should be an audible click as the tensioner is released and comes in contact with the chain; if not remove it and correct any hinting. Tighten the holding bolt to and lock nut yada
                    29 Rotate the crankshaft clockwise 2 complete rotations and align the "T" mark on the timing plate with the fixed pointer. Check the alignment of the dot on both cams to the arrow on the center caps.
                    30 Rotate the cranshat clockwise and install the 2 remaing cam sprocket bolts and tighten.
                    31 Install the cam chain guide.


                    rest is putting the cover on.

                    correct do it just like this?
                    Bike History:1980 XS 1100 special current bike
                    1980 XS 850 special wife sold

                    Comment


                    • #11
                      Originally posted by Rasputin View Post
                      Not trying to be a smart arse here Ian, But do you recognize this fellow to be an earlier version of yourself? I kind of do, and I hope he turns out to be as good with these bikes as you did.
                      Lol, no offense taken Ras. Actually, yes, Jeff does remind me of myself in those early "rushed" days. And, of-course any member posting numerous posts regarding timing is always a dreadful reminder. Yup, now that things have slowed down a bit, doing things in a rush is no-longer necessary. Take a day off, etc. No point in wasting more money on impatient mistakes.
                      1979 XS1100F
                      2H9 Mod, Truck-Lite LED Headlight, TECHNA-FIT S/S Brake Lines, Rear Air Shocks, TKAT Fork Brace, Dyna DC-I Coils, TC Fuse Block, Barnett HD Clutch Springs, Superbike Handlebars, V-Star 650 ACCT, NGK Irridium Plugs, OEM Exhaust. CNC-Cut 2nd Gear Dogs; Ported/Milled Head; Modded Airbox: 8x8 Wix Panel Filter; #137.5 Main Jet, Viper Yellow Paint, Michelin Pilot Activ F/R, Interstate AGM Battery, 14MM MC, Maier Fairing, Cree LED Fog Lights.

                      Comment


                      • #12
                        Originally posted by Jeffintampa View Post
                        Here is what the Chilton says about putting the sprockets in and timing

                        page 69 number 19
                        Carefully lift the cam chains off the intake cam sprocket. Make sure it properly engages with the sprocket on the crankshaft. Align the holes in the sprocket with the holes in the cam flange. Pull up on the chain to remove any slack and place the chain onto the sprocket.
                        20 Repeat for exhaust cam. (question here is do I pull the chain up from the main or from the intake)
                        21 Hold onto each sprocket and chain and place them up onto the shoulder on each cam. Maintain tension on the cam chain between the crankshaft and intake cam sprocket. Slightly rotate the sprockets to align them with the bolt holes.

                        Note Make sure that the cam chain rollers are centered in both the front and rear chain tensioner slippers located in the cylinder chain cavity.

                        22. Install one bolt into the intake cam sprocket, only finger-tight at this time.
                        Caution The cam sprocket bolts are specially hard yada yada (Compliant)
                        23. Push in on the cam chin with your finger through the tensioner hole in the cylinder. This will help align the bolt hole in the exhaust sprocket. Install on bolt see caution after 22
                        24. Rotate the crankshaft clockwise approximately 45 degrees and align the "C"mark on the timing plate with the fixed pointer.
                        25. Loosen the cam chain tensioner holding bolt, compress the tensioner and tighten the bolt to lock it in the retracted position.
                        26 Push in again on the chain with your finger to make sure the chain is properly seated.
                        27 Install the cam chain tensioner with a new gasket.
                        28 Loosen the holding bolt on the chain tensioner. There should be an audible click as the tensioner is released and comes in contact with the chain; if not remove it and correct any hinting. Tighten the holding bolt to and lock nut yada
                        29 Rotate the crankshaft clockwise 2 complete rotations and align the "T" mark on the timing plate with the fixed pointer. Check the alignment of the dot on both cams to the arrow on the center caps.
                        30 Rotate the cranshat clockwise and install the 2 remaing cam sprocket bolts and tighten.
                        31 Install the cam chain guide.


                        rest is putting the cover on.

                        correct do it just like this?
                        Yes, follow the manual. However, I'm not going to read all that. Only thing I have to add is this:

                        Make sure the timing plate is on the "T" mark, and #1 cylinder is on TDC. Align the Intake & Exhaust cams with the dots aligned with the cam cap dots (don't worry if they're off a little). Make sure the cam sprocket tabs point up in the same direction as the cam boss dots. The chain slack should be taken out of the back of the chain TIGHTLY. Tighten the caps down. Use an In. Lb. Torque wrench. Insert the cam bridge. Use a 22mm wrench to turn each cam to align the dots up with the cam boss dots. Insert the first two bolts in the sprockets. Insert the cam chain tensioner at this point (this alleviates a need to keep tension on the chain). Turn the crank 180 and insert the second set of sprocket bolts. Turn that crank over a few times and verify the dots line-up. Turn it over a few more times to verify timing. Align the valve cover gasket, throw some silicone under and over the cam cap ends, and bolt the valve cover down.
                        1979 XS1100F
                        2H9 Mod, Truck-Lite LED Headlight, TECHNA-FIT S/S Brake Lines, Rear Air Shocks, TKAT Fork Brace, Dyna DC-I Coils, TC Fuse Block, Barnett HD Clutch Springs, Superbike Handlebars, V-Star 650 ACCT, NGK Irridium Plugs, OEM Exhaust. CNC-Cut 2nd Gear Dogs; Ported/Milled Head; Modded Airbox: 8x8 Wix Panel Filter; #137.5 Main Jet, Viper Yellow Paint, Michelin Pilot Activ F/R, Interstate AGM Battery, 14MM MC, Maier Fairing, Cree LED Fog Lights.

                        Comment


                        • #13
                          I sure would like to see you fully understand the procedure to the point the manual is not needed....You know that feeling "OK I got this it all makes sense"
                          I think it would go way smoother then line by line did I do it right....Read, Read, And Read I know the manual can be dry and confusing VS guru's explanations with good pics in the search forums....I have been in your exact shoes the timing thing was alien monster but I backed off and completed it with out the manual for one of my favorite Ah Ha moments of my build. In your corner!!!
                          1979 F worst one i could find
                          to convert into a bobber/ streetfighter!
                          _________________________________

                          We can't all get along!

                          Comment


                          • #14
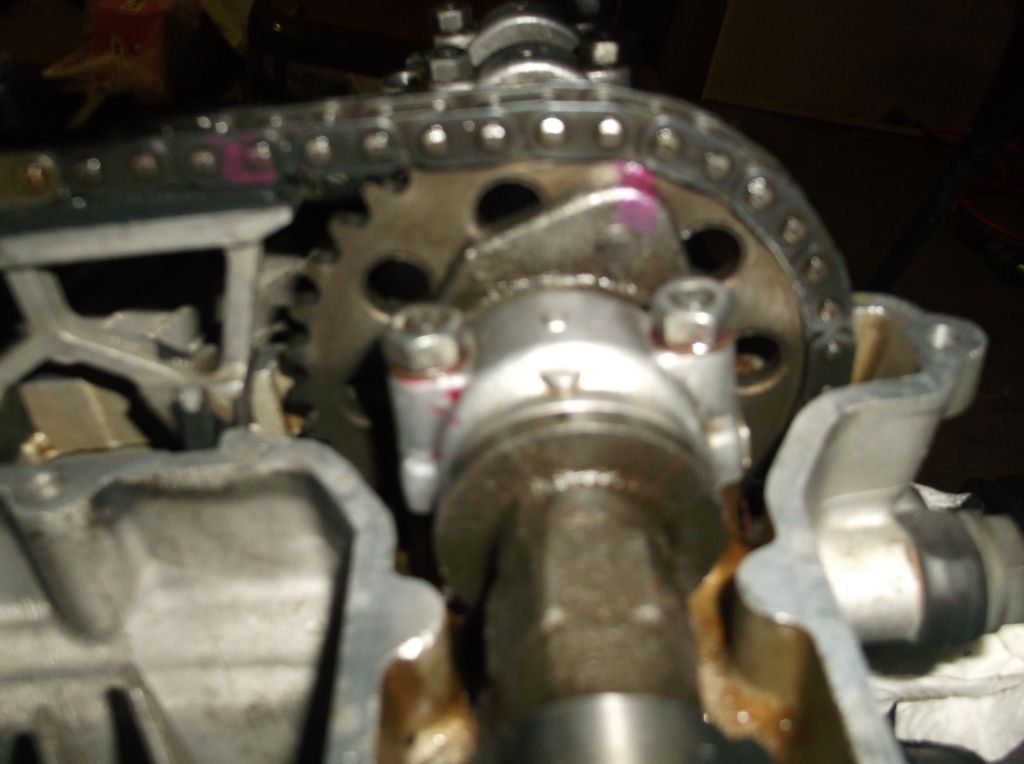
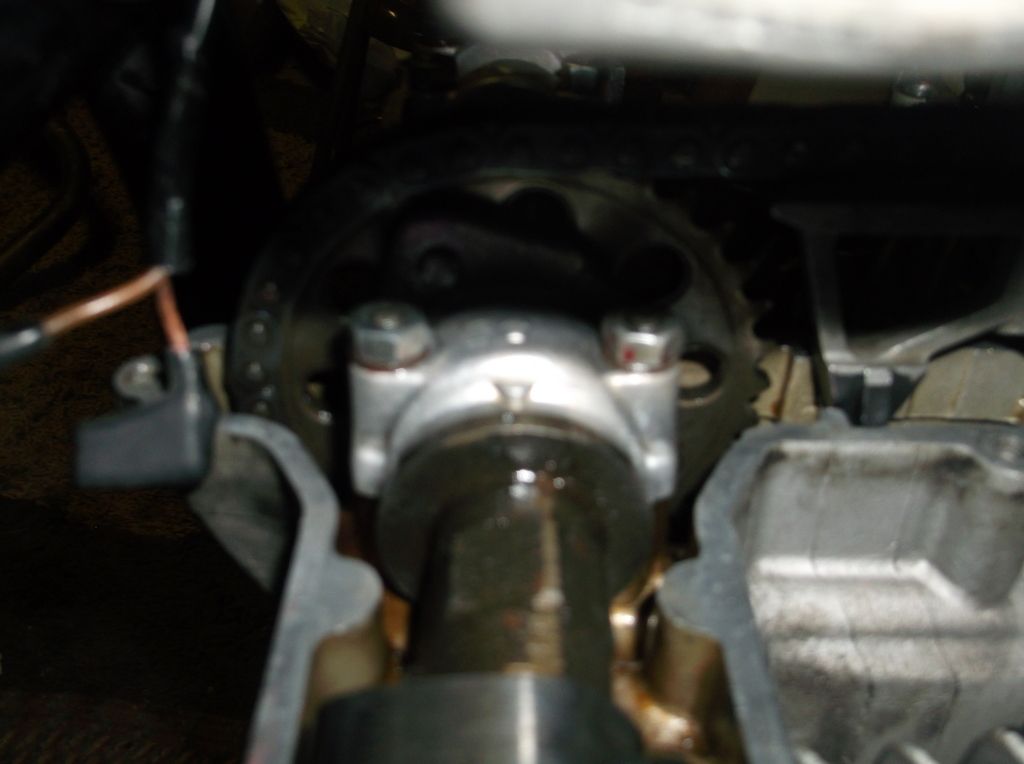
                            end of the day...

                            Well chain installed, the siming I did came out

                            Exhaust
                            22 20 25 25

                            Intake
                            24 18 25 25

                            The final dot locations


                            Bike History:1980 XS 1100 special current bike
                            1980 XS 850 special wife sold

                            Comment


                            • #15
                              [IMG][/IMG]

                              [IMG][/IMG]
                              Bike History:1980 XS 1100 special current bike
                              1980 XS 850 special wife sold

                              Comment

                              Working...
                              X