Announcement

Collapse
No announcement yet.

Ryan's 1979 XS1100SF Build

Collapse
X
 
  • Filter
  • Time
  • Show
Clear All
new posts

  • Ryan's 1979 XS1100SF Build

    Hello Everybody!

    So first thing first, I’m new to both riding and maintenance…be prepared for questions. Picked up a 1979 XS1100SF yesterday and have to say I’m really excited about learning and tooling around with the bike.

    I’ve also been reading through the forum posts for known issues/things to look at fixing right away and I’ll be taking those on as well (ie. the fuse box). As for what I know about the bike right now here is a short list of things already I’m going to be checking off in the next couple of weeks (let me know if I’m off on any of these):
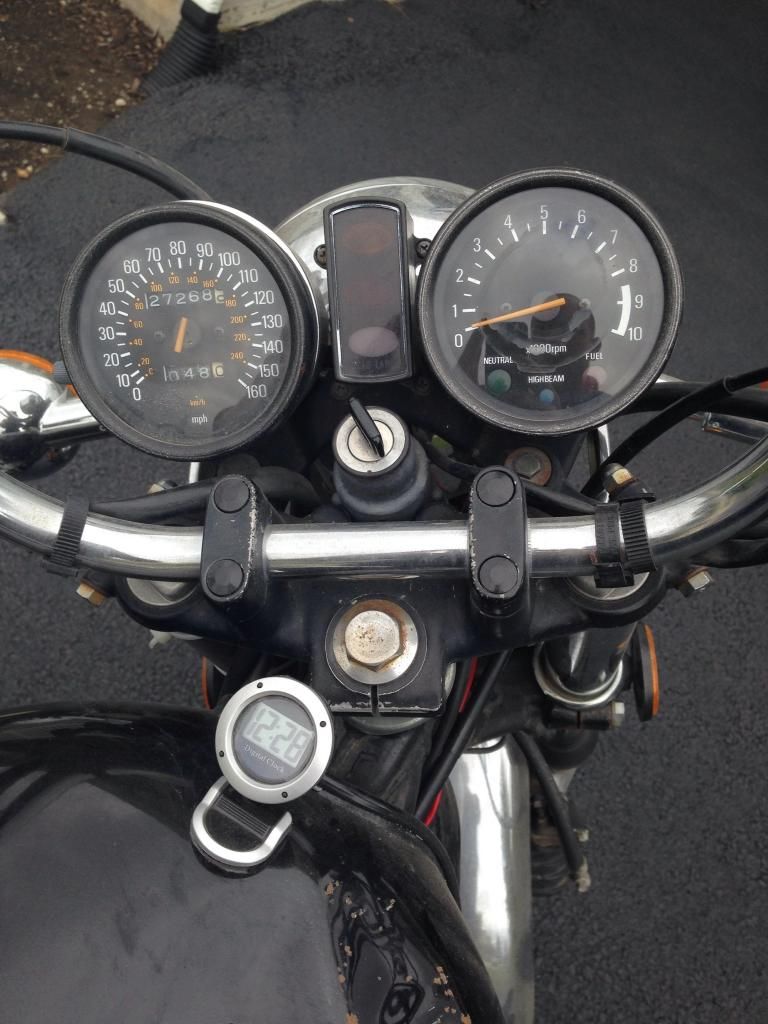
    1. Speedometer – you can see in the pics below the Speedometer is not stock (at least from what I’ve seen it doesn’t look like it is…round instead of the square ones). That’s fine with me – aesthetically I like the round ones. However it’s also broken. Previous owner told me he was riding one day and the needle started spinning out of control until it broke off (it was also making a screeching sound) – so he just unhooked the speedo wire. Going to try and identify the manufacture and then see if I can repair or if I’ll have to order a new one.
    2. Previous owner reported the bike “bogging down (losing power) in 3rd and 4th gear” – apparently this had happened to him a few years back as well and he took it to a mechanic who did something to one of the Spark Coils and then it worked like a charm. Unfortunately the problem is back – so I’m going to check the spark plugs, coils, fuel lines, mixture, and also combustion – hopefully one of those will be the problem.
    3. Haven’t seen the fuse box yet but I’m guessing that is stock and I’ll replace it – if not then cool, I’m one step ahead.
    4. Looks like the master break cylinder fluid might have leaked at some point because the reservoir at the handlebars is all corroded – may need to replace (going to check for leaks).
    5. Previous owner stated he just had it tuned up this summer but I’m going to drain all the fluids anyways and replace for my own peace of mind.
    6. Idle is low in RPM’s – below 1000..probably between 600 and 800. Need to see why this is and I’m hoping it has something to do with the coils or spark plugs…is that even feasible? Basically I don’t want to just turn up the IDLE as that’s not going to fix a problem if there is one…right?
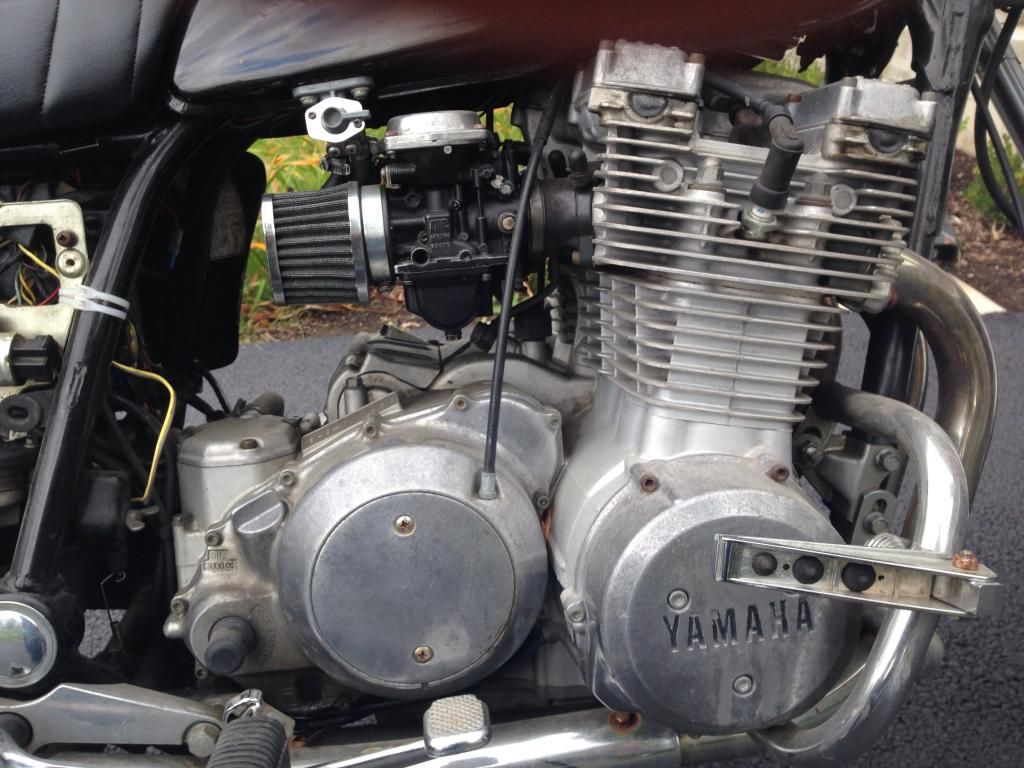
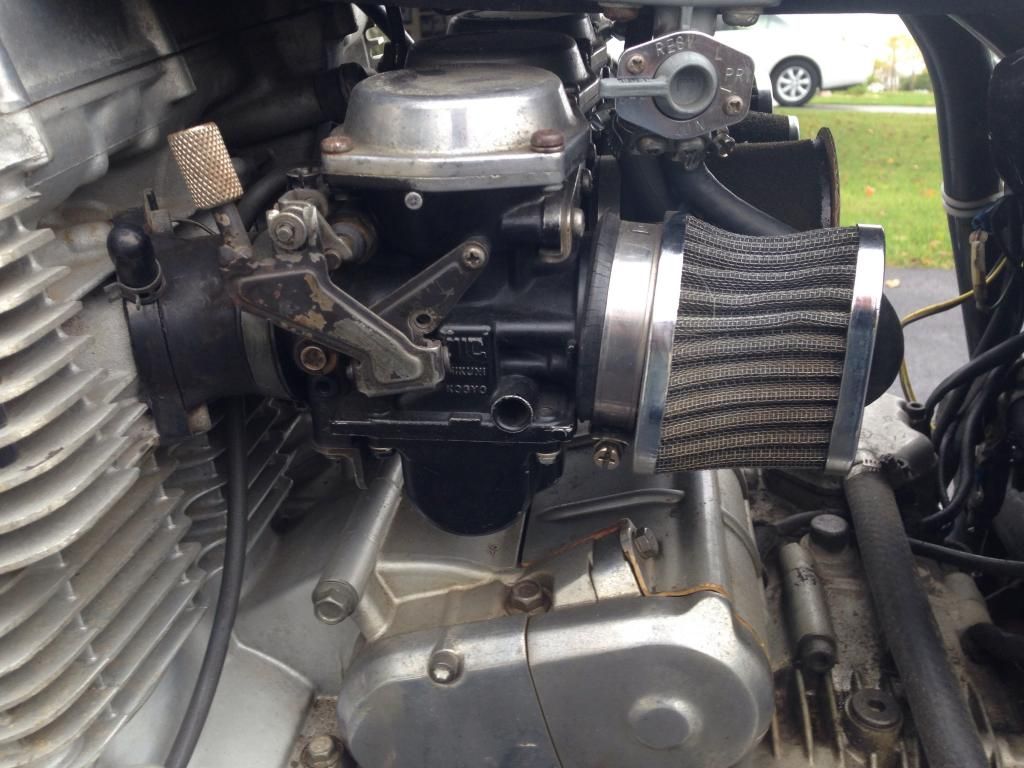
    7. Don’t think the carbs are stock. Need to check into it to see if I can identify a part number (only reason I say this is my carbs are black and not chrome/silver like I’ve seen in pics of the XS11 from ’79 ads or on google…does that make sense?) To make matters worse (and I’ll post pics of this later) A previous owner removed the stock air-intake box and put on pods…not just pods but 2 different kinds. Carb 1 and 4 have the coil/mesh cones and 3 and 4 have foam shaped like a cup. So unfortunately I have no idea if they ever jetted the carbs when they put the pods on…this is something I want to also try and check…been looking through the forums on this one. I’m not a fan of PODS (from what I’ve read…in actuality I have no idea what I’m doing) so I may even try and find a stock air-intake and put it back in (anyone ever do this…silly question).


    Two possible major ones as well that I’ve seen so far:
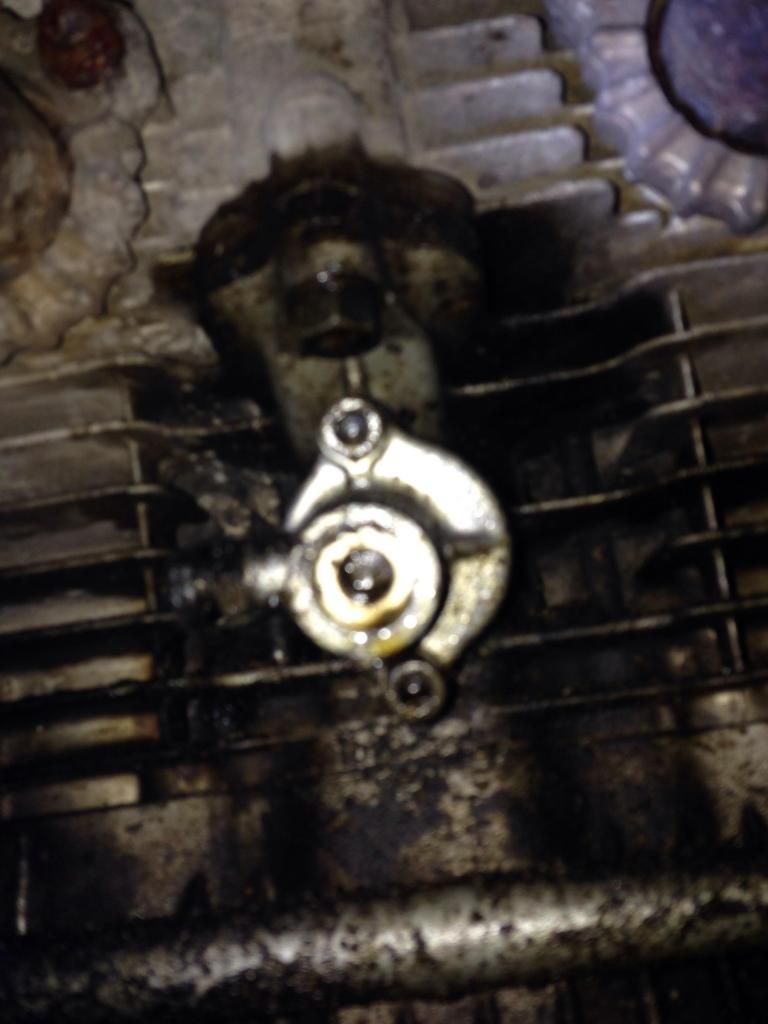
    1. Looks like there is oil caked to the front of the engine (behind the front wheel) – possible coming from upper crank case gasket – not dripping or anything but definitely discoloration and some build up from oil in places. I’m going to actually clean up everything first and then watch to see where the build up begins (does this sound like a good route?)
    2. MY GARAGE REAKS OF GAS!!! – ok so after I rode it around the block when I got it home (didn’t get out of second for fear of the bog down…was just trying to see breaks and a few gear changes working) I noticed a little bit of gas (very very slow drip) coming out of my left petcock. Turned that thing to the off position and the drip stopped. I should say I got really lucky with that one and you’ll understand why in a moment. Thinking that would fix the problem and not seeing anything else leaking I parked the bike in my garage with liner underneath to catch anything that might leak while I wasn’t looking. After about 10 minutes the garage stank like gas. So vented many many times looking for the cause – open garage door, let smell escape, close garage, look for leaks. Couldn’t find anything until a few hours later when I noticed the 3rd (from left) air pod was dripping gas! Turns out, being a novice, I had turned the right petcock to the PRIME position and not the OFF position – and as the bike was on it’s side stand (and on my carbs the 3rd and 4th carbs are connected by a T) the reservoir on the third was filling up and coming out the air pod. So, turned that to the off position, removed the POD, wiped up any excess gas in that carb (also made sure the carb wasn’t stuck shut and could open and close) and then put the POD outside to evaporate and save me from the smell. This morning much less smell – and I’m assuming the remaining is from the reservoir evaporating slowly. The plan today is to fire it up (with clean pod) and let that fuel burn through.


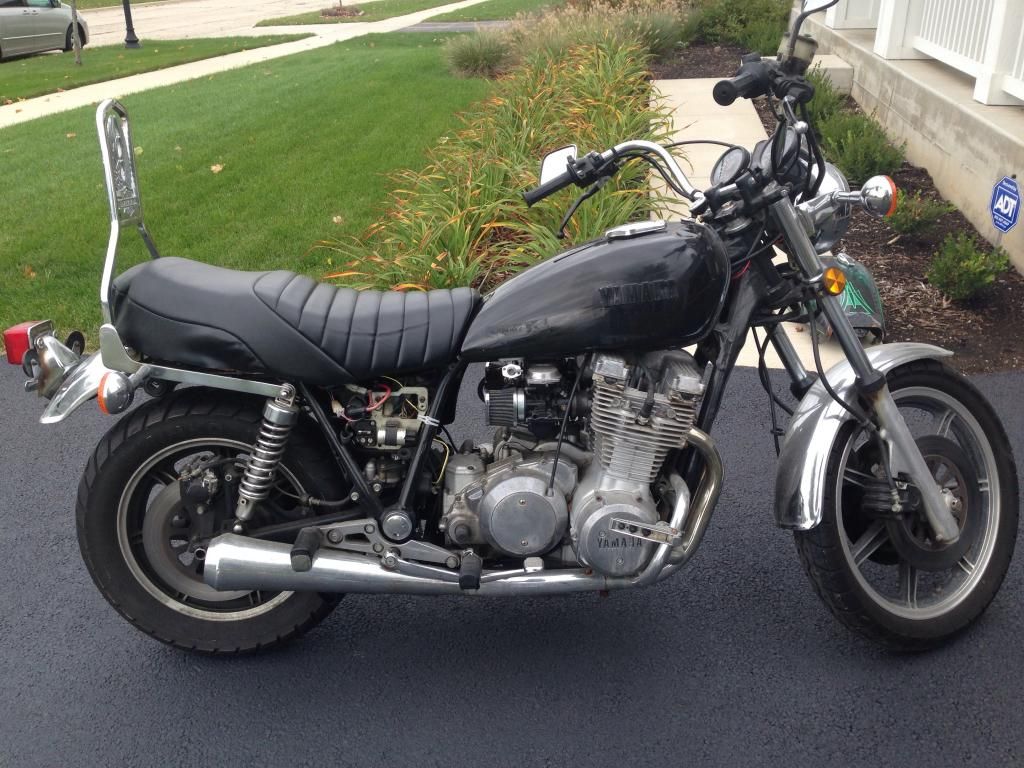
    That’s all for now – just wanted to introduce myself, my XS1100SF and what I’m seeing at first glance. Advice, opinions, and help appreciated. Initial PICS Below:

    [IMG][/IMG]
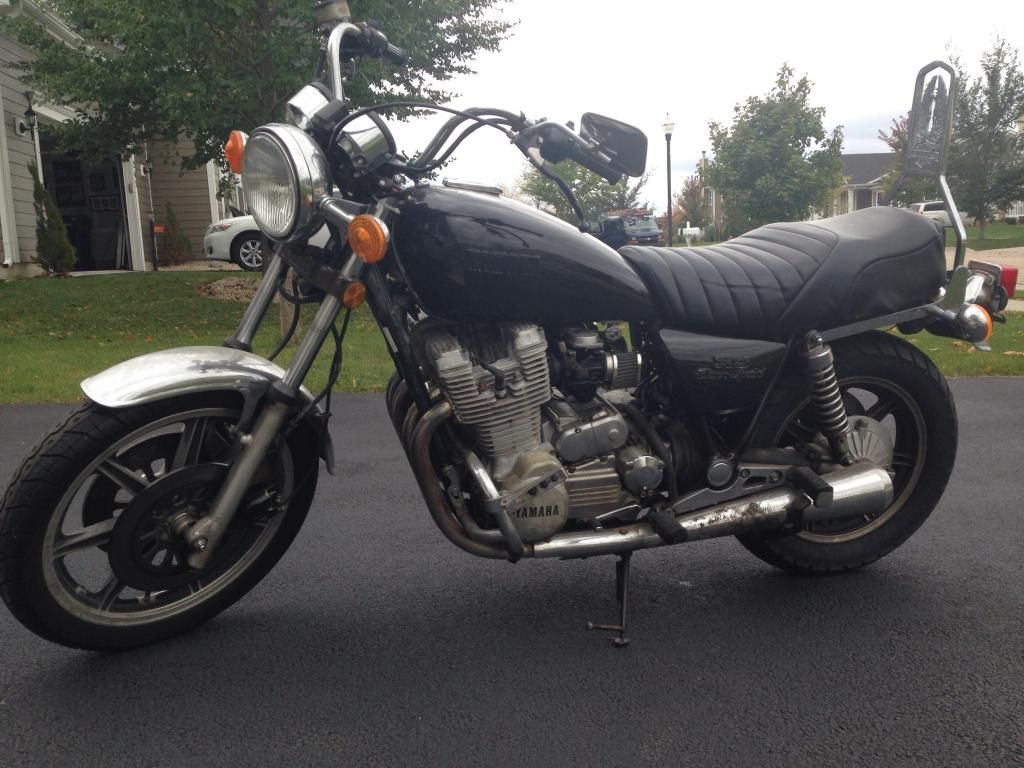
    Missing the right side cover as well.

    [IMG][/IMG]
    Mix and match PODS - is this a normal practice?

    [IMG][/IMG]
    [IMG][/IMG]

    [IMG][/IMG]

    Here is some of the gunk from the front of the engine.

    [IMG][/IMG]
    "It would help if you had some gas in the tank...just saying" -- 1979 XS1100 Special

  • #2
    Nice bike! Welcome aboard!

    It appears you have all the common maladies.

    Your speedometer is stock and likely original.

    Your carburetors are likely stock and were painted along the way. You can acquire an airbox easily enough.

    Your cam chain tensioner is leaking. You should replace it rather than fix it.

    Don't be in a big hurry to replace the fuse box unless is broken. We don't want to introduce problems before we address the old ones.

    Here's a very good video about crimping and splicing: How to splice and repair wires, splicing techniques

    Here's another on cleaning your carburetors: Motorcycle Mikuni CV Carburetor Cleaning for Suzuki, Honda, Yamaha Tutorial

    Your carburetors are leaking, so that is a good enough place to start.
    Last edited by jetmechmarty; 10-05-2014, 08:30 AM.
    Marty (in Mississippi)
    XS1100SG
    XS650SK
    XS650SH
    XS650G
    XS6502F
    XS650E

    Comment


    • #3
      What fuse box?

      Better find a wiring diagram for that bike, since it looks like the PO has done bad things in there.

      CZ

      Comment


      • #4
        Originally posted by CaptonZap View Post
        What fuse box?

        Better find a wiring diagram for that bike, since it looks like the PO has done bad things in there.

        CZ

        After a closer look, you're right! Where is it. That thing has flunked its safety inspection. You can give it new life. We can help. Do you have a place to do the maintenance on it over the winter?
        Marty (in Mississippi)
        XS1100SG
        XS650SK
        XS650SH
        XS650G
        XS6502F
        XS650E

        Comment


        • #5
          Alrighty - Cam Chain Tensioner - will start looking for a replacement (took a quick took through the forums and looks like people like the VMAX ones as an option - looking on ebay though and only finding these for above $50 - everyone seemed to think they were cheap so will keep looking)

          OH NO! my response to the "fuse box" discussion - ha. OK not going to worry I'm sure there is a solution.

          Yes, have it parked in my garage so I can work on it through-out the winter.

          I will say this in regards to the electrical - all the lights work and the bike did fire up (with a little turn of the throttle to keep it going). Current state is I've pulled the POD filter where the gas was leaking - need to go by air filter cleaner (it's a foam one) and air filter oil before getting it back on, correct?
          "It would help if you had some gas in the tank...just saying" -- 1979 XS1100 Special

          Comment


          • #6
            WARNING!!!! Not to underestimate your abilities or knowledge, but DO NOT ATTEMPT to do the ACCT mod without reading the write-up a gazillion times. And, even then, one step at a time. It sounds so easy like checking valve lash, but I assure you, it's much more complicated than it seems, and the results of doing just one step wrong is very pricey.
            1979 XS1100F
            2H9 Mod, Truck-Lite LED Headlight, TECHNA-FIT S/S Brake Lines, Rear Air Shocks, TKAT Fork Brace, Dyna DC-I Coils, TC Fuse Block, Barnett HD Clutch Springs, Superbike Handlebars, V-Star 650 ACCT, NGK Irridium Plugs, OEM Exhaust. CNC-Cut 2nd Gear Dogs; Ported/Milled Head; Modded Airbox: 8x8 Wix Panel Filter; #137.5 Main Jet, Viper Yellow Paint, Michelin Pilot Activ F/R, Interstate AGM Battery, 14MM MC, Maier Fairing, Cree LED Fog Lights.

            Comment


            • #7
              As a follow-up, it's hard to tell someone how to work on their bikes, as everyone works differently. Myself? One thing at a time until I cannot go any further, than fiddle with something else. My advice to you is this:

              First-Powerwash that engine first. Goto Wally world and grab four quarts of their 20w-50. Drain the oil, and fill according to sight glass on level surface.

              Second thing to do is to check all the other fluids and re-fresh them.

              Third- Run your engine again, and check for obvious oil leaks. If so, now you know you have some gaskets to refresh. Also check for any gear slips.

              Fourth- Refresh your braking system with pads, fluids, and possibly master cylinder caliper rebuilds.

              Fifth- Petcock rebuilds

              Sixth- Headlight to Taillight connector cleaning using deoxit.

              Seventh- Check your tires. Replace if old. Clean, re-grease splines on driveshaft.

              Eighth- Check your battery

              Ninth- Clean your carbs following the write-up

              Tenth- Clean all battery grounds and replace your fuse box with one from TC.

              Eleventh- Check your valve lash

              Twelveth- Start your engine, sync your carbs and go from there.
              1979 XS1100F
              2H9 Mod, Truck-Lite LED Headlight, TECHNA-FIT S/S Brake Lines, Rear Air Shocks, TKAT Fork Brace, Dyna DC-I Coils, TC Fuse Block, Barnett HD Clutch Springs, Superbike Handlebars, V-Star 650 ACCT, NGK Irridium Plugs, OEM Exhaust. CNC-Cut 2nd Gear Dogs; Ported/Milled Head; Modded Airbox: 8x8 Wix Panel Filter; #137.5 Main Jet, Viper Yellow Paint, Michelin Pilot Activ F/R, Interstate AGM Battery, 14MM MC, Maier Fairing, Cree LED Fog Lights.

              Comment


              • #8
                Originally posted by Sparkin79 View Post
                Don’t think the carbs are stock. Need to check into it to see if I can identify a part number (only reason I say this is my carbs are black and not chrome/silver like I’ve seen in pics of the XS11 from ’79 ads or on google …
                Hi, Ryan -
                WELCOME to the forums!

                Yamaha used 2 different types of carbs for the XS (and XJ) 11's between 1978 and 1982.

                The early model carbs: '78-'79
                The late model carbs: '80-'82

                It appears you have the late model carbs on your bike, instead of the '78-'79 carbs that would have been installed on your SF from the factory. Someone changed those carbs.

                Still XS11 carbs, just the later model carbs.

                There are very few parts that are a direct swap between the 2 types of carbs. Different float bowls, different jetting, different float height, etc.

                And the '82-only XJ model's carbs are slightly different than the '80-'81 carbs.

                Also, the PO may have changed the jetting when he installed the pods ... you'll find out when you are cleaning your carbs.

                You have some work ahead of you, but if you take it step by step as Ian said in his excellent write-up, you'll be able to tackle it.

                Read Marty's links in post #2 ... lots of good info ...

                And take a look at both of these threads before you work on your carbs:

                http://www.xs11.com/forum/showthread.php?t=35964

                http://www.xs11.com/forum/showthread.php?t=36017
                Marco

                Current bikes:
                1979 Yamaha XS Eleven Special (SF)
                1979 Honda CBX
                2002 Kawasaki ZRX1200R

                Rest in Peace, Don Glardon (DGXSER) 1966-2014
                WE MISS YOU, DON

                Comment


                • #9
                  You all are awesome - thank you so much.
                  "It would help if you had some gas in the tank...just saying" -- 1979 XS1100 Special

                  Comment


                  • #10
                    Hi Ryan,
                    Welcome to the madness of XS11
                    I like your thread title Good luck with your project.
                    Phil
                    1981 XS1100 H Venturer ( Addie)
                    1983 XJ 650 Maxim
                    2004 Kawasaki Concours. ( Black Bear)

                    Comment


                    • #11
                      Those carbs actually look to be 80MNS(LG). 80 carbs since they don't have the side-screw seats for the casted bowl drains as the 81/XJ did.
                      81H Venturer1100 "The Bentley" (on steroids) 97 Yamaha YZ250(age reducer) 92 Honda ST1100 "Twisty"(touring rocket) Age is relative to the number of seconds counted 'airing' out an 85ft. table-top.

                      Comment


                      • #12
                        Hey there Ryan,

                        Okay, lots of good comments/recommendations already.

                        The idle speed is a tad low....stock should be ~1100-1200. But it is adjusted with the main idle screw...once the carbs are properly synchronized...which will come after your cleaning.

                        The petcocks are leaking, but the carbs float valves are leaking also hence the gas on the floor....and because of that, there can also be gas IN the engine...the flooded carb can leak forward into the intake, past the valve, into the cylinder, and past the pistons/rings and into the OIL! So....yes, an oil/filter change is needed but NOT until you fix your carbs and petcocks.

                        The engine stall is probably the pickup coil wires...see the tech tips for how to test and repair them. These are the ignition controlling coils in the left engine crankcase cover....not the main spark plug coils.

                        Yes, the CCT process is delicate and possibly fraught with danger. I suggest also reading thru this thread: http://www.xs11.com/forum/showthread...ght=minute+cam

                        for some extra tips on how to remove the cam chain tensioner and not allow the cam chain SLACK to drop down around the crank when installing the replacement CCT whichever one you decide to use, ACCT or Modded CCT.

                        Lots of folks poo-poo the pod filters, saying they are difficult to tune/jet for, but with the later carbs, they seem to work well. There's info regarding the mounting mod...velocity stack type tubes that are suggested to be used to put on the carbs to then mount the filters onto....prevents the cheap filter's mounting lip from interferring with the carb throat ports, and also straightens out the air flow going into the carbs in a similar way that the OEM box with its INTERNAL velocity stacks do.

                        The front master cylinder reserviors age like that just from decades of UV exposure, not from the brake fluid. It can be reconditioned with just some scrubbing and painting if so desired. Yes, replace the vinyl lines with Stainless Steel braided ones....would suggest doing the caliper tear down and rebuild....often can use the same O-ring....just clean the corrosion beneath/behind the O-ring down in the O-ring caliper housing groove....so that the O-ring doesn't squeeze too tight preventing the caliper/pistons from releasing pressure when you let go of the lever. See the tech tip regarding the Spooge Hole in the MC.

                        As stated, you have a SPECIAL which has all of the round acoutremants, guages, headlight, turn signals. The speedos/Tachs are difficult to take apart, so trying to repair it(replace the needle) as well as lubing the internal gears is problematic. The drive cable may also have been damaged/dried and binding vs. the speedo itself? You can test the cable by just spinning the front wheel and watching the end of the cable, if it spins easily and smoothly, then the speedo was probably the thing that died. You can put any XS11 Special speedo on there....however, the later model ones only go to 85 mph due to the changes in the speed limits and such! The XS650 gauges will also work, but they are slightly smaller in diameter!

                        Here's the MikesXS website where they have replacement gauges.
                        http://www.mikesxs.net/products-46.html#products

                        And I'm the one that provides the replacement fuseblocks, see the For Sale Forum, Parts, then Parts/services by members sticky thread, post #10 for info, all current!!

                        T.C.
                        T. C. Gresham
                        81SH "Godzilla" . . .1179cc super-rat.
                        79SF "The Teacher" . . .basket case!
                        History shows again and again,
                        How nature points out the folly of men!

                        Comment


                        • #13
                          Incorrect running fuel levels and or variable levels of the four carbs may also be attributing to the problem's .
                          81H Venturer1100 "The Bentley" (on steroids) 97 Yamaha YZ250(age reducer) 92 Honda ST1100 "Twisty"(touring rocket) Age is relative to the number of seconds counted 'airing' out an 85ft. table-top.

                          Comment


                          • #14
                            Hey Sparkin

                            Where is the idle screw located on the bank of carbs. The reason I ask is because if someone swapped the 79 carbs with 80 carbs as it seems by the color and drain screws from the pictures the idle speed adjustment screw will be in the middle of the carb bank on the pod side and will be facing down towards the bottom of the carbs. If still stock 79 carbs and painted black the screw will still be in the middle but the adjustment screw will be facing up. Both are thumb screw knobs whether 79 or 80. The reason we are all saying 80 model is because the 81 carbs had a different drain plug set up on the carb bowls. You have your work ahead of you to get the bike back in shape but it is all doable by you with some investment in time and money. When you do get into the carb cleaning make a note of the size of your pilot jets and main jets and make sure you keep the parts separated by each carb so that parts that come out go back into the same carb. If it were me I would try going back to a stock air box. Makes things easier in the long run in tuning the bike and getting it to run efficiently. Not knocking the pods users just my preference. If you do decide to go that route you will need to check your jetting. Not saying it will need to be changed just looked at. You need to see what you have first, post what that is here, and ask for advice as you proceed. Good luck and keep the folks here posted on your findings and progress and you will get through the repairs and be riding by spring. Of course pictures are great and speak volumes.
                            2 - 80 LGs bought one new
                            81 LH
                            02 FXSTB Nighttrain
                            22 FLTRK Road Glide Limited
                            Jim

                            Comment


                            • #15
                              Hi Ryan,
                              To avoid getting too involved with the cam chain tensioner swap first up, just get a replacement plug for the front of the original tensioner to stop the oil from leaking all over the front of the motor, as thats where most of the oil has come from. Note- I'd do this prior to hitting the engine with a power washer as you'll pump water into the motor if you spray the end of the tensioner.
                              79 SF Special W/ Stock all original motor @ 384,000klms
                              Stock exhaust, stock airbox, XJ sump, 78E carbs, Xs1100RH seat, Bosch superhorns, 5/8ths front M/c, braided lines, sintered SBS pads, drilled discs, progressive springs, 8" 50w HID headlight 4300K, 2 x 50w HID spiral driving lights, KONI shocks, Spade fuse box
                              *Touring mode - Plexistar 2 screen, Gearsack rack & bag & saddlebags, homebuilt towbar
                              *"The Keg"- UC torana hubs, XS11 discs, Tokico 4 spot calipers

                              Comment

                              Working...
                              X