Announcement

Collapse
No announcement yet.

Are these right?

Collapse
X
 
  • Filter
  • Time
  • Show
Clear All
new posts

  • #16
    Interesting

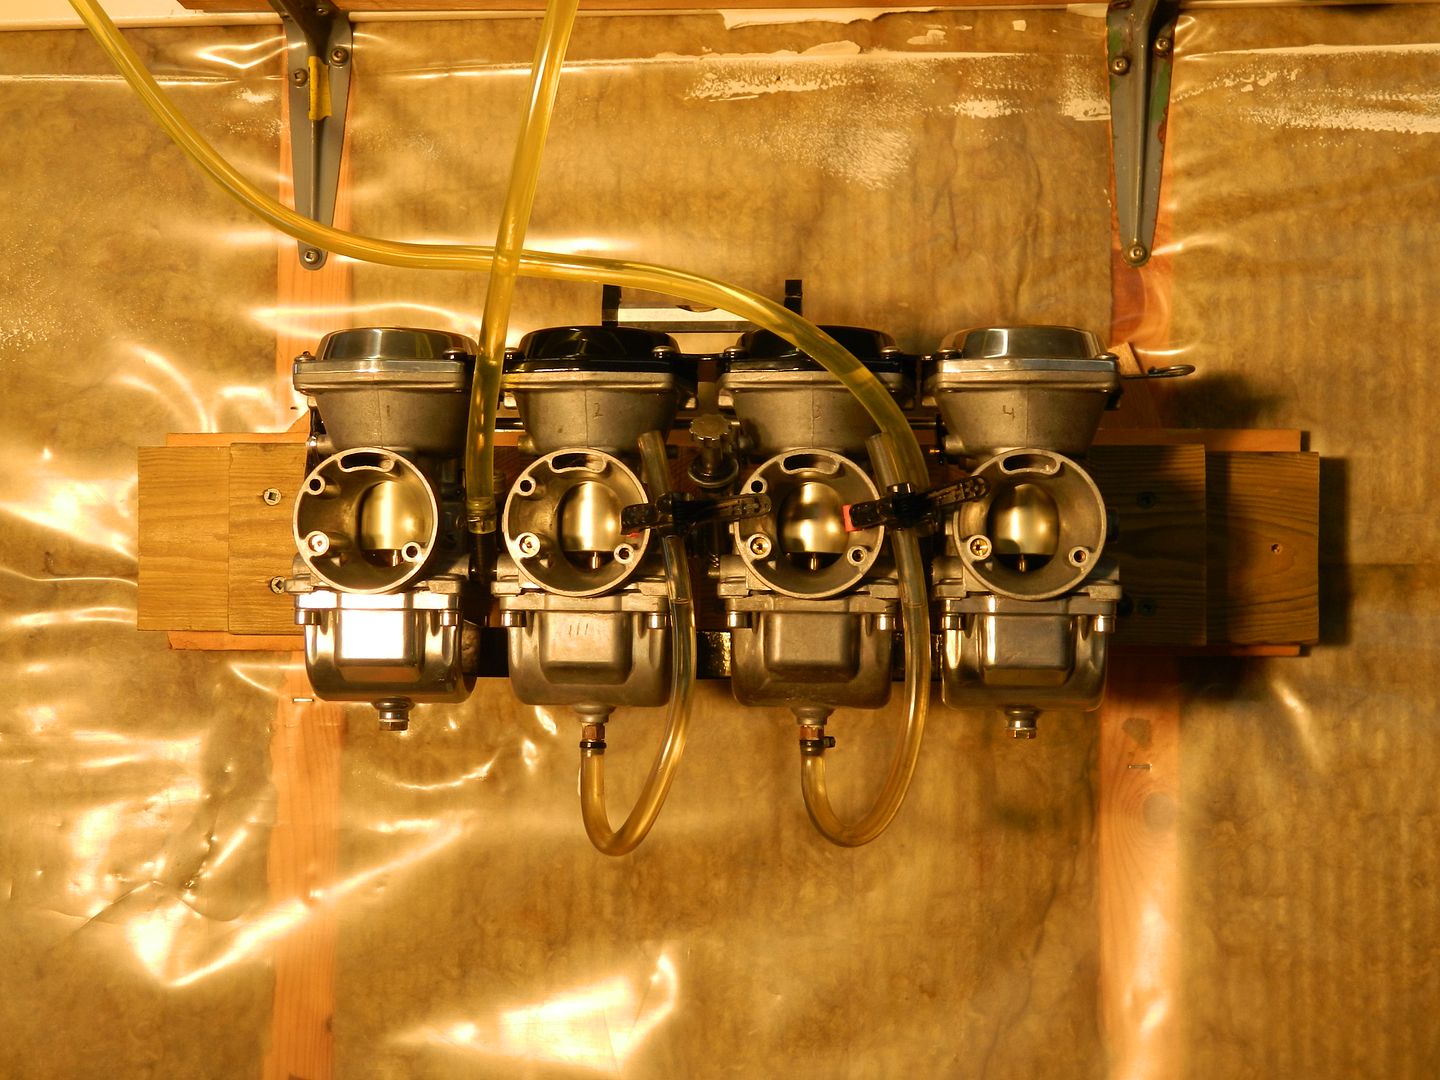
    You may find this interesting. There has been some debate about float heights and fuel levels between various year carbs. I have always been curious myself as the quality control is not the same since China, Taiwan, chec republic started to supply the replacement floats. To compound the issue, the FSM for the 80 carbs states a height of 23mm and the 81 carbs are to be checked with a clear plastic hose. Sounds simple enough until you read the manual for this , as it states 3 +/- 1mm measured from the mixing chamber flange. Then the diagram for the 81's shows the datum line measure to the carb bowl body. I've been puzzled buy these conflicting references so I went out to the shop and have grabbed a set of each and am performing tets on all of them to see where the level should really be. I have to get my snow tires off today so I've only had a chance to do the 78/79 carbs so far. Figuring that the older carbs represented the desired datum best I started with them.
    So here is what I did. I grabbed a set I knew had original pristine floats(brass) and set the height to 25.7 mm with the gaskets removed, then threw them on my set up and checked the levels with hoses. Figuring that 24.7 would be a rich setting and 26.7mm would represent a lean setting, here is what I found:


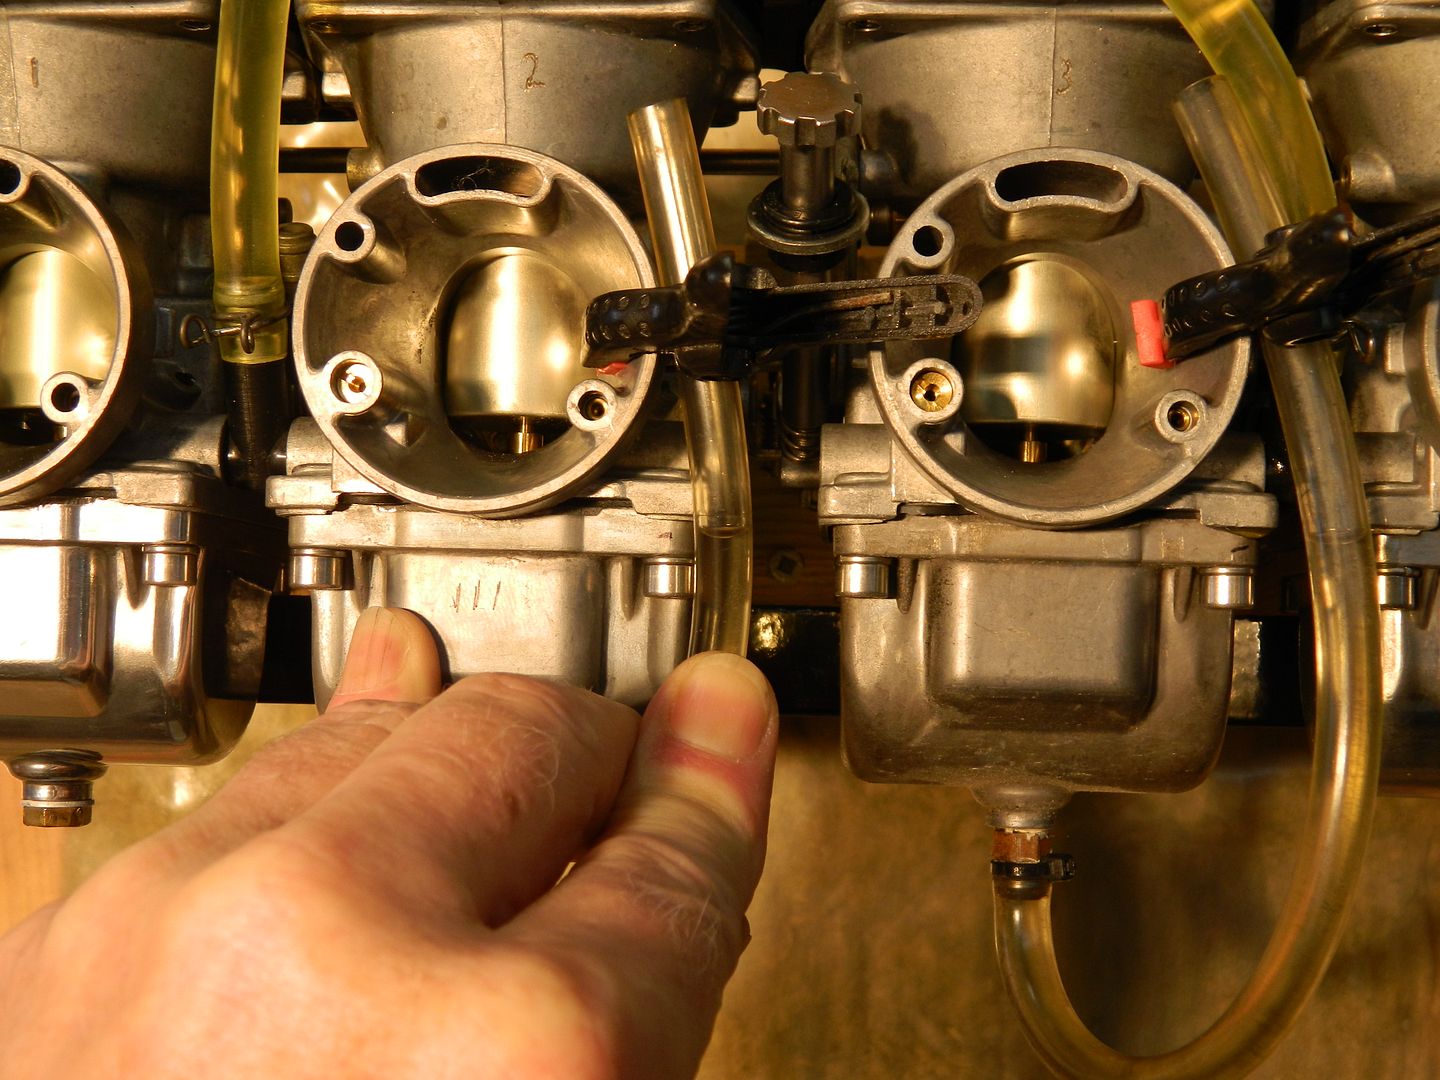
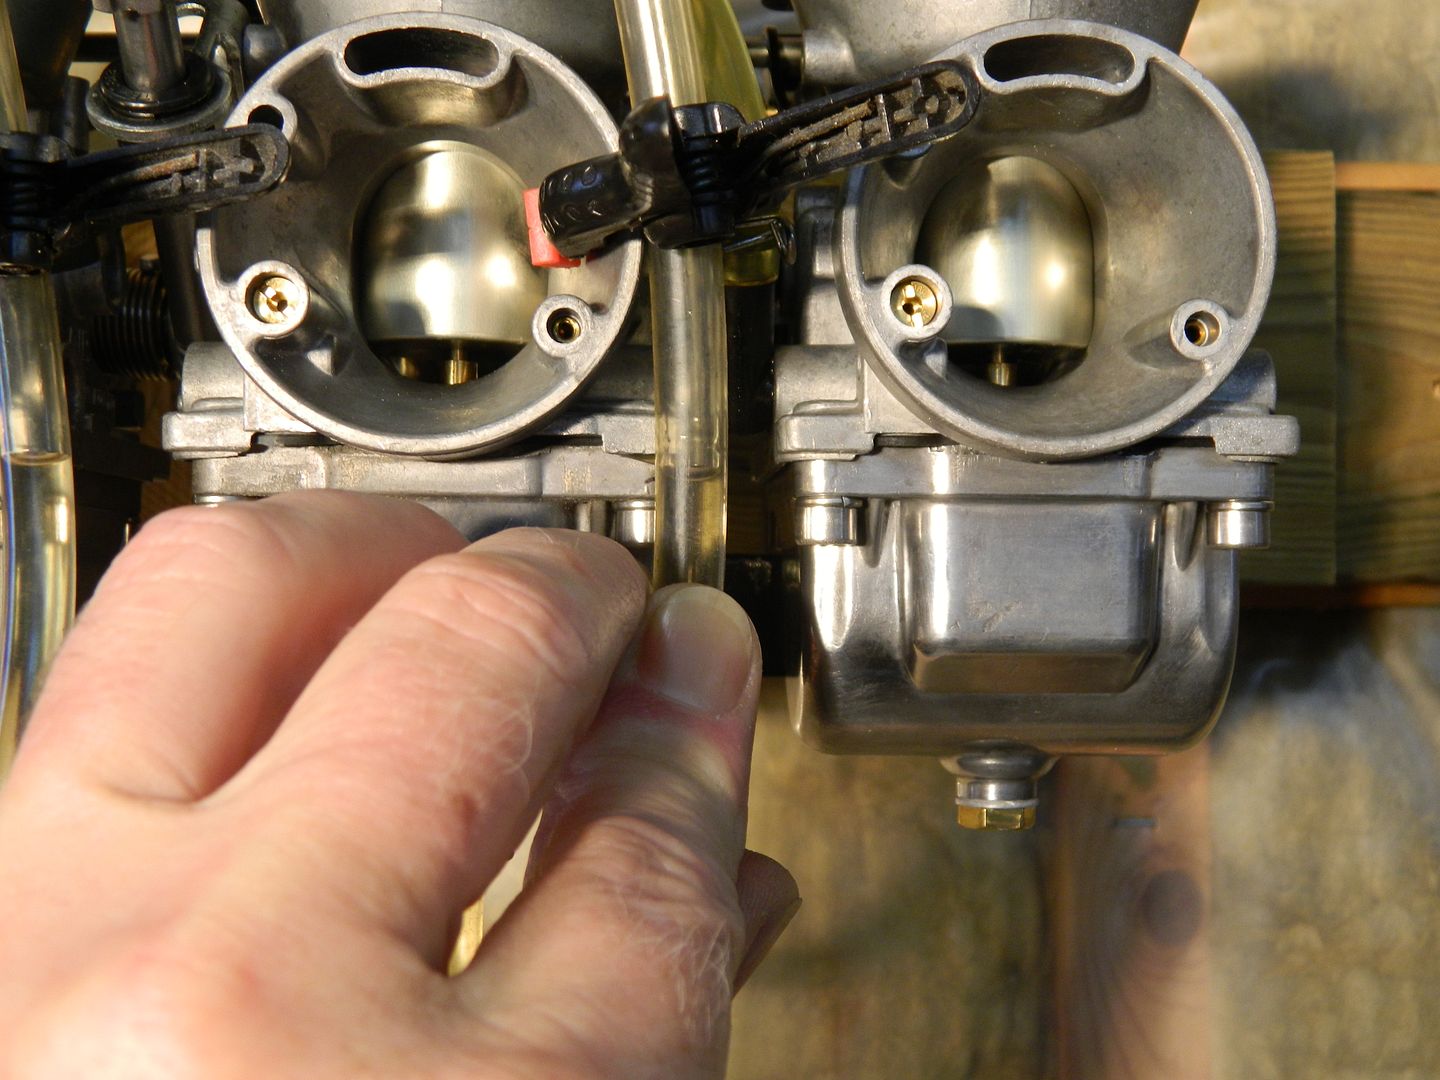
    You'll notice that I prematurely marked 3mm with magic marker on the bowls before installing them. This was a mistake because it didn't factor in the thickness of the gasket !!!!!


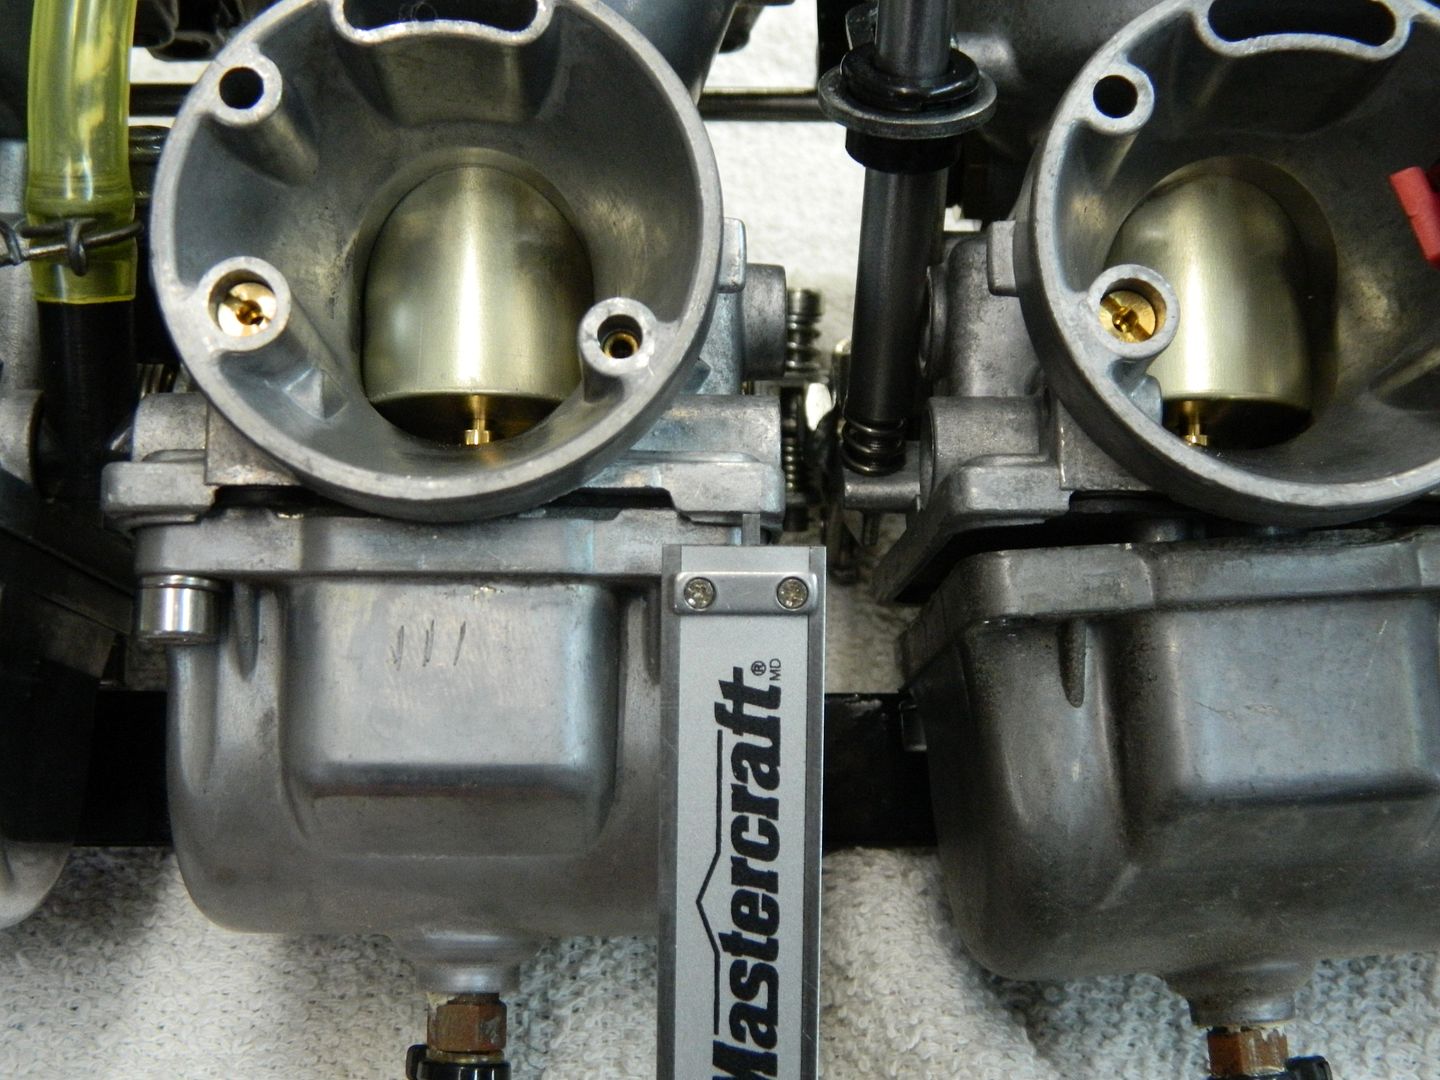
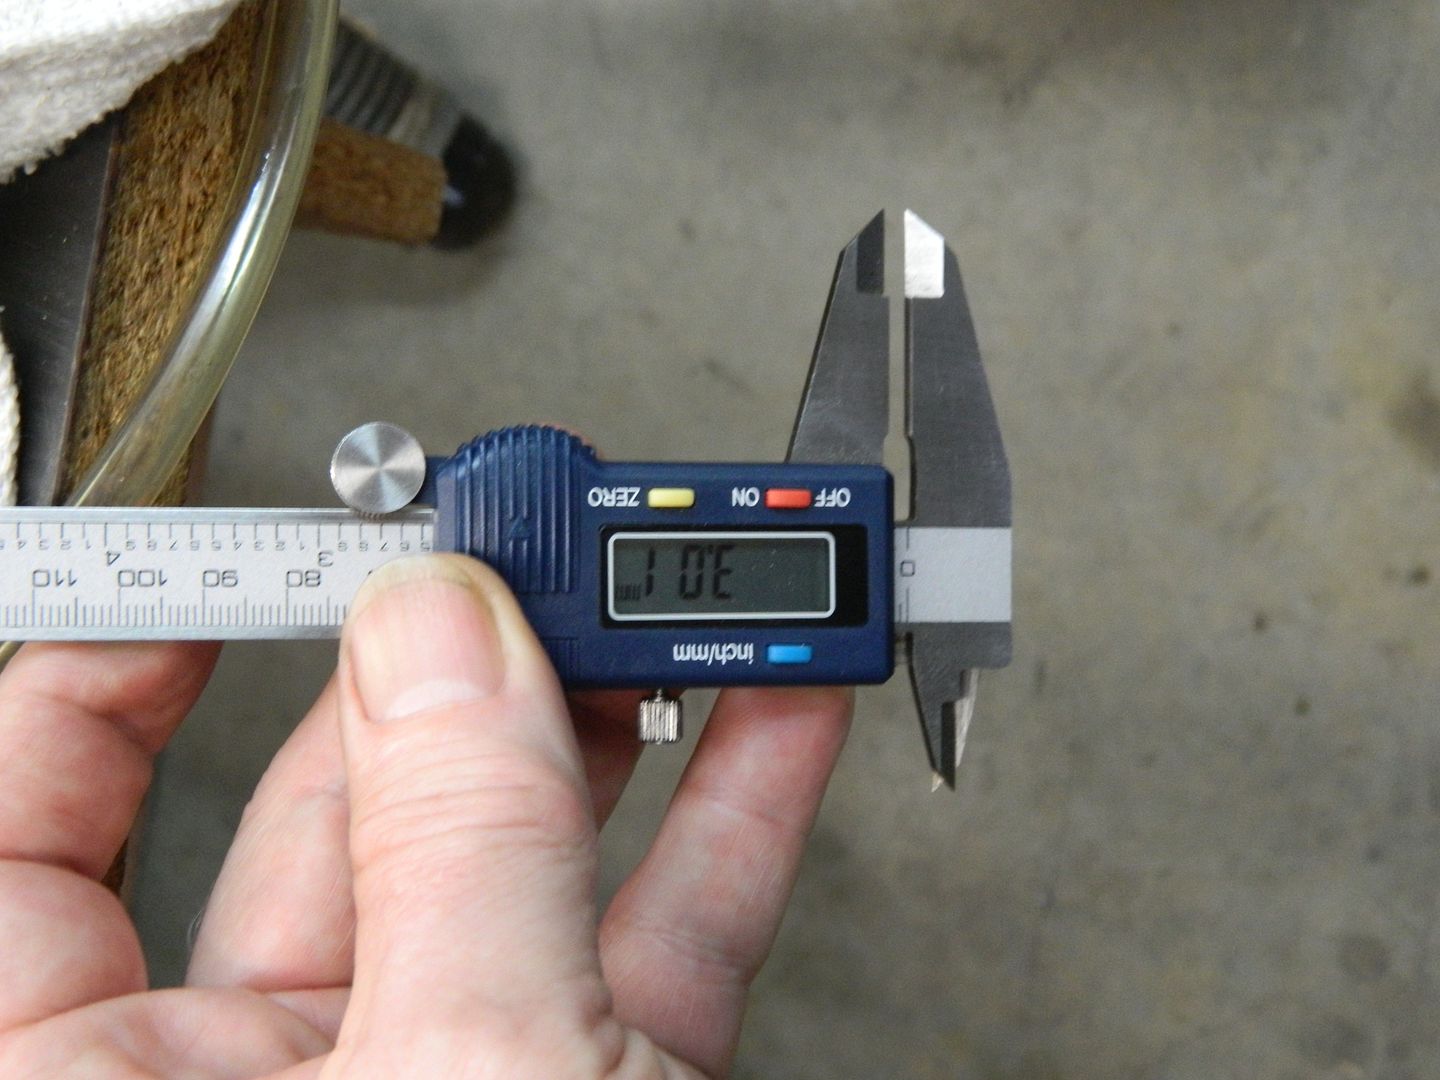
    Sorry the calipers were upside down but 3mm from the lip of the carb mixing chamber matches 25.7 mm float height.


    Now why is this important. As I said before quality control is minimal in the floats you'll be buying and if your reusing the old ones and someone has repaired them with solder the boyancy's will be affected from float to float. The biggest thing with setting your heights is to have them neither rich nor lean but having them all the same is equally important. The only way to do this accurately is with hoses.
    mack
    79 XS 1100 SF Special
    HERMES
    original owner
    http://i946.photobucket.com/albums/a...ps6932d5df.jpg

    81 XS 1100 LH MNS
    SPICA
    http://i946.photobucket.com/albums/ad305/mack-055/2.jpg

    78 XS 11E
    IOTA
    https://youtu.be/wB5Jfbp6SUc
    https://youtu.be/RaI3WYHSuWA


    Have recovery trailer and shop if you breakdown in my area.
    Frankford, Ont, Canada
    613-398-6186

    Comment


    • #17
      Yep very interesting.

      I can see why its the best way to check them, I've only ever done them by measuring the 25mm from gasket face to float bottom which can be inaccurate. One of the reasons for this was not having the right size screw in adapter for the hose to connect to.

      The Special carbs I have are the later type that a pipe will fit onto the bowl, so easier, My XJ11 carbs are the same but they run great and I've never had to go inside them, I might check them for reference of good running carbs when I get to that stage.
      Tom
      1982 5K7 Sport, restored to original from a wreck
      1978 2H9 (E), my original XS11, mostly original
      1980 2H9 monoshocked (avatar pic)http://i145.photobucket.com/albums/r...psf30aa1c8.jpg
      1982 XJ1100, waiting resto to original

      Comment


      • #18
        Hi Mack,
        A couple yrs. back, I did what you did, cept on the later 81carbs. I did the fuel levels test on bike and running. Made for alot of on and off of the carbs, but also varied float levels at different settings and installed and measured fuel levels bike running. Various settings from 22mm up to and including 29mm. I found that each millimeter in float change consistantly changed fuel levels a hint over 2mm. Doesn't sound like much initially, but 1mm difference in fuel levels has a dramatic effect how much vacuum draw is required to draw fuel. Overly high levels will 'draw' more easier creating a rich cond.(and start easier cold with no enricher).

        Never had rebuilt the early carbs, but fuel supplied thru both circuits throughout rpm range would definitely make them more a bit more 'tuner friendly' as opposed to the later carbs with seperated circuits, which make them a bit more 'fiddly'.
        81H Venturer1100 "The Bentley" (on steroids) 97 Yamaha YZ250(age reducer) 92 Honda ST1100 "Twisty"(touring rocket) Age is relative to the number of seconds counted 'airing' out an 85ft. table-top.

        Comment


        • #19
          BTW, good pics and explanation! Might also consider that different measuring ponit of fuel level is likely due to 'static or running'. Your pic shown being a static fuel level will be a bit higher than when mounted and running.
          That determining factor would be the spring loaded float needle. Fully sealing off flow, float comes up a bit compressing spring creating pressure to seal off flow resulting in a higher fuel level in bowl.
          Idleing, the float needle spring is slightly 'unloaded' resulting in float lower and lower running fuel level in bowl constantly metering a small amount of fuel. Having said that, I'm bettin' the actual 'running' fuel levels of those carbs if mounted, would be at the top of the lock washer, the '3mm down' specified for the 81's while running.
          On a side note, when I give the throttle a quick rev to 6K, fuel level instantly drops to within 3/8" from bottom of bowl till time/ fuel catches back up and balances back out at pre-set levels. Not alot of room in there for much fuel displacement. Just another reason for getting those levels on all four carbs identical. So all four cyls. are drawing as close as you can get initially, the same amount of fuel. I've also found getting fuel levels the same in all four carbs resulted in all four idle-mix screws ending up within a screwdriver slot width of each other when all said and done.
          81H Venturer1100 "The Bentley" (on steroids) 97 Yamaha YZ250(age reducer) 92 Honda ST1100 "Twisty"(touring rocket) Age is relative to the number of seconds counted 'airing' out an 85ft. table-top.

          Comment


          • #20
            Hey Mack - Is this what the illustration looks like for the '81 in your FSM?

            [IMG][/IMG]

            This came from my XJ FSM. If the levels were set like shown in the picture vs what your test shows, the bike would be running quite lean true? I've read that plastic floats should be set at 23mm and brass at 25.7 (mine are plastic), is this because of buoyancy, shape of the floats, ???

            Are the carbs all shaped the same as far as bowls related to mixing chamber flange so that correctly adjusted carbs should all have fuel levels viewed through clear tubing at the same spot/point on the carb? What good is it to have a visual reference/picture for checking accurate fuel level if it is incorrect? I could just set mine at 23 and forget it but I like to understand the reason behind something rather than simply memorizing facts with no "why".
            Billy

            1982 XJ1100, Ceramic Coated Headers, Raptor ACCT, Barnett Clutch Springs, Dremmel Fix, TC's Fuse Block, De-Linked S/S Brake Lines, 850 Final Drive, Yahman's YICS Eliminator, Pods, stock jets

            Comment


            • #21
              carb levels

              Wait for it. I have a set of 80 LG and 81 LH carbs with the plastic floats i will do tomorrow. Will post the results. Also i have a new set of plastic floats i intend to put on the 78 carbs i did today just to see for myself how close to the original brass float levels they will come at 23mm.
              mack
              79 XS 1100 SF Special
              HERMES
              original owner
              http://i946.photobucket.com/albums/a...ps6932d5df.jpg

              81 XS 1100 LH MNS
              SPICA
              http://i946.photobucket.com/albums/ad305/mack-055/2.jpg

              78 XS 11E
              IOTA
              https://youtu.be/wB5Jfbp6SUc
              https://youtu.be/RaI3WYHSuWA


              Have recovery trailer and shop if you breakdown in my area.
              Frankford, Ont, Canada
              613-398-6186

              Comment


              • #22
                Billy

                Yes that is exactly what i was talking about.
                mack
                79 XS 1100 SF Special
                HERMES
                original owner
                http://i946.photobucket.com/albums/a...ps6932d5df.jpg

                81 XS 1100 LH MNS
                SPICA
                http://i946.photobucket.com/albums/ad305/mack-055/2.jpg

                78 XS 11E
                IOTA
                https://youtu.be/wB5Jfbp6SUc
                https://youtu.be/RaI3WYHSuWA


                Have recovery trailer and shop if you breakdown in my area.
                Frankford, Ont, Canada
                613-398-6186

                Comment


                • #23
                  Forgive me if I'm being a bit thick here....

                  Mack you say you marked a line on the float bowl 3mm below the gasket face, which your fuel levels appear to be spot on to.

                  But BillyRoks FSM diagram shows the 3mm being below the float bowl outer face where the screw heads tighten up on.

                  This would make your fuel levels (at a guess) about 6mm too high.
                  Tom
                  1982 5K7 Sport, restored to original from a wreck
                  1978 2H9 (E), my original XS11, mostly original
                  1980 2H9 monoshocked (avatar pic)http://i145.photobucket.com/albums/r...psf30aa1c8.jpg
                  1982 XJ1100, waiting resto to original

                  Comment


                  • #24
                    Would people recommend doing this for a set of carbs, cleaned and rebuilt with the same floats but new float valve seats and needles? Ie my carbs that I'm in the process of rebuilding.

                    I haven't worked out why but I find the idea of doing this a bit daunting.. . The last carb rebuild I did, I used Georgefix jets, new float valve seats and needles and just put everything together without checking float levels. I didn't have any problems at all, although the general consensus was that non-Mikuni jets etc could cause problems. This time, my gut reaction is to check and alter the float levels if necessary but I've never done it before so it's freaking me slightly (.confidence issues...bane of my life..any psychiatrists on the forum with a spare half hour?)

                    The floats are all ok and undamaged and seem fine....
                    XS1100F 1980 European model. Standard. Dyna coils. Iridium plugs. XS750 final drive (sometimes). Micron fork brace. Progressive front springs. Geezer regulator/rectifier. Stainless 4 into 2 exhaust. Auto CCT (Venturer 1300) SOLD. New project now on the go. 1980 European model.

                    Comment


                    • #25
                      Float Height

                      Originally posted by James England View Post
                      Would people recommend doing this for a set of carbs, cleaned and rebuilt with the same floats but new float valve seats and needles? Ie my carbs that I'm in the process of rebuilding.

                      I haven't worked out why but I find the idea of doing this a bit daunting.. . The last carb rebuild I did, I used Georgefix jets, new float valve seats and needles and just put everything together without checking float levels. I didn't have any problems at all, although the general consensus was that non-Mikuni jets etc could cause problems. This time, my gut reaction is to check and alter the float levels if necessary but I've never done it before so it's freaking me slightly (.confidence issues...bane of my life..any psychiatrists on the forum with a spare half hour?)

                      The floats are all ok and undamaged and seem fine....
                      Hi James,

                      If you are comfortable with setting the float heights with the measuring device of your choice, you have done enough. The level check with the tubes is just that - a check.

                      This would be similar to checking gear tooth pattern with marking compound after setting up a ring and pinion.

                      The results of your float height setting will be revealed by plug color and/or MPG.

                      Interestingly, the float levels are presumed correct with the bike/carburetor bank level. Question is - when is the bike ever truly level?

                      Mike
                      1981 XS1100H Venturer
                      K&N Air Filter
                      ACCT
                      Custom Paint by Deitz
                      Geezer Rectifier/Regulator
                      Chacal Stainless Steel Braided Brake Lines
                      Chrome Front Rotor & Caliper Covers
                      Stebel Nautilus Horn
                      EBC Front Rotors
                      Limie Accent Moves On In 2015

                      Mike

                      Comment


                      • #26
                        James,

                        It's actually easier to check the fuel levels than it is to write about it.


                        The fuel level check is a dynamic test performed with the carburetors on the bike with the engine running.

                        It's been a while so double check the fitting diameter and pitch but for the early carbs with drain plugs in the float bowls instead of the later drain screw and hose nipple you'll need:

                        four 8mm x 1.0mm brake bleeder screws
                        Teflon tape
                        four clear nylon hoses
                        four hose clips or plastic ties


                        Grab your handy-dandy fire extinguisher and take it and the bike outdoors.

                        Put the bike up on the center stand and make sure it's level side-to side. Don't worry too much about the level front-to-rear, unless it's a truly serious grade it'll be alright.

                        Make sure the fuel taps are not set to Prime.

                        Remove the float bowl drain plugs and catch the fuel in a spark-free container.

                        Wrap some Teflon tape around the threads of the bleeder screws and put them in the float bowls.

                        Push the clear hoses onto the nipples of the bleeder screws.

                        Pick a side to work from, right or left, and secure the hoses to the outer carburetor body with the open ends of the hoses several inches/centimeters above the float bowl gasket.

                        Turn the fuel taps to the Prime position to fill the float bowls and watch for leaks.

                        After you fix any leaks, grab the fire extinguisher and start the engine.


                        The fuel levels in the hoses will drop slightly when you rev the engine, then return to a relatively static level at idle.

                        If the fuel drop during acceleration is not close to identical in all four hoses then one or more of the cylinders isn't doing its job -- troubleshoot.

                        If the fuel level in all four hoses is not close to identical after return to idle then one or more floats are out of adjustment -- adjust the float(s).


                        Turn the fuel taps to the Off (not Prime) position and drain the float bowls into a spark-free container.

                        Remove the brake bleeder screws and put the float bowl drain plugs back in the float bowls.

                        Turn the fuel taps to Prime to refill the float bowls and check for leaks.

                        Put the fire extinguisher back in the garage and quit messing with the carbs -- go ride somewhere, anywhere!


                        .
                        -- Scott
                        _____

                        2004 ST1300A: No name... yet
                        1982 XJ1100J: "Baby" SS Brakes, '850 FD, ACCT
                        1980 XS1100G: "Columbo" SS Brakes, '850 FD, ACCT
                        1979 XS1100SF: "Bush" W.I.P.
                        1979 XS1100F: parts
                        2018 Heritage Softail Classic 117 FLHCS SE: "Nanuk" It's DEAD, it's not just resting. It is an EX cycle.

                        Comment


                        • #27
                          In lieu of bleeder screws, you can alternatively use grab some grease fittings from the local hardware store, and take them apart and remove the ball/spring.
                          -Mike
                          _________
                          '79 XS1100SF 20k miles
                          '80 XS1100SG 44k miles
                          '81 XS1100H Venturer 35k miles
                          '79 XS750SF 17k miles
                          '85 Honda V65 Magna ~7k miles
                          '84 Honda V65 Magna 48k miles (parts bike)
                          '86 Yamaha VMAX 9k miles

                          Previous: '68 Motoguzzi 600cc + '79 XS750SF 22k miles +'84 Honda V65

                          Comment


                          • #28
                            That, Scott, was an AWESOME write up!
                            Really? Brake Bleeder Screws? Who would of thought that?!?
                            Hi, my name is George & I'm a twisty addict!

                            80G (Green paint(PO idea))
                            The Green Monster
                            K&N A/F, TC's fuse block, '81 oil cooler, TC's homemade 4-2 w/Mac Mufflers, Raptor 660 ACCT
                            Got him in '04.
                            bald tire & borrowing parts

                            80SG (Black w/red emblems & calipers)
                            Scarlet
                            K&N A/F, TC's fuse block, WJ5, Shoei bags, Raptor 660 ACCT.
                            Got her in '11
                            Ready for the twisties!

                            81H (previously CPMaynard's)
                            Hugo
                            Full Venturer, Indigo Blue with B/W painted tank.
                            Cold weather ride

                            Comment


                            • #29
                              Not My Idea

                              It wasn't me, George, there've been a few posts about it on this site but a quick Google search pulled up the thread with James, Larry (Yahman), and '91-'97 Ford Escort brake bleeder screws. They don't take up much room so I keep the fittings and hoses stashed on Columbo in case of trouble out on the road.

                              If there's any doubt at all, take one of the float bowls to the parts store to make sure the bleeder screws fit before you buy four of them and mess up the threads in the float bowls.

                              .
                              -- Scott
                              _____

                              2004 ST1300A: No name... yet
                              1982 XJ1100J: "Baby" SS Brakes, '850 FD, ACCT
                              1980 XS1100G: "Columbo" SS Brakes, '850 FD, ACCT
                              1979 XS1100SF: "Bush" W.I.P.
                              1979 XS1100F: parts
                              2018 Heritage Softail Classic 117 FLHCS SE: "Nanuk" It's DEAD, it's not just resting. It is an EX cycle.

                              Comment

                              Working...
                              X