Announcement

Collapse
No announcement yet.

Piston rings / shaving fins

Collapse
X
 
  • Filter
  • Time
  • Show
Clear All
new posts

  • #16
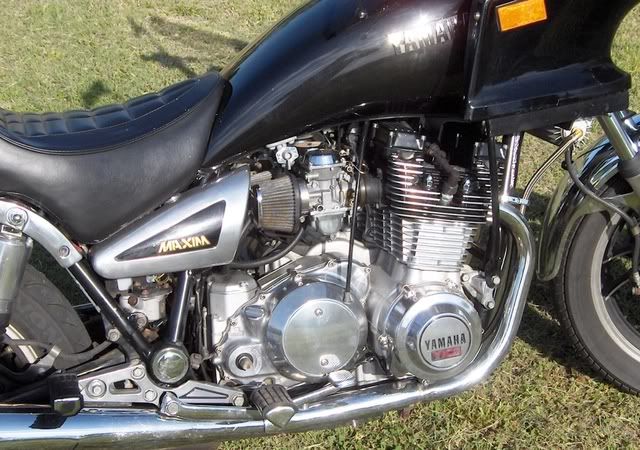
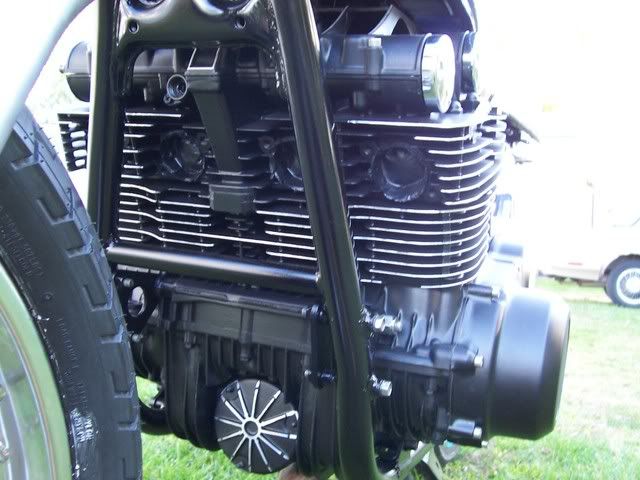
    I sandblasted the head on mine, then used a palm sander on the edges of the fins. I started out using a fairly aggressive grit like 120, then got it looking nice progressively down to @ a 1000 grit. Then I painted the head with high temp paint, let it dry a day or two, then used a 1500 wet paper with the palm sander again and took the paint off the edges and polished the metal back up.
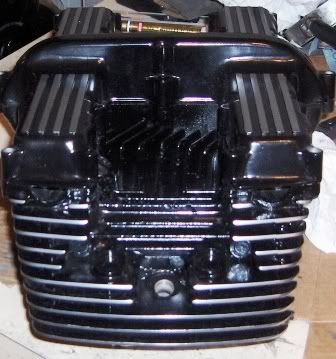


    Did the rest of the motor in high temp silver.
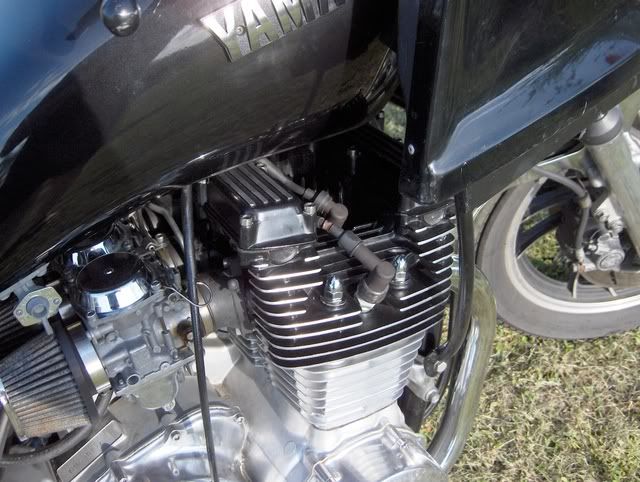


    Then I rode the dang thing @ 100,000 miles and quit worrying about "Pretty" so much... lol.
    Try your hardest to be the kind of person your dog thinks you are.

    You can live to be 100, as long as you give up everything that would make you want to live to be 100!

    Current bikes:
    '06 Suzuki DR650
    *'82 XJ1100 with the 1179 kit. "Mad Maxim"
    '82 XJ1100 Completely stock fixer-upper
    '82 XJ1100 Bagger fixer-upper
    '82 XJ1100 Motor/frame and lots of boxes of parts
    '82 XJ1100 Parts bike
    '81 XS1100 Special
    '81 YZ250
    '80 XS850 Special
    '80 XR100
    *Crashed/Totalled, still own

    Comment


    • #17
      Originally posted by trbig View Post

      This is pretty much exactly what I wanna do. Thanks for the sanding info.

      This still leaves me with one question that hasn't been answered yet. If I pull the cylinders off, will I have any issues reusing the old rings, if they were ok before I removed the cylinders? I'm getting smoking off of the engine under the carbs, and out of the exhaust attachment points. I'm still going to super clean everything, to make sure that its not just burning oil, and I'll be replacing the exhaust gaskets, and I'd like to replace the head gasket, and the one under the cylinders, but I'd have to take them off to get there. If the smoking stops after a good deep clean, I won't worry about it, but I kinda like the piece of mind knowing that everything is replaced, and any potential leaky spots are new and completely sealed.
      -Whatever it is, it's better in the wind.

      1980 XS1100SG - "Bluesy Suzy"
      -Oil cooler
      -TKAT Fork Brace
      -Drilled Airbox w/ K&N
      -Engine guards
      -Speed Bleeders
      -TC's blade fuse block (waiting to be installed)

      Comment


      • #18
        If you pull the cylinders, you've messed up where the rings were riding and a light hone would be in order if the rings check good. Though not the most scientific, what I would do is carefully take just the top ring off each piston (One at a time so to make sure each goes back into the hole it came from... and also don't mess up which side of the ring faces up/down and re-install same way) and slide it down into the cylinder and measure the ring gap at the top, middle and bottom of the cylinder where the piston stroke is. Look in your manual to see what the max gap allowed is. Theoretically, you should do all the rings this way, but they get very brittle and there's a good chance of snapping one while taking them off and on. If everything measures out to spec, be careful of the gap spacing on the rings according to the manual and put it back together.
        Last edited by trbig; 11-21-2012, 02:28 PM.
        Try your hardest to be the kind of person your dog thinks you are.

        You can live to be 100, as long as you give up everything that would make you want to live to be 100!

        Current bikes:
        '06 Suzuki DR650
        *'82 XJ1100 with the 1179 kit. "Mad Maxim"
        '82 XJ1100 Completely stock fixer-upper
        '82 XJ1100 Bagger fixer-upper
        '82 XJ1100 Motor/frame and lots of boxes of parts
        '82 XJ1100 Parts bike
        '81 XS1100 Special
        '81 YZ250
        '80 XS850 Special
        '80 XR100
        *Crashed/Totalled, still own

        Comment


        • #19
          New rings- make sure the carbs and electrical were correct BEFORE the tear down. Not good to be troubleshooting flooding carbs and broken ign advance wires when your rings are new and not seated. Break in? I immediately did some going thru the gears. Not redline but not babying like consensus of old days.

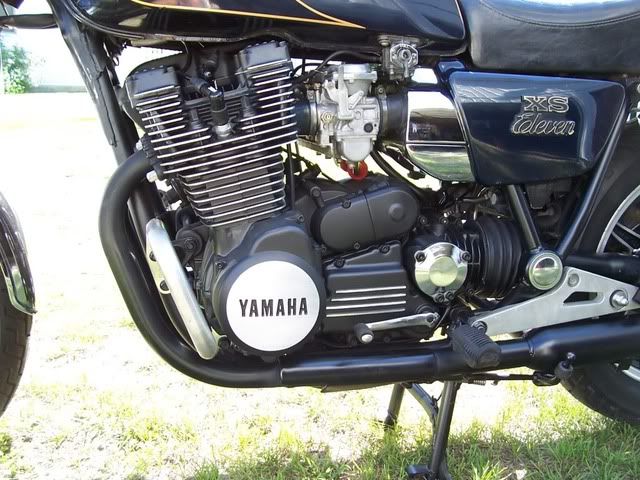
          Ive done 3 engine blackouts with PJ1 case paint. I liked the accuracy of my rotary flexshaft tool with a carbide cutter. Held the end like a pencil an took my time LIGHTLY removing paint and light imperfections in the fin ends with the tippy tip of the bullit shaped carbide bit. Of course sandpaper does fine- I just cant stand when the paper hits a fin I am not trying to sand.

          Comment


          • #20
            Just beautiful!!!!!!!!!!!
            1979 XS1100F
            2H9 Mod, Truck-Lite LED Headlight, TECHNA-FIT S/S Brake Lines, Rear Air Shocks, TKAT Fork Brace, Dyna DC-I Coils, TC Fuse Block, Barnett HD Clutch Springs, Superbike Handlebars, V-Star 650 ACCT, NGK Irridium Plugs, OEM Exhaust. CNC-Cut 2nd Gear Dogs; Ported/Milled Head; Modded Airbox: 8x8 Wix Panel Filter; #137.5 Main Jet, Viper Yellow Paint, Michelin Pilot Activ F/R, Interstate AGM Battery, 14MM MC, Maier Fairing, Cree LED Fog Lights.

            Comment


            • #21
              ????????


              Your oil filter cover???


              Oops... Never mind.. not an XS11 motor.
              Try your hardest to be the kind of person your dog thinks you are.

              You can live to be 100, as long as you give up everything that would make you want to live to be 100!

              Current bikes:
              '06 Suzuki DR650
              *'82 XJ1100 with the 1179 kit. "Mad Maxim"
              '82 XJ1100 Completely stock fixer-upper
              '82 XJ1100 Bagger fixer-upper
              '82 XJ1100 Motor/frame and lots of boxes of parts
              '82 XJ1100 Parts bike
              '81 XS1100 Special
              '81 YZ250
              '80 XS850 Special
              '80 XR100
              *Crashed/Totalled, still own

              Comment


              • #22
                Originally posted by trbig View Post
                ????????


                Your oil filter cover???


                Oops... Never mind.. not an XS11 motor.
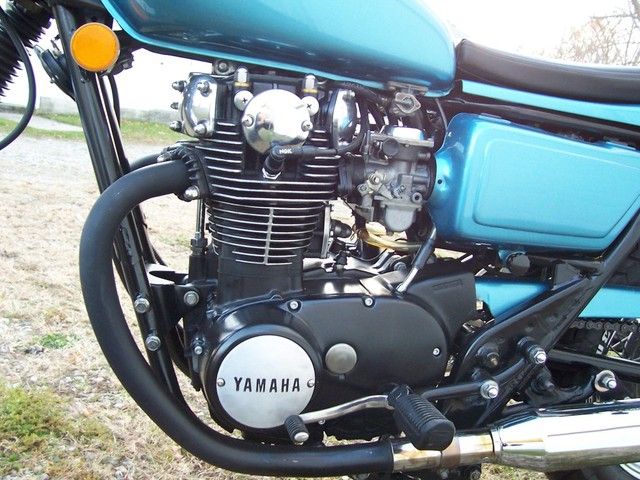
                Its a 79 GS1000N I am fixing up for my brother. Oil filter cover was removed, blasted and painted- THEN I gently applied a belt sander to the ribbing. Why? Because I could!!

                Here is my XS1100 motor


                MyXS650

                Comment


                • #23
                  Hey there Misfit,

                  You've teased us with "some" info regarding your troubles...but have not told us the whole story! You mentioned rpm changes when spraying WD-40 around carbs....sealed new intake boots, but haven't told us what you may have done to the carbs? IS the bike one you've had for a while, or is it a NEW TO YOU machine where you may not know what a P.O.(Previous Owner) has done to it....like cleaned the carbs by soaking the bodies in caustic auto carb dip which could have damaged the butterfly shaft seals=vac. leak!

                  The smoking from around/below the carbs and exhaust ports is rarely a leaking base gasket...more common is the cam chain tensioner housing or lock bolt/nut combo O-ring on the CCT leaks as well as the valve cover gasket...wind blows it back thru the vents in the head where it can then land below the carbs, drip down the head, etc.! Also the topend oil supply pipe can leak, but it's rare compared to the valve cover/CCT sources.

                  The cylinder base gasket isn't under any real pressure, and IIRC the sealing O-rings were not used in the later engines, just the gasket. A few folks have had good luck sealing with just a nice layer of your choice of RTV spread/smeared along the seam AFTER a thorough cleaning to remove OIL! This would prevent you from having to remove the cylinders and disturbing the rings and seat.

                  So...it would be advised to truly ruleout the source of the leaking oil before "tearing" the engine apart. How long have you had the bike, has it been regularly run, or has it sat for quite a while? The rings can get slightly stuck from sitting and will usually reseat with just a few hundred miles of running.

                  I understand the need/desire to remove the head to repair the broken exhaust stud, but as stated would recommend doing a proper comp. test as mentioned to determine rings or valve leaks. These engines are quite strong and many have seen 100+K miles without rebuilds! IF the rings are strong and you have good comp readings, then pulling the head to fix the stud may be all that's needed, but doing a valve lapping and replacing the stem seals is still suggested since you'll have it off anyways. Good Luck.

                  T.C.
                  T. C. Gresham
                  81SH "Godzilla" . . .1179cc super-rat.
                  79SF "The Teacher" . . .basket case!
                  History shows again and again,
                  How nature points out the folly of men!

                  Comment

                  Working...
                  X