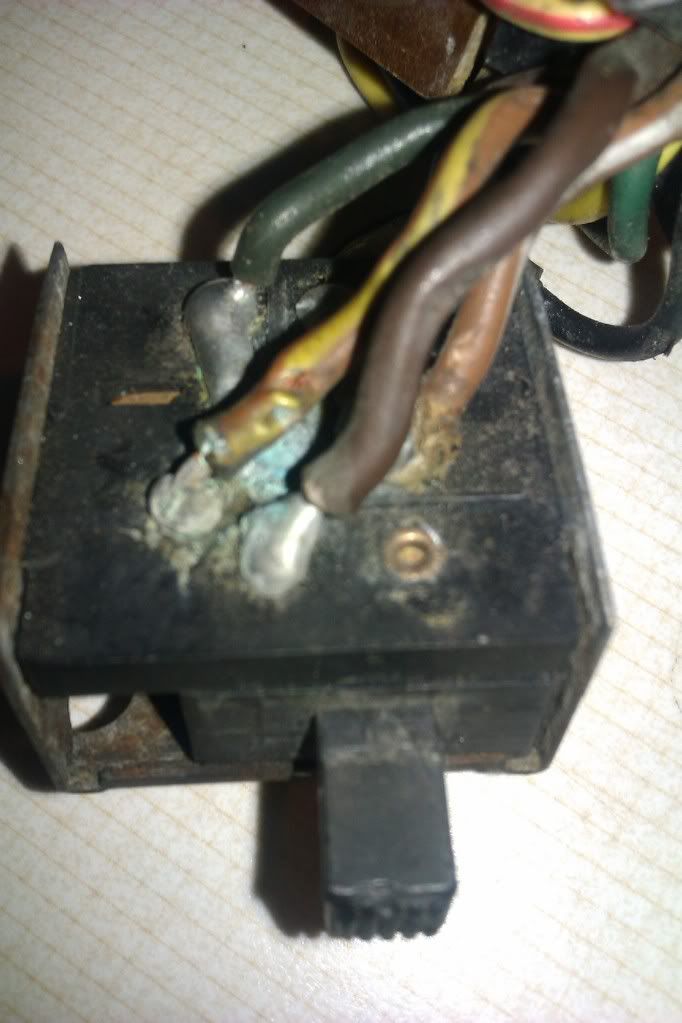
Need help with wiring. So lost
Collapse
X
-
Cy
1980 XS1100G (Brutus) w/81H Engine
Duplicolor Mirage Paint Job (Purple/Green)
Vetter Windjammer IV
Vetter hard bags & Trunk
OEM Luggage Rack
Jardine Spaghetti 4-2 exhaust system
Spade Fuse Box
Turn Signal Auto Cancel Mod
750 FD Mod
TC Spin on Oil Filter Adapter (temp removed)
XJ1100 Front Footpegs
XJ1100 Shocks
I was always taught to respect my elders, but it keeps getting harder to find one. -
Good picture CY. Glad to see you are doing better. I would have done it but I am 100 miles from home tonight.
Now with the picture and the info Steve sent you should be able to solder and test. You still may want to clean and lubricate the switch internally after the fix.To fix the problem one should not make more assumptions than the minimum needed.
Rodan
https://www.youtube.com/watch?v=khm6...liHntN91DHjHiS
1980 G Silverbird
Original Yamaha Fairfing and Bags
1198 Overbore kit
Grizzly 660 ACCT
Barnett Clutch Springs
R1 Clutch Fiber Plates
122.5 Main Jets
ACCT Mod
Mac 4-2 Flare Tips
Antivibe Bar ends
Rear trunk add-on
 http://s1184.photobucket.com/albums/z329/viperron1/
Comment
-
Not to hijack but looking at my switch it appears that I've been POed. My brown/white wire appears to be in the wrong spot.

Would this cause a very rapid blink when the hazards are on but let the blinkers flash at a normal rate?Last edited by daf1668; 01-28-2012, 09:41 PM.Current 1981 xs1100H
First Bike was 1982 xj550jComment
-
my switch solder repair
I had to resolder my switch leads back together a few months ago. My advice is to watch how hot you get the joint. I had a hard time getting mine to stay connected after it cooled. So I went and got a soldering gun. (More heat) it so hot, the plastic started melting. After about 2hrs I finally got it all back together.Hi, my name is George & I'm a twisty addict!
80G (Green paint(PO idea))
The Green Monster
K&N A/F, TC's fuse block, '81 oil cooler, TC's homemade 4-2 w/Mac Mufflers, Raptor 660 ACCT
Got him in '04.
bald tire & borrowing parts
80SG (Black w/red emblems & calipers)
Scarlet
K&N A/F, TC's fuse block, WJ5, Shoei bags, Raptor 660 ACCT.
Got her in '11
Ready for the twisties!
81H (previously CPMaynard's)
Hugo
Full Venturer, Indigo Blue with B/W painted tank.
Cold weather rideComment
-
IIRC that is the same place electrically, so it should work fine. The fast on the 4 ways but normal on the normal turn signals would point to the wrong flasher unit on the 4 way flasher. Easiest fix is to replace the 4 way flasher with a 2 prong heavy duty automotive flasher which will then always flash at the same (proper) speed no matter what the load. I'm seriously considering changing mine out that way to get more noticeable 4 ways, as I'm not happy with the way they work right now. I've got one laying around that should work fine, I just have to do it, but I'm running a little short on get up and go for some reason right now . I can't figure out why that would be though
  .
.
Other than installing the replacement mirror when it comes in, and tightening the highway pegs some more, I've pretty much got the mechanical work done (still got one or two things left to do, but the bike is street worthy as of this moment), but I can't seem to make myself get down there and do the work to put the auto cam chain tensioner in. Cy
Cy
1980 XS1100G (Brutus) w/81H Engine
Duplicolor Mirage Paint Job (Purple/Green)
Vetter Windjammer IV
Vetter hard bags & Trunk
OEM Luggage Rack
Jardine Spaghetti 4-2 exhaust system
Spade Fuse Box
Turn Signal Auto Cancel Mod
750 FD Mod
TC Spin on Oil Filter Adapter (temp removed)
XJ1100 Front Footpegs
XJ1100 Shocks
I was always taught to respect my elders, but it keeps getting harder to find one.Comment
-
The flasher unit for the hazards has probably been changed and is too light duty. Try a different flasher.
It's right under the seat where you sit.Greg
Everybody is a genius. But if you judge a fish by its ability to climb a tree, it will live its whole life believing that it is stupid.”
― Albert Einstein
80 SG Ol' Okie;79 engine & carbs w/pods, 45 pilots, 140 mains, Custom Mac 4 into 2 exhaust, ACCT,XS850 final drive,110/90/19 front tire,TKat fork brace, XS750 140 MPH speedometer, Vetter IV fairing, aftermarket hard bags and trunk, LG high back seat, XJ rear shocks.
The list changes.
Comment
-
Thanks for all the help guys. Those pictures will surely do a lot of good. I'm going to give that setup a shot from cy's pic. Ill let you know how it turned out1981 yamaha xs eleven standardComment
-
Turn and Hazard Schematic
Mr. T, I honestly don't remember where the wires connect on the switch and I'd have to open it up to take a picture; not going to happen today.
Here's the Yamaha factory schematic for the turn signals and hazard flashers.
Click the image to enlarge:-

I re-soldered all of the connections a few years ago and I know they work because I keep testing them by bumping the switch with the back of my hand when I unsnap the tonneau cover on the fairing. -- Scott
_____
♬
2004 ST1300A: No name... yet
1982 XJ1100J: "Baby" SS Brakes, '850 FD, ACCT
1980 XS1100G: "Columbo" SS Brakes, '850 FD, ACCT
1979 XS1100SF: "Bush" W.I.P.
1979 XS1100F: parts
2018 Heritage Softail Classic 117 FLHCS SE: "Nanuk" It's DEAD, it's not just resting. It is an EX cycle.
♬Comment
Comment