One issue with the standard square headlight is as-sold, you can only use a Yamaha replacement, which as we all know are difficult to find sometimes and usually expensive. I suggested this to DaVinci, but was at a boneyard yesterday so I picked up a car/truck headlight bucket assembly to see if this was feasible... well, it is. 
Here's the how-to and if all you have is the bucket and trim ring, I'll give dimensions so you don't even need a OEM light for a pattern...
[IMG]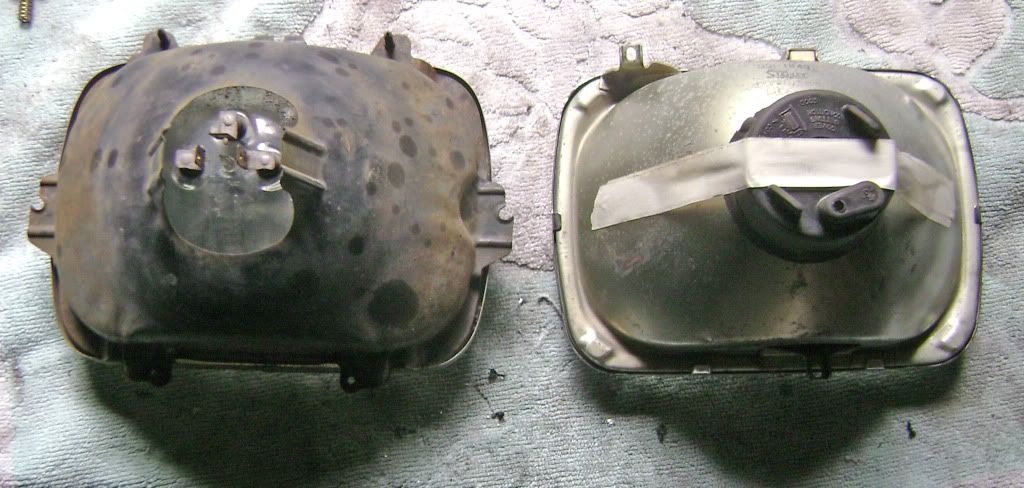 [/IMG]
Here's the comparison between a OEM and automotive-type bucket. In this case, this one is off a '80s S-10, but there's plenty of other vehicles that used these and they'll all work as long as the trim/retaining ring is rounded like this one. Cost me all of $7....
[IMG]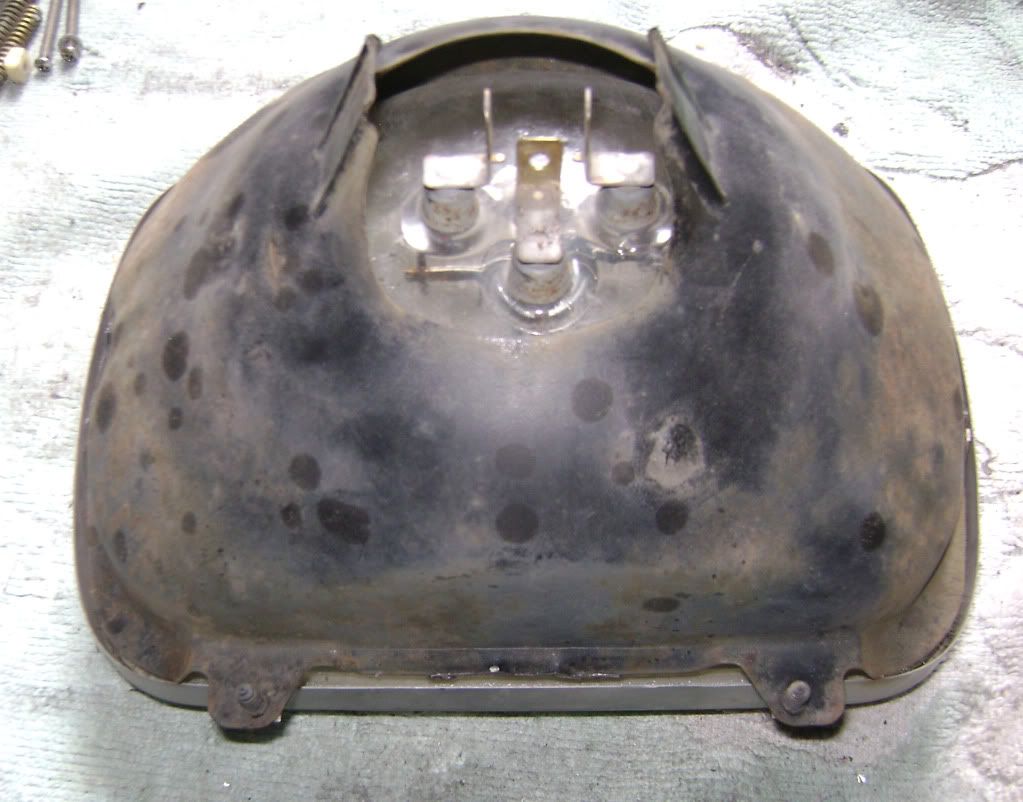 [/IMG]
Cut off the original adjusting/mounting ears.
[IMG]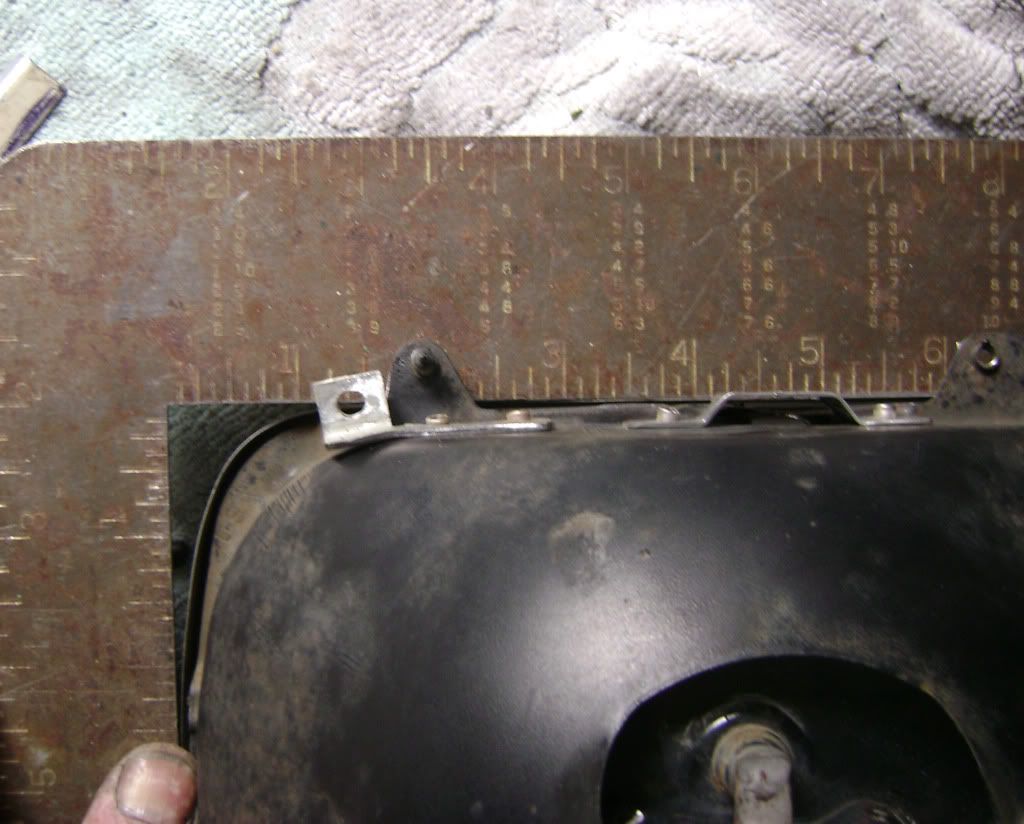 [/IMG]
The next several pics are all related. In this one, this is how you locate the mounting points. Using a square against the top and left edges (looking from the back), the center of the main mount is 4.5" over from the left end. The top aiming screw is 1.5" in, or 3" from the center hole. The lower adjusting screw is opposite the top center hole.
[IMG]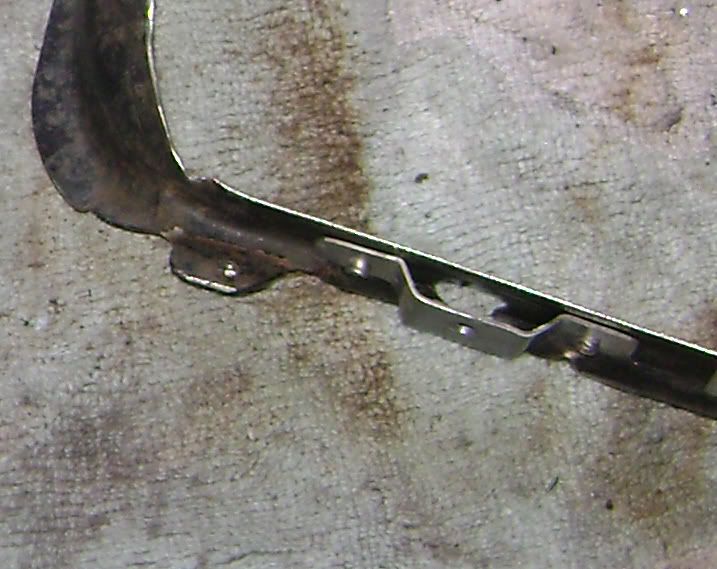 [/IMG]
Main mount fabbed and installed. The top of this should be between 1/32" and 1/16" higher than the headlight retaining ring, or in this case, 1/4" above the bucket. I'll note here that the two adjusting brackets should have their hole centers even with the retaining ring also. I'll also note that the main mount I made out of some scrap body sheetmetal, but I used some stouter .062 thick material for the adjusting brackets so they won't bend.
[IMG]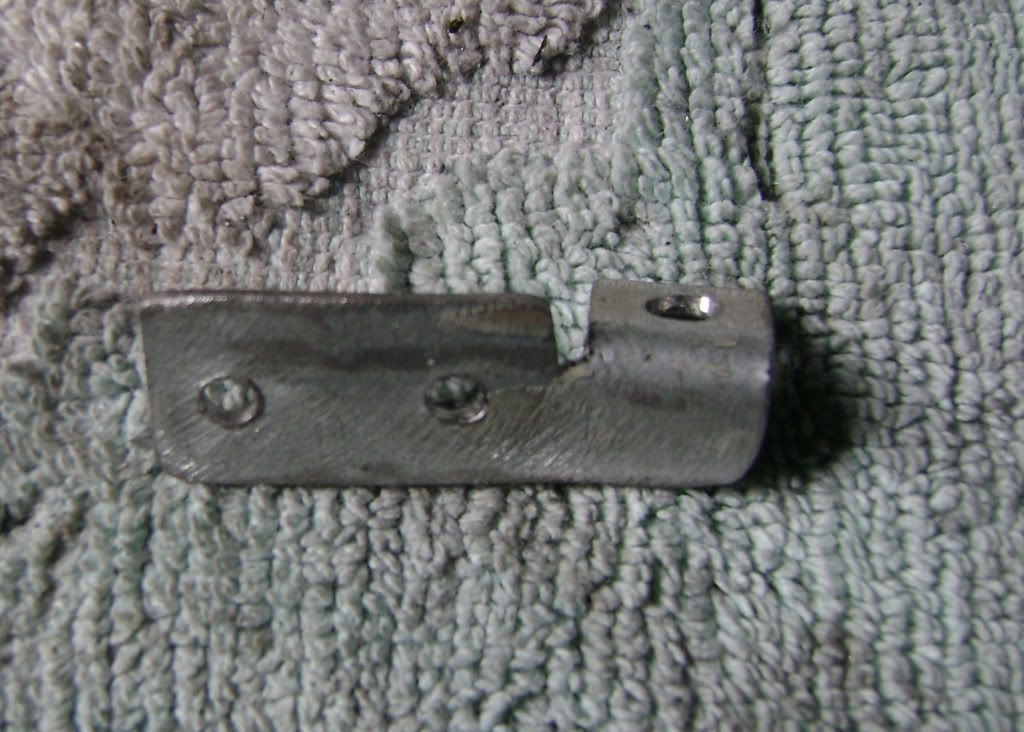 [/IMG]
The upper adjusting bracket. The 'tab' with the hole in it should be .4" (13/32") on it's inside length after bending. Bend it to 90 degrees, then go another 15 for the correct angle, and do the same for the lower bracket. By the way, all the screw holes are 3/16".
[IMG]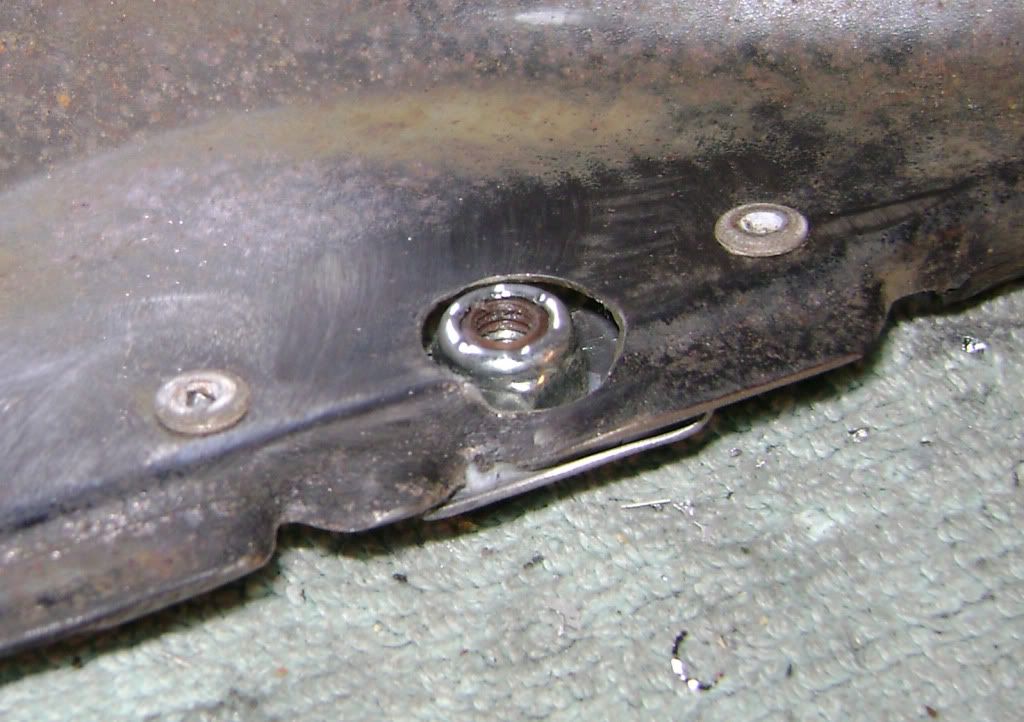 [/IMG]
I drilled a 7/16" hole through the bucket for a nut. I'm using a 10/32 screw and nylock nut for the main mount. You'll need to lay the nut in there loose, then install the light. You'll be able to hold the nut with some needle-nose pliers when assembling. Note that the screw cannot be any longer than 3/8" or it will contact the light. Also note that I did the pop rivets from inside shell for the same reason; it's tight in there...
This pic is important; to properly locate the headlight, the center of the mounting should be exactly 1.125" from the front edge of the retaining ring.
[IMG]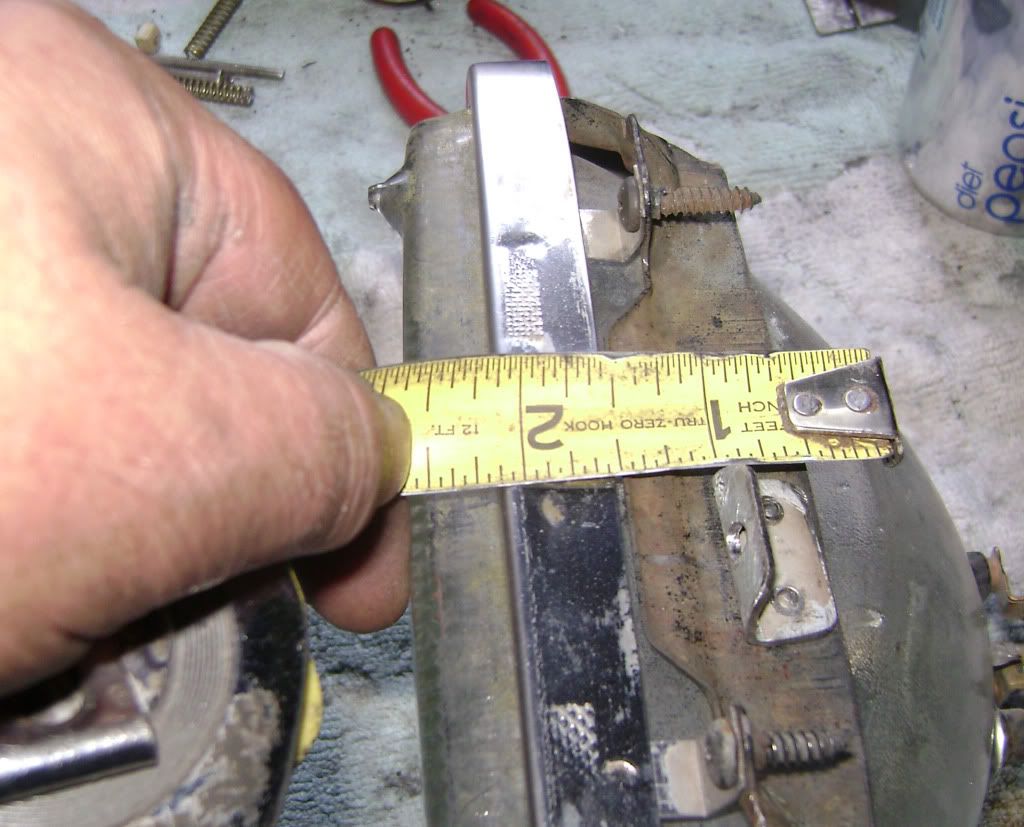 [/IMG]
Same thing goes for the adjusting tabs, although you have a little wiggle room here...
[IMG]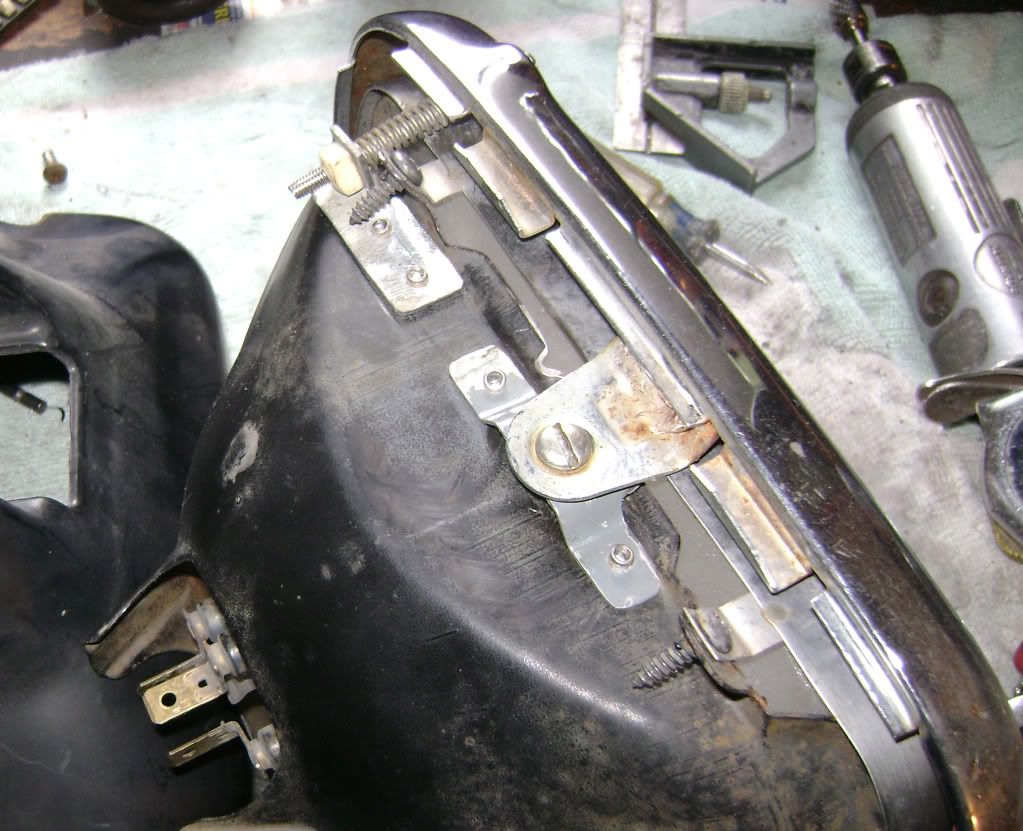 [/IMG]
This shows the finished top mounts, but also shows that I had to bend the two top retaining ring tabs back for clearance; the bottom ones should be OK.
[IMG]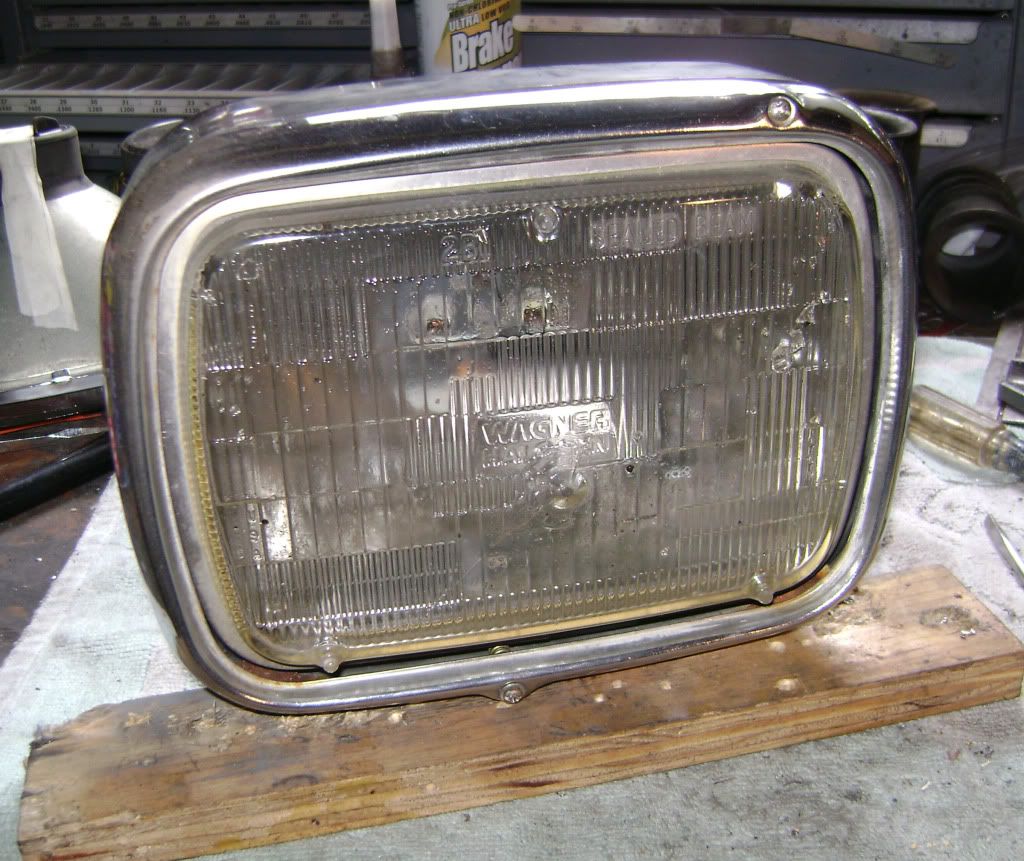 [/IMG]
Installed headlight... looks factory...
[IMG]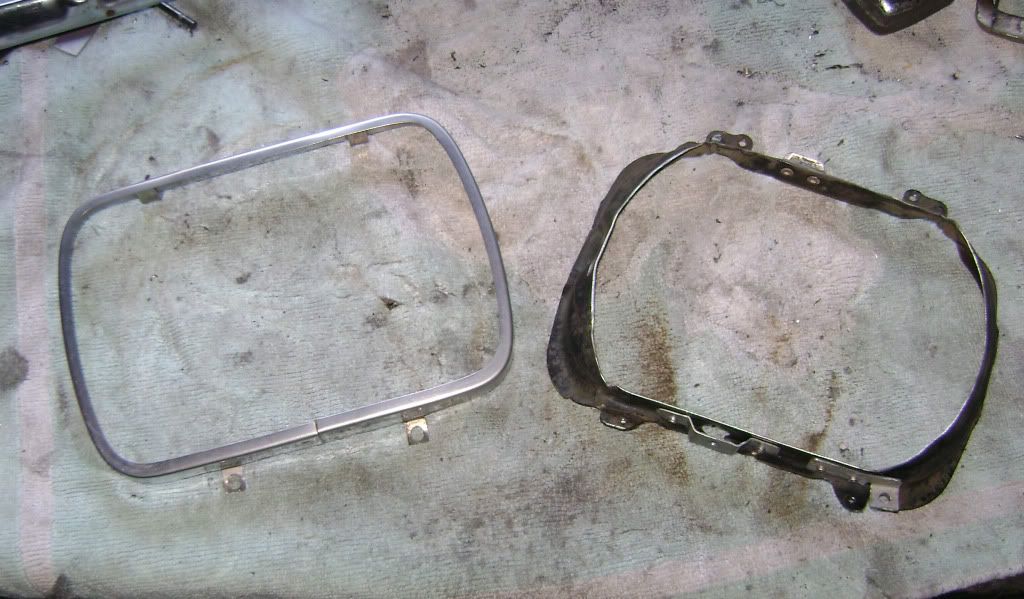 [/IMG]
Final modified parts. I cut the excess back out of the bucket (that was harder than all the rest!) for a bit more room, but you may not need to.
If you don't have any of the OEM hardware, you'll need one 10/32 x 3/8" screw, one 10/32 nyloc nut (I don't see any way to get a lockwasher in there) for the main mount, and two 8/32 x 2.25" screws, two 8/32 square nuts, and two .25" OD x 2" long springs. You may be able to find the springs at the wrecking yard, look around.
You can now use any standard 5x7 automotive headlight, or any aftermarket replacement like a Cibie or Hella. No more hunting for a good OEM unit...
That's it unless there's any questions...

Here's the how-to and if all you have is the bucket and trim ring, I'll give dimensions so you don't even need a OEM light for a pattern...
[IMG]
 [/IMG]
Here's the comparison between a OEM and automotive-type bucket. In this case, this one is off a '80s S-10, but there's plenty of other vehicles that used these and they'll all work as long as the trim/retaining ring is rounded like this one. Cost me all of $7....
[IMG]
 [/IMG]
Cut off the original adjusting/mounting ears.
[IMG]
 [/IMG]
The next several pics are all related. In this one, this is how you locate the mounting points. Using a square against the top and left edges (looking from the back), the center of the main mount is 4.5" over from the left end. The top aiming screw is 1.5" in, or 3" from the center hole. The lower adjusting screw is opposite the top center hole.
[IMG]
 [/IMG]
Main mount fabbed and installed. The top of this should be between 1/32" and 1/16" higher than the headlight retaining ring, or in this case, 1/4" above the bucket. I'll note here that the two adjusting brackets should have their hole centers even with the retaining ring also. I'll also note that the main mount I made out of some scrap body sheetmetal, but I used some stouter .062 thick material for the adjusting brackets so they won't bend.
[IMG]
 [/IMG]
The upper adjusting bracket. The 'tab' with the hole in it should be .4" (13/32") on it's inside length after bending. Bend it to 90 degrees, then go another 15 for the correct angle, and do the same for the lower bracket. By the way, all the screw holes are 3/16".
[IMG]
 [/IMG]
I drilled a 7/16" hole through the bucket for a nut. I'm using a 10/32 screw and nylock nut for the main mount. You'll need to lay the nut in there loose, then install the light. You'll be able to hold the nut with some needle-nose pliers when assembling. Note that the screw cannot be any longer than 3/8" or it will contact the light. Also note that I did the pop rivets from inside shell for the same reason; it's tight in there...
[IMG]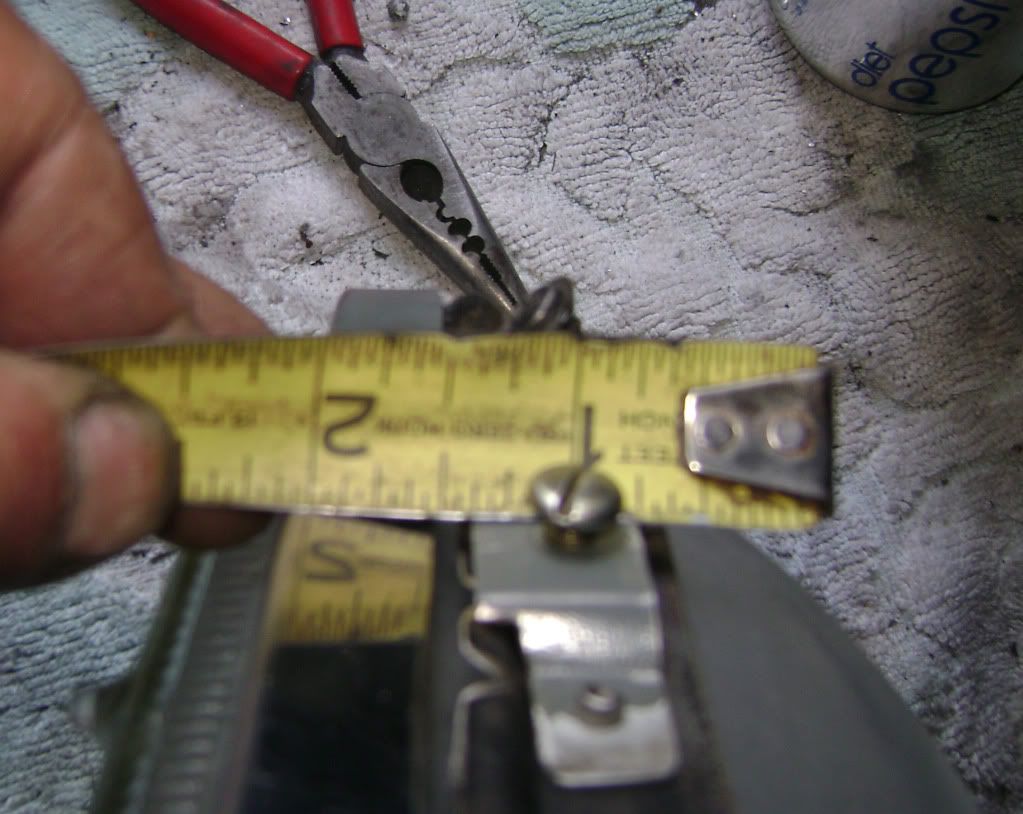 [/IMG]
 [/IMG]
[IMG]
 [/IMG]
Same thing goes for the adjusting tabs, although you have a little wiggle room here...
[IMG]
 [/IMG]
This shows the finished top mounts, but also shows that I had to bend the two top retaining ring tabs back for clearance; the bottom ones should be OK.
[IMG]
 [/IMG]
Installed headlight... looks factory...
[IMG]
 [/IMG]
Final modified parts. I cut the excess back out of the bucket (that was harder than all the rest!) for a bit more room, but you may not need to.
If you don't have any of the OEM hardware, you'll need one 10/32 x 3/8" screw, one 10/32 nyloc nut (I don't see any way to get a lockwasher in there) for the main mount, and two 8/32 x 2.25" screws, two 8/32 square nuts, and two .25" OD x 2" long springs. You may be able to find the springs at the wrecking yard, look around.
You can now use any standard 5x7 automotive headlight, or any aftermarket replacement like a Cibie or Hella. No more hunting for a good OEM unit...
That's it unless there's any questions...


Comment