Announcement

Collapse
No announcement yet.

Alternative Alternator Options

Collapse
X
 
  • Filter
  • Time
  • Show
Clear All
new posts

  • #61
    Right on, you got the frequency, Kenneth!

    D'oh! I did not see the stator wires before but now that you mention them I sure do.That'll make it a lot easier to tap than pulling the diode bridge but you really, really, should find out what the two unmarked mystery terminals are supposed to do, don't guess. It could make things easier or prevent tears after doing a benchload of work.

    The Yellow wire is 7V because it's tied to all the other phases. It sees half the voltage so it's 7V, not 14V. You can use the 7V relay for whatever you want, just make sure you put in a fuse because the O.E.M. relays are getting harder to find every year. You already have two White wires, one with a diode, in Godzilla's harness. You could put them both on the same phase leg and not upset the higher output alternator much or you could balance the load between two legs. You know how the guys in white coats did it when they designed the XS but it's up to you.

    For reference: A couple of days ago I discovered that the XJ1100 does not use a headlight relay, it uses the Start button to make/break the headlight circuit. I included both XS1100 relays and the wire colors because you know someone is going to try this with a '78/'79 and wonder about the differences in the lighting circuit!
    -- Scott
    _____

    2004 ST1300A: No name... yet
    1982 XJ1100J: "Baby" SS Brakes, '850 FD, ACCT
    1980 XS1100G: "Columbo" SS Brakes, '850 FD, ACCT
    1979 XS1100SF: "Bush" W.I.P.
    1979 XS1100F: parts
    2018 Heritage Softail Classic 117 FLHCS SE: "Nanuk" It's DEAD, it's not just resting. It is an EX cycle.

    Comment


    • #62
      More Progress.

      Hey Scott,

      Well, I played with the mini-Alt, put it on my bench vice, and took my 1350 rpm drill and chucked up a 10mm socket and tried to spin the alt while taking meter readings...but most likely my high torque corded drill wasn't strong or fast enough, all I got were ~350 mV AC out of the #'s 1,2,3 screws as well as ~350mVDC from the Main "B" output. I also got about 150mv DC out of 1 of the mystery terminals, and a negative reading on the other...so I've sorta figured that the (-) was the 12V input SENSOR wire, the other the Idiot Light. At proper rpms it should put out 12 V, and I would think we could tap that one with possibly a resistor to the 7V Yellow headlight relay for the 78-79s'. The 80-81 wiring diagram shows only 1 phase tapped for both Tach and headlight...remember the headlight is a latching one, so once it's energized, it stays connected until de-energized. I don't think it takes much to keep it energized, same for the tach trigger, so I don't see a problem with using the 1 tap for both. I'll test it out on my bike once I get the ALT mounted and the bike running...THEN I'll connect the TAP to the white wire, and we'll see IF the tach displays AND the headlight turns on!?

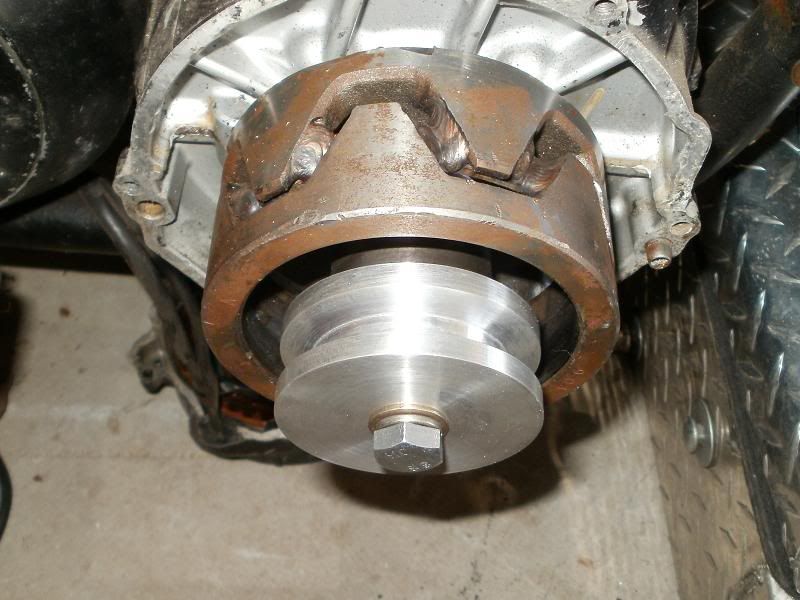
      Well, Since winter took a couple of days off around here, I was able to play with cutting out the mounting plate, as well as MAKE the crankshaft pulley! I had forgotten about the small incremental tool advance slide on my LATHE, and that I could ANGLE it to get the "V" shape!
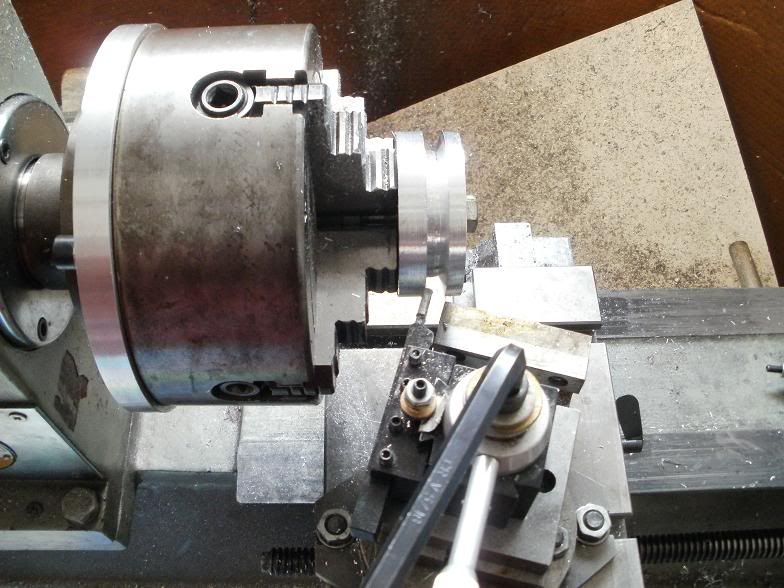


      Here it is mounted on the crank, it's quite small compared to the rotor since it is only 2.75" diam!


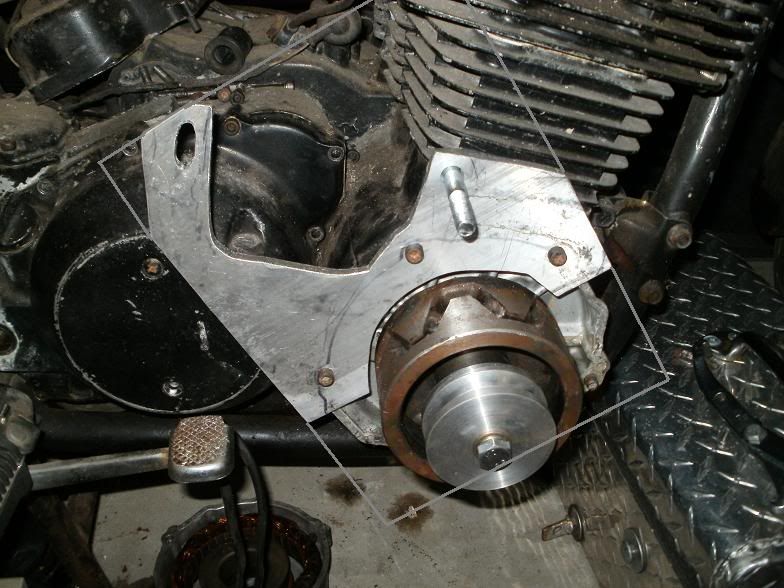
      Okay, here's the plate C-clamped to my workmate, showing a jigsaw to cut it out. This is 1/4" thick plate.....rated at 10,000 lbs strength, it should be plenty strong enough to hold/secure the mini-ALT to the bike. I'm showing the use of regular tools for anyone that may want to perform this mod, that you won't need to use a bandsaw and such.


      You can drill large holes at the corners so you can cut straight lines, it's tough trying to turn the jigsaw in Aluminum! I used the OEM ALT Case cover as a template to draw on the plate the areas for cutout.
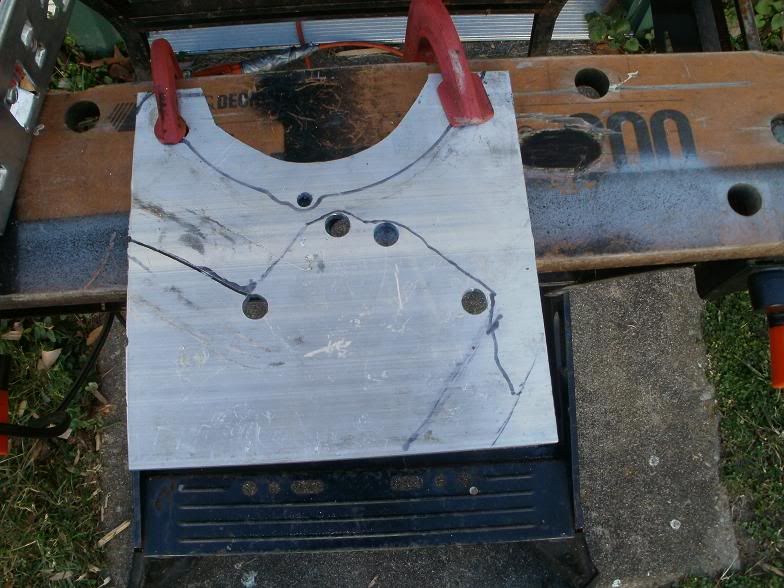


      Here it is on my basketcase spare bike/engine, I added the original dimension lines, along with extending the bottom to 13" long. ALL I had on hand were some 8" x 8" plate, but would suggest anyone doing this to use an 8" x 13" piece, and cut out the round center ROTOR section so that would have 1 solid piece, and a section to cover/secure the engine oil galley plug at the bottom!


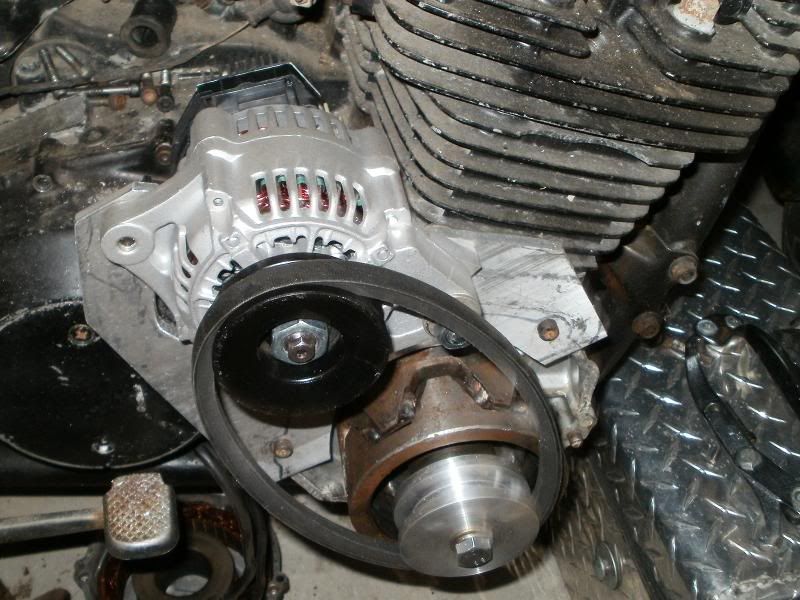
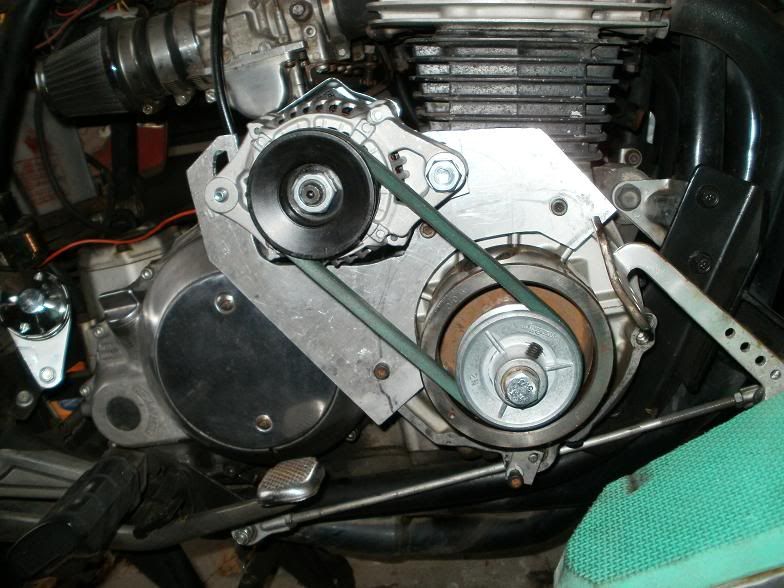
      Finally, here is the plate, alt, all mounted. I'll provide the bolt sizes and such in the formal tech tip. The belt is the wrong length...it's a 22" from my bandsaw, I found a 1/2" wide V-belt at NAPA 20" long, but they have to order it, it should be in tomorrow...and guess what...it's GREEN! It's a GATES brand, heavy duty for other than just auto applications...like lawnmowers or other industrial stuff! I'll provide the Gates brand Model # when I get it. I also had to grind off a little bit of the head of the large bolt holding the right end of the ALT, otherwise it would hit the engine cooling fin. I wanted to position it as far to the right as possible to provide as little interference with the clutch cable!


      I've made my 30" long 8ga charging cable, made the ALT Phase tap wire that will plug into one of the spades in the large white connector behind the fuseblock, also the 12V Sensor wire that will plug into the field coil portion of the reg/rect plugs.

      So...that's it so far. Once it's actually on my running bike and I have metered it at idle and such, I'll then post that info, along with working on the pulley guard covers and ALT...."RAIN" guard cover!

      Thanks for viewing..more to follow.
      T.C.
      T. C. Gresham
      81SH "Godzilla" . . .1179cc super-rat.
      79SF "The Teacher" . . .basket case!
      History shows again and again,
      How nature points out the folly of men!

      Comment


      • #63
        Are you going to leave the rotor open or is the guard going to cover the belt and rotor altogether?
        Nathan
        KD9ARL

        μολὼν λαβέ

        1978 XS1100E
        K&N Filter
        #45 pilot Jet, #137.5 Main Jet
        OEM Exhaust
        ATK Fork Brace
        LED Dash lights
        Ammeter, Oil Pressure, Oil Temp, and Volt Meters

        Green Monster Coils
        SS Brake Lines
        Vision 550 Auto Tensioner

        In any moment of decision the best thing you can do is the right thing, the next best thing is the wrong thing, and the worst thing you can do is nothing.

        Theodore Roosevelt

        Comment


        • #64
          I find it absolutely awesome that you are doing this mod to your bike I've been wanting to try this, but just have not had the experience or the time with these bikes to attempt this. I figured it would work and had been trying to get going on it so now that I can tag along on with your success I may be able to solve another problem of longevity to my 79 special.
          Even a blind monkey gets the odd banana.

          1979 XS 1100 special (been down the PO trail and it was messy)

          Comment


          • #65
            your doing nice work TC,
            was just curious why you are leaving the
            stator in place, if ur not going to use the
            original charging system wouldnt it be lighter
            if u took the stator off, also wouldnt it sit closer
            to the engine.
            pete


            new owner of
            08 gen2 hayabusa


            former owner
            1981 xs1100 RH (aus) (5N5)
            zrx carbs
            18mm float height
            145 main jets
            38 pilots
            slide needle shimmed .5mm washer
            fitted with v/stax and uni pod filters

            [url]http://www.youtube.com/watch?v=3pA8dwxmAVA&feature=mfu_in_order&list=UL[/url]

            Comment


            • #66
              Hey Pete,

              I think you mean ROTOR, that big heavy thing that spins inside the field coil and STATOR windings inside the ALT case!?

              The crank shaft is TAPERED, and leaving the ROTOR covers/fits the crankshaft taper, provides a simple flat surface to bolt/secure the flat pulley against, and provides the flywheel affect for the engine/crank.

              Also, because the mounting of the ALT along it's mid section makes it stick outwards away from the carbs/heads, and having the pulley on the end of the crank/rotor provides an easier alignment of the pulleys...IMHO.

              I got the belt today, and ordered the other Grainger pulley, and I want to wait for that pulley to arrive to see how it will fit and the positioning/alignment works out. Again, my aim to have this as bolt on/pnp, and home doable as possible.

              So...thanks Rooster, I'm hoping this pans out properly.
              Nate, the pudding's cooking, it's almost to a boil, and then it has to chill!
              But speaking of chill, winter has blown back into town, hopefully it won't be too cold this coming weekend when I hope to finalize the installation onto my actual runner, and do some performance tests!

              And, yes I plan on a sheet metal/aluminum cover for the belt/pulleys, as well as the ALT case to protect against water/rain without compromising air circulation/cooling. The Mini-Alt has 2 internal fans, and the folks that sold it said that it should cool just fine in CCW rotation. With moving air blowing around it while driving/riding, that should also help contribute to cooling vs. being in a stagnant auto engine compartment!

              T.C.
              T. C. Gresham
              81SH "Godzilla" . . .1179cc super-rat.
              79SF "The Teacher" . . .basket case!
              History shows again and again,
              How nature points out the folly of men!

              Comment


              • #67
                hi TC,
                yep i did mean the rotor,
                was thinking of the effect the rotor would have on the engine (fly wheel effect),
                but the crank on our engines have the hi vo chain connected to the middle
                of the crank compared to an auto veh which dont,
                so the weight of the rotor i dont think would make
                to much of a difference.
                but i do understand wher ur coming
                from in relation to setting it up.
                keep up the good work, looking forward to seeing how it all
                turns out.


                glad ur going to cover the pulleys, i cringe when i see them uncovered on some bikes near the feet, i had a mini bike when i was a kid with an uncovered pully that fell on top of my foot, and literally tore into it.
                pete


                new owner of
                08 gen2 hayabusa


                former owner
                1981 xs1100 RH (aus) (5N5)
                zrx carbs
                18mm float height
                145 main jets
                38 pilots
                slide needle shimmed .5mm washer
                fitted with v/stax and uni pod filters

                [url]http://www.youtube.com/watch?v=3pA8dwxmAVA&feature=mfu_in_order&list=UL[/url]

                Comment


                • #68
                  The Puddings DONE, and it tastes SWEET!

                  Hey there Xsives,

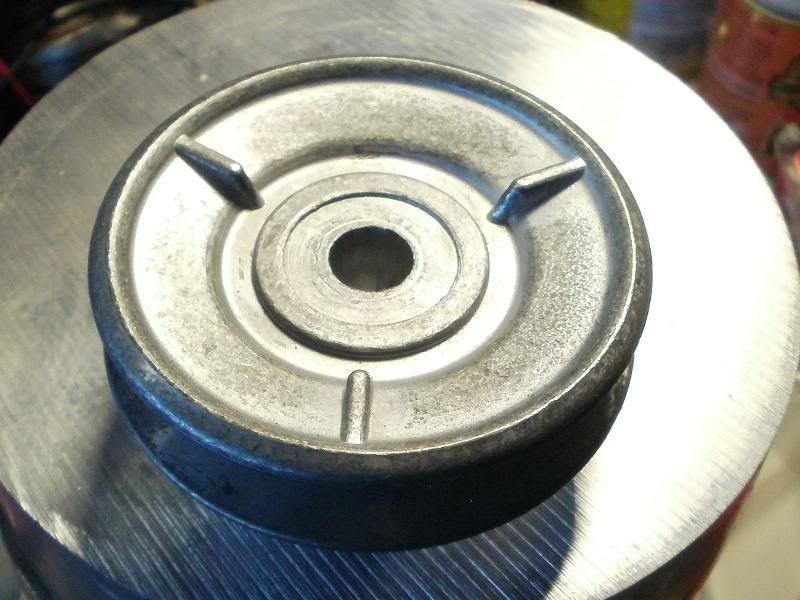
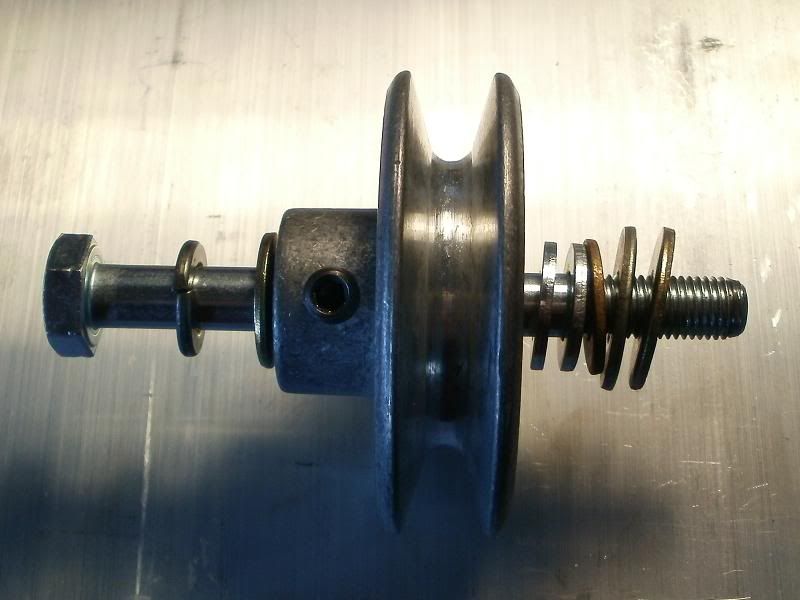
                  Great news today! I was finally able to work on the installation onto MY bike today. First, showing the Grainger Pulley, it has a bit of a recess in the back of it.


                  So... a few washers for spacers are needed, along with being able to have enough distance from the 10mm x 1.25pitch x 100mm long bolt needed to secure it, without hitting the ends of the threads! An 85mm bolt would have been perfect, but all I could find were either 70 to 75mm, or 100, and the 75 only allowed about 5mm worth of thread engagement, no where near enough! SO...the longer bolt is required, and therefore the washers.


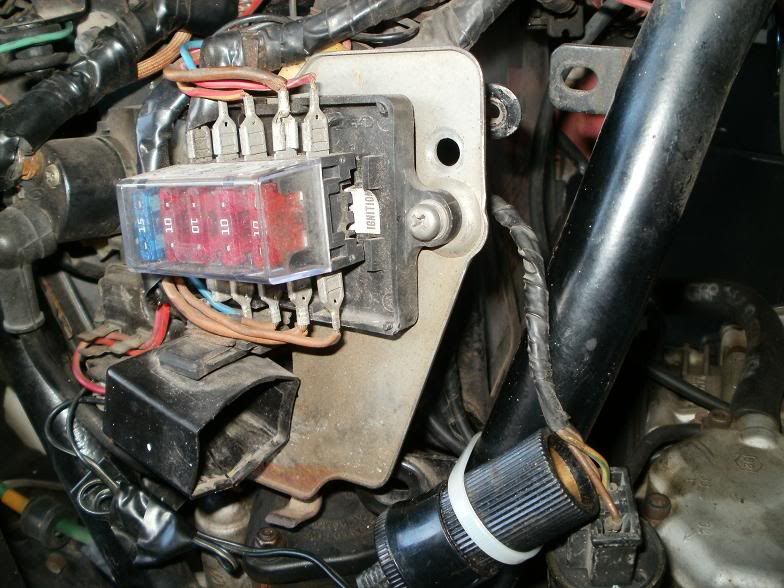
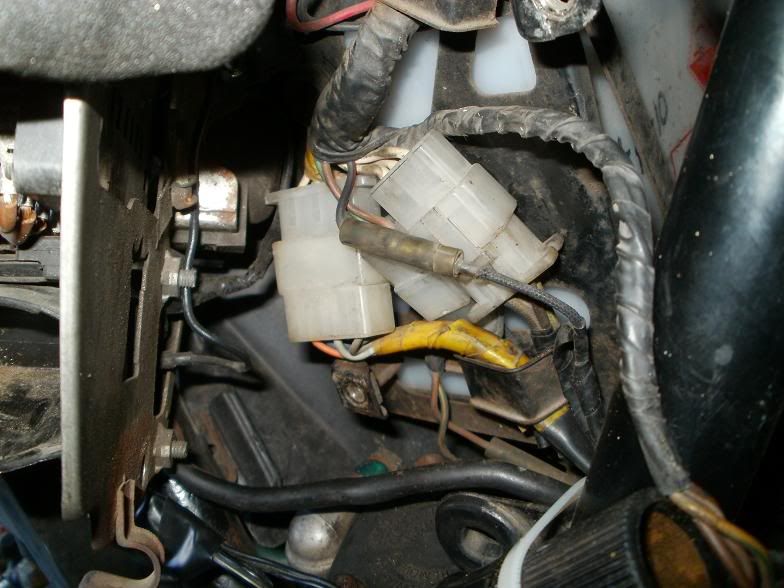
                  I disconnected the Reg/Rect from the harness, both plugs! Then I got behind the main fuse panel, and disconnected the ALT Stator and field coil plugs from the harness there!


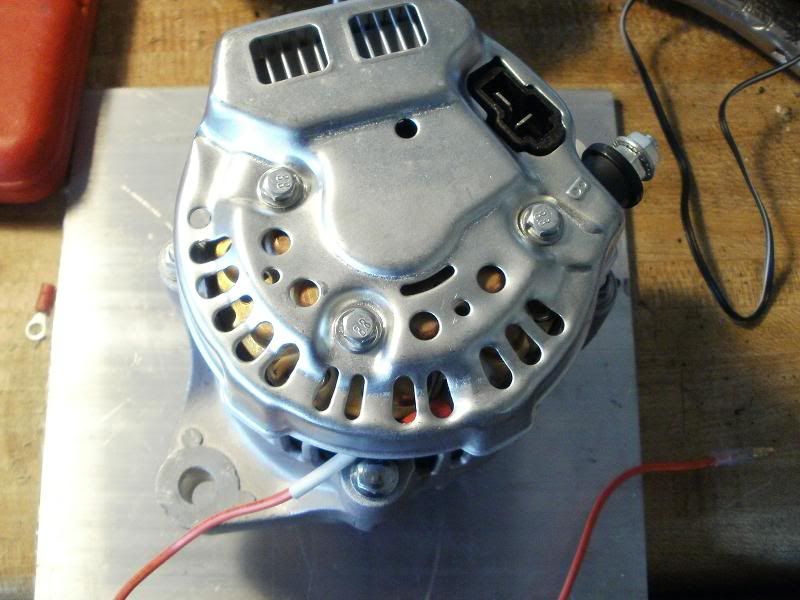
                  This photo shows the Phase tap on the Mini Alt, with an extra layer of heat shrink around the wire before the back plate was put on, to protect against rub thru!


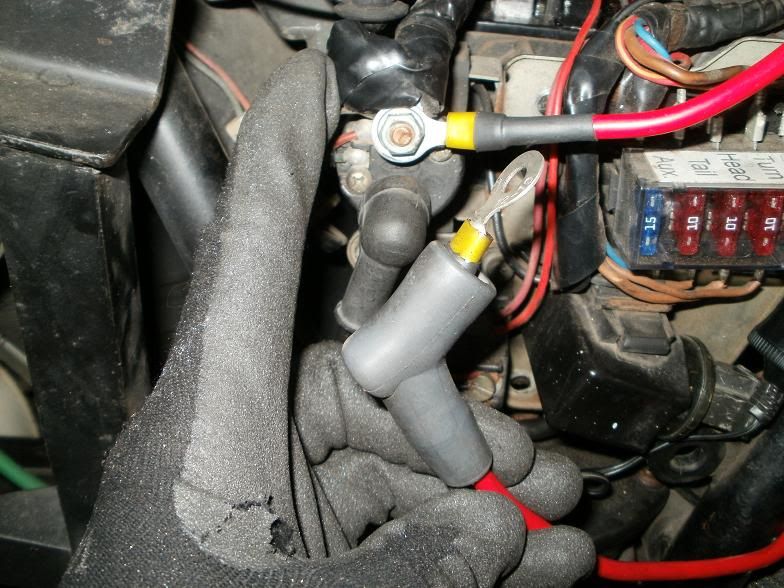
                  I figured out that I could use a spark plug rubber boot to provide the protection for the charging wire and post on the mini alt. Here it is already connected to the battery side of the starter solenoid, and the boot end!


                  Here's the Mini-Alt mounted with the 20" long 1/2" V belt, tensioned up nicely but not too tight, no need...it's a LOW DRAG ALT!!! There was a spacer and a few washers to get it aligned, but fit well!


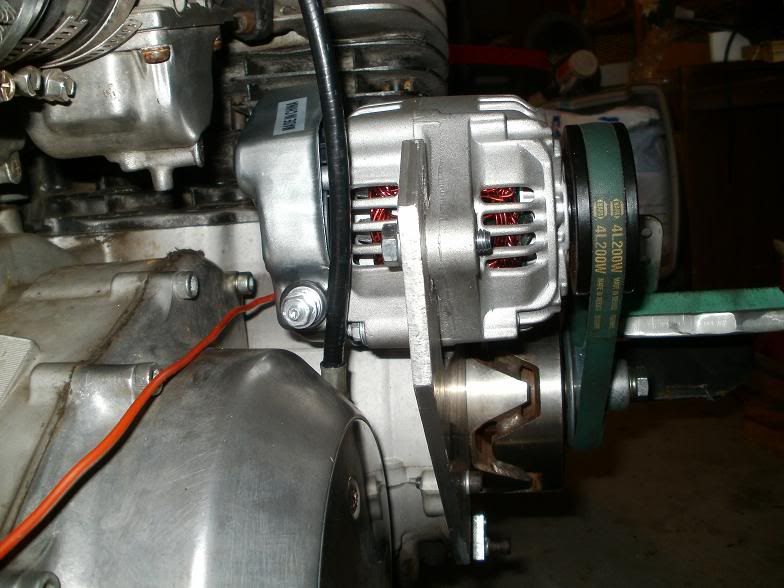
                  And here's a hind view showing the minimal deflection of the clutch cable! It still pulled smoothly and such!


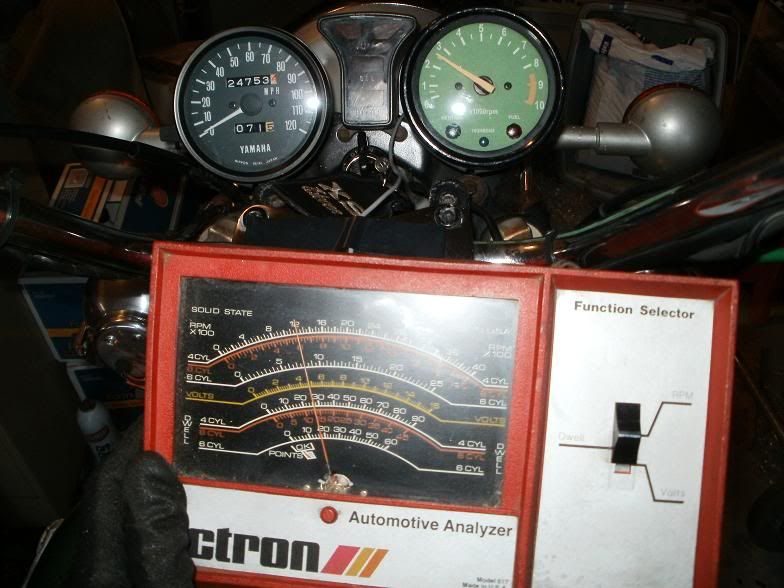
                  And here's the gauge readout showing the ~1200 4 cylinder rpm on the Dwell/meter, double that is ~2400 and the bike's tach showing 2500!


                  And the coup-de-gra, the charging level of 14.5 volts at IDLE!!!!!


                  I haven't quite figured out how to use my VOM AMPMETER function...blew a fuse on it the other day ... not sure if I connect it in Parallel with a powered circuit, or in series from the Alt Charging post to Ground thru the meter??

                  Anyways, I threw on the dual 55 watt headlights, and the voltage only dropped to 14 volts...AT IDLE!

                  Scott...you were right about the wiring...the Clymer's was WRONG..imagine that! The tach tap did NOT latch the headlight. I moved the tapped wire to another of the 3 white wires in that plug and the headlight came on, but then after I removed it, the headlight stayed on. So...I'm pretty sure I can just "Y" that phase tap, and plug it into both wires to run the tach and latch the headlight without causing any problems/damage to the Mini-Alt.

                  Folks that have the 78-79 headlight circuit may just need to run a tap off of the charging wire, put a resistor to pull it down to 7 volts, and then plug it into the Yellow connector for the headlight...that way it'll latch ONLY after the engine is running and the ALT is charging!

                  I tested the other 2 plugs on the mini-alt, but couldn't get any voltage readings off it them...so it's connected as truly a 1 wire ALT, along with the phase tach/headlight tap!

                  I revved the engine up to 7500 rpm, and the belt and pulley spun just fine!!

                  There is a keeper/stop bolt on the pulley, so after the 10mm bolt is properly torqued and locktited, then a person could take a drill and gently put a small flat on the 10mm bolt Thru the pulley stop bolt hole so the allen key bolt will have a flatter place to tighten up against, instead of the round 10mm bolt side. Then locktite and secure the pulley stop allen bolt just to provide a little more protection against it coming loose..but with the Rotor/Pulley bolt torqued to ~50 ft/lbs..Spec is 47...it shouldn't come loose, and neither should the ROTOR!!

                  Tomorrow we'll be fabricating the pulley/ALT rain cover from 26ga galvanized sheet metal...the Aluminum treadplate was just too $$$!

                  In the formal tech tip that I'll be making, I'll post the cost rundown for all the parts and such.

                  BTW, the weight of the OEM Alt is ~7lbs, the Mini-Alt is 5.75, the plate was 1 lb, and the pulley/bolt was 0.75 lbs, so the net weight gain was only~1 lb! or so...didn't weigh the belt or the 2 ALT mounting bolts!

                  Okay, that's about it, VICTORY does taste sweet!!!
                  T. C. Gresham
                  81SH "Godzilla" . . .1179cc super-rat.
                  79SF "The Teacher" . . .basket case!
                  History shows again and again,
                  How nature points out the folly of men!

                  Comment


                  • #69
                    Very nice. You will have to paint the guard and the alt green to match things!
                    Nathan
                    KD9ARL

                    μολὼν λαβέ

                    1978 XS1100E
                    K&N Filter
                    #45 pilot Jet, #137.5 Main Jet
                    OEM Exhaust
                    ATK Fork Brace
                    LED Dash lights
                    Ammeter, Oil Pressure, Oil Temp, and Volt Meters

                    Green Monster Coils
                    SS Brake Lines
                    Vision 550 Auto Tensioner

                    In any moment of decision the best thing you can do is the right thing, the next best thing is the wrong thing, and the worst thing you can do is nothing.

                    Theodore Roosevelt

                    Comment


                    • #70
                      Volt and ohm meters are connected in parallel - just clip your black lead to ground and poke your other lead wherever you wanna measure. Terminology wise you measure voltage AT a point and resistance OF a path.

                      Ammeters (current) are different and have to be connected in series. Often times there is a special connection used for current measuring and there is usually a 10 or so amp line and an unprotected line.

                      Make sure your meter can handle the estimated max current running through the path you're measuring and then break the circuit somewhere (anywhere, current is constant through the entire loop) and connect the ammeter. If you're blowing things up then the current is too strong for your ammeter.

                      I use an old Fluke 73 I got off ebay for $50 and it's beyond amazing, but even the best meters will fry if you overload them (I blew one up on a commercial microwave - the caps still had charge in them and I tried to measure the diode to see if it was shorted - 3KV and a spark later my meter was never the same).
                      -Ken

                      1979 XS1100F Standard

                      Comment


                      • #71
                        Nice mod, TC.
                        2H7 (79) owned since '89
                        3H3 owned since '06

                        "If it ain't broke, modify it"

                        Comment


                        • #72
                          This is way cool TC! I've twisted this kind of mod around in my mind since I started riding my XS. I ride where deer, turkeys, cows and other animals are a major threat to bikers. I have wanted to hang more illumins on her. I look forward to seeing the finished product and mod write-up!

                          Deny
                          1978 XS1100E - The TimeMachine
                          1980 XS850 Special - Little Mo

                          Comment


                          • #73
                            editted....no need to copy the entire last post/photos..etc.
                            Would it matter if you didn't hook up the wire to the headlight latch wire and just have the headlight turn on as soon as you turn on the key and just worry about the tach wire.

                            I really liked this tread and have been following it since the beginning great work tc.
                            '79 XS11SF

                            Comment


                            • #74
                              +1 on the mod T.C.

                              Great Job!!
                              Four wheels move your body, two wheels move your soul.

                              ATGATT, It could save your life!

                              1980 XS 1100SG
                              Dyna 3 Ohm Hi Output Coils
                              Pod Filters
                              DynoJet Kit
                              T.C.'s Fuse Block
                              Slip Streamer Turbo Windshield
                              Custom Tank and Side Cover Decals
                              V-Max Auto CCT

                              Comment


                              • #75
                                Was there any thought given to the extra stress the crank will have with the belt pulling on it? I realize this is a low drag unit, but the crank is not used to the movement to the rear of the bike. I am sure somebody thought about this though, just didn't see it anywhere. Very good mod TC.
                                1980 XS1100LG Midnight
                                1991 Honda CBR1000F Hurricane


                                "The hand is almost valueless at one end of the arm if there be not a brain at the other"

                                Here's to a long life and a happy one.
                                A quick death and an easy one.
                                A pretty girl and an honest one.
                                A cold beer and another one!

                                Comment

                                Working...
                                X