If this is your first visit, be sure to
check out the FAQ by clicking the
link above. You may have to register
before you can post: click the register link above to proceed. To start viewing messages,
select the forum that you want to visit from the selection below.
Ok, #11 is the O-ring on the fork cap. #18 is the C-clip that sits atop the fork seal. #19 is the fork seal itself. #20 is a washer that sits below the fork seal which can be omited if not available. Sometimes that washer is placed on top the fork seal instead.
That diagram is confusing, I may be incorrect with the above.
Ok, just went and looked at an extra fork leg I have, it should go in this order: fork seal, large washer, lock clip. On top of the spring it should be just small recessed washer and cap with O-ring. I have rebuilt many of these forks and you should have no problems assembling it like that. HTH
OK, very confusing. So if 18 and 19 are the E ring (spring clip, whatever) and the seal, what are 4 and 5? I was assuming that those were the oil seal and the clip?
Thanks for the help.
John (XSive_Speed)
'80 XS1100G Standard
- 4 - 1 exhaust (probably Mac)
- UNI air filter
I may be looking at it wrong but it seems to me that 11, 18, 19, 20 are just above and below the headlight ears. They live between the upper and lower triple tree parts and the headlight ears are in between them. I believe the washer is rubber.
2-79 XS1100 SF 2-78 XS1100 E Best bike Ever 80 XS 1100 SG Big bore kit but not fully running yet.
Couple of more parts bikes of which 2 more will live!
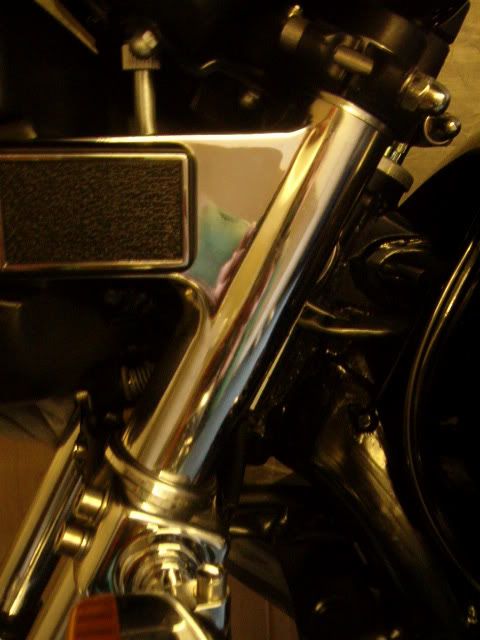
18, 19 and 20 are external parts which slip over the top of the fork tube. 20 and 19 are a rubber ring and chromed circle which go under the fork 'ear' that holds the headlamp. 18 goes on top of the 'ear'.
So, basically, you fit your fork tube into the bottom yoke, slip 20 and 19 on, slide the fork 'ear' on and then put 18 on top of that. Then you slide the fork tube into the top yoke.
XS1100F 1980 European model. Standard. Dyna coils. Iridium plugs. XS750 final drive (sometimes). Micron fork brace. Progressive front springs. Geezer regulator/rectifier. Stainless 4 into 2 exhaust. Auto CCT (Venturer 1300) SOLD. New project now on the go. 1980 European model.
Here are some photos of parts 18, 19 and 32. Part number 20 (the rubber ring) is not on the parts photo because I don't have one. As you can see, they are external parts which fit on the outside of the fork tube.
Here is a photo of the fork on the bike. You can see the chrome ring (20) under the fork ear. Under it is the rubber ring (19). Part number 18 is the chrome ring at the top of the fork ear....
XS1100F 1980 European model. Standard. Dyna coils. Iridium plugs. XS750 final drive (sometimes). Micron fork brace. Progressive front springs. Geezer regulator/rectifier. Stainless 4 into 2 exhaust. Auto CCT (Venturer 1300) SOLD. New project now on the go. 1980 European model.
Not to interrupt the conversation, but since I have a similar project going that fits the topic, I thought I would ask here, and maybe help the OP when it comes time to reassemble.
I have changed the fork oil, and cannot seem the compress the spring to thread on the cap (the one with the schrader valve on it). Maybe I need to eat a can of spinach but Is there any other way to keep the spring compressed while threading the aluminum cap on? I can only seem to hold down the pressure and get about a half turn on it before I loose my ability to hold it against the threaded fork tube and twist.
Thanks
It's even trickier on the non-air forks. I replaced my old springs with new progressive ones. The old ones were about 10mm shorter as they had compressed over the years, so the new springs took a lot of getting in,
You have to be very carfeul that the screw on top is not cross threaded when you start to turn it. Also, repeated failure to get the top in first time can strip the lower part of the thread on the softer metal of the screw-on top.... not in itself a disaster... it just means you have to push it even harder on next try (they sell stainless steel replacements in Germany).
What I did was to get a small piece of wood... about 1" thick and about 3" square. I drilled a shallow hole in it which the top of the screw-on bit would just sit into without sliding out. I then put a small amount of grease in the hole. Then I sat the screw-on top on the fork spring and held it on with the wood. Then forced down the wood block with the palm of my hand until the screw-on top sat squarely on the top of the fork. The wood spreads the force of the spring a bit on the palm of the hand. Then you carefully start screwing the top on with a spanner, whilst pushing down on the wood block. You really have to make sure it's not cross-threaded as the threads are very fine.
I actually managed one of them without the wood but ended up with a very sore palm because, once you start turning that top with a spanner, it digs into your palm very painfully!
If you can get it to go about 1.5 turns, it will stay in and you can remove the wood and get on with screwing it in. In practice, this means that you have to remove the spanner at least twice, whilst maintaining pressure on the wood block.
I've done two sets of forks this way. It is quite a strain but it can be done. To reiterate.... watch out for those threads!
XS1100F 1980 European model. Standard. Dyna coils. Iridium plugs. XS750 final drive (sometimes). Micron fork brace. Progressive front springs. Geezer regulator/rectifier. Stainless 4 into 2 exhaust. Auto CCT (Venturer 1300) SOLD. New project now on the go. 1980 European model.
Here are some photos of parts 18, 19 and 32. Part number 20 (the rubber ring) is not on the parts photo because I don't have one. As you can see, they are external parts which fit on the outside of the fork tube.
James - Great pix. That clarified the situation a great deal. Thanks. I kept looking at the diagrams and thought those parts must live either inside the upper tube, or somewhere around the dust boot/oil seal. The diameters on the drawing were at least as confusing as the placement of the parts.
I'll review my tripple tree tonight. I believe that everything I need is present now. Still need to order new springs. With air forks and 20 3/8 inch springs, they are definitely compressed and need to be replaced.
Has anyone had experience with progressive springs in their forks? I saw them listed at Dennis Kirker for about $85, but maybe there is a better spring or a better source?
Thanks again for all the help and pix. I've been taking several pix myself, so if I can I'll sit down and write this up as a tech tip. It may be a little bit of the blind leading the blind, but that's how we learn.
John (XSive_Speed)
'80 XS1100G Standard
- 4 - 1 exhaust (probably Mac)
- UNI air filter
Starting those caps can be tough, I've found it helps to start therm by turning counterclockwise til you feel the threads mate and the cap straighten out, then go clockwise.
...Has anyone had experience with progressive springs in their forks? I saw them listed at Dennis Kirk for about $85, but maybe there is a better spring or a better source?
I've used their springs in several bikes and they've never failed to deliver better handling with a nice balance of a comfortable ride for me. That price is about standard for those springs. I've also seen them on eBay for about the same $ but with free shipping.
If you want a bit 'racier' handling, RaceTech (http://old.racetech.com/evalving/eng...ngname=english) and Sonic (http://www.sonicsprings.com/catalog/...c7fbdcd8a1dfb9) both offer straight-rate springs that will improve handling even more but the trade-off is a bit stiffer ride. If you go for the straight-rate springs, you really need a fork brace to get the full benefit of them, as these forks are pretty flexible under hard cornering. I've used RaceTech springs, but personally found them too stiff for my tastes. I'll note that Sonic doesn't offer a XS-specific fork spring, but can do 'custom' units; you'll need to contact them for more info.
Fast, Cheap, Reliable... Pick any two
'78E original owner - resto project
'78E ???? owner - Modder project FJ forks, 4-piston calipers F/R, 160/80-16 rear tire
'82 XJ rebuild project
'80SG restified, red SOLD
'79F parts...
'81H more parts...
Other current bikes:
'93 XL1200 Anniversary Sportster 85RWHP
'86 XL883/1200 Chopper
'82 XL1000 w/1450cc Buell, Baker 6-speed, in-progress project
Cage: '13 Mustang GT/CS with a few 'custom' touches
Yep, can't leave nuthin' alone...
Comment