Announcement

Collapse
No announcement yet.

My XJ on crutches!!???

Collapse
X
 
  • Filter
  • Time
  • Show
Clear All
new posts

  • My XJ on crutches!!???

    This could be a helpful hint/tip for someone....
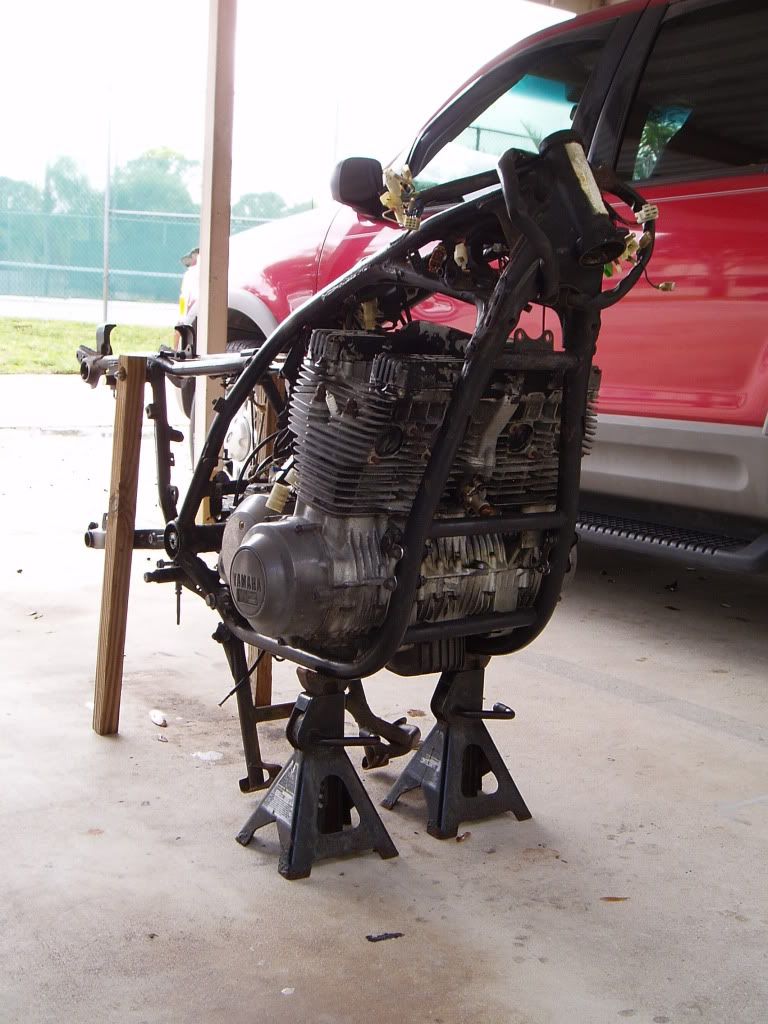
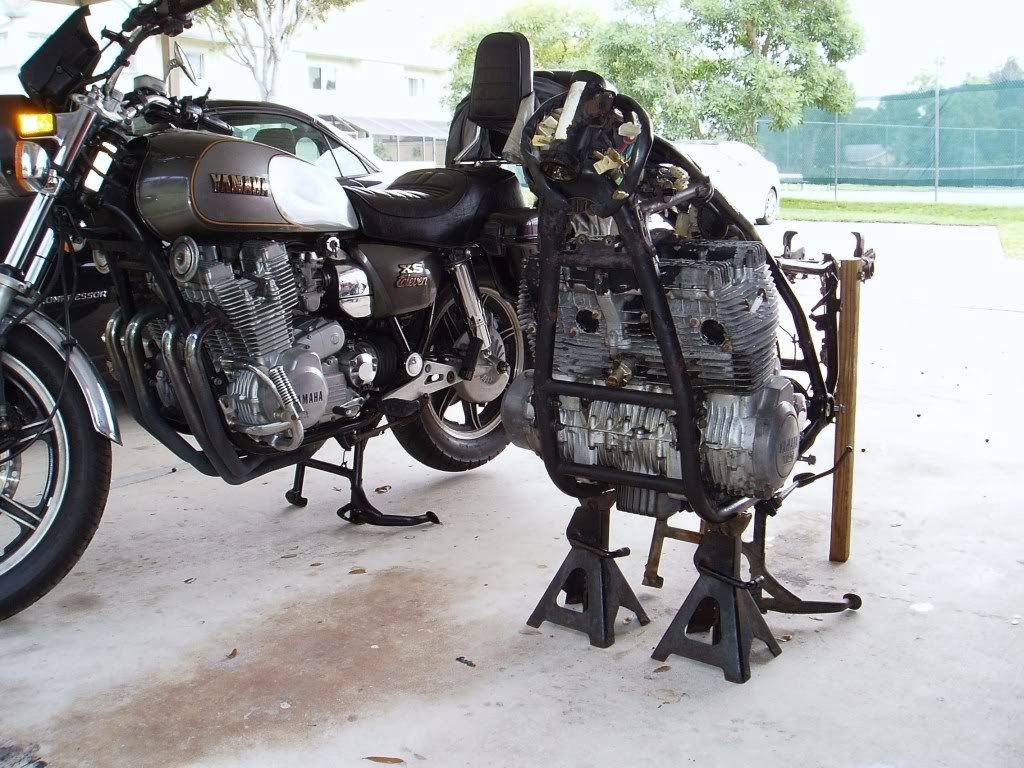
    I'm restoring my XJ and in the process found myself needing to support the rear of the bike as I wanted to remove the rear wheel, final drive, swing arm, etc.
    The front was resting on jackstands and the back was supported by the rear wheel. What to do since I wanted something more solid than a motorcycle lift? Then the bulb went off!!!! Eureka!!!
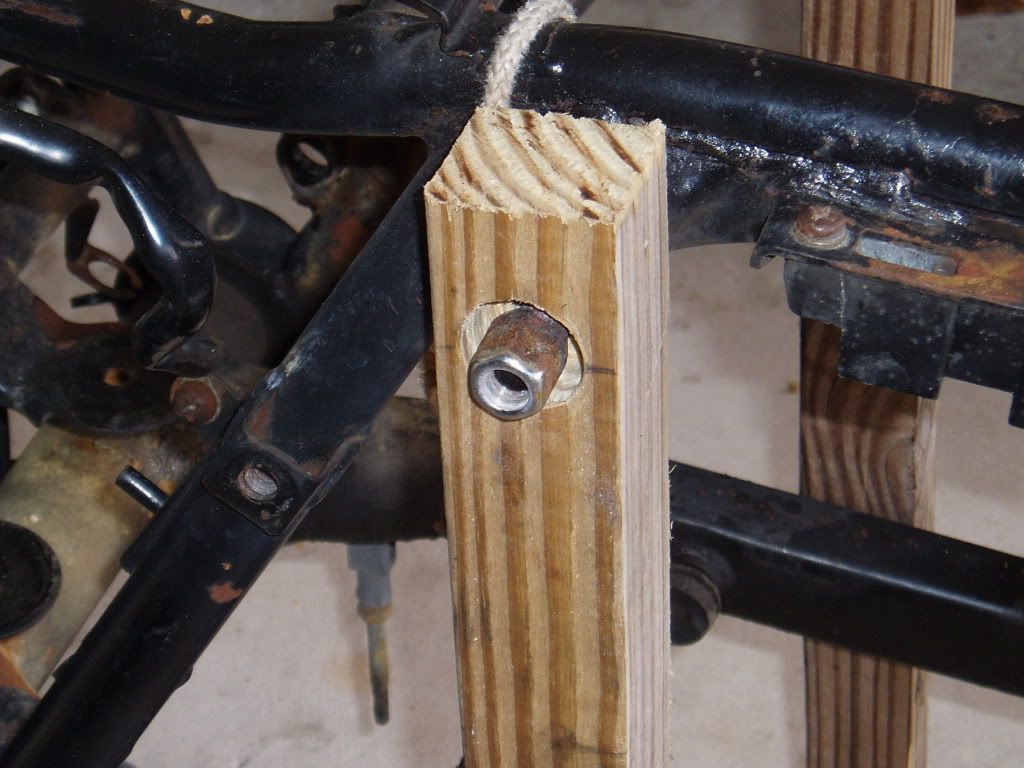
    I took some measurements and found that I had a fairly straight line down from the upper shock absorber bolts to the ground.
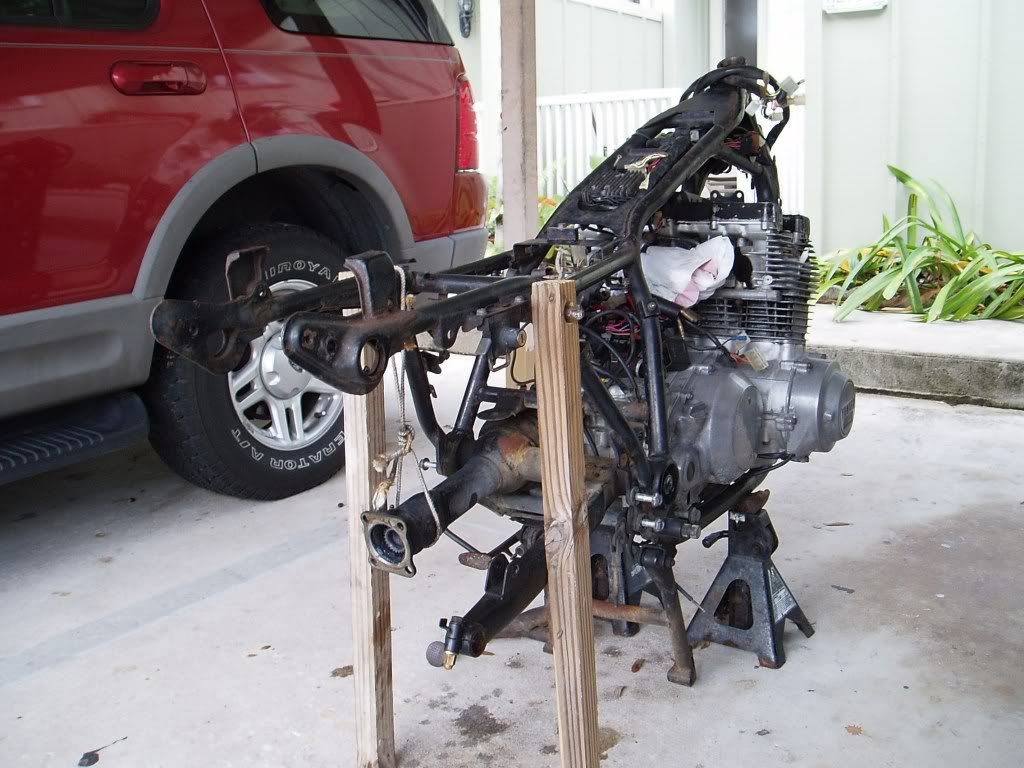
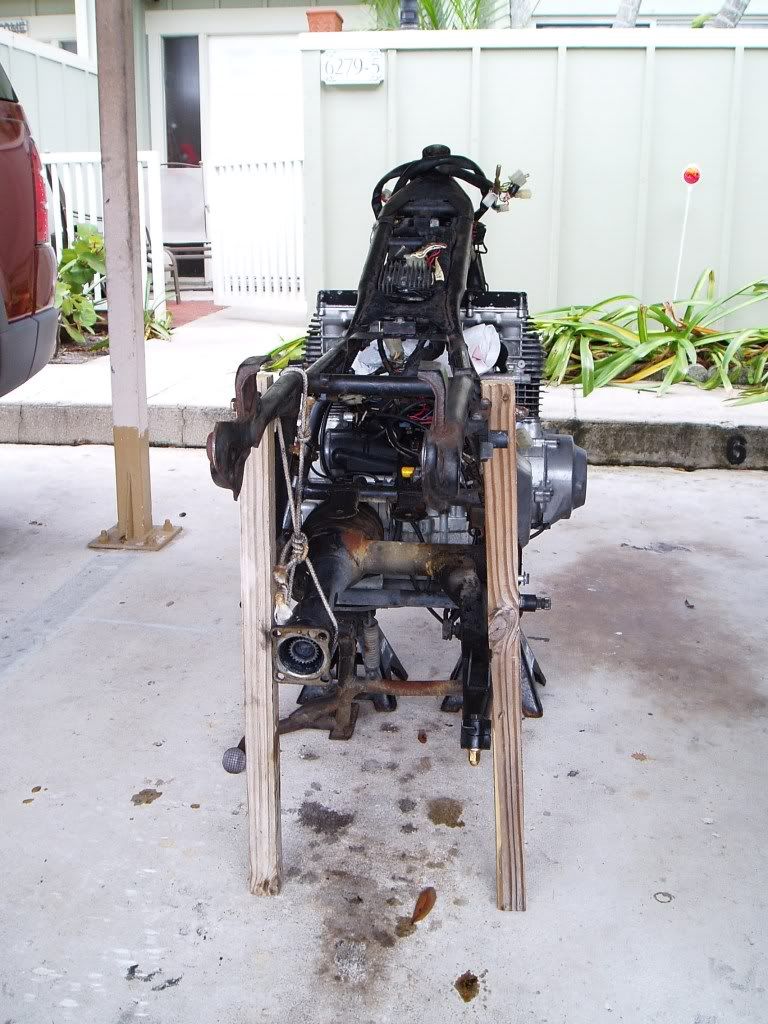
    I then took two 28" 2X2s and drilled a wide hole half way through it and an appropriately sized hole all the way through to install it on the shock bolts, tapped them into place and put the nuts on and....... voila!!!
    An XJ on crutches!!!

    Here it is nest to the G.

    [IMG][/IMG]
    [IMG][/IMG]

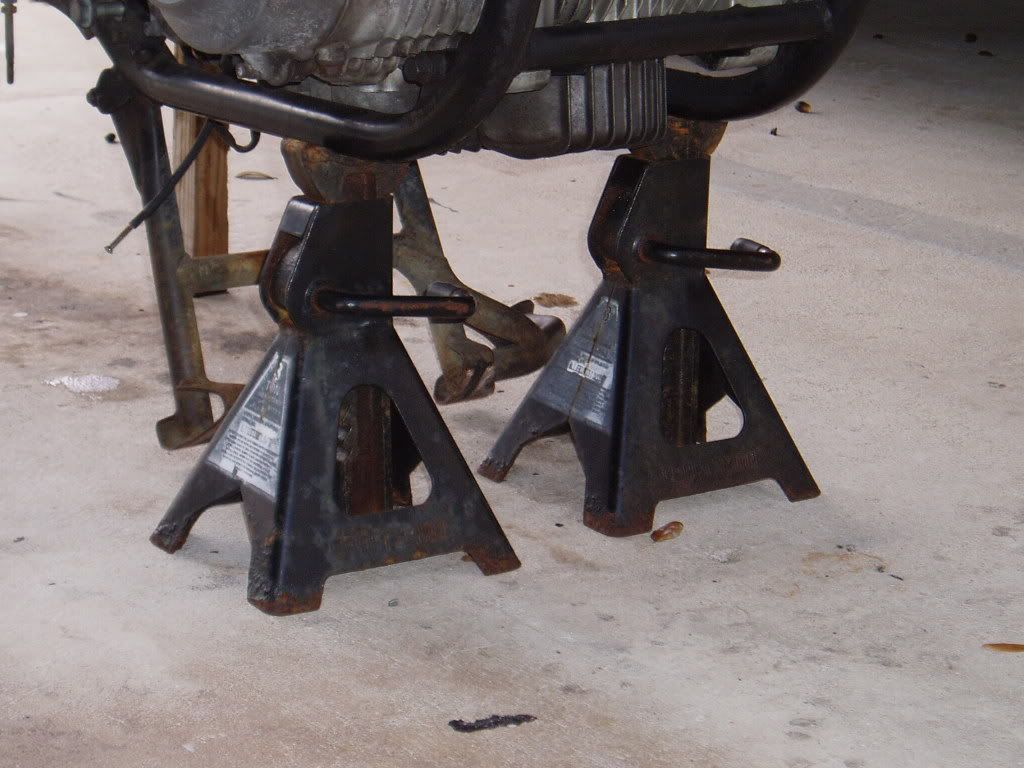
    BTW - The position of the jackstands is CRITICAL!! Too far back and the bike will tilt forward on its own due to the weight of the engine. Too far forward and you chance being too close to the bend on the frame and it slipping off the stands.


    [IMG][/IMG]
    [IMG][/IMG]

    [IMG][/IMG]

    [IMG][/IMG]

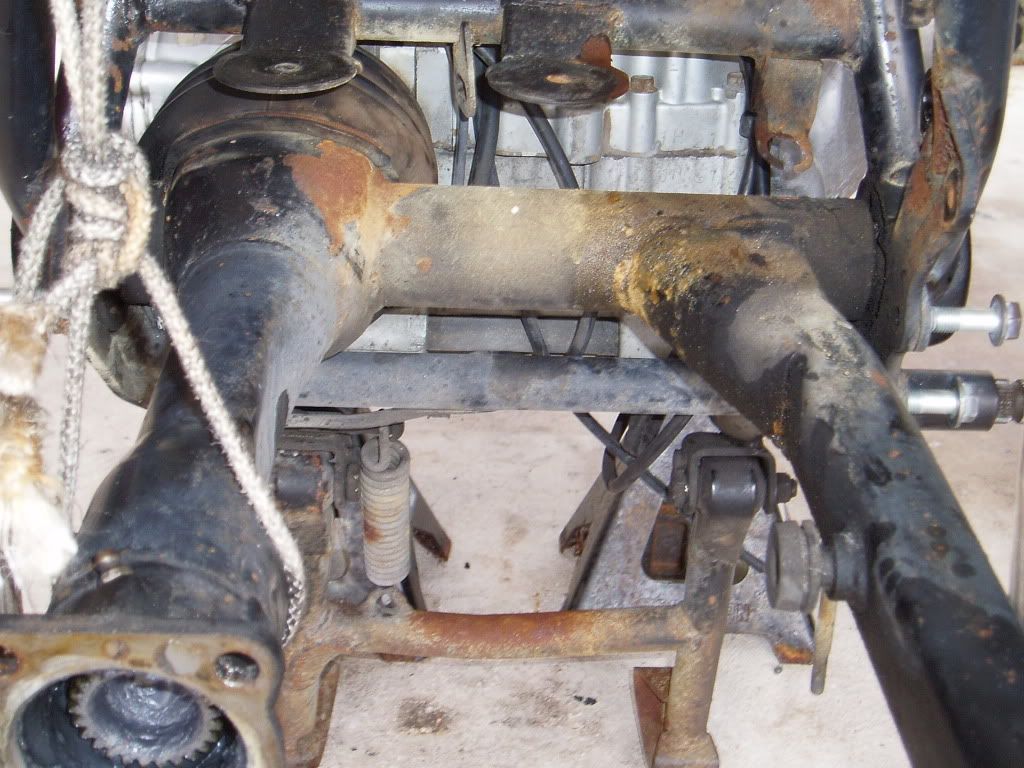
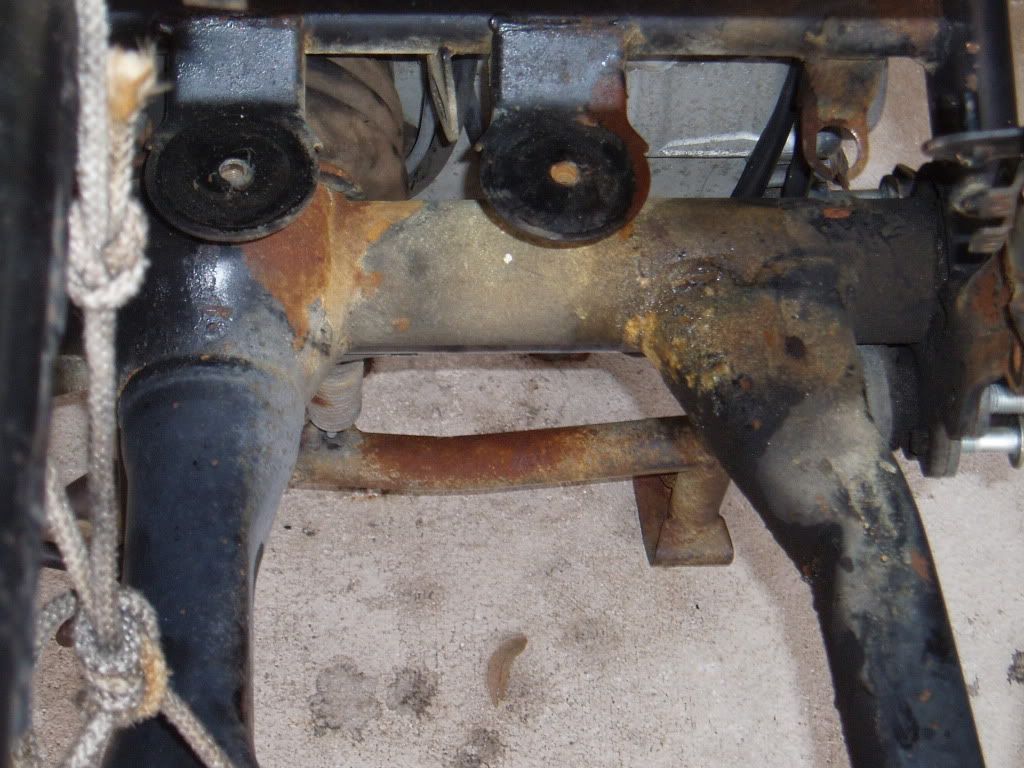
    And this is one of the reasons for needing to get deep into the frame. It's the worse of the rust I've found on the J. And it's really not bad, mostly surface rust. I suspect it's the result of an overflowing/broken battery case and acid dripping on the parts.

    [IMG][/IMG]
    [IMG][/IMG]


    Plan to resore the bike in two sections, the rear half first, then the engine and the front part of the frame.
    I'll keep posting pics of the progress.
    Last edited by Cobia; 10-30-2010, 01:16 PM.
    1980G Standard, Restored
    Kerker 4 - 1
    850 Rear End Mod
    2-21 Flashing LED Arrays on either side of license plate for Brake Light Assist, 1100 Lumen Cree Aux Lights,
    Progressive springs, Showa rear shocks
    Automatic CCT
    1980GH Special, Restored
    Stock Exhaust, New Handlebars, 1" Spacer in Fork Springs, Automatic CCT, Showa Rear Shocks
    '82 XJ1100 (Sold)
    Automatic CCT, RC Engineering 4 X 1 Exhaust, K&N Pods, #50 Pilot Jets, YICS Eliminator. Sorely missed.

  • #2
    Yeah looks like a battery problem with the greenish yellow crap all over there. Have fin and good luck.

    I tale it you don't plan on just striping it down and redoing the whole frame at once?
    Nathan
    KD9ARL

    μολὼν λαβέ

    1978 XS1100E
    K&N Filter
    #45 pilot Jet, #137.5 Main Jet
    OEM Exhaust
    ATK Fork Brace
    LED Dash lights
    Ammeter, Oil Pressure, Oil Temp, and Volt Meters

    Green Monster Coils
    SS Brake Lines
    Vision 550 Auto Tensioner

    In any moment of decision the best thing you can do is the right thing, the next best thing is the wrong thing, and the worst thing you can do is nothing.

    Theodore Roosevelt

    Comment


    • #3
      Hi Cobia,
      What did the drive shaft do to end up in a noose
      Phil
      1981 XS1100 H Venturer ( Addie)
      1983 XJ 650 Maxim
      2004 Kawasaki Concours. ( Black Bear)

      Comment


      • #4
        Yep, I'd take the swingarm off at least. Thing looks pretty nasty.
        2H7 (79) owned since '89
        3H3 owned since '06

        "If it ain't broke, modify it"

        Comment


        • #5
          That's exactly how I had my jack stands set up when my nearly completed bike went for a surprise nose dive. The jack stands got spit out the front and over she went when the total weight of the bike got to the point where it could happen. Now I pull strap the jack stands to the frame and install the front end first when rebuilding.
          Rob
          KEEP THE RUBBER SIDE DOWN

          1978 XS1100E Modified
          1978 XS500E
          1979 XS1100F Restored
          1980 XS1100 SG
          1981 Suzuki GS1100
          1983 Suzuki GS750S Katana
          1983 Honda CB900 Custom

          Comment


          • #6
            Nate,
            I don't plan on taking the engine out. Did it this way on the G and it turned out OK. The frame and swingarm are really not bad at all, just surface rust. Nothing a wire wheel can't handle.

            Maximphil,
            It has always been cautioned about not letting the swingarm drop down to the ground and hyper-extending when doing this process. I guess it stresses the u-joint and boot. So, I hung it the best/easiest way I could.

            79XS11F,
            OUCH!!!! Good idea about strapping the frame to the jackstands. I'm going to do that today, particularly since I'll have a bunch of trick or treaters roaming the neighborhood and possibly walking around the bikes. Thanks for the idea.

            BikerPhil,
            Yeah, I guess I'll have to take it out. It'll make it easier to paint as well. Actually the shaft, splines, and swingarm bearings are really well packed with grease. Found no suspect splines either.
            Might enlist your help in pulling the shaft if I get stuck.

            Thanks all.
            1980G Standard, Restored
            Kerker 4 - 1
            850 Rear End Mod
            2-21 Flashing LED Arrays on either side of license plate for Brake Light Assist, 1100 Lumen Cree Aux Lights,
            Progressive springs, Showa rear shocks
            Automatic CCT
            1980GH Special, Restored
            Stock Exhaust, New Handlebars, 1" Spacer in Fork Springs, Automatic CCT, Showa Rear Shocks
            '82 XJ1100 (Sold)
            Automatic CCT, RC Engineering 4 X 1 Exhaust, K&N Pods, #50 Pilot Jets, YICS Eliminator. Sorely missed.

            Comment


            • #7
              Hey Cobia,

              Nice rig you set up. As to the drive shaft, once you pull the four bolts holding the u-joint to the middle drive output it and the drive shaft will slide out with the swing arm. If you want he shaft out anyway, I take a piece of 12 ga wire , like one leg out of a 2 wire romex piece, wrap it around the bell of the driveshaft, grab it with pliers and use a rubber mallot on the pliers to drive it out. Works like a charm every time.
              Life is what happens while your planning everything else!

              When your work speaks for itself, don't interrupt.

              81 XS1100 Special - Humpty Dumpty
              80 XS1100 Special - Project Resurrection


              Previously owned
              93 GSX600F
              80 XS1100 Special - Ruby
              81 XS1100 Special
              81 CB750 C
              80 CB750 C
              78 XS750

              Comment


              • #8
                Very nice. Way to be inventive. Do you have an engine stand to support the engine when it is out of the frame, that will still allow you to easily and safely work on the engine?
                1980 CB750K

                Comment


                • #9
                  Thanks Don,
                  I plan to go the four bolts on the MD flange to get the shaft out. I think it'll be a lot easier to re-install as well.
                  Bikerphil and I went the wire route when he showed me how to do the FD mod a while back. He also had a right angle screwdriver that was very helpfull.

                  Hammer,
                  I don't plan to take the engine out since it really doesn't need any repairs, just cleaning and paint, same with the frame.
                  1980G Standard, Restored
                  Kerker 4 - 1
                  850 Rear End Mod
                  2-21 Flashing LED Arrays on either side of license plate for Brake Light Assist, 1100 Lumen Cree Aux Lights,
                  Progressive springs, Showa rear shocks
                  Automatic CCT
                  1980GH Special, Restored
                  Stock Exhaust, New Handlebars, 1" Spacer in Fork Springs, Automatic CCT, Showa Rear Shocks
                  '82 XJ1100 (Sold)
                  Automatic CCT, RC Engineering 4 X 1 Exhaust, K&N Pods, #50 Pilot Jets, YICS Eliminator. Sorely missed.

                  Comment


                  • #10
                    XJ Frame up Resto Update

                    I really wasn't going to go radical on this bike but with the exortation of several members.... Thanks Phil!! And since the rest was only a few bolts away I decided to pull the engine from the frame and go all the way. After removing the wiring harness, actually the scariest part of it , the swing arm, etc. I used what I call the cow tipping technique to remove the engine from the frame.... or is it the other way around.... well, never mind, I separated the two.
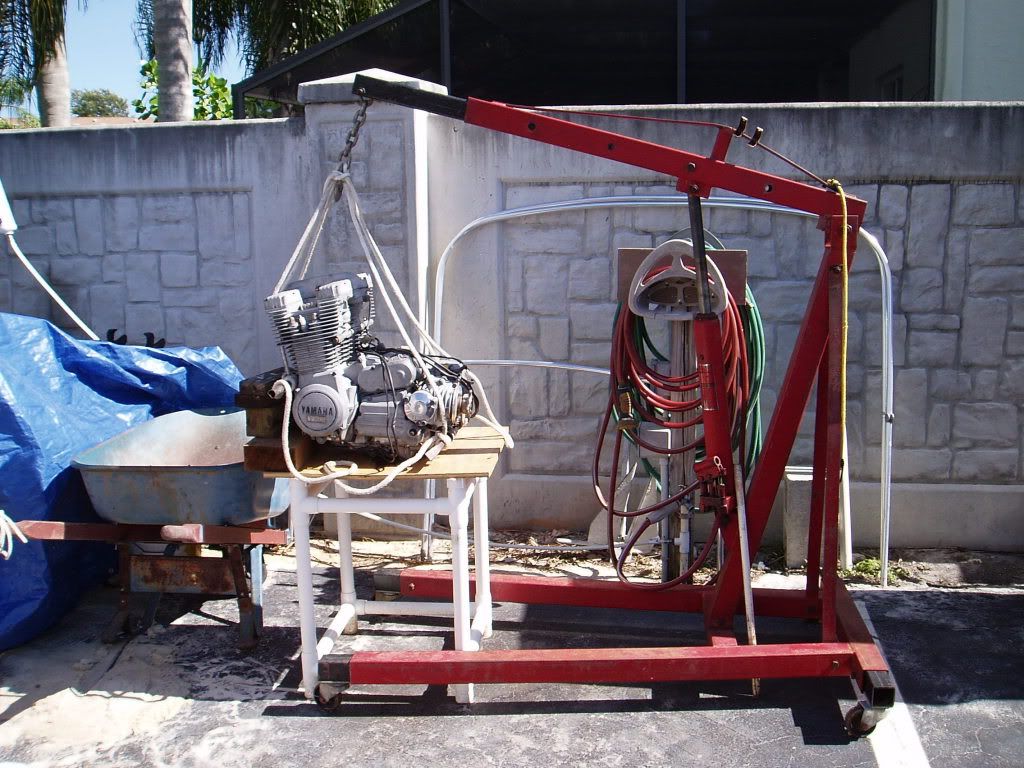
                    I then transported the engine and frame to our boat storage facility where we have a compressor and other useful items such as an engine hoist, etc.
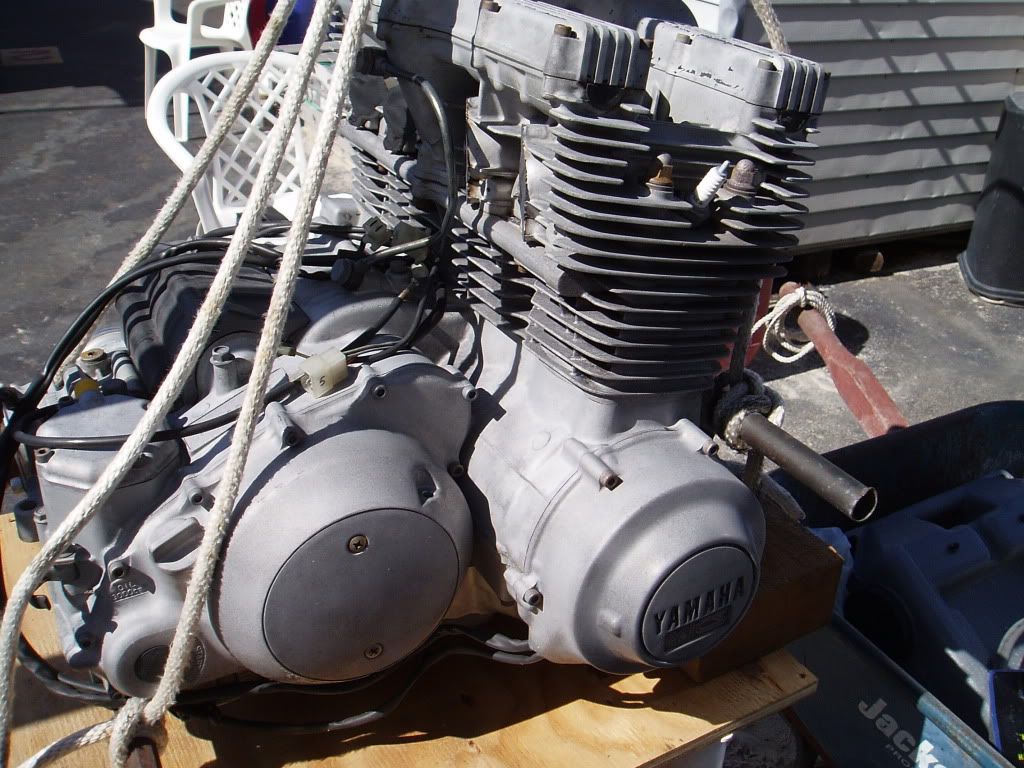
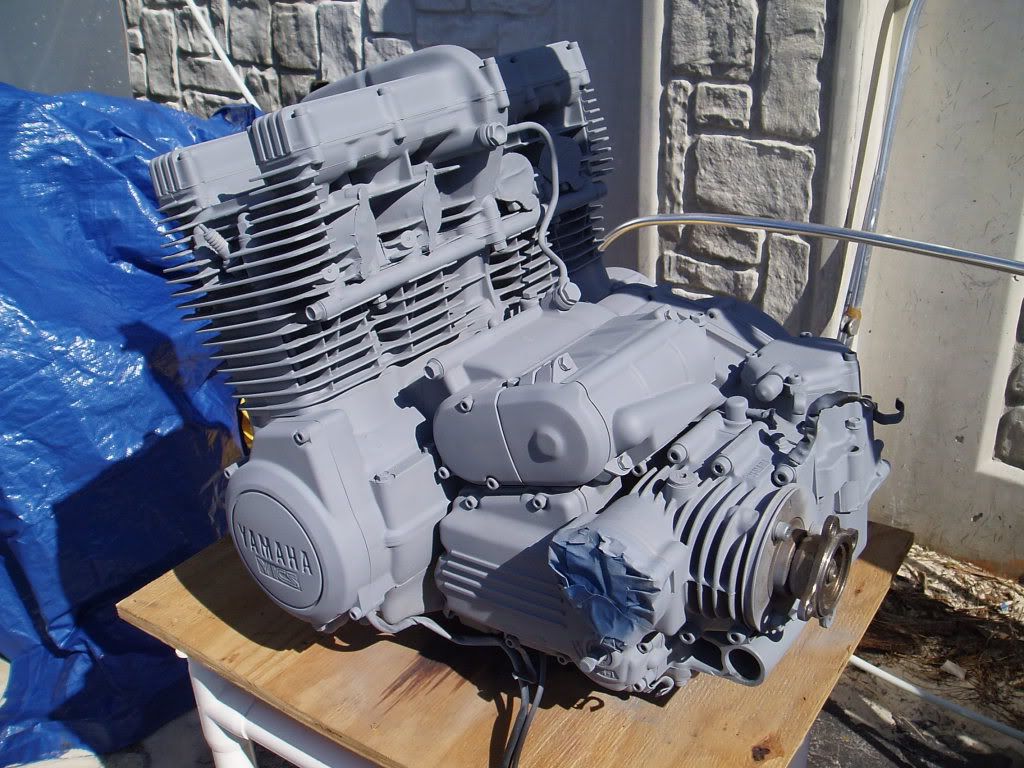
                    My goal is to sandblast everything (easier and kinder to the parts than a wire wheel on a drill or a grinder) in preparation for priming and painting.
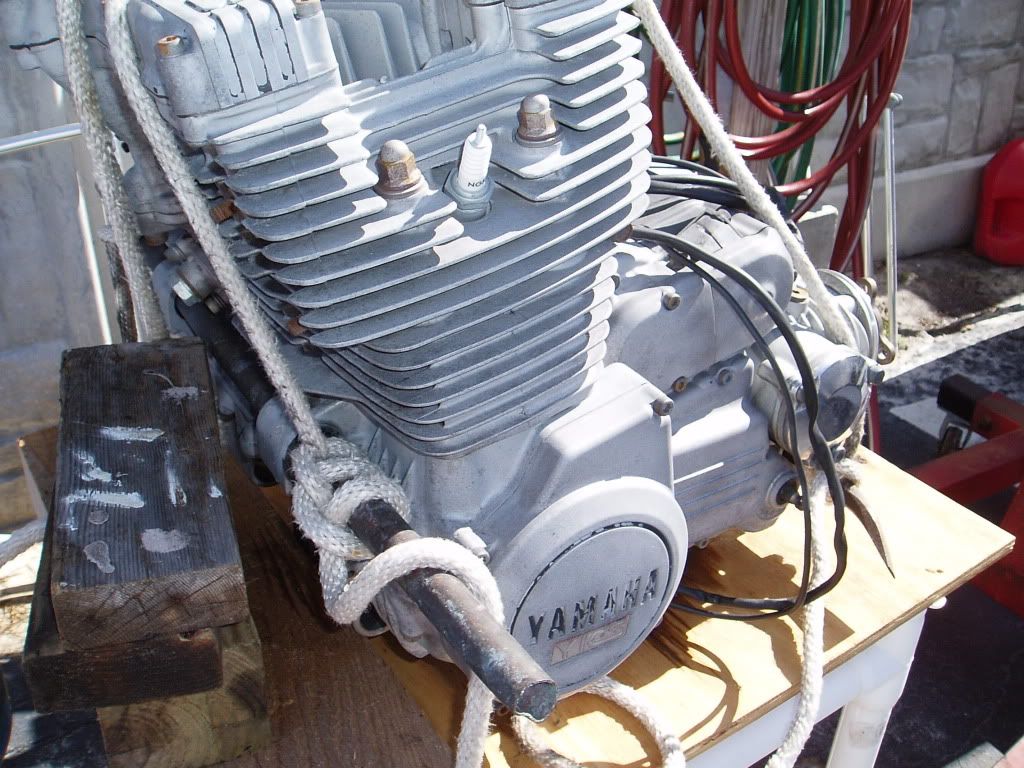
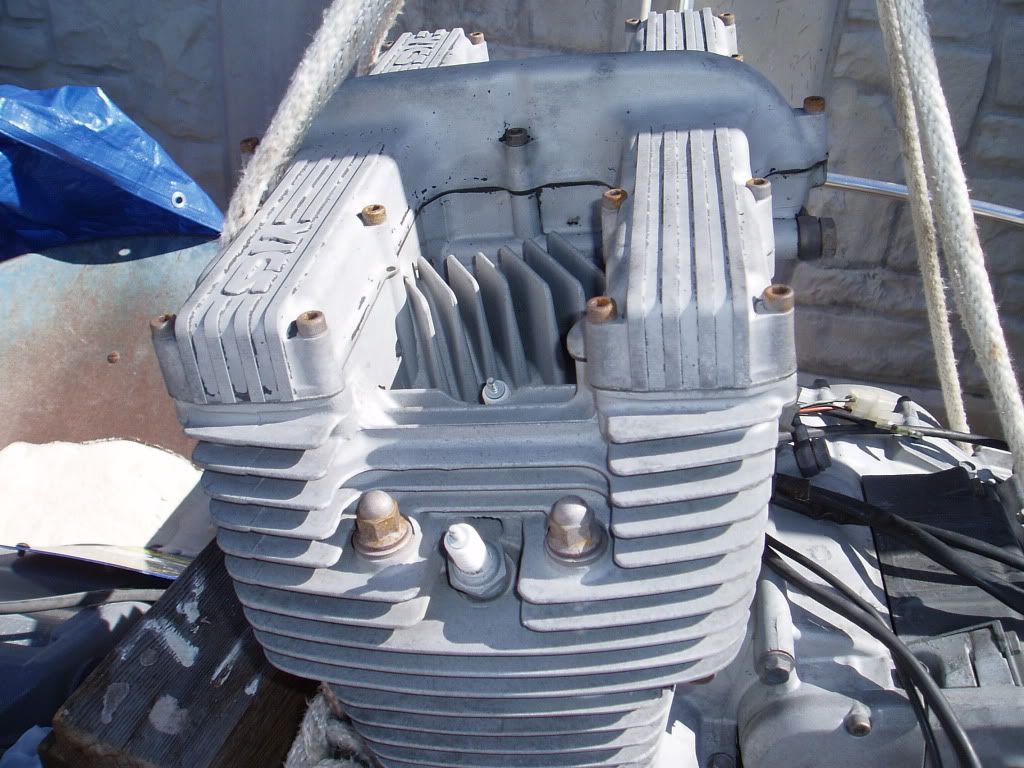
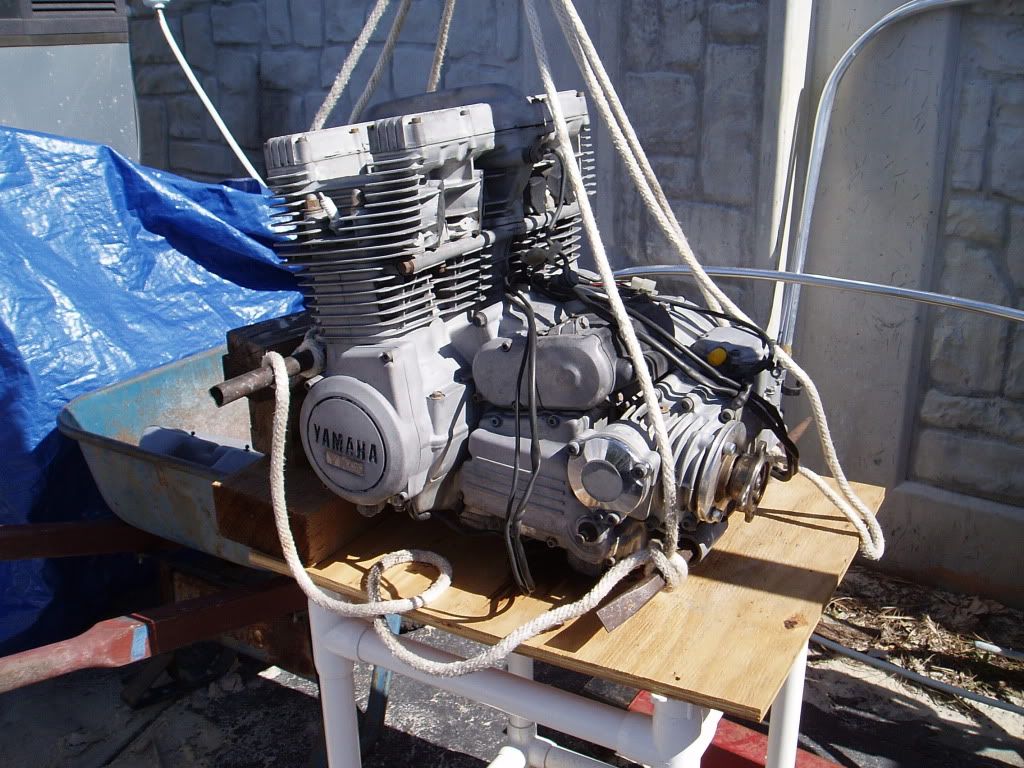
                    Here are some pics after sandblasting the engine:

                    [IMG][/IMG]
                    [IMG][/IMG]
                    [IMG][/IMG]
                    [IMG][/IMG]
                    [IMG][/IMG]

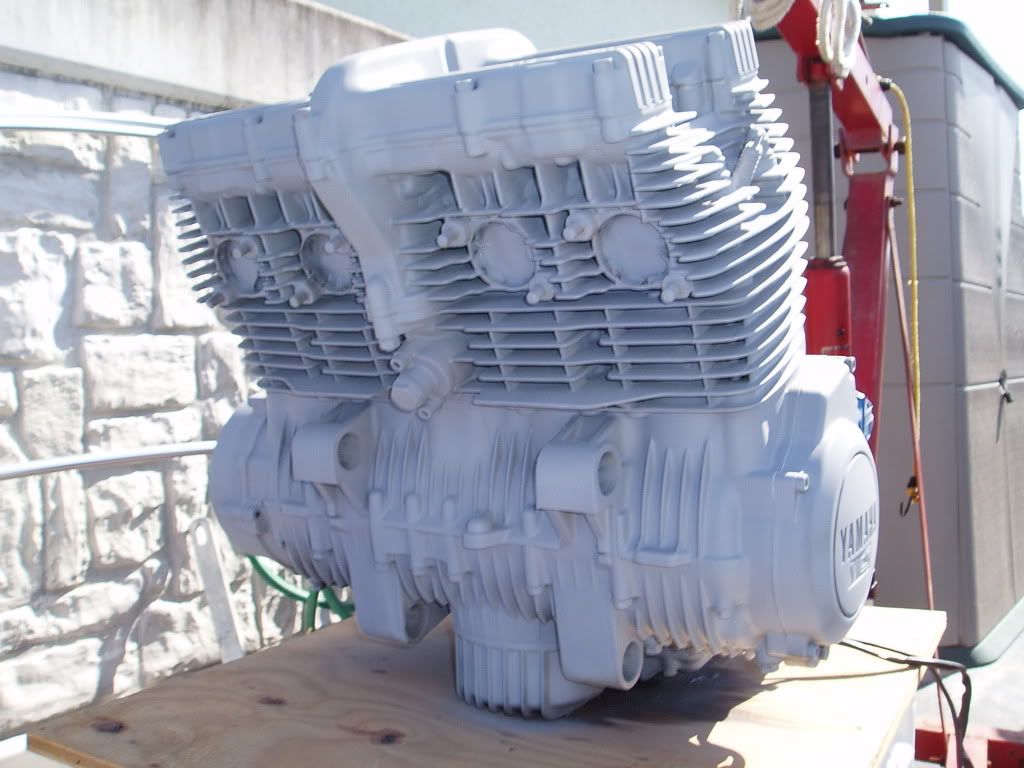
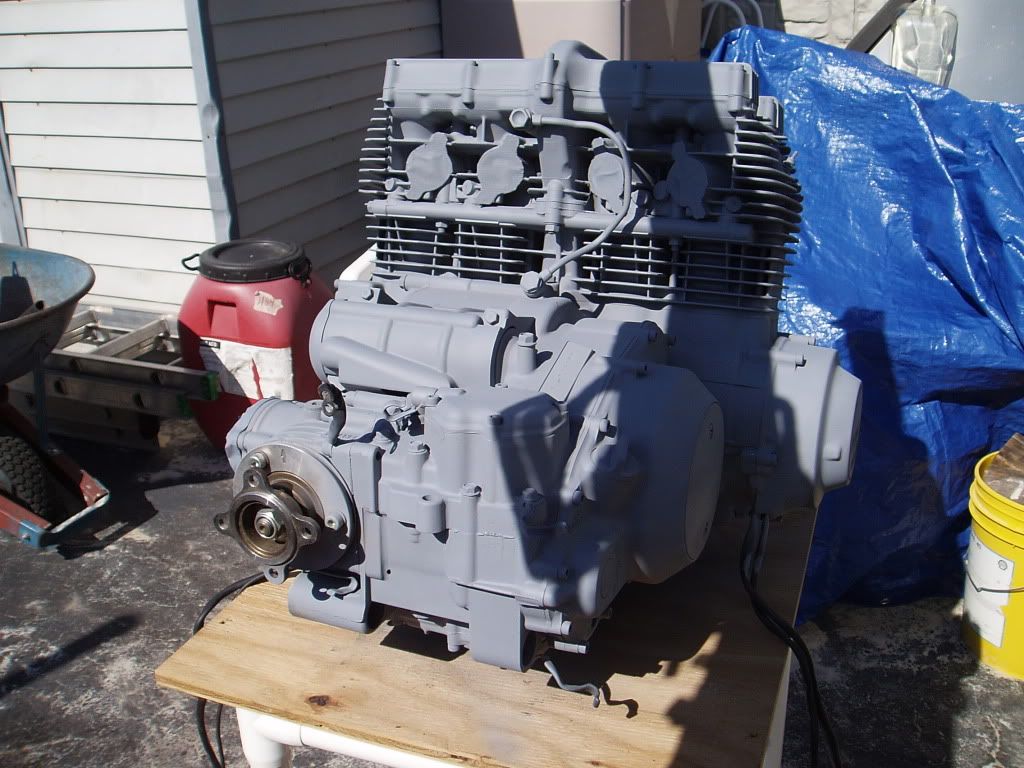
                    And here it is after an acetone wash and primed for paint:

                    [IMG][/IMG]
                    [IMG][/IMG]
                    [IMG][/IMG]
                    [IMG][/IMG]

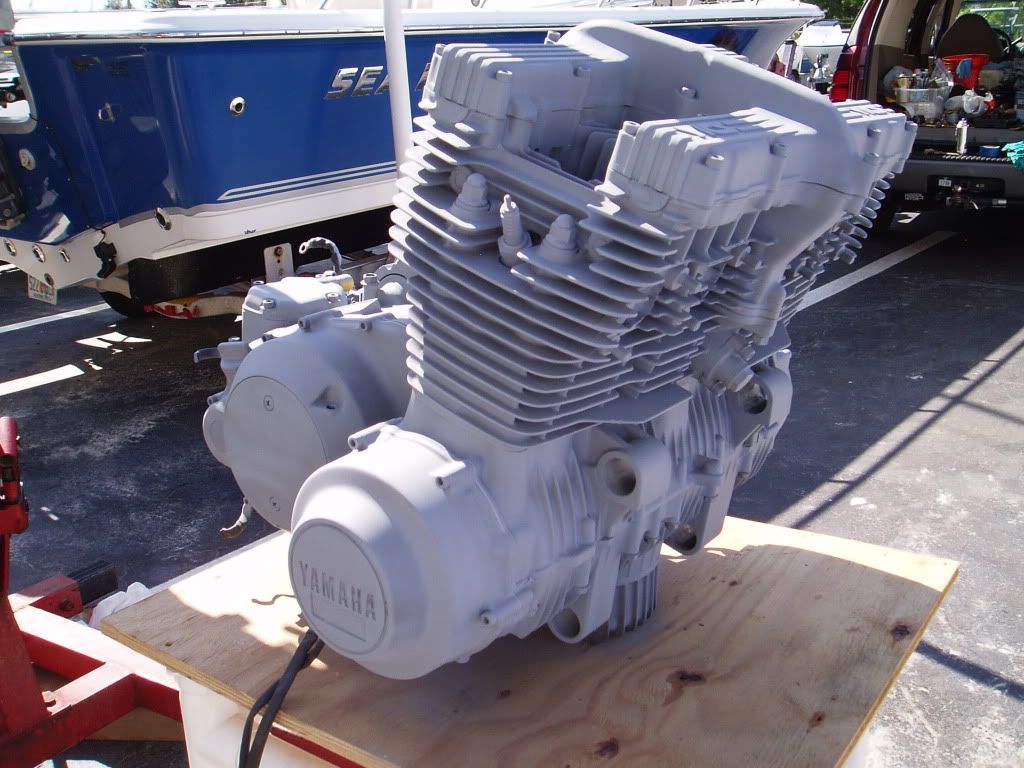
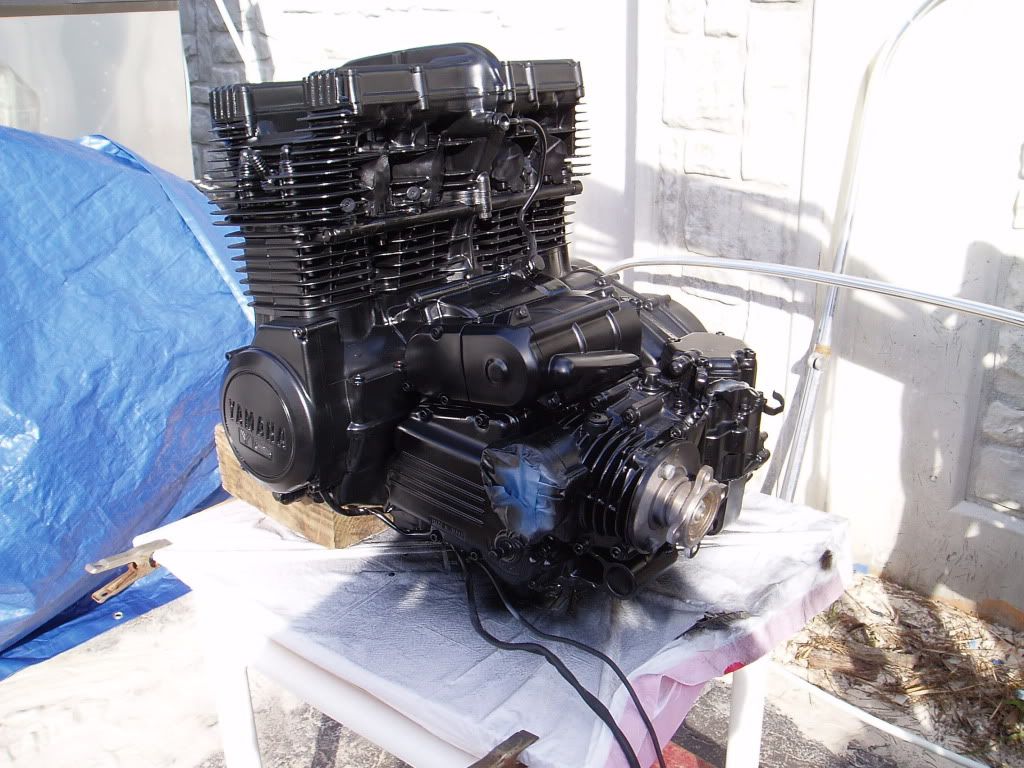
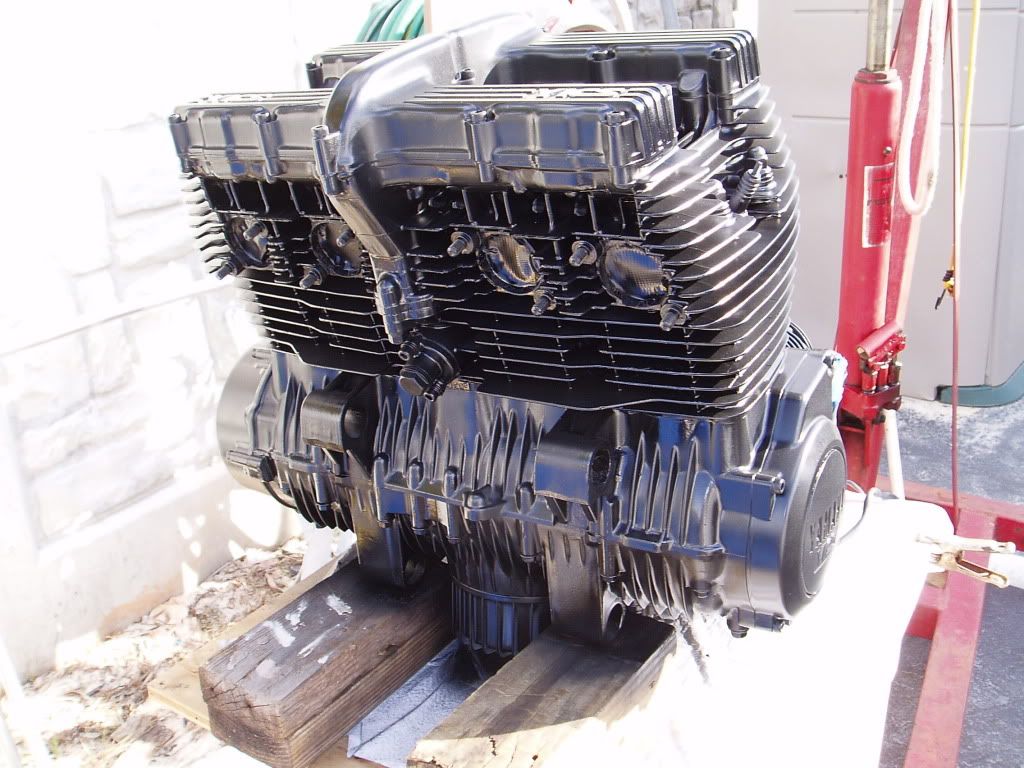
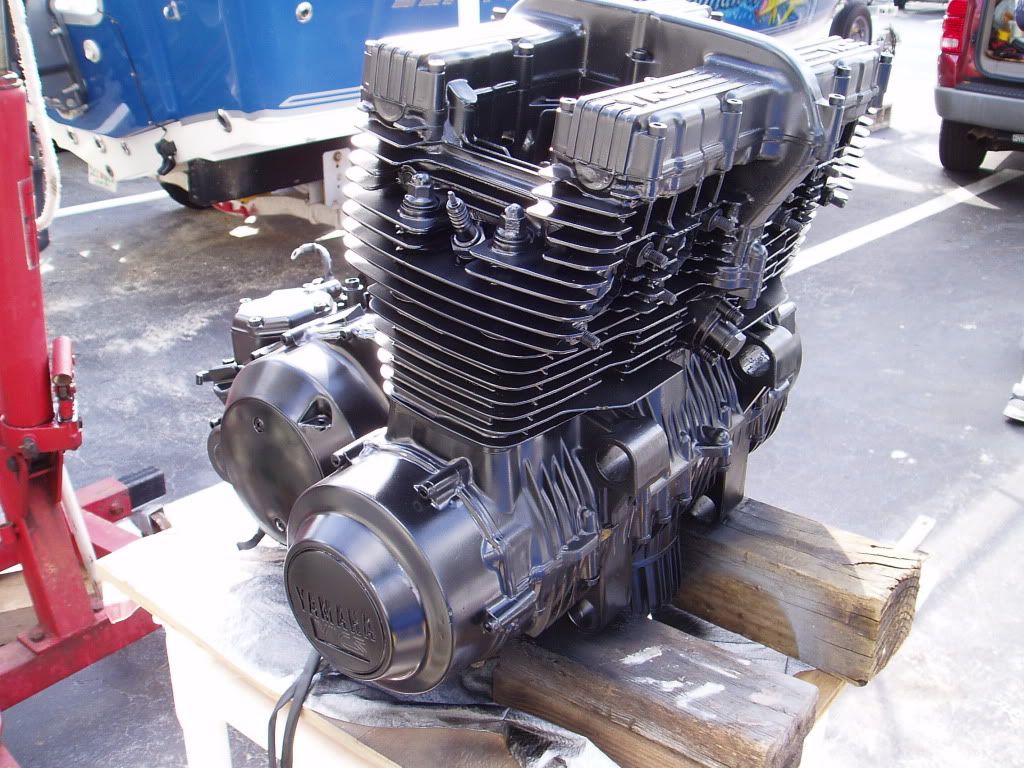
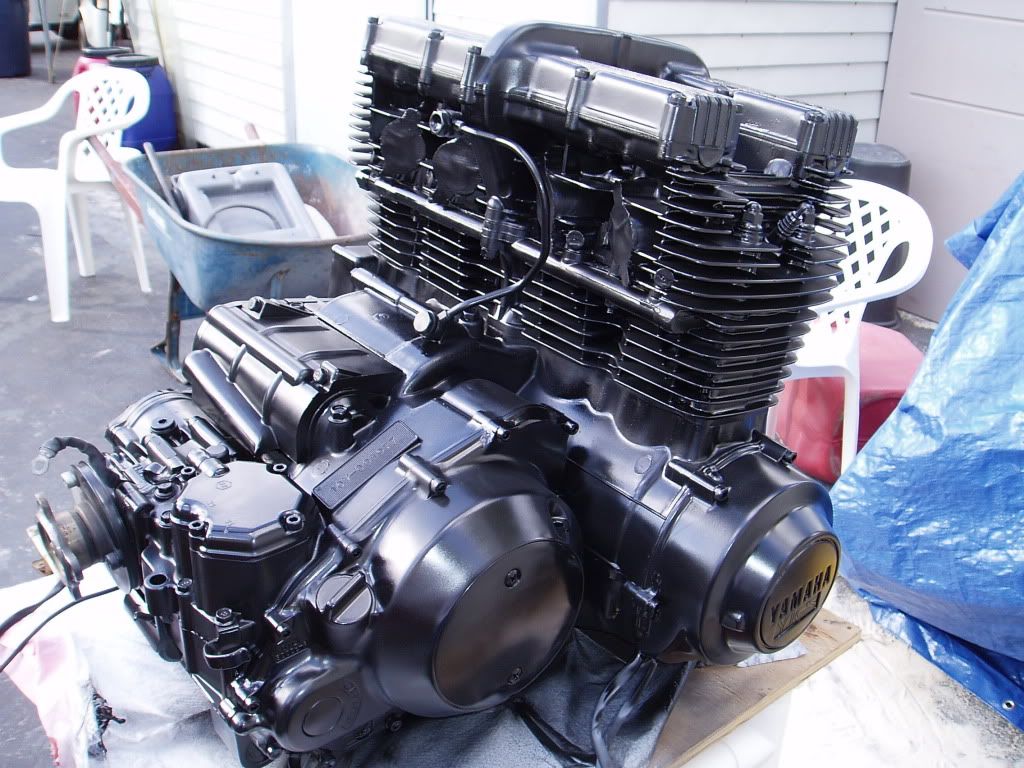
                    After waiting for over an hour for the primer to dry, I then went ahead and painted it with the 500 degree DupliColor Semi Gloss ceramic based paint.

                    [IMG][/IMG]
                    [IMG][/IMG]
                    [IMG][/IMG]
                    [IMG][/IMG]

                    I'm really not looking for a very shiny coat of paint on the engine, thus the semi gloss (satin) finish coating. I don't want all the maintenance of keeping the engine all farkly (sp?) and shiny, more like the finish on the FZ1 and R1. The shiny finish is going on the frame and other exterior parts. But one very cool thing I noticed was that the ceramic particles actually look like metal flake once the paint is dry, it's a very cool look, deep dark semi gloss black with these silver metallic particles lurking underneath.
                    I'm semi-considering sanding the ends of the fins and the ridges of the valve cover but since my finish is semi-gloss and not glossy, I don't see where I could find a matching clear coat. Afterall, I don't want oxidation to take hold on the sanded and polished fins and then proliferate thought he paint job.
                    Well, the sandblasting took about a day or two, and the degreasing, acetone wash, priming, and painting took one day. Sure beats the hell out of wirebrushing!!!
                    Next are the frame, swing arm, center stand, kick stand, final drive, calipers, etc. If you're interested, I'll keep posting pictures of the progress.
                    There's this really wild metallic paint I'm considering for the headers and the can. I'm just wondering what the max temperature the headers endure and whether this paint will withstand it.
                    Not bad for a rattle can job so far!!!???
                    Last edited by Cobia; 11-16-2010, 09:41 PM.
                    1980G Standard, Restored
                    Kerker 4 - 1
                    850 Rear End Mod
                    2-21 Flashing LED Arrays on either side of license plate for Brake Light Assist, 1100 Lumen Cree Aux Lights,
                    Progressive springs, Showa rear shocks
                    Automatic CCT
                    1980GH Special, Restored
                    Stock Exhaust, New Handlebars, 1" Spacer in Fork Springs, Automatic CCT, Showa Rear Shocks
                    '82 XJ1100 (Sold)
                    Automatic CCT, RC Engineering 4 X 1 Exhaust, K&N Pods, #50 Pilot Jets, YICS Eliminator. Sorely missed.

                    Comment


                    • #11
                      Looks real good, Bro. That bike is going to be sweet, keep the pics coming.
                      2H7 (79) owned since '89
                      3H3 owned since '06

                      "If it ain't broke, modify it"

                      Comment


                      • #12
                        Looks AWESOME Cobia!! I'd be happy to call that engine mine!! With this as the starting point, the rest of it has got to look amazing when done!! Keep posting the pics, now I'm sad I do not have a winter project!!
                        Life is what happens while your planning everything else!

                        When your work speaks for itself, don't interrupt.

                        81 XS1100 Special - Humpty Dumpty
                        80 XS1100 Special - Project Resurrection


                        Previously owned
                        93 GSX600F
                        80 XS1100 Special - Ruby
                        81 XS1100 Special
                        81 CB750 C
                        80 CB750 C
                        78 XS750

                        Comment


                        • #13
                          Nice, let us know how the paint holds up. I am thinking I will use the 1200 deg. paint just to be on the safe side. I have had good luck with the BBQ paint I have used.
                          Just ME and my 82 XJ 1100. Mac 4>1-2 1/2" open baffle shotgun, no octy, K&N pod filters, LED tail/brake light & directionals, 750 FD mod, Ear Cannon air horn, modified bars and dash. "Motorcyclists are all bound together by a brotherhood tie through their love of the sport, and what difference does it make what machine he rides as long as he belongs to the clan." Walter Davidson, Dec. 1920 edition of Harley-Davidson Enthusiast Magazine http://s851.photobucket.com/albums/ab78/justme1100/

                          Comment


                          • #14
                            I agree! Keep the pics coming as you go!
                            Nathan
                            KD9ARL

                            μολὼν λαβέ

                            1978 XS1100E
                            K&N Filter
                            #45 pilot Jet, #137.5 Main Jet
                            OEM Exhaust
                            ATK Fork Brace
                            LED Dash lights
                            Ammeter, Oil Pressure, Oil Temp, and Volt Meters

                            Green Monster Coils
                            SS Brake Lines
                            Vision 550 Auto Tensioner

                            In any moment of decision the best thing you can do is the right thing, the next best thing is the wrong thing, and the worst thing you can do is nothing.

                            Theodore Roosevelt

                            Comment


                            • #15
                              Thanks Phil and Don,
                              I'll keep the pics coming as best I can with dirty and paint laden hands..lol!!
                              Hey Don,
                              I hope you're healing well and on the fast track to a quick recovery. A winter project might help that along!!??

                              I've been lucky that the weather has been ideal for this type of work, temps in the high 70s to low 80s and humidity in the mid 60s. Paint dries fast, keeps runs to a minimum. It's a biatch getting all those fins coated properly from all angles, I've had to turn into a contortionist to do it properly. Hope I find a honey that will take advantage of these abilities!!! He, he...
                              1980G Standard, Restored
                              Kerker 4 - 1
                              850 Rear End Mod
                              2-21 Flashing LED Arrays on either side of license plate for Brake Light Assist, 1100 Lumen Cree Aux Lights,
                              Progressive springs, Showa rear shocks
                              Automatic CCT
                              1980GH Special, Restored
                              Stock Exhaust, New Handlebars, 1" Spacer in Fork Springs, Automatic CCT, Showa Rear Shocks
                              '82 XJ1100 (Sold)
                              Automatic CCT, RC Engineering 4 X 1 Exhaust, K&N Pods, #50 Pilot Jets, YICS Eliminator. Sorely missed.

                              Comment

                              Working...
                              X