Announcement

Collapse
No announcement yet.

Help with the things I'm dealing with?

Collapse
X
 
  • Filter
  • Time
  • Show
Clear All
new posts

  • Help with the things I'm dealing with?

    1. Front Master Cylinder rebuild
    2. WTF? fuel hoses are a clusterfu[|<
    3. Only 7500 mi?
    4. First vestages of seat tear

    1. I finally got my master apart today and it was pretty bad. The rubber was fine so I decided to clean it up and slap it back together. It was working before I cleared the whole system (all krunked up) So it should be working fine... Did I reassemble wrong?

    Banjo/ Spring/ ]cup []Piston with ]cup/ Owasher/ Cspring clip
    I have both cups facing the banjo ]<---- and the steel cap on the spring is set into the first rubber cup.

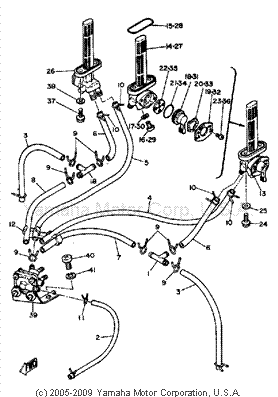
    2. Some hack has removed the vaccum shutoff switch for the fuel supply, capped off the prime lines, put a fuel pump on the timing side that pushes fuel into the carbs and relieves itself into the clutch side of the tank. I need a diagram of how it's supposed to be. I'm sure I can come up with hoses and the vaccum switch from the laundry list of parts suppliers you guys gave me

    3. This bike supposedly only has 7500 mi on it. How can I get a good idea of actual miles?

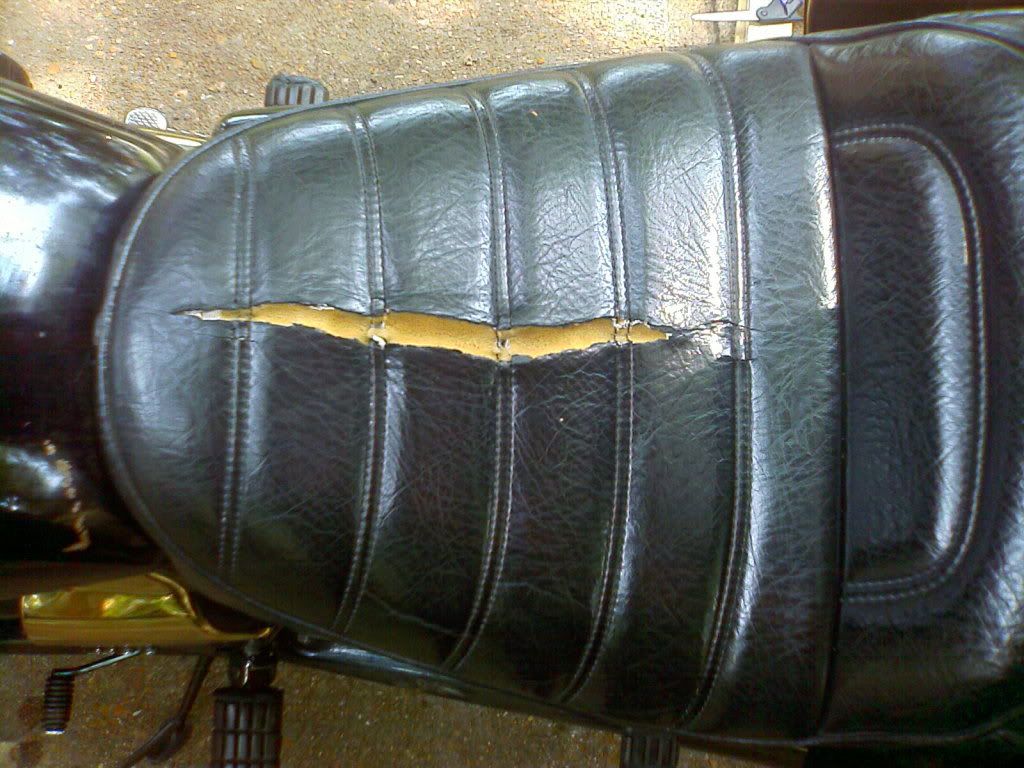
    4. My seat has its first little peek of a tear. Any ideas of how to head it off? I don't want to do the duct tape thing :P
    "There is a principle which is a bar against all information, which is proof against all arguments and which can not fail to keep a man in everlasting ignorance-that principle is contempt prior to investigation." --HERBERT SPENCER


    Active: 1932 Ford Model A; XS1100SF (Just got 'er); XS1100SG; 2000 F250 Turbo Diesel; 2003 Ford Mustang
    Broken: 1999 Kawi Vulcan 750; 1998 Triumph Trophy 1200
    Gonners: XS1100SF (my first ride); '82 Honda CB900F (bored to 1123cc); '86 Kawasaki ZG1000

  • #2
    Can go here to see parts break downs
    http://www.yamaha-motor.com/sport/parts/home.aspx


    80 SG front master


    Otopus


    "This bike supposedly only has 7500 mi on it. How can I get a good idea of actual miles?"

    Tough one...
    I've got a 79F engine with only 2500 miles on it. Stored indoors for all it's years, turns over good but have yet to use it. Have had a quick look inside clutch cover and looks nice, BUT so does a 80G with 35,000 miles and another 79 SF with 55,000.

    Google "vinyl seat repair", some work..., some sorta work


    mro

    Comment


    • #3
      Originally posted by Macamon View Post
      1. Front Master Cylinder rebuild
      2. WTF? fuel hoses are a clusterfu[|<
      3. Only 7500 mi?
      4. First vestages of seat tear

      1. I finally got my master apart today and it was pretty bad. The rubber was fine so I decided to clean it up and slap it back together. It was working before I cleared the whole system (all krunked up) So it should be working fine... Did I reassemble wrong?

      Banjo/ Spring/ ]cup []Piston with ]cup/ Owasher/ Cspring clip
      I have both cups facing the banjo ]<---- and the steel cap on the spring is set into the first rubber cup.

      2. Some hack has removed the vaccum shutoff switch for the fuel supply, capped off the prime lines, put a fuel pump on the timing side that pushes fuel into the carbs and relieves itself into the clutch side of the tank. I need a diagram of how it's supposed to be. I'm sure I can come up with hoses and the vaccum switch from the laundry list of parts suppliers you guys gave me

      3. This bike supposedly only has 7500 mi on it. How can I get a good idea of actual miles?

      4. My seat has its first little peek of a tear. Any ideas of how to head it off? I don't want to do the duct tape thing :P
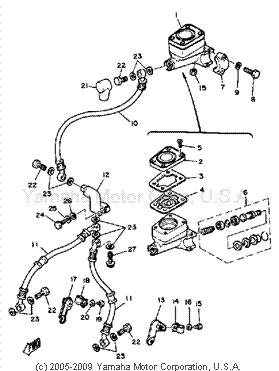
      Hi Mac and welcome,
      1) Click on CatatonicBug's signature line link to download an XS11 manual, there has to be a teardown pic of a M/C in there.
      2) No way you need a fuel pump, remove and carefully save for future use on another project. IMHO, no way you need an octopus valve either.
      Leave the prime connections capped off. If there's a vacuum hose still on one of the carb boots remove it and cap off the connector.
      NOT the vacuum line from #2 carb body to the vacuum advance mechanism, that needs to be there and has to stay.
      Run fuel hoses with in-line filters from the right-hand fuel tap to the left-hand carb fuel tee and from the left-hand fuel tap to the right-hand carb fuel tee. The crossover allows more room to fit the filters in without kinking the lines. You have to use both taps to run all 4 cylinders and just like grandpa's old Norton, you have to remember to turn the gas off when you park but it's the simplest way to hook up a Special's fuel lines.
      3) If you don't believe the odometer or the PO, you can only guess.
      Look at how worn the footpeg rubbers are. Check the date codes on the tire walls to see if they are still the originals or when they were last changed.
      More important than how far it's gone is what shape it's in. Do a compression and a leak-down test.
      4) Buy a curved sewing needle and a spool of black buttonhole thread at a fabric store. Sew up the tear as neatly as you can. Daub the stitching with black goop from a vinyl repair kit. Yes it will still show but won't be as tacky as duct tape.
      Last edited by fredintoon; 08-25-2009, 11:40 PM.
      Fred Hill, S'toon
      XS11SG with Spirit of America sidecar
      "The Flying Pumpkin"

      Comment


      • #4
        Originally posted by fredintoon View Post
        4) Buy a curved sewing needle and a spool of black buttonhole thread at a fabric store. Sew up the tear as neatly as you can. Daub the stitching with black goop from a vinyl repair kit. Yes it will still show but won't be as tacky as duct tape.
        Fred - I had never even thought that far, and I have a similar issue with my seat. I about kicked myself when I read your suggestion! I don't know why I didn't do that a LONG time ago!

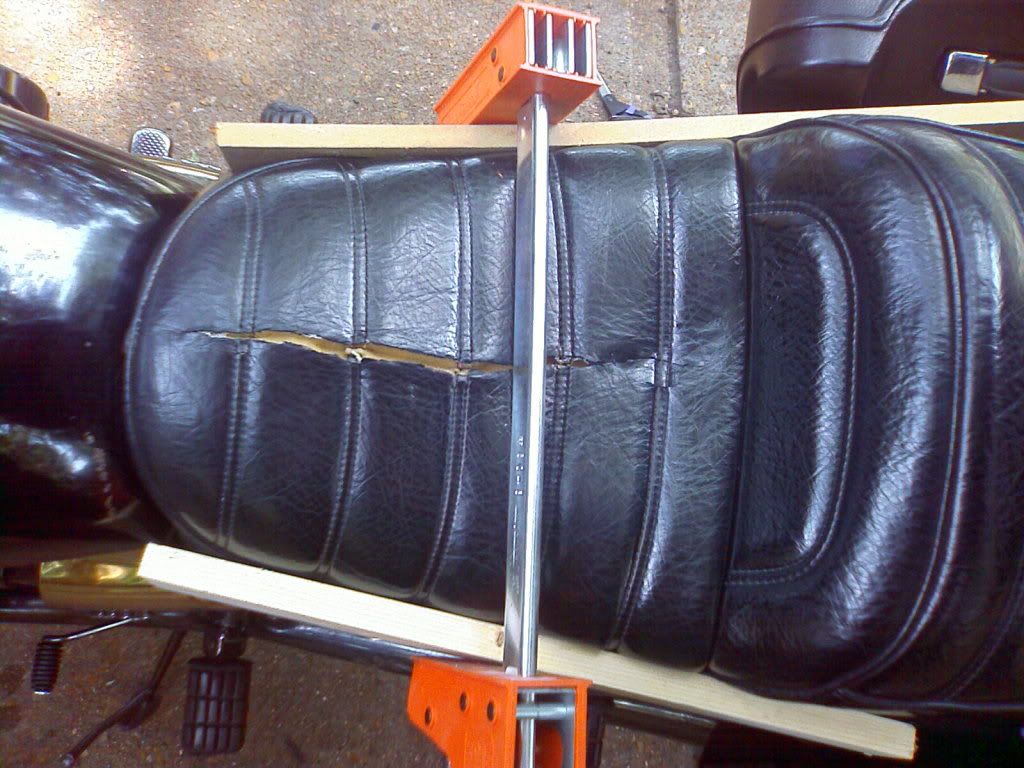
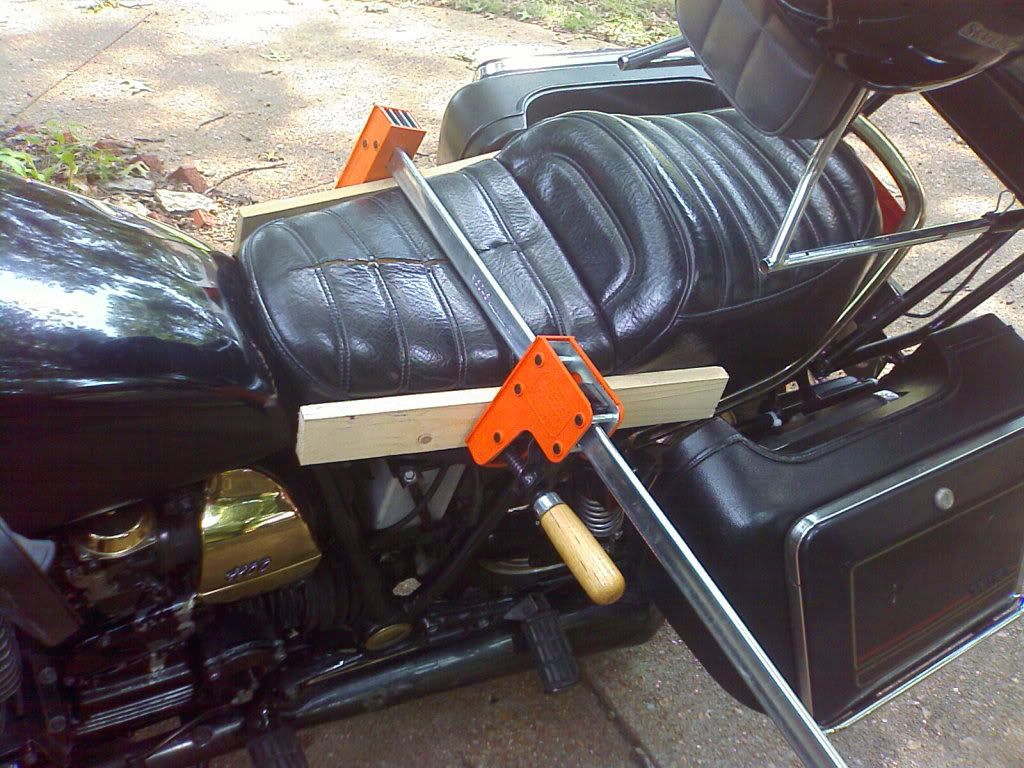
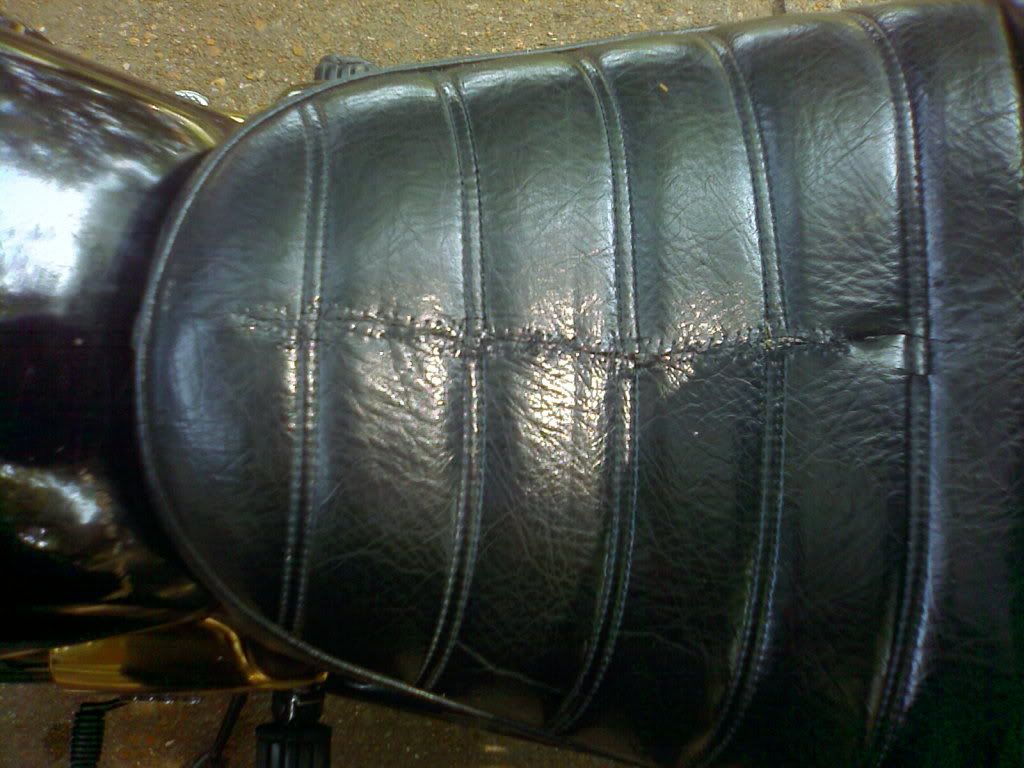
        Here are some pictures, as I went home at lunch. It took 30 minutes, a jorgensen wood clamp, 2 small pieces of wood, some button-hole twist, and a straight needle (I would suggest the curved needle for anyone else trying this though - it would have been a lot easier). I may buy some of that vinyl goop later on, but I had the thread and needle already, so I gave it a try.

        Before:


        Clamped:


        Finished!

        1980 XS850SG - Sold
        1981 XS1100LH Midnight Special (Sold) - purchased 9/29/08
        Fully Vetterized and Dynojet Kit added, Heated Grips, Truck-Lite LED headlight, Accel Coils, Irridium plugs, TKAT Fork Brace, XS850LH Final Drive & Black SS Brake lines from Chacal.
        Here's my web page devoted to my bike! XS/XJ User's Manuals there, and the XJ1100 Service Manual and both XS1100 Service manuals (free download!).

        Whether you think you can, or you think you cannot - You're right.
        -H. Ford

        Comment


        • #5
          What is your MC doing wrong, CB? Not building up pressure? Is it stuck? Is it leaking around the seal? I just rebuilt mine a few days ago so the memory is fresh and it is working fine now. From your description it sounds like you put everything in the right order. Did you lube everything (all the rubber parts) up with brake fluid before you reassembled it? More info would help.

          Patrick
          The glorious rays of the rising sun exist only to create shadows in which doom may hide.

          XS11F (Incubus, daily rider)
          1969 Yamaha DT1B
          Five other bikes whose names do not begin with "Y"

          Comment


          • #6
            Originally posted by CatatonicBug View Post
            Finished!

            Interesting! Sort of a frankenstein look...
            Ken Talbot

            Comment


            • #7
              Must have been one hell of a fart!

              "There is a principle which is a bar against all information, which is proof against all arguments and which can not fail to keep a man in everlasting ignorance-that principle is contempt prior to investigation." --HERBERT SPENCER


              Active: 1932 Ford Model A; XS1100SF (Just got 'er); XS1100SG; 2000 F250 Turbo Diesel; 2003 Ford Mustang
              Broken: 1999 Kawi Vulcan 750; 1998 Triumph Trophy 1200
              Gonners: XS1100SF (my first ride); '82 Honda CB900F (bored to 1123cc); '86 Kawasaki ZG1000

              Comment


              • #8
                Yeah, the stitching is not a "Professional" job, but the crack wasn't exactly straight either. I bought it that way, last fall, so it had gotten just a tad larger this summer, and I really wanted to keep it from getting too big. I also don't have the funds to buy a replacement cover at the moment, with all the other things I want to buy... I've sewn since Jr. High (4-H), and I don't know why it never dawned on me to just grab a needle and thread and sew it up! Super simple, and looks a LOT better from 20 feet than it used to!
                1980 XS850SG - Sold
                1981 XS1100LH Midnight Special (Sold) - purchased 9/29/08
                Fully Vetterized and Dynojet Kit added, Heated Grips, Truck-Lite LED headlight, Accel Coils, Irridium plugs, TKAT Fork Brace, XS850LH Final Drive & Black SS Brake lines from Chacal.
                Here's my web page devoted to my bike! XS/XJ User's Manuals there, and the XJ1100 Service Manual and both XS1100 Service manuals (free download!).

                Whether you think you can, or you think you cannot - You're right.
                -H. Ford

                Comment


                • #9
                  Arts of the Sailor

                  Good work on the repair.

                  If you ever have to deal with another tear like this then it's worth the effort to learn and use the Herringbone Repair Stitch. I'm a sailor and use this stitch a lot to repair torn canvas covers.

                  Scroll down a bit to see the diagram of the stitch "How-To."

                  http://books.google.com/books?id=axf...repair&f=false

                  advantages are that the stitch spreads the "load" out between the stitches lengthwise and from the sides so it doesn't pull the stitches out from the side holes.

                  Yeah, I know. Seems like a lot of extra trouble to go through at first but after you have done it and used it once the advantages convince you to use it again.

                  Comment


                  • #10
                    I completely agree that the herringbone would have been a better choice for a long-term repair, but I was doing this on my lunch break, and I hope to get a real leather replacement seat cover when my whip-stitching pulls apart.
                    1980 XS850SG - Sold
                    1981 XS1100LH Midnight Special (Sold) - purchased 9/29/08
                    Fully Vetterized and Dynojet Kit added, Heated Grips, Truck-Lite LED headlight, Accel Coils, Irridium plugs, TKAT Fork Brace, XS850LH Final Drive & Black SS Brake lines from Chacal.
                    Here's my web page devoted to my bike! XS/XJ User's Manuals there, and the XJ1100 Service Manual and both XS1100 Service manuals (free download!).

                    Whether you think you can, or you think you cannot - You're right.
                    -H. Ford

                    Comment


                    • #11
                      Damn, I really messed up the stitch the last time I sewed a corpse's nose to the shroud, Larry. That explains the apparitions. Where were you when I needed you?

                      Patrick
                      The glorious rays of the rising sun exist only to create shadows in which doom may hide.

                      XS11F (Incubus, daily rider)
                      1969 Yamaha DT1B
                      Five other bikes whose names do not begin with "Y"

                      Comment


                      • #12
                        Old School...

                        "Necromancy For Dummies" says that you should wait at least 30 seconds after the "deceased" has ceased breathing before you begin the process of sewing the burlap closed. Prior to that moment you risk the "deceased" struggling during the process and can end up with all manner of mishaps from trying to complete the task.

                        It is also essential to leave a small area unstitched in order to allow the soul to escape.

                        Practice..practice...Practice.

                        You'll get it right eventually.

                        Comment

                        Working...
                        X