 Tweet
Tweet
1. Front Master Cylinder rebuild
2. WTF? fuel hoses are a clusterfu[|<
3. Only 7500 mi?
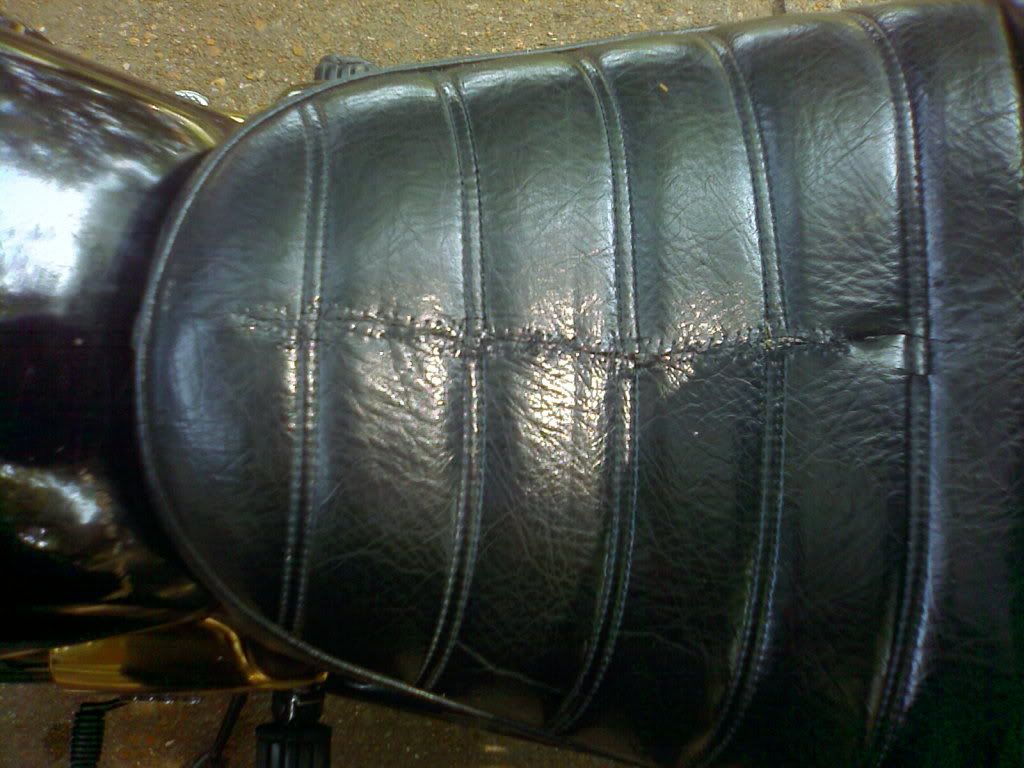
4. First vestages of seat tear
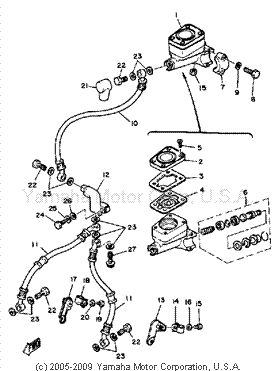
1. I finally got my master apart today and it was pretty bad. The rubber was fine so I decided to clean it up and slap it back together. It was working before I cleared the whole system (all krunked up) So it should be working fine... Did I reassemble wrong?
Banjo/ Spring/ ]cup []Piston with ]cup/ Owasher/ Cspring clip
I have both cups facing the banjo ]<---- and the steel cap on the spring is set into the first rubber cup.
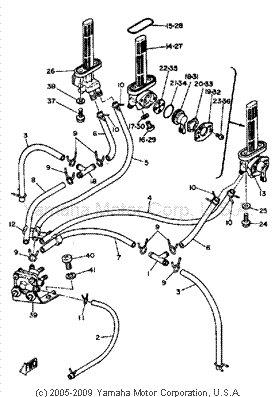
2. Some hack has removed the vaccum shutoff switch for the fuel supply, capped off the prime lines, put a fuel pump on the timing side that pushes fuel into the carbs and relieves itself into the clutch side of the tank. I need a diagram of how it's supposed to be. I'm sure I can come up with hoses and the vaccum switch from the laundry list of parts suppliers you guys gave me
3. This bike supposedly only has 7500 mi on it. How can I get a good idea of actual miles?
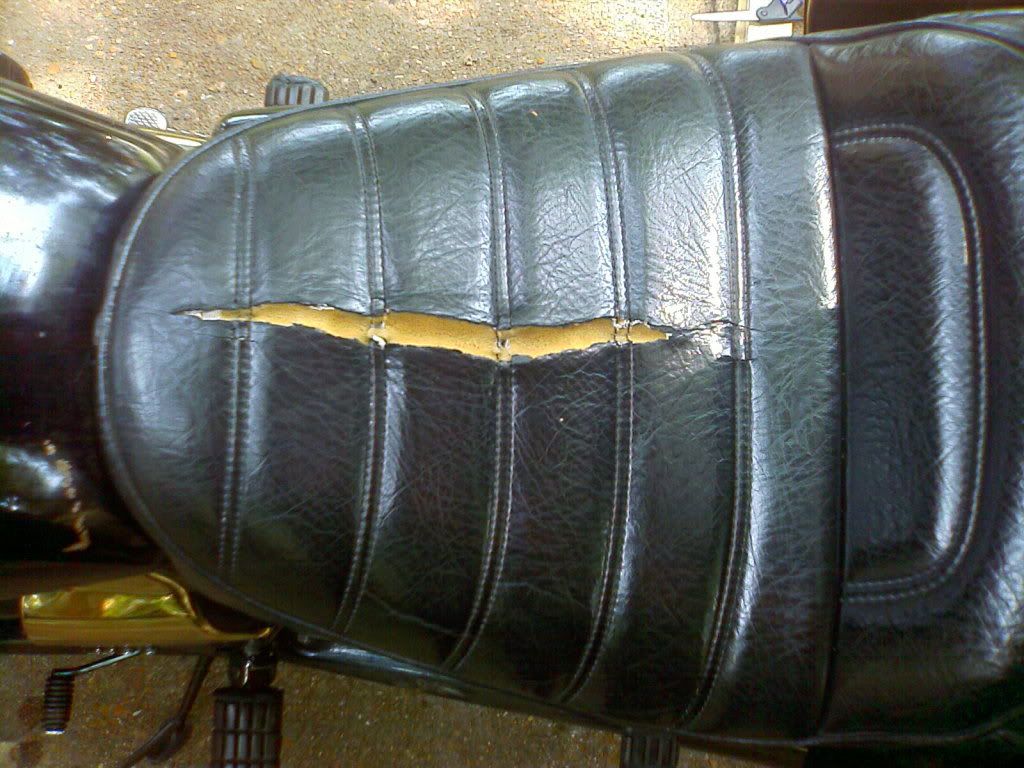
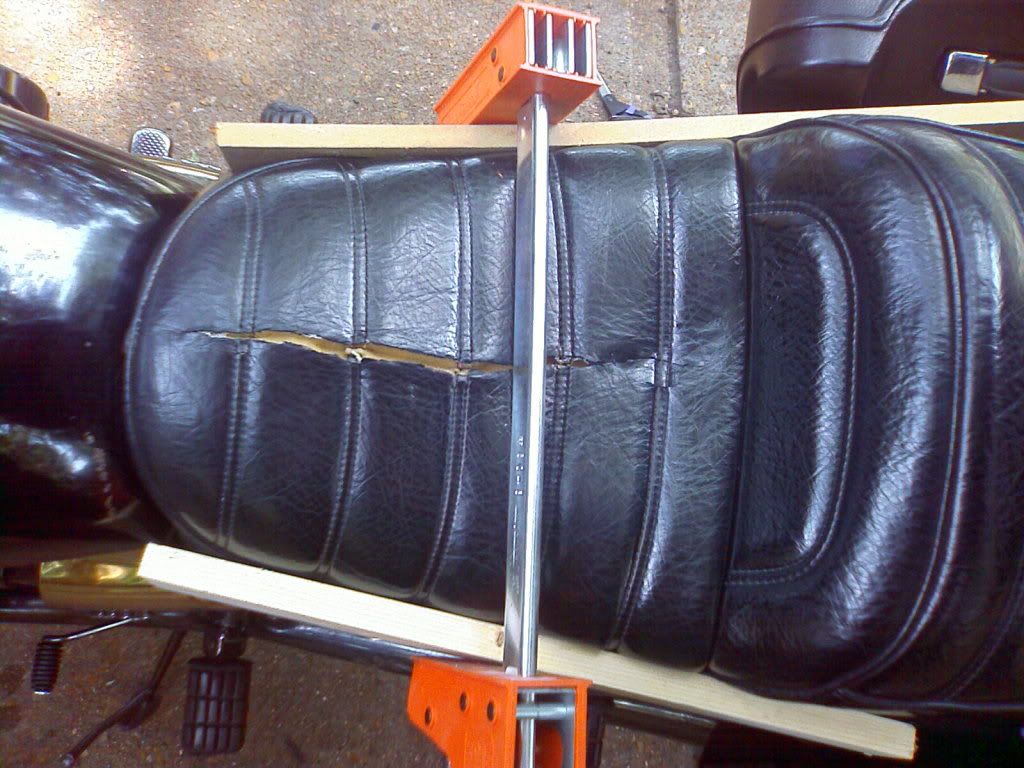
4. My seat has its first little peek of a tear. Any ideas of how to head it off? I don't want to do the duct tape thing :P
2. WTF? fuel hoses are a clusterfu[|<
3. Only 7500 mi?
4. First vestages of seat tear
1. I finally got my master apart today and it was pretty bad. The rubber was fine so I decided to clean it up and slap it back together. It was working before I cleared the whole system (all krunked up) So it should be working fine... Did I reassemble wrong?
Banjo/ Spring/ ]cup []Piston with ]cup/ Owasher/ Cspring clip
I have both cups facing the banjo ]<---- and the steel cap on the spring is set into the first rubber cup.
2. Some hack has removed the vaccum shutoff switch for the fuel supply, capped off the prime lines, put a fuel pump on the timing side that pushes fuel into the carbs and relieves itself into the clutch side of the tank. I need a diagram of how it's supposed to be. I'm sure I can come up with hoses and the vaccum switch from the laundry list of parts suppliers you guys gave me
3. This bike supposedly only has 7500 mi on it. How can I get a good idea of actual miles?
4. My seat has its first little peek of a tear. Any ideas of how to head it off? I don't want to do the duct tape thing :P


")


Comment