Announcement

Collapse
No announcement yet.

Cutting down a windshield

Collapse
X
 
  • Filter
  • Time
  • Show
Clear All
new posts

  • Cutting down a windshield

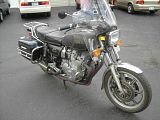
    I finally got around to cutting down the 21" tall windshield on Tsunami today. Having ridden SWMBO's Purple Reign with its 18" windshield, that seemed like a good height to go with, allowing me to see over the top edge, but still having the main airstream pass over above the top of my helmet. Lots of pictures and vid clips to follow:

    First, tape up the windshield with lots of wide masking tape. Mark the new height in the centre. Clamp a 1/8" dowel to produce a nice curve parallel to the top edge, and use this to mark on the tape with a sharpie.


    Hold a bit of cardboard behind each top corner to make a template for the new lower corner shape.


    Trim the templates, and transfer the new corner shapes for each side.


    Use a jigsaw with a sharp, coarse blade.


    Run the saw on a very slow speed to prevent heat build-up which can cause the chips to melt and fuse into the kerf behind the blade. On my Dewalt, I set the speed to just a bit above 1.


    Take your time with the cutting, letting the blade do the work. The more care you take in keeping to your line, the less time you will have to spend later cleaning up the edge.


    Once you've cut about half way, stop. Tape up the kerf so as you get to the other side, the cut will not fall off.


    Here's what the raw cut edge will look like.


    Now, here come the videos! First is a shot of cutting. Nice and slow...


    Once cut, start refining the edge with a coarse file. I like to use a file made specifically for aluminum.


    Next use a power sander with 80 grit paper.


    320 grit paper comes next, in a handheld rubber sanding block.


    Wet or dry paper in 400 grit, used with water is next.


    Final sanding is done with a polyester-backed ultra fine sheet that is made for polishing plastic. Also used with water.


    This special polyester-backed abrasive comes in a kit.


    Remove the masking tape.


    And finally, get out your favourite celaning product and clean the new, shorter windshield.


    Here's how the edge turned out.


    It's as easy as that!
    Ken Talbot

  • #2
    Would a bandsaw have been a better tool to cut with? Seems like it would have been a cleaner, more consistent cut than a hand-held jigsaw.
    1980 XS850SG - Sold
    1981 XS1100LH Midnight Special (Sold) - purchased 9/29/08
    Fully Vetterized and Dynojet Kit added, Heated Grips, Truck-Lite LED headlight, Accel Coils, Irridium plugs, TKAT Fork Brace, XS850LH Final Drive & Black SS Brake lines from Chacal.
    Here's my web page devoted to my bike! XS/XJ User's Manuals there, and the XJ1100 Service Manual and both XS1100 Service manuals (free download!).

    Whether you think you can, or you think you cannot - You're right.
    -H. Ford

    Comment


    • #3
      I've got a bandsaw in the carport too. Just couldn't figure out how to handhold it to cut the edge, or lift and move the bike to get the windshield to the blade.
      Ken Talbot

      Comment


      • #4
        Thats a great pictorial.The process worked well it looks like.
        How long did it take to do it Ken?
        80 SG XS1100
        14 Victory Cross Country

        Comment


        • #5
          The whole job would probably be about an hour. I probably was in to it for about 10 or 15 minutes before I thought of shooting the photos and clips. The timestamp on the first image was 10:31, time on the last video was 11:26, and it would have been a bit quicker without the camera. Yup, an hour would be about right. I know it took more time processing and uploading the files and writing the post.
          Ken Talbot

          Comment


          • #6
            Nicely done, Ken. That edge looks very professional.
            I think I have a loose screw behind the handlebars.

            '79 XS11 Standard, Jardine 4/1, Dyna DC1-1 Coils, 145 mains, 45 pilots, plastic floats - 25.7mm, XV920 fuel valves, inline fuel filters, speed bleeders, Mikes XS pods, spade-type fuse block, fork brace, progressive fork springs/shocks, manual petcocks, 750 FD, Venture cam chain tensioner, SS brake lines

            Comment


            • #7
              Very nice job. Looks great.
              Harry

              The voices in my head are giving me the silent treatment.

              '79 Standard
              '82 XJ1100
              '84 FJ1100


              Acta Non Verba

              Comment


              • #8
                "Final sanding is done with a polyester-backed ultra fine sheet that is made for polishing plastic. Also used with water."

                I am interested in cutting down my shield also and was contemplating on how to go about it. Now that its been done I dont have to improvise as much. Is that “polyester-backed ultra fine sheet” made for polishing the main viewing areas of the shield? I have been wondering if they make some type of polish that will remove the dullness and light scratches from the surface. I love my shield but when the setting sun or car lights hit it at the right angle its hard to see… Any thoughts of using it on the rest of the shield? Thanks. Nice job.
                '79 XS11 F
                Stock except K&N

                '79 XS11 SF
                Stock, no title.

                '84 Chevy K-10 "Big Blue"
                GM 350, Muncie SM465, NP208, GM 10 Bolt with 3.42gears turnin 31x10.5 Baja Claws

                "What they do have is an implacable, unrelenting presence and movement that bespeaks massive power lurking behind paint and chrome. They don't wail like a screeching ninja, the don't rumble like a harley. They just growl like a spactic, stressed out badger waiting to rip your face off and eat your soul." Trainzz~RIP~

                Comment


                • #9
                  Is that “polyester-backed ultra fine sheet” made for polishing the main viewing areas of the shield? I have been wondering if they make some type of polish that will remove the dullness and light scratches from the surface. I love my shield but when the setting sun or car lights hit it at the right angle its hard to see… Any thoughts of using it on the rest of the shield? Thanks. Nice job.
                  My first question is how old is the shield? If it's "about 30 years", think of getting a new shield. I had to replace one that the UV's killed. They get a spider web like lines, but usually all in the same direction. This is the plastics breaking down, and a sign to replace it.
                  The outside coating on ALL plastic shields are a UV inhibitor, and once this is gone, the shield will decay. If you need to remove something that deep from the outside, you are into the unprotected plastic. You CAN polish it out, but you will need to do this more often.
                  Ray Matteis
                  KE6NHG
                  XS1100 E '78 (winter project)
                  XS1100 SF Bob Jones worked on it!

                  Comment


                  • #10
                    The shield cant be too old maybe 5-8 yrs(is that old?), its deff not origional! Even so, the scratchs are only noticable around dusk+night. Day time driving its hardly noticable. Even if it removes the UV protecting it will atleast be more friendly on the eyes for the remaining life of it. Cheaper than buying another shield. Once I get it cut to the correct height I may not be concerned with the scratches. Its only when I look through it thats bothersome....
                    '79 XS11 F
                    Stock except K&N

                    '79 XS11 SF
                    Stock, no title.

                    '84 Chevy K-10 "Big Blue"
                    GM 350, Muncie SM465, NP208, GM 10 Bolt with 3.42gears turnin 31x10.5 Baja Claws

                    "What they do have is an implacable, unrelenting presence and movement that bespeaks massive power lurking behind paint and chrome. They don't wail like a screeching ninja, the don't rumble like a harley. They just growl like a spactic, stressed out badger waiting to rip your face off and eat your soul." Trainzz~RIP~

                    Comment


                    • #11
                      If you are looking through it, it's too tall. You should be looking OVER the windshield unless you bend down to get out of the rain, or are going slow and looking down close to the front tire.
                      Ray Matteis
                      KE6NHG
                      XS1100 E '78 (winter project)
                      XS1100 SF Bob Jones worked on it!

                      Comment


                      • #12
                        I don't remember where I got the kit I used, but I think it was a Micro Mesh product. Have a look at their website here. They do make products for restoring acrylic windshields. For the cost of some of these kits, and the time that would be involved, it might be better to buy a piece of material and cut a new windshield using the old one as a template.
                        Ken Talbot

                        Comment


                        • #13
                          It should be cut cuz I find myself looking over it at night/dusk. Its not on a fairing so I cant replace a section of it, its a full shield. See here:


                          Thanks for the tips. Probably wont need to polish when its at the correct height. Its the top few inches that need to come off that are scratched and annowing. Know a good plastic surgen? haha
                          '79 XS11 F
                          Stock except K&N

                          '79 XS11 SF
                          Stock, no title.

                          '84 Chevy K-10 "Big Blue"
                          GM 350, Muncie SM465, NP208, GM 10 Bolt with 3.42gears turnin 31x10.5 Baja Claws

                          "What they do have is an implacable, unrelenting presence and movement that bespeaks massive power lurking behind paint and chrome. They don't wail like a screeching ninja, the don't rumble like a harley. They just growl like a spactic, stressed out badger waiting to rip your face off and eat your soul." Trainzz~RIP~

                          Comment


                          • #14
                            The procedure is the same for that windshield. You cut it while it's on the bike anyway.

                            I cut mine down 2" a couple years ago, have no idea how old the windshield is.

                            My take is, if it's not right, try and cut it. If it doesn't work, you can always buy another one. I don't really care if the screen is perfect, I don't look through it anyway.

                            The next project is to cut 3 1/8" holes in mine to put my vents in....
                            Nice day, if it doesn't rain...

                            '05 ST1300
                            '83 502/502 Monte Carlo for sale/trade

                            Comment


                            • #15
                              I cut mine to 16 1/4". You get more wind turbulence, but it's not an uncomfortable amount. A friend who used to make windshields for boats taught me to run a torch over the cut a couple of inches away from the windshield to seal the edge and stop any unseen microscopic cracks from running over time, it will also cut down on a lot of finish work, but you have to be careful.
                              Fastmover
                              "Just plant us in the damn garden with the stupid
                              lion". SHL
                              78 XS1100e

                              Comment

                              Working...
                              X