Announcement

Collapse
No announcement yet.

30 minute cam chain tensioner mod

Collapse
X
 
  • Filter
  • Time
  • Show
Clear All
new posts

  • #31
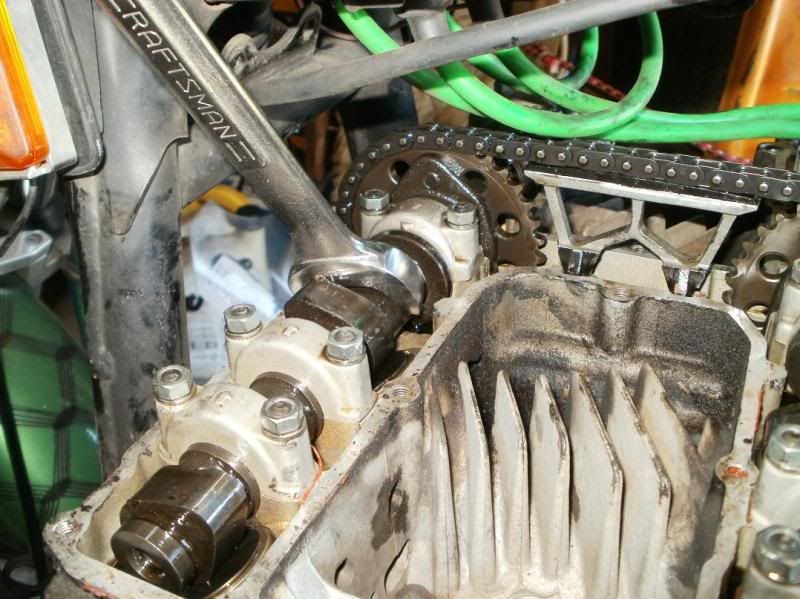
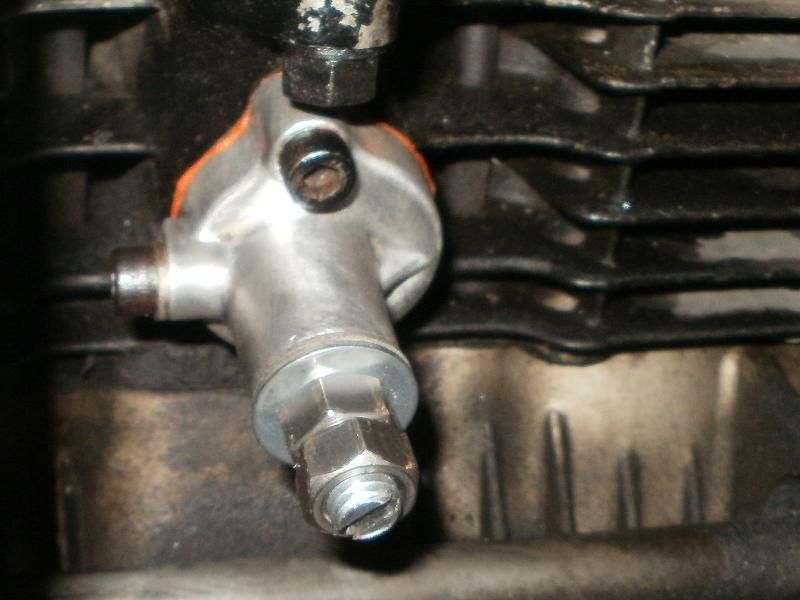
    Ivan - That's a pretty good idea. If the housing was only tapped back from the nose maybe 3/4" that would make a good locking device to keep the adjuster from backing out. I'd probably use a small piece of 3/8 16, or 3/18 24 all thread with the fiber washer and locking nuts to allow for adjustment and to provide a good seal against leaks.

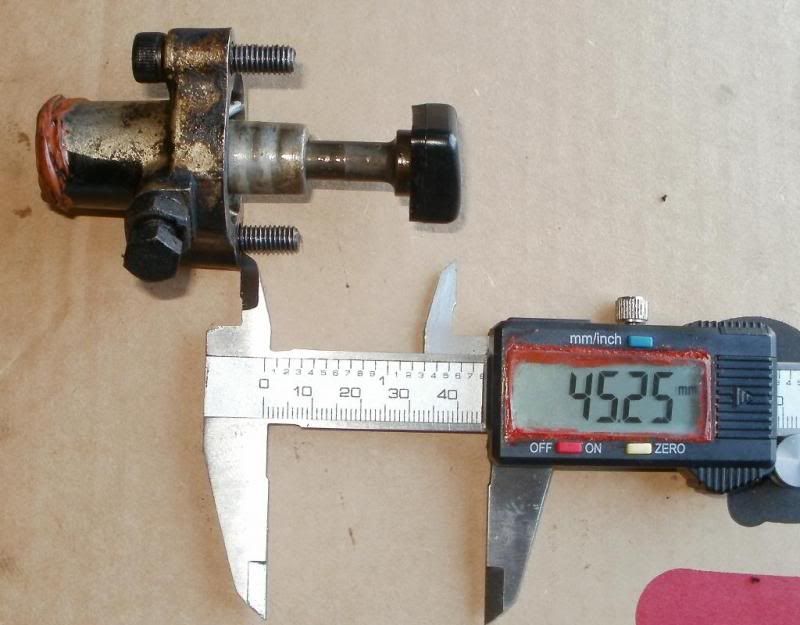
    I'm not going to try it with this one as I've already tapped the hole slightly larger than it was and I wouldn't want it wobbling in the hole and causing problems. I think this would be an excellent solution for someone who isn't comfortable with manually tensioning their cam chain.
    I think I have a loose screw behind the handlebars.

    '79 XS11 Standard, Jardine 4/1, Dyna DC1-1 Coils, 145 mains, 45 pilots, plastic floats - 25.7mm, XV920 fuel valves, inline fuel filters, speed bleeders, Mikes XS pods, spade-type fuse block, fork brace, progressive fork springs/shocks, manual petcocks, 750 FD, Venture cam chain tensioner, SS brake lines

    Comment


    • #32
      TC - You were right (not that I ever doubted you), neither the hot glue nor the furniture tips were up to the heat. They make rather interesting modern art, however 
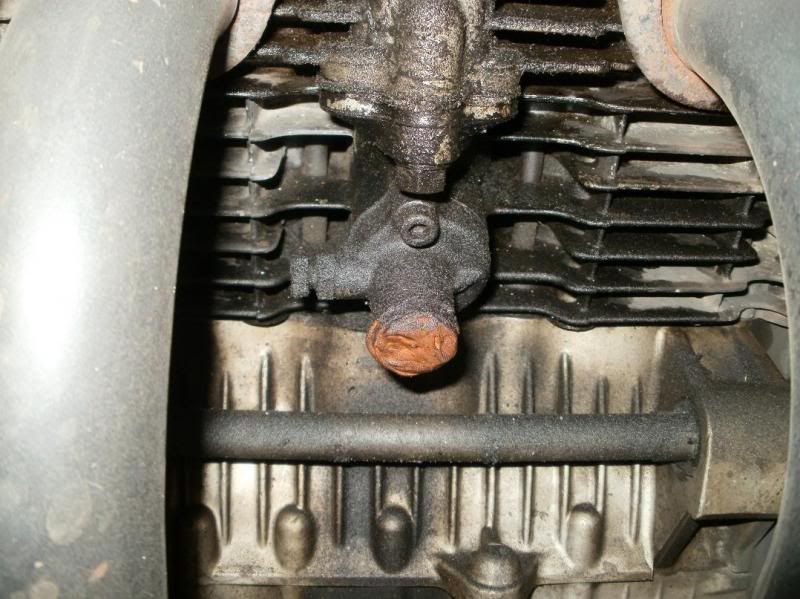
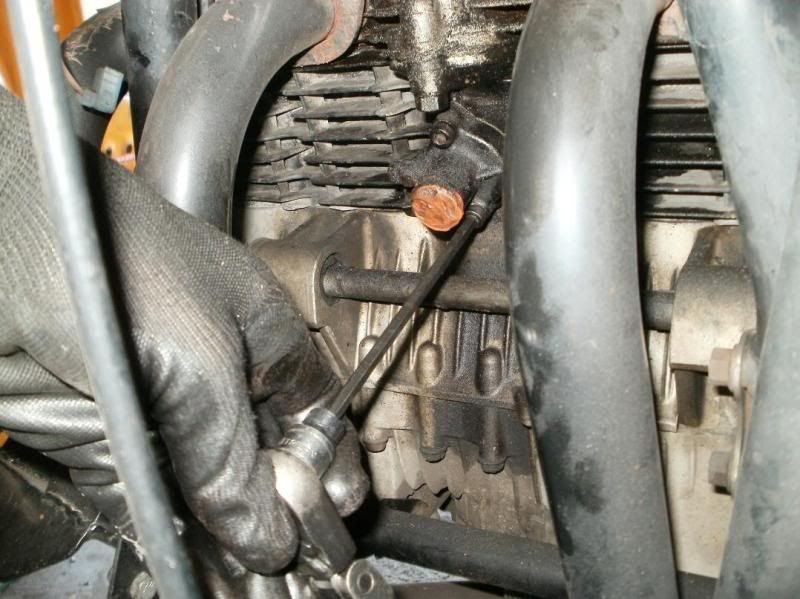
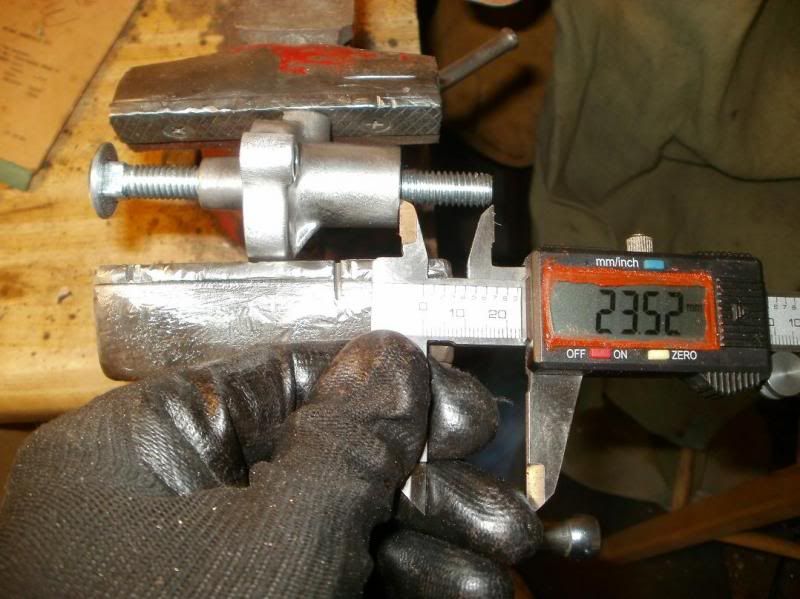
I made up another carriage bolt with a thick, dense, neoprene washer and JB Welded it to the end, and after riding it long enough to get good and hot it isn't showing any signs of deterioration. I'll check it again after I log some more miles on it. It too cured the chirp, so, so far so good.
      I think I have a loose screw behind the handlebars.

      '79 XS11 Standard, Jardine 4/1, Dyna DC1-1 Coils, 145 mains, 45 pilots, plastic floats - 25.7mm, XV920 fuel valves, inline fuel filters, speed bleeders, Mikes XS pods, spade-type fuse block, fork brace, progressive fork springs/shocks, manual petcocks, 750 FD, Venture cam chain tensioner, SS brake lines

      Comment


      • #33
        You could mold an end around the bolt head out of Devcon rubber epoxy. That should hold up to the heat and wear...

        Geezer
        Hi my name is Tony and I'm a bikeoholic.

        The old gray biker ain't what he used to be.

        Comment


        • #34
          Update and a few extra discussion points!

          It's been several years since this thread was posted, but I wanted to provide some additional info, updates to it. It was made into a tech tip:

          http://www.xs11.com/forum/showthread.php?t=35497

          Okay, with all of the talk about the ACCT mods and such, I wanted to provide an alternate point of view. Something about the ACCT's bothered me, that fact that they will adjust farther than the OEM manual unit which can allow one to then run a cam chain that is beyond the wear/stretch limits as set by Yamaha, and with the ACCT you can NOT tell how much slack it has taken up without having to PULL the unit and the valve cover off and check it manually anyways!

          My bike has some estimated 65K miles on it, and although I've been able to perform the manual CCT adjustment in the past, I was thinking that there was a good chance that I might be nearing the adjustment limit. Also concern about the OEM CCT failing was nagging at me, although I was pretty sure that I had not overtorqued/stripped the locking bolt and housing during my previous adjustments.

          So...I decided to peform the MANUAL Mod to the OEM CCT as outlined in this thread, but also wanted to measure and document the range of adjustment that the OEM plunger will perform, and determine a way to measure that externally with the Modded manual CCT.

          First off, here's my OEM unit still on my engine...yes it's dirty, oily, had both a leaky CCT...note the RED RTV sealant around the end of the CCT unit, but also had a leaky valve cover!


          This next image shows the cams with the large open/box style wrench positioned on the HEX portion of the cam next to the sprocket...for being able to take up the slack in the cam chain while removing the CCT.


          This next shows loosening the CCT mounting bolts, but still holding the CCT against the cam chain, this was done of course after several rotations of the engine and aligned at the "C" mark.


          This next image shows me rotating the Exhaust cam clockwise to pull the slack of the chain on the side of the CCT, this will then push the CCT plunger and housing away from the engine while NOT letting the slack drop down around the crank sprocket! This is the step that I have tried to suggest and recommend to folks performing the installation of the ACCT, not just setting it on "C", removing the OEM CCT and "hoping" that the slack will not drop/flop down around the crank sprocket!


          This just shows me supporting the CCT as it is being pushed outwards as I rotate the exhaust cam and take up the slack.


          This next image shows the OEM CCT removed, I had performed the adjustment just prior to this, and the caliper shows how much it is protruding. Also note that the rubber stopper on the end of the plunger is NOT flat/perpendicular to the shaft, it is slanted, that's another reason why you can't attach it to the end of the carriage bolt since the carriage bolt will spin, you could not keep the flat/slanted orientation the same!


          This next image shows the spring removed, and the plunger pulled out to the end of the allowable travel....as you can see it was just about another 1 mm before I would have reached the end of the allowed adjustment which means that it's pretty darn close to cam chain replacement time!


          Just a closeup of the plunger showing the flat locking surface and the bolt score markings, and you can better see the slant of the rubber end!


          So...with a 4" long carriage bolt, and the round head end set to the ~45mm max travel distance from the inside of the housing, the amount of bolt sticking out from the external side of the housing is ~24mm. This was the measurement I was looking for, so that after I install the new cam chain, I will then be able to monitor and gauge how much slack is being adjusted as I perform the adjustments by how much of the bolt is sticking out of the housing! And once it gets to about 24mm short, then I'll know that I have again reached the OEM wear limit of the chain and will be time to replace it, hopefully well before the point of excessive stretch to the failure point!


          This next image is after I had installed the newly modded CCT, set the tension, released the slack by rotating the exhaust cam CCW as I inserted the CCT assembly and then bolted it up, and then rotated the engine CW several rotations and then set it on "T", the CAM alignment DOTS are in perfect position. This was a bit surprising also because of the amount of stretch/wear that is already present on this chain, that it's almost to the wear limit/spec, and that the cams will still NOT be badly out of time!


          And then the final image just showing the modded CCT installed and ready for action.


          SO...for all of you that have installed the ACCT, I would highly suggest the exhaust cam rotation method of taking up the chain slack DURING the process of removing the ACCT to allow you to "check" to see how much wear/stretch you have developed....and that sticking a ruler/caliper, something that you can have premarked or preset to the ~45mm wear limit length that you can stick into the CCT hole and then push inwards as you release the cam chain slack...then repeat the taking up of the slack, and reinstalling the ACCT until you are ready to put in a new cam chain!

          T.C.

          PS, forgot to mention that I also performed a valve clearance measurement while I was in there, my #1 intake was just a shade over .004", and my Exh. #3 was a shade over .007....almost .008 but not quite, so a little tight, but will be okay till after the rally riding, and then I can reshim when I put in the new Cam Chain over the winter!
          T. C. Gresham
          81SH "Godzilla" . . .1179cc super-rat.
          79SF "The Teacher" . . .basket case!
          History shows again and again,
          How nature points out the folly of men!

          Comment


          • #35
            Good reminder, and detailed, EASY way to be sure things didn't 'slip when doing the adjuster swap T.C. Way too many folks here have ruined there riding day with a bent valve. Not removimg spark plugs and holding a slight tension with wrench direction of rotation on the timing wheel I'm sure has kept chain links in place on the crank the three I have swapped out(mine and two other riders here). BTW, like the hand socks.
            81H Venturer1100 "The Bentley" (on steroids) 97 Yamaha YZ250(age reducer) 92 Honda ST1100 "Twisty"(touring rocket) Age is relative to the number of seconds counted 'airing' out an 85ft. table-top.

            Comment


            • #36
              Ive lost the plunger on mine so this alternative mod would work a treat. Thanks guys
              1980 XS1100 Standard

              Comment


              • #37
                I just did this one on my bike. Worked great!

                I made 2 changes however, I used a 4.5" long bolt, and fitted a Nylon lock nut to the end to make adjustment easier. Then 2 nuts to lock the bolt in place at the original housing.

                No leaks! Works great. Now I just need to replace the dang cam chain. The original CCT was at it's max extension when I removed it. After 78k miles, I guess it's done pretty well for itself.

                Took me about 30 minutes as advertised too. Mostly because there was a beer break or two involved.

                Thanks for the write-up and info!

                ~Revanoff2~
                1980 3H5 XS1100G Standard Diamond Silver
                77k miles and going strong! Best free bike ever!

                1962 Briggs & Stratton 3.5hp mini-bike!

                Previous Hogs:
                1972 Honda SL350 K2 325cc
                1971 Kawasaki 350cc Bighorn 2 Stroke
                1981 Yamahahaha XS650 Special
                1981 Yamahahaha XJ550 Maxim

                Comment


                • #38
                  THIS works much better and it's self adjusting.

                  Direct bolt on.
                  Greg

                  Everybody is a genius. But if you judge a fish by its ability to climb a tree, it will live its whole life believing that it is stupid.”

                  ― Albert Einstein

                  80 SG Ol' Okie;79 engine & carbs w/pods, 45 pilots, 140 mains, Custom Mac 4 into 2 exhaust, ACCT,XS850 final drive,110/90/19 front tire,TKat fork brace, XS750 140 MPH speedometer, Vetter IV fairing, aftermarket hard bags and trunk, LG high back seat, XJ rear shocks.

                  The list changes.

                  Comment


                  • #39
                    Originally posted by BA80 View Post
                    THIS works much better and it's self adjusting.

                    Direct bolt on.
                    Well, I wouldn't necessarily say it works "BETTER", but equivalently.
                    But as I stated in my text, with the ACCT you can't easily tell how much wear/stretch your cam chain has experienced, and the chance of utilizing the chain beyond it's recommended service length to a point of breakage, as well as the stretch allowing the valve timing to drift more out of time. YMMV.

                    T.C.
                    T. C. Gresham
                    81SH "Godzilla" . . .1179cc super-rat.
                    79SF "The Teacher" . . .basket case!
                    History shows again and again,
                    How nature points out the folly of men!

                    Comment


                    • #40
                      Have you heard of that happening since Ivan came up with the ACCT mod?

                      The chain is going to wear much less if it is always in adjustment. That chain is MUCH more likely to snap if it's slapping the walls of the tunnel.
                      Greg

                      Everybody is a genius. But if you judge a fish by its ability to climb a tree, it will live its whole life believing that it is stupid.”

                      ― Albert Einstein

                      80 SG Ol' Okie;79 engine & carbs w/pods, 45 pilots, 140 mains, Custom Mac 4 into 2 exhaust, ACCT,XS850 final drive,110/90/19 front tire,TKat fork brace, XS750 140 MPH speedometer, Vetter IV fairing, aftermarket hard bags and trunk, LG high back seat, XJ rear shocks.

                      The list changes.

                      Comment


                      • #41
                        Hey Greg,

                        I'm not dissing the ACCT Mod, just discussing the possibilities. As to you saying that the chain won't wear as much? Are you saying that the wear/stretch is from the chain being overly slack and jerking during use?? The ACCT will keep the chain tightened so that MINIMAL slack will be present, and some will be UNTIL enough develops for the ACCT to advance the plunger another NOTCH. With proper periodic checks/adjustments of the modded manual tensioner....the same amount of slack/tension should be maintained, so the same amount of wear will occur.

                        NO...no one has reported their chain breaking while using the ACCT mod, but not too many members have had that much wear in their chains to begin with. And they also haven't necessarily put that much more wear/k miles on their engines (YET) to reach the excessive wear limit/length of the chain that CAN occur since the ACCT can take up MORE slack because of longer plunger distance than the OEM or the manual adjuster.

                        SO...this is all I'm saying, and that with the ACCT, it's more difficult to monitor the chain wear to determine WHEN it's worn enough to need replacing, and so with the set it and forget it mentality it COULD allow excessive wear/stretch to the point of catastrophic failure.

                        What may be needed is a way to check the total amount of slack in the chain during a valve clearance check. It will require removing the ACCT, or at least the bolt that fixates the central plunger to allow full slack of the chain, and then pulling the slack UP between the cams, and determining a certain measurable height point that would then be the max point that would indicate max chain stretch/wear and would then indicate time for chain replacement.

                        With the manual mod, I have figured out how to determine when my chain has reached the max wear limit by how far out the carriage bolt plunger is sticking out from the adjuster housing.

                        T.C.
                        T. C. Gresham
                        81SH "Godzilla" . . .1179cc super-rat.
                        79SF "The Teacher" . . .basket case!
                        History shows again and again,
                        How nature points out the folly of men!

                        Comment


                        • #42
                          I have no idea how many miles are on my engine as it is a 79 engine that came from one of Bob J's parts bikes I got a few years back. I can however say I've put at least 40K on it with the ACCT.

                          The ACCT self adjusts in very small increments so the chain never gets loose enough to make any noise.

                          I'm just speaking as to what I've learned over the years as an automotive tech, when something gets loose and starts flopping around it doesn't last too long after that. I've heard several cam chains rattling at the different rallies I've attended, and seen a few adjusted on the road.

                          I just believe that's the way to go. If Yamaha had had a ACCT when they built this bike it would have come OEM.
                          Greg

                          Everybody is a genius. But if you judge a fish by its ability to climb a tree, it will live its whole life believing that it is stupid.”

                          ― Albert Einstein

                          80 SG Ol' Okie;79 engine & carbs w/pods, 45 pilots, 140 mains, Custom Mac 4 into 2 exhaust, ACCT,XS850 final drive,110/90/19 front tire,TKat fork brace, XS750 140 MPH speedometer, Vetter IV fairing, aftermarket hard bags and trunk, LG high back seat, XJ rear shocks.

                          The list changes.

                          Comment


                          • #43
                            The XJR1300 has an ACCT as standard but, ironically, there is a kit produced to replace it with something just about the same as the manual one in this thread.
                            Personally, though, I won't be fitting one as I think the ACCT is the way to go.
                            XS1100F 1980 European model. Standard. Dyna coils. Iridium plugs. XS750 final drive (sometimes). Micron fork brace. Progressive front springs. Geezer regulator/rectifier. Stainless 4 into 2 exhaust. Auto CCT (Venturer 1300) SOLD. New project now on the go. 1980 European model.

                            Comment


                            • #44
                              I went with the ACCT mod more thsn a year ago and I have only one suggestion. The ACCT has one possible flaw and that is in long term use the teeth in the locking mechanism could pack with normal engine crud. I suggest as part of general maintenance that when the valve adjustment is checked that the ACCT be removed soaked cleaned and inspected to insure it does not stick open and there is no packing or wear in the teeth of the locking mechanism. I went with the ACCT because I have had the side locking screw in the original allow slip in the adjustment before. If using this new mod to the original I would suggest using either a pointed screw or sharpening the original to insure a good locking point and avoid it slipping back to previous notch.
                              To fix the problem one should not make more assumptions than the minimum needed.

                              Rodan
                              https://www.youtube.com/watch?v=khm6...liHntN91DHjHiS
                              1980 G Silverbird
                              Original Yamaha Fairfing and Bags
                              1198 Overbore kit
                              Grizzly 660 ACCT
                              Barnett Clutch Springs
                              R1 Clutch Fiber Plates
                              122.5 Main Jets
                              ACCT Mod
                              Mac 4-2 Flare Tips
                              Antivibe Bar ends
                              Rear trunk add-on
                              http://s1184.photobucket.com/albums/z329/viperron1/

                              Comment


                              • #45
                                I put on a new chain with the ACCT. I think if we just replace the chain every 100,000 miles or so, we should be just fine.
                                Marty (in Mississippi)
                                XS1100SG
                                XS650SK
                                XS650SH
                                XS650G
                                XS6502F
                                XS650E

                                Comment

                                Working...
                                X