Announcement

Collapse
No announcement yet.

Valves

Collapse
X
 
  • Filter
  • Time
  • Show
Clear All
new posts

  • #46
    Thank you, my Leige

    I think you're right, but as confused as I've sounded in the threads til now, I don't want to be wrong again.
    I will get this bike running, one way or the other. It's becoming a matter of pride for me. Especially since I believe I have a sabotuer(sp)in my midst, knowingly or otherwise, and I will not be denied-Wow-was that me?-. I want this thing running by the end of the month and will see that it happens.
    I can, and will, lap the head and get it put back on-without the help that is extended to me here at home. I have all I need to do this. The 79 head may add some juice due to the tighter clearances. Somehow, I may-no, will-have enough energy left tomorrow to check the valves on the 79 and go from there.
    Luckily, before I tear it apart, I will be here to see what you think. Stick with me, you'll be impressed!
    80 XS1100G w/ Windjammer-the Witch
    79 XS1100F

    "Look Ma! No hands!...."

    Comment


    • #47
      Hey Carolyn,

      I had another thought, a dirty one! DO you still have the carbs off?? If not, if it's not too much trouble, take them off, and the intake boots, and look inside the head at the valves. Rotate the engine so that you can see the valves going down and up, and see if you can see a ring of buildup below where the valves go up into the head at the valve guides while looking into the intake chamber? If you see a lot of crud around the valve stem near the valve head along with a clean zone when the valve is sticking DOWN in the open position, then you might be able to get some strong carb cleaner to spritz in there along with a fine brush to break up, dissolve the carbon to see if it will allow the valve to retract farther up into the head when the cam releases it!? Then recheck the clearance. IF the clearance gets smaller, then you/we may be on to something, and you may be able to get compression without pulling the head off!?

      You'll need to pull the exhausts to do the same thing from that side, but don't bother until you try the intake side first!?
      T.C.
      T. C. Gresham
      81SH "Godzilla" . . .1179cc super-rat.
      79SF "The Teacher" . . .basket case!
      History shows again and again,
      How nature points out the folly of men!

      Comment


      • #48
        Brilliant!

        You are a genius! I will try that!
        I want to be cut loose early tomorrow to play with the bikes. I am a boss there...I'll do as I please.
        This is a good idea, and I will try it and another compression test.
        I will let you all know.
        BTW-you are a gem! Just in case noone's told you lately...
        80 XS1100G w/ Windjammer-the Witch
        79 XS1100F

        "Look Ma! No hands!...."

        Comment


        • #49
          Re: Checked cam 'dots'

          Originally posted by CarolynS
          They line up. Each side. The dot next to the center bearing keeper just before the cam chain. It took me a second to find it, but I did. Both are straight up with the timing mark at 'T'.
          One thing I did notice though, someone has messed with the screws that hold-what I would call-the 'timing indicator plate'. I don't know the name and I'm not going to look it up now. So much so that the screws are stripped out. Is that how you advance the engine timing? It's strange that someone would strip them out like that, at least someone that has a clue wouldn't do that. If I strip a screw, I replace it even if it means I have to drop what I'm doing and go get another.
          So what now?
          Looks like valve lapping may be in my future. Unless you guys can think of something that could cause all of this due to someone messing with the timing. Remember, no compression.
          Wait a minute! The person who did the compression was HWMBO. He may have screwed it up. He thought I was crazy to go and buy a gauge. I may redo it-the right way-just to recheck.
          Do you guys think that may be possible? The timing could be way off and that's the problem? If he did this on purpose, I'll kill him!
          Have you seen the actual compression test being done?
          Now that you know that the cam timing is right, and you do not have a compression guage, put your finger over the spark plug hole and turn over with the starter. If it was 0 psi you will not feel a thing, meaning no air around your finger, pushing out, and spark plug hole.
          I'm thinking that possibly the person was using a leak down tester instead of a compression tester.?. Or it was faulty.
          Flatlander

          '81 XS11H

          Comment


          • #50
            Hi Caro,
            some details on previous posts:-
            When I was doing it CAD was Computer Aided Design. I musta led a drab wretched life, eh?
            0.25mm is perhaps .01" or "ten thou" old style. If the valve clearances are all at 0.25mm & nothing else is wrong with it the engine will have valve rattle but it will run.
            When you've taken the carb rack off, turn the motor until an inlet valve has it's maximum clearance and pour some engine oil into the inlet hole. If the oil don't run into the head, that particular valve is sealing.
            BTW, it's not been mentioned in this string that I have noticed but you DO know that the XS11 engine runs "backwards"?
            Fred Hill, S'toon
            XS11SG with Spirit of America sidecar
            "The Flying Pumpkin"

            Comment


            • #51
              Update-in case you were wondering if I gave up...

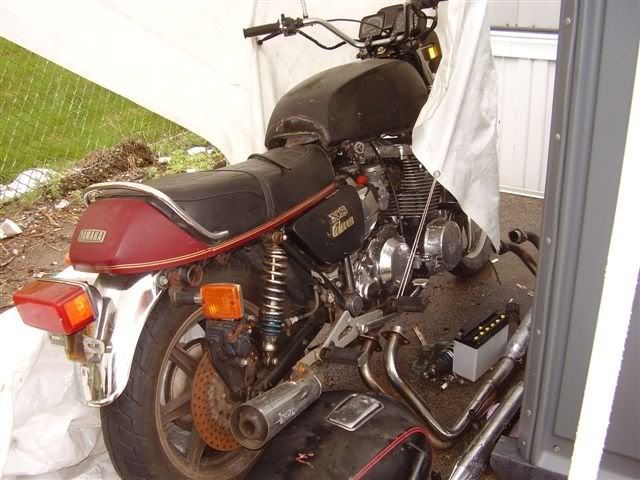
              It has rained here steadily since the last time I posted on this thread. I can't get to the bike, however, it is under cover and HWMBO built a little tarp over it to keep it dry. Especially since the engine is open.
              One of the guys at work used to build engines with a guy here in town-machinist-a million years ago. He's done automotive heads for him over the years for around $100-$200. He's going to call and get a price for doing the 80. Tell him that it's his bike and what can he do? I'll order whatever it needs.
              I'd rather keep the one that's running together and just repair the 80. $30 a valve, I may as well replace them all. We'll see what he has to say and what the price will be.
              Meanwhile, once the rain stops, anything I should look out for when trying to remove this head. It's my first time tackling something like this and I don't want to screw it up.
              Speaking of screws, I still can't shake the feeling that someone messed with the timing plate. I have figured out photobucket now, so I will take some pix of it and post them so you all can see it and tell me what you think. Hopefully the camera phone will do a good enough job. If not, I'll go buy a regular camera.
              I'm still going to try all the things that you have suggested, another comp test, looking inside, etc. but I am resigned to taking it apart, so I may as well be ready.
              Oh, and I am doing it ALL myself this time. No helpers!
              80 XS1100G w/ Windjammer-the Witch
              79 XS1100F

              "Look Ma! No hands!...."

              Comment


              • #52
                Carolyn,

                You can take a long straw, stick, whatever and place it down inside the #1 spark plug hole, and then turn the crank with the TDC indicator close to the arrow/pointer. Then watch the straw for it moving up and down, and note when it stops moving. There will be some crank movement that will NOT make the straw move due to the connecting rod just sliding sideways under the piston before it starts to pull it back down. So....you may need to take some chalk or other marker and mark on the timing plate to 2 points where the straw starts and stops moving up/down. The TDC indicator on the timing plate should be in the middle, and you can use this to approximate whether the timing plate is in the correct position as well as if the pointer is close to where it is supposed to be!

                I think I remembered mentioning in the PM about the odd nut under the center of the head, think there are 2, one front and one back, along with the top head nuts! Also, there isn't a cam chain gasket section with the new sets, just the head gasket.

                I'll check and get the Yam. Parts #'s for the valves, you can then use that to search online for sources for replacing them!

                Intake: 3H5-12111-01-00
                Exhaust: 3H5-12121-00-00
                T.C.
                T. C. Gresham
                81SH "Godzilla" . . .1179cc super-rat.
                79SF "The Teacher" . . .basket case!
                History shows again and again,
                How nature points out the folly of men!

                Comment


                • #53
                  Cool!
                  Thanks TC!
                  80 XS1100G w/ Windjammer-the Witch
                  79 XS1100F

                  "Look Ma! No hands!...."

                  Comment


                  • #54
                    It begins...

                    Got everything taken off except the head itself. It was really fun to work on the bike-by myself-it was raining so all of my 'helpers' stayed inside. I was surprised at how easy it was for everything to come apart. I only broke one exhaust stud, the rest came out fine. I'll have that fixed when the head is done.
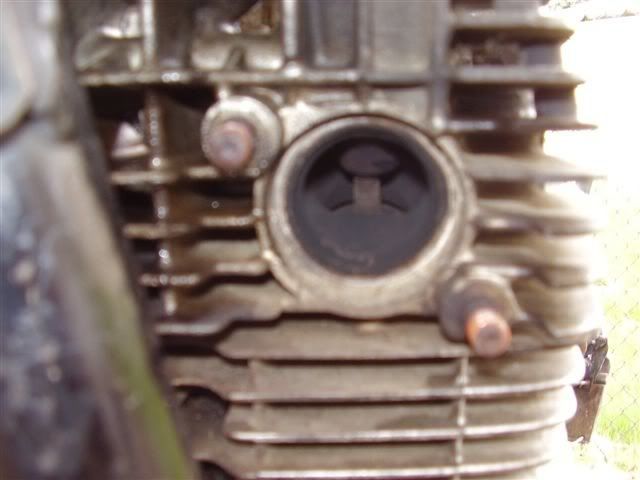
                    I was a little surprised at the amount of carbon built up on the exhaust. #1 is almost choked closed on the head, there's so much built up in there. What would cause that? I also found what look to be some important wires that go nowhere. One is broken off at the connector and the other is just dangling there. He also has the horns disconnected for some reason. I will tackle electrical later but I am keeping notes on the things I find.
                    Tomorrow it is supposed to pour, but I am going to move the bike tighter into it's little shelter and take the head off. I have a box all ready for it to go into along with various bags for the numbered pieces I remove, so that nothing is lost or misplaced.I have a sharpie all ready to go. Hopefully, it WILL rain tomorrow and all of my 'helpers' will opt to stay indoors.
                    I will mention one thing. If you remove the engine guards, put the bolts back in! I almost had the last one out when I thought to really look at it. Had a bear getting them put back in. I may be wrong, but it sure looked like the front of the engine rests on them. I really didn't want to find out the hard way that is the case.
                    Wish me luck.
                    80 XS1100G w/ Windjammer-the Witch
                    79 XS1100F

                    "Look Ma! No hands!...."

                    Comment


                    • #55
                      Hey Carolyn,

                      Congrats on your progress. Well, yes, the engine guards are bolted on using the engine support brackets and such, but you figured that out! Putting a jack under the engine and lifting it a little could have helped you put the bolts back in!

                      As for the Xsive carbon buildup, could be a combination of many factors, dirty carbs, poor ignition, but also what a lot of folks do when they get these machines...they LUG them in the 1-4krpm range! These machine do have plenty of power/torque in the low rpms, but they like to be run as well, I rarely shift under 5K rpm, often take it to 7+ during accel ramp runs and such! Also frequent use of SeaFoam or similar can help keep things cleaned out!
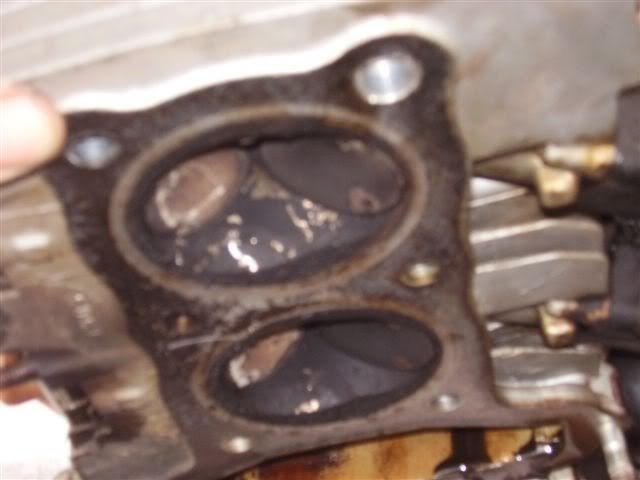
                      Will be curious to hear about the condition of the head and valves...if they are ALL bent, etc., keep us informed!
                      T.C.
                      T. C. Gresham
                      81SH "Godzilla" . . .1179cc super-rat.
                      79SF "The Teacher" . . .basket case!
                      History shows again and again,
                      How nature points out the folly of men!

                      Comment


                      • #56
                        Hi Carolyn,
                        Wish you were closer, I would run over and give you a hand, rain would not bother me (I have been sanforized and don't shrink) do keep us posted and put up pictures please. I (and probably everyone else here) am real curious as to what you will find in there!
                        The Old Tamer
                        _________________________
                        1979 XS1100SF (The Fire Dragon)
                        1982 650 Maxim (The Little Dragon)
                        another '82 650 Maxim (Parts Dragon)
                        1981 XS1100SH (The Black Dragon)

                        If there are more than three bolts holding it on there, it is most likely a very important part!

                        Comment


                        • #57
                          Discovery

                          I tried for 6 hours last night to get onto my computer. Some kind of glitch...I don't know what, but I was about to throw it out the window. Comcast seems to have pulled their heads out of their you-know-what's and it's working now. I can get my email and connect here. That means pix and an update.
                          Got the head off. I wasn't easy, but it wasn't super hard either. I only busted one knuckle, that's success! One thing I learned tho-hold the timing plate while you try to take off the sprocket bolts. Otherwise the engine just turns. I didn't find anything about that in the manual. I took all the cam holders and put them in separate bags-intake with the cam adjuster; exhaust with the chain bridge-don't worry guys, they're all numbered. Broke the head loose and slid a coat hanger in to catch the chain when I cut the ziptie I had it held up with, now the coat hanger is wrapped around the frame holding the chain. Head came loose with a little slapping of the fins with a bare hand, no mallet needed.
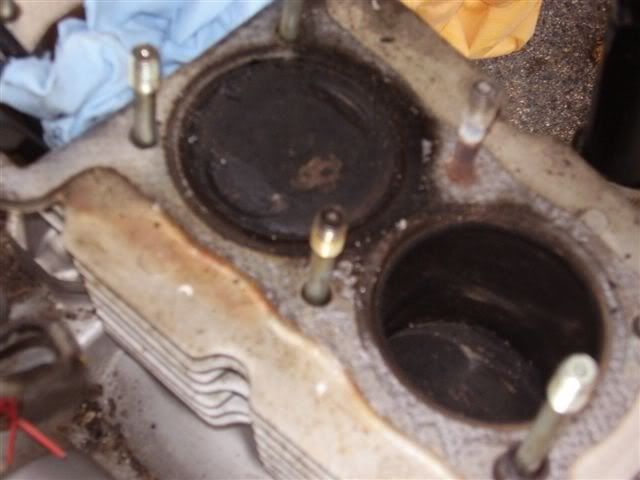
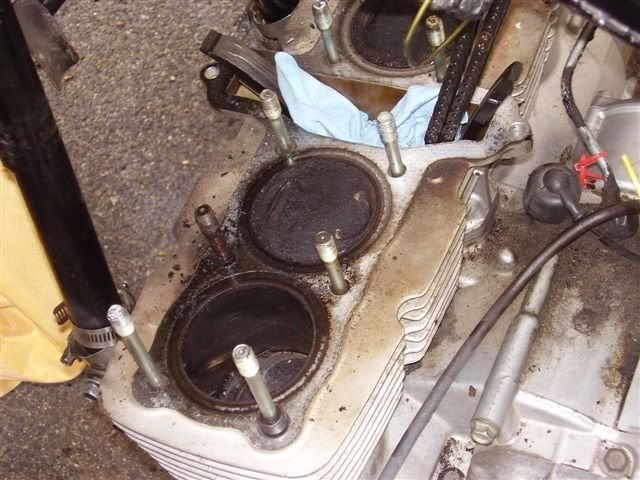
                          As we pulled it off we noticed alot of carbon around one stud, and the pistons are caked in it. We also noticed distinct indents where the valves hit the pistons, not just intake side but exhaust too. They don't seem to be damaged, just scratched up, and nothing appears to be cracked on the lower end, but that stud with the carbon makes me wonder. Should I look deeper at that?
                          The head will be disassembled by the machinist. I don't want to make things worse. We upended it, careful not to drop anything out of it, and all of the valves are open.
                          So...you all were right, and it wasn't for nothing that I did all of this work. The machinist wasn't in this morning-must be nice-so I left him my card for him to call me. The reassembly sounds alot more complicated and precise, so I am considering having the mechanic do it, along with tune, sync, fork seal, and change all the fluids, plus whatever else he thinks it needs.
                          I figure if I do the job right this machine will give me years of enjoyment with minimal upkeep. So, why not spend the initial money, have an expert do it, and then have fun basically tinkering with it every spring to keep it happy and healthy? We'll see what the budget allows me to do. I am willing to spend $1000 to have it be back to normal, and I think that is a realistic.
                          Now lets see if I can get the pix up here!
                          80 XS1100G w/ Windjammer-the Witch
                          79 XS1100F

                          "Look Ma! No hands!...."

                          Comment


                          • #58
                            Discovery

                            [IMG][/IMG]
                            80 XS1100G w/ Windjammer-the Witch
                            79 XS1100F

                            "Look Ma! No hands!...."

                            Comment


                            • #59
                              [IMG][/IMG] [IMG][/IMG] [IMG][/IMG] [IMG][/IMG] [IMG][/IMG]
                              The 80 has the fairing, the other is the 79.
                              Hope you all can make them out somewhat.
                              What a mess!
                              80 XS1100G w/ Windjammer-the Witch
                              79 XS1100F

                              "Look Ma! No hands!...."

                              Comment


                              • #60
                                The image of the pistons with the dark stud

                                I asked if I should look at that a little harder. All of the other studs are clean around the bases. That one is all sooted up.
                                Is that a problem?
                                80 XS1100G w/ Windjammer-the Witch
                                79 XS1100F

                                "Look Ma! No hands!...."

                                Comment

                                Working...
                                X