Announcement

Collapse
No announcement yet.

A note on cam chain replacement

Collapse
X
 
  • Filter
  • Time
  • Show
Clear All
new posts

  • A note on cam chain replacement

    If you're replacing your cam chain with a new one with a rivetable link, make sure you're on that lower sprocket and your dots are pointing where they're supposed to before you crimp the rivets! I had mine all setup (apparently) with the cams in their correct orientation and the timing plate pointing at "T". Crimped the link and went to turn the crank back and forth a little by hand to make sure the orientation stayed that way. Turned the crank and nothing moved on top - expletive deleted! Somehow in my fiddleing around I had managed to get the chain off the crank sprocket.

    In retrospect, what I should have done is to put the link in place, hold it together with my left hand while moving the crank with my right to double check the setup. Would have saved me the five days I now have to wait for a rivetable link to arrive by mail.
    I think I have a loose screw behind the handlebars.

    '79 XS11 Standard, Jardine 4/1, Dyna DC1-1 Coils, 145 mains, 45 pilots, plastic floats - 25.7mm, XV920 fuel valves, inline fuel filters, speed bleeders, Mikes XS pods, spade-type fuse block, fork brace, progressive fork springs/shocks, manual petcocks, 750 FD, Venture cam chain tensioner, SS brake lines

  • #2
    Forget about breaking the chain again, just remove the cam caps and pull the cams to give yourself enough slack to get the chain back on the crank. You could be up and running in an afternoon! Besides, with the cams out, you can rotate the crank all day to make sure you got the chain on without risking the pistons hitting any open valves.

    Just a thought - Good luck!
    Jeremy

    1979 XS11 Special
    2002 Ducati ST4S
    2012 BMW F800R
    1981 Suzuki GS450E
    1982 Honda XL500R

    Comment


    • #3
      Jeremy - Thanks for the reply. That would probably work on a stretched chain, but this one is brand new and there is VERY little slack to work with. Additionally, it is VERY easy to get a cam chain one tooth off. It's just a lot easier to work with with the chain broken. Besides, I already screwed the pooch The point was don't be in a big hurry to rivet that link.

      DB
      I think I have a loose screw behind the handlebars.

      '79 XS11 Standard, Jardine 4/1, Dyna DC1-1 Coils, 145 mains, 45 pilots, plastic floats - 25.7mm, XV920 fuel valves, inline fuel filters, speed bleeders, Mikes XS pods, spade-type fuse block, fork brace, progressive fork springs/shocks, manual petcocks, 750 FD, Venture cam chain tensioner, SS brake lines

      Comment


      • #4
        dbeardslee;

        I see you have a 4-into-1 exhaust. Does it follow that you don't have a centerstand? I ask because a center stand will help the chain hang straight down. I take my cams out for every valve adjustment and I've never had a problem hooking up the chain to the crank, I just push/pull the ends and it hooks up practically by itself.

        I would suggest that you NOT un-rivet it, now that you have it riveted, lest you increase your chances of dropping it down the tunnel. That would be a bad day. Try to get the bike as straight up as possible, like with a block of wood under the sidestand, and wiggle it back on the crank. It helps also to have the tensoiner mechanism removed

        Comment


        • #5
          Randy,

          Thanks for the reply - I always appreciate your input.

          I've got a 4/1 that allows for a center stand, which it was up on. I don't know how it got off that sprocket - probably when I went to pull up equal amounts of chain on both sides and just didn't pay enough attention to what the chain was doing. Already broke the rivets, hence my five-day wait.

          After reading-up on what you have to do if you drop the chain down inside the tunnel I have been COSMICALLY AWARE (see Heavy Metal Magazine circa 1978) of wiring that sucker. What I have done with it now is wired the ends, plus I put a couple loops of wire through the holes in the cam sprocket and across the chain so it can't move off the upper sprocket or that darn lower sprocket.

          This happened on Sunday, so my new parts should be in on Friday.

          Actually, I'm kind of glad for the wait. It afforded me the opportunity to take the 4/1 apart. The PO had spot-welded three of the header pipes to the collector. Unfortunately they leaked exhaust gas badly by the collector. If I put my hand down there while it was running it felt like a fan blowing. I ground off the welds and cleaned up the ends of the headers and the inside of the collector. I'm getting ready to put them back on, and I intend to use Permatex Ultra Copper sealant to take care of the leaks. If it hadn't been for the chain problem I would have just thrown them back on and lived with the putt-putt-putt.

          DB
          I think I have a loose screw behind the handlebars.

          '79 XS11 Standard, Jardine 4/1, Dyna DC1-1 Coils, 145 mains, 45 pilots, plastic floats - 25.7mm, XV920 fuel valves, inline fuel filters, speed bleeders, Mikes XS pods, spade-type fuse block, fork brace, progressive fork springs/shocks, manual petcocks, 750 FD, Venture cam chain tensioner, SS brake lines

          Comment


          • #6
            Hey Dbeardslee

            As for the exhaust leak, I don't think the Permatex copper would be strong enough against the extreme temps of the header exhausts not to mention the pressure??

            Have you thought of taking it to a welder/exhaust place and have them seal the holes with welds?

            I was going to suggest a product called Quicksteel, but after reading a bit more about it, it's not recommended for headers or uses where temps exceed 500 degrees! Same for JB Weld.

            I've not used any exhaust tape/glue stuff, but I've read where others on here have, perhaps they can provide other/better alternatives for sealing your pipe leaks??
            T.C.
            T. C. Gresham
            81SH "Godzilla" . . .1179cc super-rat.
            79SF "The Teacher" . . .basket case!
            History shows again and again,
            How nature points out the folly of men!

            Comment


            • #7
              TC -

              It doesn't actually have a hole in it, it's just leaking exhaust around the header pipes where they go into the collector.

              Permatex rates the ultra copper up to 700 degrees. I've checked the temps on the header pipes (immediately after shutdown) and they seem to run around 212-250 degrees. I checked them with a laser light thermometer so I'm pretty confident on the temperature issue. Permatex recommends this stuff for exhaust manifolds so hopefully it will handle the pressure as well.

              I'm trying to keep from permanently attaching the header pipes to the collector as it's easier for me to reinstall them one pipe at a time. I gooped them and reassembled yesterday so at this point I'm kind of committed to the "proof of concept". If it blows the permatex out I'll try your tape idea next.

              DB
              I think I have a loose screw behind the handlebars.

              '79 XS11 Standard, Jardine 4/1, Dyna DC1-1 Coils, 145 mains, 45 pilots, plastic floats - 25.7mm, XV920 fuel valves, inline fuel filters, speed bleeders, Mikes XS pods, spade-type fuse block, fork brace, progressive fork springs/shocks, manual petcocks, 750 FD, Venture cam chain tensioner, SS brake lines

              Comment


              • #8
                Ultra copper will work for temps.
                Used on automotive header pipes instead of gaskets by racers all the time,great stuff. Will not stand up to pressure very well if excessive gap though. Seal it, clamp it and should be ok.
                XJ1100 Ruby Red
                XS1100LH "Midnight"
                1972 MGB Roadster "sold"

                Comment


                • #9
                  After action report

                  TC - you'll love this. I got my machine put back together yesterday. When I permatexed the pipes, I had really globbed it in on the inside of the collector so as to give it the best chance of getting between the pipes and the collector. I started it up, and it made a sound I NEVER heard before - 4 times. Imagine what an 1100cc pea shooter would sound like and you'll be pretty close. I walked around the back of the bike, and about three feet from the end of the exhaust were four round rings of permatex . My first thought was 'TC was sure right about pressure'. On the plus side, I evidently managed to get it between the pipes and collector and, as the gap there is relatively small, it is sealing so far. It was just the excess it blew out the exhaust.

                  Man does that thing run smoother with the reworked heads. It'll drop the idle down to 3-400 rpms without stalling. I'm having a little trouble synching the carbs though, as my mercury gauge somehow got a bunch of bubbles in the tubes. Got any idea what would cause those bubbles and how to get rid of them? The gauge has been hanging in its normal spot since the last time I used it (several weeks ago), and the only thing that has changed since then is that the ambient temperature has gone up.
                  I think I have a loose screw behind the handlebars.

                  '79 XS11 Standard, Jardine 4/1, Dyna DC1-1 Coils, 145 mains, 45 pilots, plastic floats - 25.7mm, XV920 fuel valves, inline fuel filters, speed bleeders, Mikes XS pods, spade-type fuse block, fork brace, progressive fork springs/shocks, manual petcocks, 750 FD, Venture cam chain tensioner, SS brake lines

                  Comment


                  • #10
                    Tiny bubbles......la la laa laa!

                    Hey Dbeardslee,

                    Mercury is very heavy, and so I can't see that AIR bubbles can hold in it, but perhaps some FUEL has gotten in and contiminated the stuff. I don't know how to work on Merc Gauges, but folks talk about being able to refill them, so there should be a way of pouring it out, perhaps into a bowl(that you won't be using for eating/drinking....and use breathing protection) to inspect, stir up to release the bubbles, and then pour back into the gauges??

                    Or try applying gingerly a heat gun to it??? JAT!?
                    T.C.
                    T. C. Gresham
                    81SH "Godzilla" . . .1179cc super-rat.
                    79SF "The Teacher" . . .basket case!
                    History shows again and again,
                    How nature points out the folly of men!

                    Comment


                    • #11
                      Tiny bubbles - OK Don Ho

                      Thanks TC. I was just out in my laboratory and the guage is still acting up. You may be on to something with the in the guage. I'm going to try dumping it out and stiring as per your suggestion. Thanks for the heads-up on breathing protection.
                      I think I have a loose screw behind the handlebars.

                      '79 XS11 Standard, Jardine 4/1, Dyna DC1-1 Coils, 145 mains, 45 pilots, plastic floats - 25.7mm, XV920 fuel valves, inline fuel filters, speed bleeders, Mikes XS pods, spade-type fuse block, fork brace, progressive fork springs/shocks, manual petcocks, 750 FD, Venture cam chain tensioner, SS brake lines

                      Comment


                      • #12
                        Well, I probably shouldn't have tried that. Mercury is about a trip when it hits the floor Anyway, long story short - my stick gauge is toast so I went over to Harbor Freight and bought four $13 combination gauges (pressure and vacuum). They're HUGE! Four inch diameter faces. I used cable ties (the metal kind with the u-bolts you use to secure loops of steel cable) on the lines to damp them, and they really worked well. I just kept turning the nuts 'till the bounce abated. Ace Hardware had some little ball-cocks that I could have put in the lines to make it really slick, but the cable ties work fine.
                        I think I have a loose screw behind the handlebars.

                        '79 XS11 Standard, Jardine 4/1, Dyna DC1-1 Coils, 145 mains, 45 pilots, plastic floats - 25.7mm, XV920 fuel valves, inline fuel filters, speed bleeders, Mikes XS pods, spade-type fuse block, fork brace, progressive fork springs/shocks, manual petcocks, 750 FD, Venture cam chain tensioner, SS brake lines

                        Comment


                        • #13
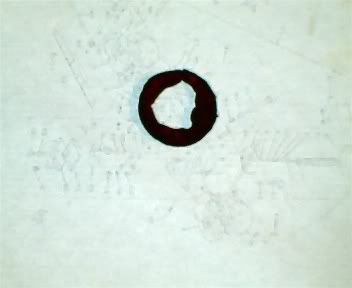
                          Got an el-cheapo camera just so I could show you the excess permatex that blew out the pipe.


                          I should have put something in the pic to show the relative size. The ring is about the diameter of a fat pencil. Reminds me of the rubber bullets the cops shoot at rioters. Don't know, could have crowd control applications...

                          DB
                          I think I have a loose screw behind the handlebars.

                          '79 XS11 Standard, Jardine 4/1, Dyna DC1-1 Coils, 145 mains, 45 pilots, plastic floats - 25.7mm, XV920 fuel valves, inline fuel filters, speed bleeders, Mikes XS pods, spade-type fuse block, fork brace, progressive fork springs/shocks, manual petcocks, 750 FD, Venture cam chain tensioner, SS brake lines

                          Comment


                          • #14
                            bubbles

                            I 've had to tap the bubbles out of the old style carb sticks
                            A kind of finger flik (booger-style) repeately on the offending tube at the bubbles . The bubbles then joined or worked there way to the top so I could get a good reading . Good luck
                            XJ1100K
                            Avon rubber
                            MikesXS black coils
                            Iridium plugs w/ 1k caps
                            MikesXS front master
                            Paragon SS brake lines (unlinked)
                            Loud Horns (Stebel/Fiamm)
                            Progressive fork springs
                            CIBIE headlight reflector
                            YICS Eliminator

                            Comment


                            • #15
                              Axel - I think TC was right. It sucked some fuel or other foreign material in with the mercury. I've done the tapping thing before, and it released the bubbles. I don't know, maybe my booger technique isn't as good as yours This time it just made the mercury along with whatever was in it get uncomfortably high in the tubes. Then I started to take it apart, and that was all she wrote. Properly damped vacuum gauges seem to work better anyway, and I don't have a toxic chemical hanging on the wall in the garage anymore.
                              I think I have a loose screw behind the handlebars.

                              '79 XS11 Standard, Jardine 4/1, Dyna DC1-1 Coils, 145 mains, 45 pilots, plastic floats - 25.7mm, XV920 fuel valves, inline fuel filters, speed bleeders, Mikes XS pods, spade-type fuse block, fork brace, progressive fork springs/shocks, manual petcocks, 750 FD, Venture cam chain tensioner, SS brake lines

                              Comment

                              Working...
                              X