Announcement

Collapse
No announcement yet.

Fuel Filters FYI

Collapse
X
 
  • Filter
  • Time
  • Show
Clear All
new posts

  • Fuel Filters FYI

    In dealing with a fouled tank, I cleaned it as best I could without trashing the paint.
    Understanding that gunge would be an issue, I took out the octopus and plugged the prime side of the petcocks.
    I installed the small sintered bronze type inline filters which work well at trapping chunks. I have been through two sets in as many months. I used those because I could not find any paper type small enough to fit well.
    Today, I did the third, and I hope final, carb teardown for this year and found that a lot of sediment was still passing the filters and being deposited on the head side of the butterflys and in the bowls. Looked to be red varnish type gunk. Been running Seafoam in the gas.

    While at the Zone picking up more Gummout, I found some decent sized paper element filters for the same price as the sintered ones. these new ones have a lot more surface area, so I think they will last longer and should trap the fine particles better. They are about 1.25 diameter and about the same length not including the barbs, so they fit well just under the stock filter boots. Found them on the rack by the PCV stuff.
    XS1100SF
    XS1100F

  • #2
    Did you try putting a chain in the tank with some deisel and giving it a good shake? It will hasten the loosening of the chunkier rust that is breaking up slowly and getting into your system. Rinse it out with clean gas afterwards.
    80 XS1100SG
    81 XS400SH

    Some men miss opportunity because it is dressed in overalls and looks like work. - Thomas Edison

    A Few Animations I've Made

    Comment


    • #3
      The bike was left sitting with a full tank of gas for about 15 years.
      There really is no rust, just varnish about a quarter inch thick. There was still over half a tank of toxic waste when I got it. I blasted it with high pressure and did the gravel and dishsoap thing. It actually took all of the chunks out. Now its the varnish coating getting dissolved. I figure the best thing is to run it as much as possible. Oh well, sucks to be me.

      I know it's improving because the fuel level sensor started working a couple of weeks ago.
      I have run about 5 tanks through it, now with the Seafoam it is clearing up one tank at a time.

      The red stuff is not rust. It's almost like paint, real sticky gummy crap.
      XS1100SF
      XS1100F

      Comment


      • #4
        have you tried some higher end filters? I have been in search of some good fuel filters also... What I found is that the Russell filters (anodized aluminum case) are supposed to filter down to 40 microns... The Emgo's that look similar... no data... but I would guess they are similar to other "cheaper" filters that only go down to 75-90 microns... I am pretty sure the clear plastic Emgo's don't filter much past 75-90 microns either.

        Maybe, if you could find a way to hide some bigger filters, the Russell filters would keep more of that crap out.

        Hope this helps

        Theron
        Yamaniac
        '79 xs11 sf - WidowMaker, 750 final drive
        '80 xs1100 sg- ENEMY#1 parts bike no title(free)
        '79 f- frame and swingarm (and title)
        '82 yz 490- needs a cylinder, head, & new piston, etc. Got one for sale?
        '88 Honda cbr600- Running, finally! Training bike for swmbo, maybe a stunt bike for me eventually.

        Comment


        • #5
          Originally posted by oseaghdha
          The bike was left sitting with a full tank of gas for about 15 years.
          There really is no rust, just varnish about a quarter inch thick.
          ~snip~
          The red stuff is not rust. It's almost like paint, real sticky gummy crap.
          I had the exact same problem with mine. Inside of the tank stunk like hell.

          I ended up shaving my tank and splitting it in two to clean all the gunk out. It also helped to knock a difficult dent out as well. Took about two hours with a wire wheel in the drill to get all the gum off.

          TIG welded it all back together and was good as gold. Needed a repaint of course.


          Pressure tested and recently painted She is now looking tops.(no pic yet)
          1981 XJ550RH
          1978 XS1100E The Wildebeast
          1978 XS1100F X Streem
          1980 XS1100G (with an E motor)(parts bike)
          Jet/Mod Calculator
          Speed/Gearing Calculator

          Comment


          • #6
            Incredible job, Goon.
            Thanks. I now know how I'm gonna handle that spare tank o' mine.
            "Damn it Jim, I'm a doctor, not a mechanic!' ('Bones' McCoy)

            Comment


            • #7
              I have to say that's the first time I've ever seen anybody tackle a tank problem that way! Ever thought about taking apart a badly dented special tank and enlarging it? People might be interested in the styling of the special with the capacity of the late-model standard.
              Ken Talbot

              Comment


              • #8
                I have three Spcl tanks, two xs11 and one xs850. I was thinking of doing just that very same thing. Cutting one lengthwise, and widening it with pieces from one of the others.

                Comment


                • #9
                  I have 2 standard tanks that I've thought about welding into one. One was stretched out by an idiot pressurizing it to remove dents and the other one is rusted out on the bottom. I'm handy with a torch and MIG so perhaps I can make something out of the pair. At this point they're pretty much useless on their own...

                  Anyway I have a couple spare tanks so it doesn't matter much to me if this project bombs out...

                  Geezer
                  Hi my name is Tony and I'm a bikeoholic.

                  The old gray biker ain't what he used to be.

                  Comment


                  • #10
                    I got the idea from Dennyz. He had built an enlarged Spcl tank, and he said it had a 6.2 gallon capacity. He checked the capacity by filling it by sand.
                    Even though I can't ride long distance anymore, I still don't like having to fill up every couple of days from riding to work. Three days riding is just over 99 miles, and I usually have to stop for gas about 5 miles from home. I also have been toying with the idea of building an auxillary tank to mount under my luggage rack, and in place of the tool box, install a small fuel transfer pump. I would plumb the fuel lines so I can run on just one petcock, and have the line from the pump connected to the prime nipple on one of the petcocks. That way when my fuel light comes on, I can switch on the pump, and transfer the fuel from the aux tank to the main tank while underway, by simply setting that petcock to prime. With the space under the luggage rack, I think I could fit in a custom made tank, that fits the contours of the rear fender, with about two gallons capacity.

                    Comment


                    • #11
                      OK, a show of hands...are there any idiots out there? That "stretched" tank is probably fixable Geezer. I know you'll figure it out if you set your mind to it. Even an idiot can fix that. Don't ask how I know.

                      Originally posted by Geezer
                      One was stretched out by an idiot pressurizing it to remove dents and the other one is rusted out on the bottom.
                      Geezer
                      Skids (Sid Hansen)

                      Down to one 1978 E. Stock air box with K&N filter, 81H pipes and carbs, 8500 feet elevation.

                      Comment


                      • #12
                        Originally posted by skids
                        OK, a show of hands...are there any idiots out there? That "stretched" tank is probably fixable Geezer. I know you'll figure it out if you set your mind to it. Even an idiot can fix that. Don't ask how I know.
                        I don't like to admit that I know what a tank srrerched out from air pressure looks like but I've been there and done that almost 35 years ago...

                        I should have tossed these damaged tanks but the thought of welding them into one tank sounds like fun and I alreadfy have them.

                        I have 2 standard tanks that are in good shape but could use to be dipped and 1 6 gallon Euro model tank that I still haven't gotten open. So if the 2 into 1 tank project turns to crap, I'm not out much...

                        Geezer
                        Hi my name is Tony and I'm a bikeoholic.

                        The old gray biker ain't what he used to be.

                        Comment


                        • #13
                          Before you dig into chopping those tanks just be aware they are very thin around the seam. Mine had a tiny bit of rust pitting in a small section of the tank around the seam.

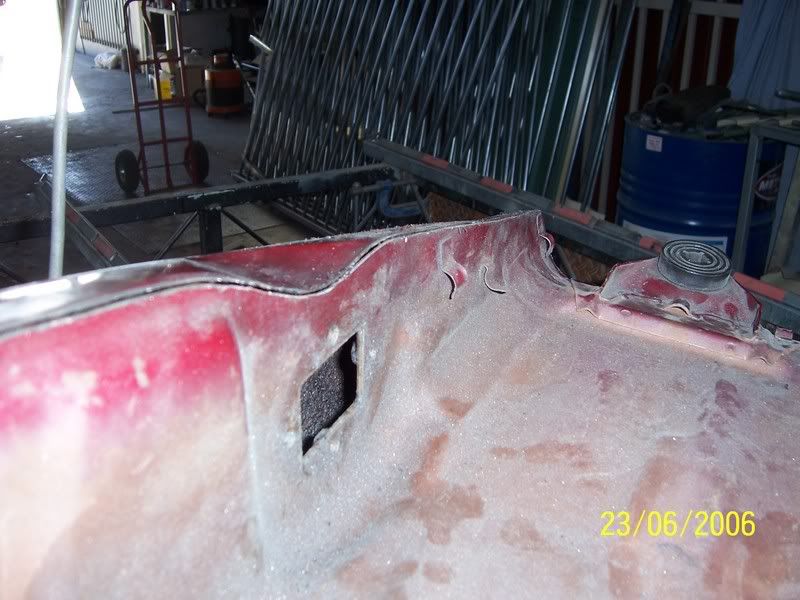
                          Rewelding with a tig was a very slow job as a lot of care was required not to blow a hole in the thin joins. Also, most of the strength of the tank is in the centre underside of the tank. The outside shell is very flimsy without the centre.

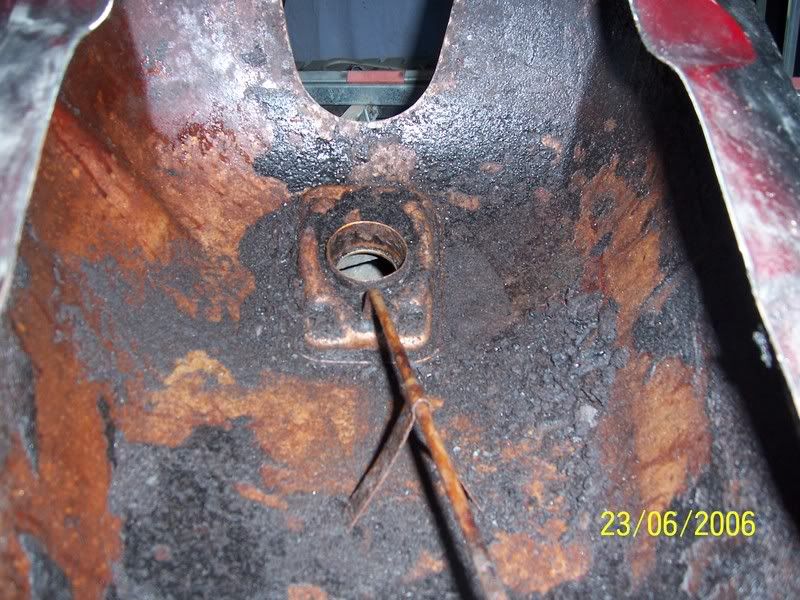
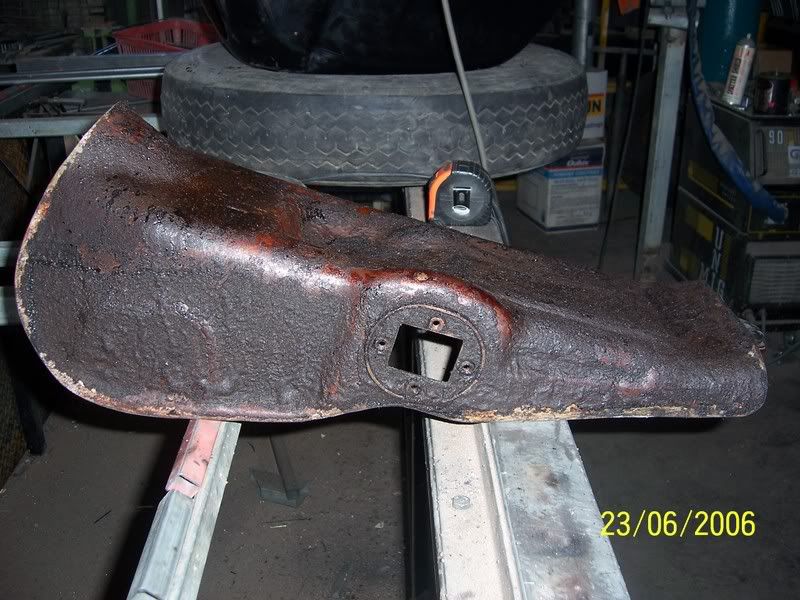
                          As you can see from the pics this tank was very dirty and try as I might nothing seemed to remove it. Had it full of diesel and chains for three days with a shake twenty times a day. All I managed to do was wrap the chain in a knot around the internal drain tube.

                          Splitting it in two allowed the fix for cleaning and removing the dent and took about three hours to split and reweld.(excluding thecleaning time )

                          If I remember, I'll take a pic of the completed, painted tank.

                          Looks Smicko now.
                          1981 XJ550RH
                          1978 XS1100E The Wildebeast
                          1978 XS1100F X Streem
                          1980 XS1100G (with an E motor)(parts bike)
                          Jet/Mod Calculator
                          Speed/Gearing Calculator

                          Comment


                          • #14
                            One of the guys on the local vintage bike mailing lists has come up with a novel way of cleaning tanks. He took and old cloths dryer and removed the heating elements and put in a 110v motor.

                            To clean a tank he partially fills it with steel shot and old nuts and bolts. Then wraps it in foam rubber and spins it in the dryer for a few hours. The tumbling action of the shot, nuts and bolts cleans it up like new.

                            I haven't tried this but it sounds like it would work very well. That is if you have a place to store an extra cloths dryer...

                            Geezer
                            Hi my name is Tony and I'm a bikeoholic.

                            The old gray biker ain't what he used to be.

                            Comment


                            • #15
                              For rusted tanks, get the POR15 kit, you won't regret it, the 'marine clean' deals to varnish, sludge, grease etc.. and the 'metal ready' dissolves rust like magic, no need for bolts, chains and drama. The whole mess just hoses out with water and you're left with bare, smooth shiny metal with a zinc oxide surface. The final thick silvery metallic sealer coats all inside surfaces and sets to a brilliant permanent rock-hard finish.

                              Comment

                              Working...
                              X