Announcement

Collapse
No announcement yet.

Did Someone Say Build Thread?!!

Collapse
X
 
  • Filter
  • Time
  • Show
Clear All
new posts

  • #61
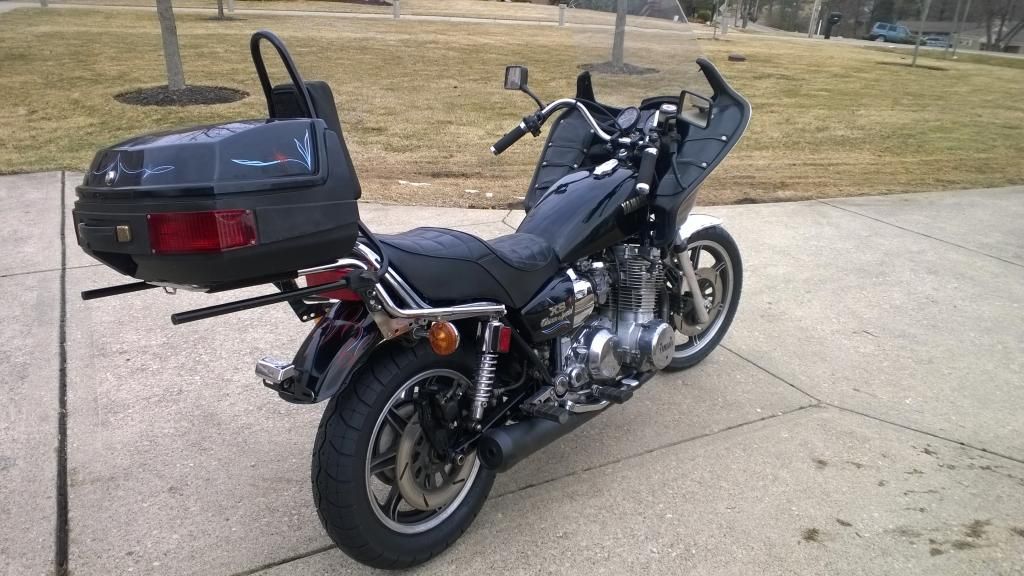
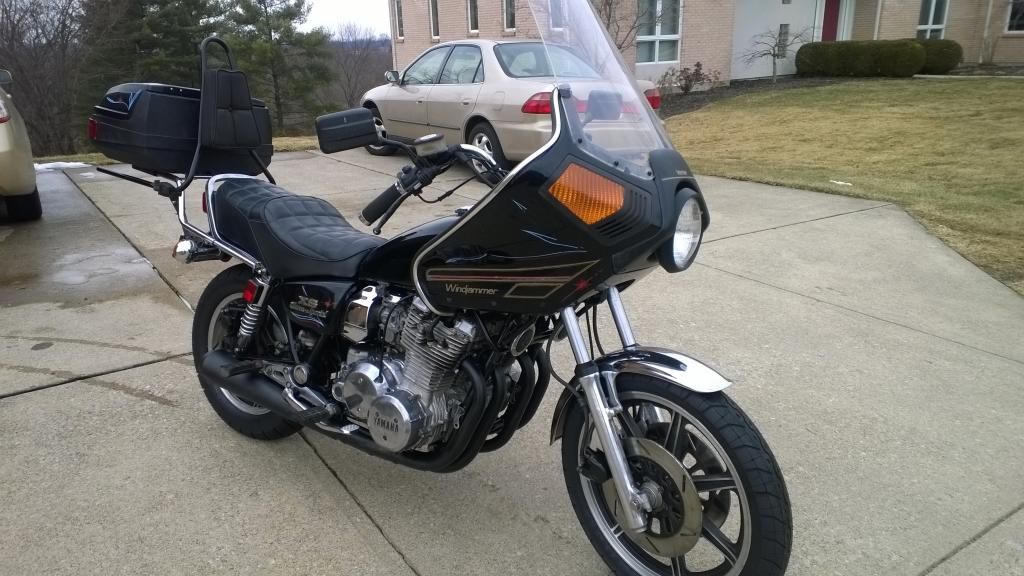
    So it has been a lonnng time since my last update. Well, the bike is almost ready to ride. I got new tires on it, cleaned and touched up paint on the wheels, all new wheel bearings, new steering stem bearings, rebuilt front MC, and cleaned all brake parts and lines. Replaced the starter button, cleaned all electrical switches and components as well as connectors. Rebuilt he front forks with new seals, rebuilt the petcocks, and repainted the gas tank. Installed a new fuse box. Had to buy new spring and washer for the oil filter, was none in there (So much for the PO's $600 shop visit). Also put new mounting hardware in the fairing windshield.

    For the exhaust I ended up renting a flux wire welder. Spent an hour or so learning the art of welding on 16 ga steel. Then I started on the exhaust. The exhaust is NOT 16 ga steel. Mush thinner stuff. So, I learned the new technique of spot welding, over and over and over to stitch the seems closed. Only way to keep from blowing out the metal. It does not look like much, and I spent some time grinding down the mess of molten metal so it almost kinda looked ok. Lucky for me, all of the spots that needed welding were on the under side and not to visible when mounted. Also got some 500 degree engine paint and used that on the exhaust.

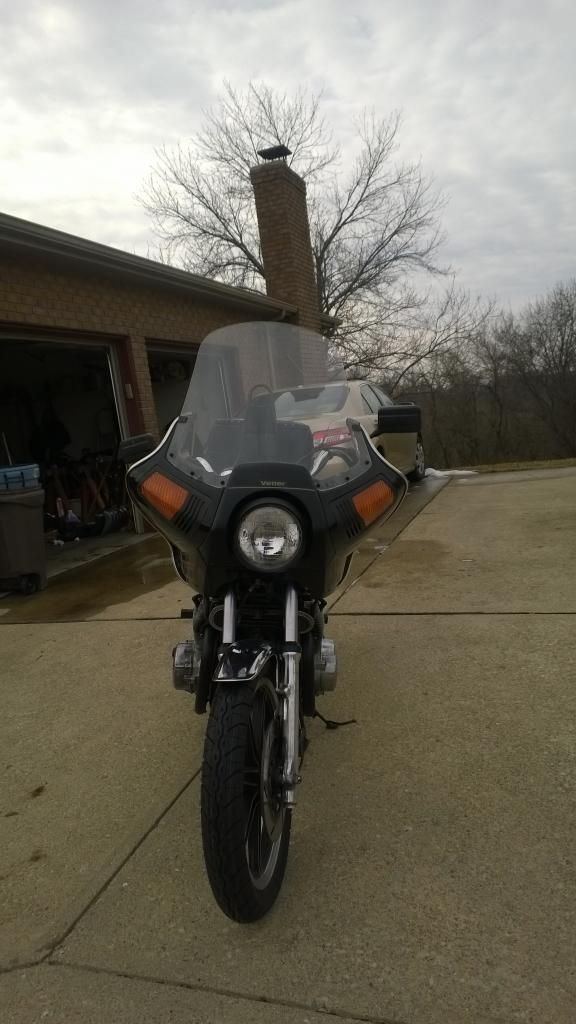
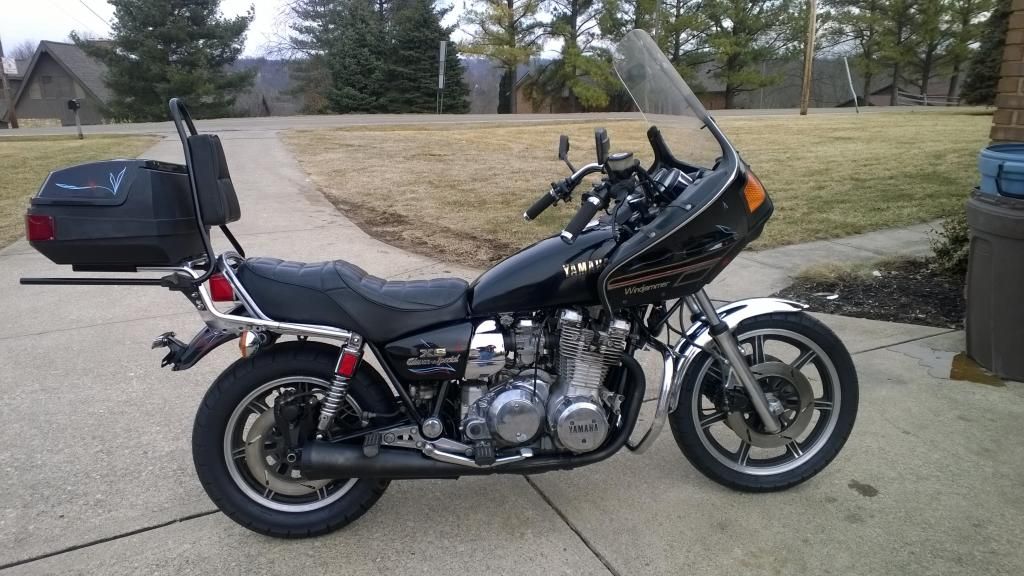
    So, after all that, here is what she looks like today..


    In some ways not a lot of noticeable improvement, but it is ALOT less rust, and the engine has run. So, it will be ready for miles and miles of smiles soon.

    The front MC is still sticking, does not fully return after you apply the brakes, so I will try honing the MC a little. Also need to get a battery for it, and put some fuel in the tank. Hope to maybe get the battery tonight, and pull the MC off tonight. Possibly ride it Monday since it will be almost 70 deg here on Monday.
    Life is what happens while your planning everything else!

    When your work speaks for itself, don't interrupt.

    81 XS1100 Special - Humpty Dumpty
    80 XS1100 Special - Project Resurrection


    Previously owned
    93 GSX600F
    80 XS1100 Special - Ruby
    81 XS1100 Special
    81 CB750 C
    80 CB750 C
    78 XS750

    Comment


    • #62
      Hey Don- What are the signs of the M/C sticking without riding the bike? Have you thought about riding it, and then bleeding it after a ride?
      1979 XS1100F
      2H9 Mod, Truck-Lite LED Headlight, TECHNA-FIT S/S Brake Lines, Rear Air Shocks, TKAT Fork Brace, Dyna DC-I Coils, TC Fuse Block, Barnett HD Clutch Springs, Superbike Handlebars, V-Star 650 ACCT, NGK Irridium Plugs, OEM Exhaust. CNC-Cut 2nd Gear Dogs; Ported/Milled Head; Modded Airbox: 8x8 Wix Panel Filter; #137.5 Main Jet, Viper Yellow Paint, Michelin Pilot Activ F/R, Interstate AGM Battery, 14MM MC, Maier Fairing, Cree LED Fog Lights.

      Comment


      • #63
        I tried a few different hot paints. None of them held-up well on the exhaust for my 750.
        1979 XS1100F
        2H9 Mod, Truck-Lite LED Headlight, TECHNA-FIT S/S Brake Lines, Rear Air Shocks, TKAT Fork Brace, Dyna DC-I Coils, TC Fuse Block, Barnett HD Clutch Springs, Superbike Handlebars, V-Star 650 ACCT, NGK Irridium Plugs, OEM Exhaust. CNC-Cut 2nd Gear Dogs; Ported/Milled Head; Modded Airbox: 8x8 Wix Panel Filter; #137.5 Main Jet, Viper Yellow Paint, Michelin Pilot Activ F/R, Interstate AGM Battery, 14MM MC, Maier Fairing, Cree LED Fog Lights.

        Comment


        • #64
          Looks awesome Don, nice work again bro.
          2H7 (79) owned since '89
          3H3 owned since '06

          "If it ain't broke, modify it"

          ☮

          Comment


          • #65
            Originally posted by IanDMacDonald View Post
            I tried a few different hot paints. None of them held-up well on the exhaust for my 750.
            This is only line of paint that has held up to my exhaust temps:

            http://www.amazon.com/Rust-Oleum-248...leum+high+heat

            If I don't end up keeping my exhaust wrap this is what I'll use again.
            78 E - 2to1 exhaust, dynatek coils, special headlight [SOLD!]
            79 F - gas tank refurb, headgasket change, straight pipes, late model carbs, virago lowering shocks, special headlight and gauges, TC fuse block, GSXR-1100 carbs (WIP)


            "May my tires not fail me, nor my engine grow cold"

            Comment


            • #66
              Awesome build Don! Bike will run better than it looks and it looks great...
              1980 XS650G Special-Two
              1993 Honda ST1100

              Comment


              • #67
                Great Job Don ! ! !

                Next ?
                1980 XS1100G "Dolly G" Full Dresser (with a coat of many colors )
                1979 XS1100SF (stock-euro mods planned)
                1984 XV700L Virago (to be hot-modded)
                1983 XJ750MK Midnight Maxim (semi-restored DD)
                1977 XS650D ( patiently awaiting resto)

                Sometimes it takes a whole tank of gas before you can think straight.

                Comment


                • #68
                  exhaust paint

                  the exhaust looks good...

                  what did you paint it with ?
                  Steven


                  1981 XS 1100 LH
                  1979 XS 1100 SF

                  Comment


                  • #69
                    I used 500 deg engine paint on the exhaust. I wanted something that did not need a cure process. And all readings I have heard on the headers was always less than 300. So I will see if it holds up after I get it running.

                    I want to feel better about the brakes before I get a battery so I do not take it out till I know the front brakes are good to go. I also noticed the oil pan bolt is leaking, so I need to pull it and get a new washer on the bolt.

                    Next....who knows. Like it to be a Standard, or maybe a Virago style bike. Who knows.
                    Life is what happens while your planning everything else!

                    When your work speaks for itself, don't interrupt.

                    81 XS1100 Special - Humpty Dumpty
                    80 XS1100 Special - Project Resurrection


                    Previously owned
                    93 GSX600F
                    80 XS1100 Special - Ruby
                    81 XS1100 Special
                    81 CB750 C
                    80 CB750 C
                    78 XS750

                    Comment


                    • #70
                      Got the MC fixed, a good honing of the cylinder got it working right. Oil pan bolt is fixed. So now to get a battery.
                      Life is what happens while your planning everything else!

                      When your work speaks for itself, don't interrupt.

                      81 XS1100 Special - Humpty Dumpty
                      80 XS1100 Special - Project Resurrection


                      Previously owned
                      93 GSX600F
                      80 XS1100 Special - Ruby
                      81 XS1100 Special
                      81 CB750 C
                      80 CB750 C
                      78 XS750

                      Comment


                      • #71
                        Yesterday turned out to be a lot of ...umm...fun...yeah...fun.

                        Got gas, put it in the tank. MY freshly rebuilt petcocks start leaking fuel out the prime outlet when in the off position. Yes, I did get the left handle on the left petcock, and on the left side of the bike, same for right petcock. So, tank off the bike, drain the gas out of the tank, disassemble petcock, wipe everything down, reassemble, and it seems to be working. Also put a plugged tube on the prime outlet of each petcock.

                        So now I have fuel, hook up my semi-charged battery to the bike, try to start it. Starter turns the bike over.....no fire. Plugs are wet, so got fuel. Check for spark, nothing. So I hook the charger back up to the battery, my thought being the battery may not have enough to trigger the TCI.

                        So I tried it this morning, full charge on battery, no joy. Still no spark. So, the fun will continue this afternoon. Since ALOT of things have been worked on, it will be a wild goose chase to figure out.
                        Life is what happens while your planning everything else!

                        When your work speaks for itself, don't interrupt.

                        81 XS1100 Special - Humpty Dumpty
                        80 XS1100 Special - Project Resurrection


                        Previously owned
                        93 GSX600F
                        80 XS1100 Special - Ruby
                        81 XS1100 Special
                        81 CB750 C
                        80 CB750 C
                        78 XS750

                        Comment


                        • #72
                          Oh God Don. This is my fear too. So many things I've done to this bike . . .
                          1979 XS1100F
                          2H9 Mod, Truck-Lite LED Headlight, TECHNA-FIT S/S Brake Lines, Rear Air Shocks, TKAT Fork Brace, Dyna DC-I Coils, TC Fuse Block, Barnett HD Clutch Springs, Superbike Handlebars, V-Star 650 ACCT, NGK Irridium Plugs, OEM Exhaust. CNC-Cut 2nd Gear Dogs; Ported/Milled Head; Modded Airbox: 8x8 Wix Panel Filter; #137.5 Main Jet, Viper Yellow Paint, Michelin Pilot Activ F/R, Interstate AGM Battery, 14MM MC, Maier Fairing, Cree LED Fog Lights.

                          Comment


                          • #73


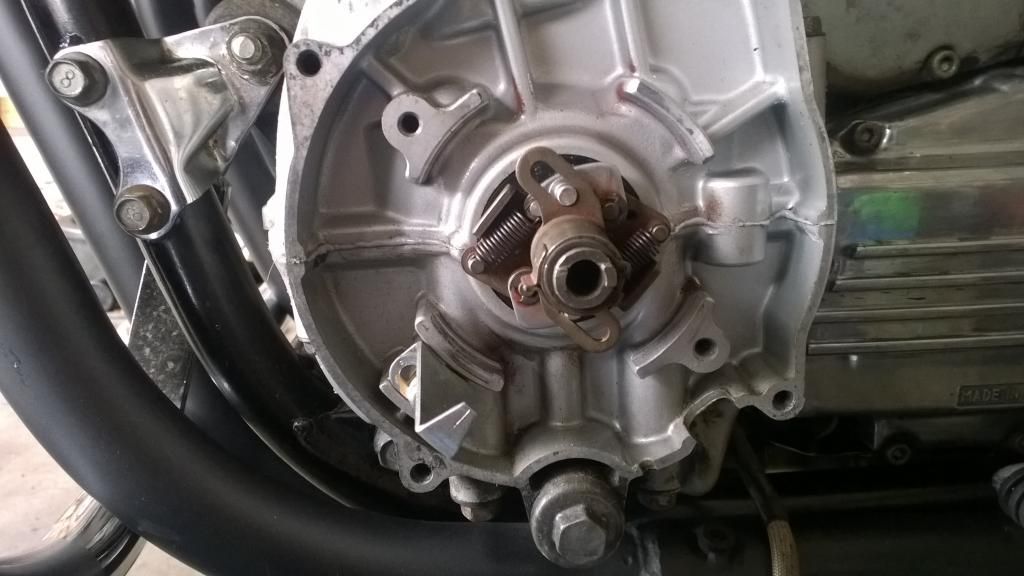
                            When you misalign the timing assembly on your bike, the pointer gets off center from the pick up coils. When it gets off center from the pickup coils, the gap at the pickup coils becomes huge. When the gap at the pickup coils becomes huge, they will not trigger the coils to fire the plugs. When the coils will not fire the plugs, your bike will not run. When your bike will not run, you chase imaginary butterflies into something highly illegal. Don't chase imaginary butterflies into something highly illegal, properly align your timing assembly.

                            Yes, that was the culprit of the no start. I began with checking voltage at coils, all was good. Coils ohmed out good, pickup coils ohmed out good. Check the gap, it is HUGE, Can not get the pickup to close enough to get the right gap. Then as I turn the assembly I notice the shaft the pointer is on is not centered in the hole of the timing plate the pickup coils sit on. SO I pull it all apart, and then I see the pin on the crank was not sitting right in the slot of the rotor.

                            So now I start trying to get it to install correctly. Well, it had marred up both the rotor and the pocket the rotor sits in. After an hour of filing, sanding, and filing and sanding, I finally get things cleaned up enough that it almost sits in correctly, a gentle nudge from a "persuasive" device, and it seated in properly.

                            Reassemble the timing assembly, set the gaps on the pickup coils. Turn the key on, set the choke, bowls still had fuel from earlier attempt, hit the button and she starts without even a full turn over.

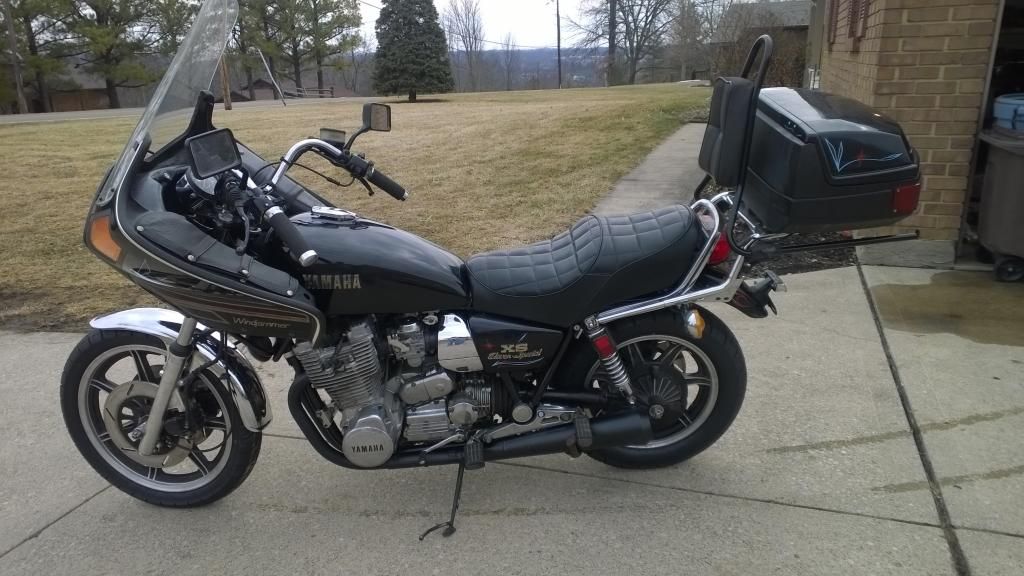
                            So, here is a pic after her first 2-1/2 miles on the road since 2007.


                            She pops out of no 1 I think. Needs some tuning for sure. No 1 header was smoking ALOT after the run. I am thinking it is lean and was heating that paint up.
                            Life is what happens while your planning everything else!

                            When your work speaks for itself, don't interrupt.

                            81 XS1100 Special - Humpty Dumpty
                            80 XS1100 Special - Project Resurrection


                            Previously owned
                            93 GSX600F
                            80 XS1100 Special - Ruby
                            81 XS1100 Special
                            81 CB750 C
                            80 CB750 C
                            78 XS750

                            Comment


                            • #74
                              Bike looks great Don!!! Glad to hear u figured it out. I wrote down the air gap spec in my notes from another thread just in-case I ever mess with it. U shoulda seen my smokey machine from the PJ1 engine paint!
                              1979 XS1100F
                              2H9 Mod, Truck-Lite LED Headlight, TECHNA-FIT S/S Brake Lines, Rear Air Shocks, TKAT Fork Brace, Dyna DC-I Coils, TC Fuse Block, Barnett HD Clutch Springs, Superbike Handlebars, V-Star 650 ACCT, NGK Irridium Plugs, OEM Exhaust. CNC-Cut 2nd Gear Dogs; Ported/Milled Head; Modded Airbox: 8x8 Wix Panel Filter; #137.5 Main Jet, Viper Yellow Paint, Michelin Pilot Activ F/R, Interstate AGM Battery, 14MM MC, Maier Fairing, Cree LED Fog Lights.

                              Comment


                              • #75
                                Good Job Don !!!

                                I have never chased imaginary butterflies into something highly illegal buuut
                                I've imagined butterflies chasing me being illegally high on something.

                                Ahh . . . da good ol' days . . .
                                1980 XS1100G "Dolly G" Full Dresser (with a coat of many colors )
                                1979 XS1100SF (stock-euro mods planned)
                                1984 XV700L Virago (to be hot-modded)
                                1983 XJ750MK Midnight Maxim (semi-restored DD)
                                1977 XS650D ( patiently awaiting resto)

                                Sometimes it takes a whole tank of gas before you can think straight.

                                Comment

                                Working...
                                X