You can try using a drift bent slightly in the middle so it will stay on that small lip of the race, but what usually happens is the tip of the drift gets chewed off due to the hardness of the race. Those are probably the original bearings that have been there 30+ years and will be very stubborn. I myself in this situation would go at it with a dremel and a cold chisel, shouldn't take more than 15-20 minutes. Careful not to cut too deep but if you do, it won't be a real problem, the new race will still stay firmly in position, GL.
Did Someone Say Build Thread?!!
Collapse
X
-
If you have access to an arc welder you should try Fred's trick of running a hot bead on the face of the race. Once it cools down it will literally fall out on it's own. I have used his trick on a few of my more stubborn races and it is amazing how quick and easy they come out.2-79 XS1100 SF
2-78 XS1100 E Best bike Ever
80 XS 1100 SG Big bore kit but not fully running yet.
Couple of more parts bikes of which 2 more will live!Comment
-
Thanks Guys, yes it does seem to just round off the lip of the drifts I have used. Sounds like Dremel time.
Ras, I would use the welding method, but I do not weld or have access to a welder.Life is what happens while your planning everything else!
When your work speaks for itself, don't interrupt.
81 XS1100 Special - Humpty Dumpty
80 XS1100 Special - Project Resurrection
Previously owned
93 GSX600F
80 XS1100 Special - Ruby
81 XS1100 Special
81 CB750 C
80 CB750 C
78 XS750Comment
-
Well 20 minutes must be if you know what your doing. I cut the race two diff angles, go a piece of the lower section V to come off. Think I have it most the way through on the top, but hard to say for sure. Still not moving though. I can say this, that race is some hard fricken steel. Ruined tow dremel bits trying to grind into it, the bits got rounded off instead.Life is what happens while your planning everything else!
When your work speaks for itself, don't interrupt.
81 XS1100 Special - Humpty Dumpty
80 XS1100 Special - Project Resurrection
Previously owned
93 GSX600F
80 XS1100 Special - Ruby
81 XS1100 Special
81 CB750 C
80 CB750 C
78 XS750Comment
-
I used the small cutoff wheels making a wide groove for the chisel to hook into, then hammer away. Then cut some more, hammer some more etc. until it gives.2H7 (79) owned since '89
3H3 owned since '06
07 Triumph Tiger 1050
"If it ain't broke, modify it"
☮Comment
-
Thanks Phil, I got it out. What I ended up using was a stone wheel, like we use for the dremel cutting of the gears. Once I got it ground down, I used a thin tipped screwdriver to drive behind the edge and got it to snap and pop loose. And yes, I took the opportunity to make those lands a little deeper. Not having seen this without the bearing in it, I did not know about the second step if you will, so I got a little to deep with the grinding...
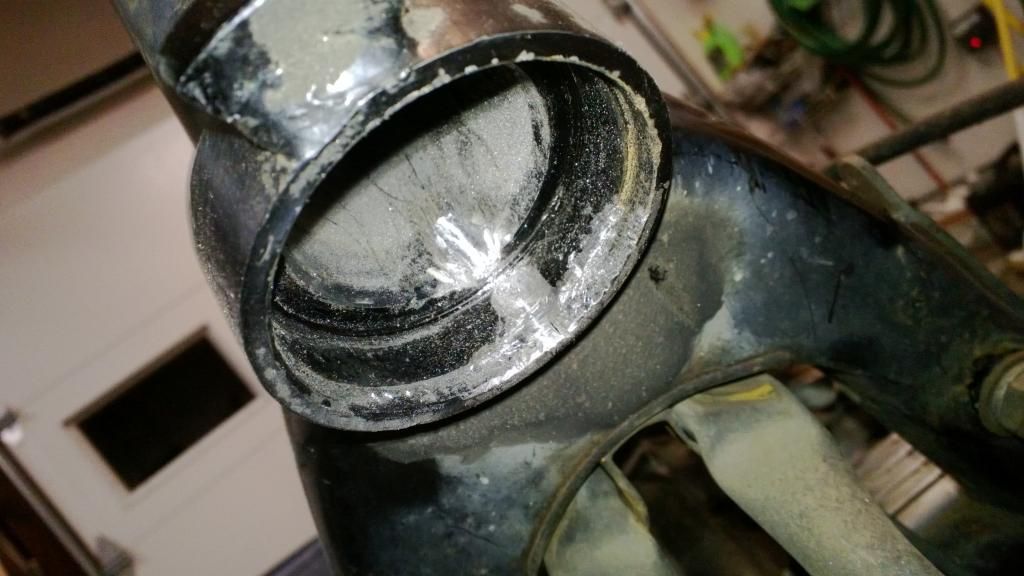
Realistically, when I think of how hard those races are and the small amount of the over all circumference I am not worried about the missing material. The only part that gives me pause is that it is at the back where a lot of the forces get applied. Now, if I were a welder, I might weld it up and grind it back down. But instead I think I will simply apply some metal filler type compound, and mold it with the old race...
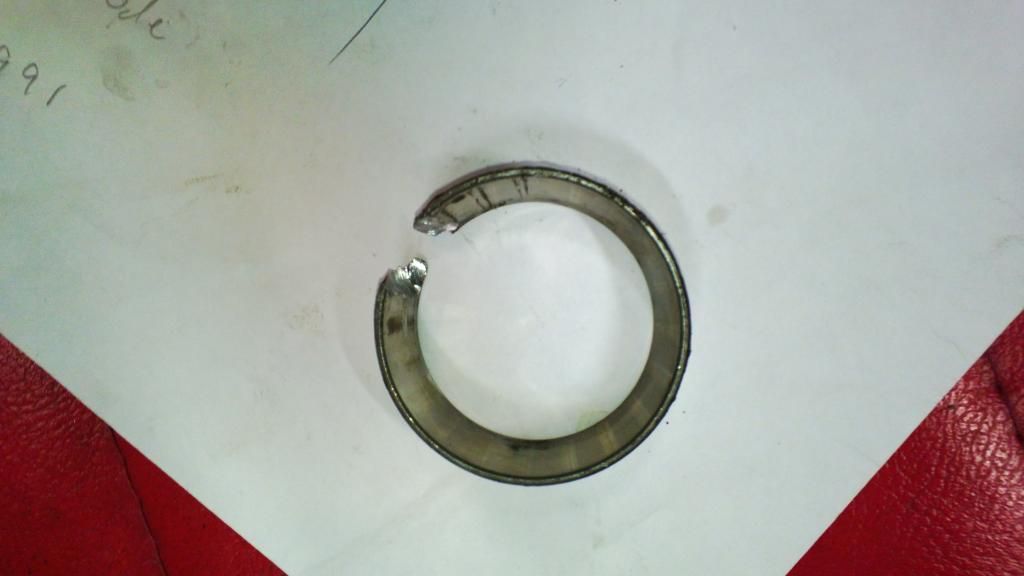 Life is what happens while your planning everything else!
When your work speaks for itself, don't interrupt.
81 XS1100 Special - Humpty Dumpty
80 XS1100 Special - Project Resurrection
Previously owned
93 GSX600F
80 XS1100 Special - Ruby
81 XS1100 Special
81 CB750 C
80 CB750 C
78 XS750Comment
-
I do not have a welder nor the capabilities to be one. I do however have a buddy who can do miracles with metal. Barring the use of a welder one must do exactly what you did.
I just have a few thoughts that may help others, as I had the same issues as you did when trying to grind out the race. Blew through bits like no tomorrow and actually damaged my bearing boss in a similar way as you did.
Could one not grind out the slot instead of the race itself in order to get better access to it?
Seems to me that after I did the repair that it would have been easier to grind a deeper/larger slot for the punch to fit rather than grind out the race. Basically the same or less damage and the same end result. Just wondering what your thoughts would be on that type of procedure instead of grinding away at the race?2-79 XS1100 SF
2-78 XS1100 E Best bike Ever
80 XS 1100 SG Big bore kit but not fully running yet.
Couple of more parts bikes of which 2 more will live!Comment
-
Don, I just put some blue Locktite on the race/frame and smack it back in, no problems. It will still come out easy next time.2H7 (79) owned since '89
3H3 owned since '06
07 Triumph Tiger 1050
"If it ain't broke, modify it"
☮Comment
-
I had the same thought Ras, But, the difficulty would still be to cut a deeper land and not cut or round out the bearing race where you want to contact to drive it out. That is what deterred me from going that route.Seems to me that after I did the repair that it would have been easier to grind a deeper/larger slot for the punch to fit rather than grind out the race. Basically the same or less damage and the same end result. Just wondering what your thoughts would be on that type of procedure instead of grinding away at the race?
Thanks Again for the insight Phil. I figured it was overkill to worry about filling it, but it will help me sleep better when I sell the bike to know I went over and above on it.Life is what happens while your planning everything else!
When your work speaks for itself, don't interrupt.
81 XS1100 Special - Humpty Dumpty
80 XS1100 Special - Project Resurrection
Previously owned
93 GSX600F
80 XS1100 Special - Ruby
81 XS1100 Special
81 CB750 C
80 CB750 C
78 XS750Comment
-
So today was a continuation of the tear down. Got he back half torn down, and the wiring removed so I have good access to the frame for rust removal and paint touch up as needed. I have decided that battery acid is a B!TCH on metal. All the corrosion must be from the leaking battery, and the leaking brake fluid. Those see to be the areas with the most corrosion issues. So here is the current state of the bike, minus the now removed rear turn signals........
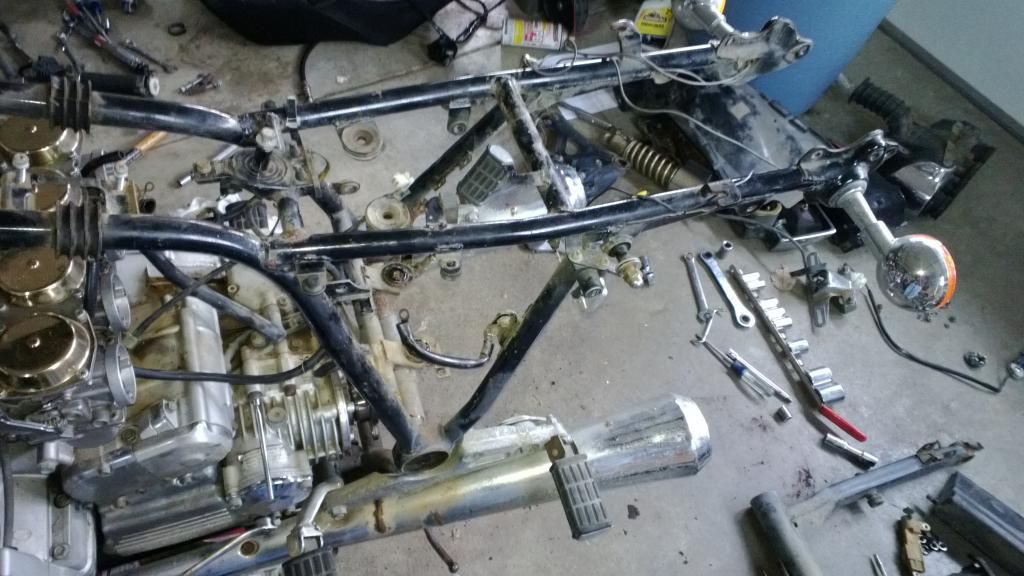
Front end, wiring removed....
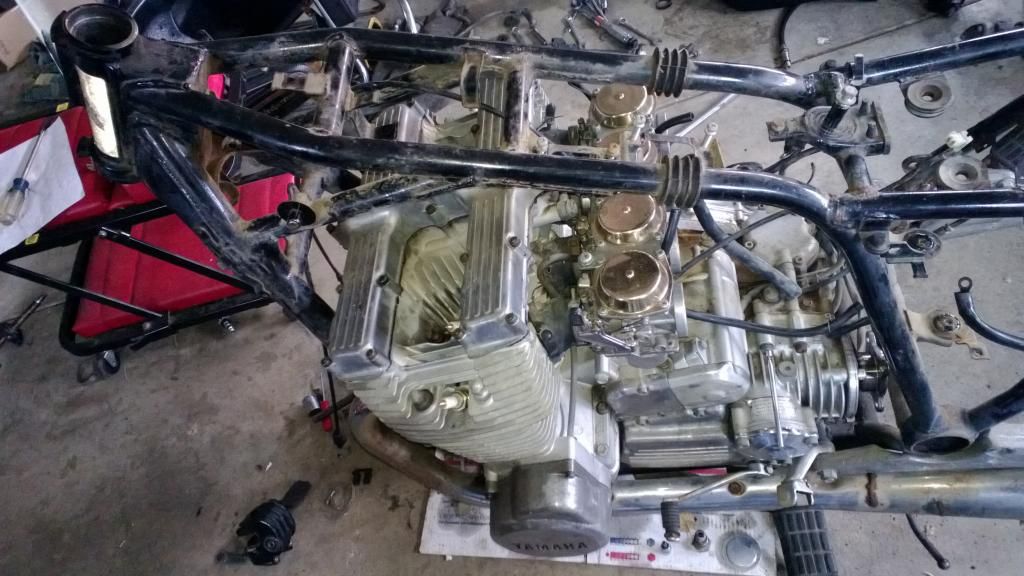
So here is the swing arm pivot bearing area on the side where the battery cap was snapped off......
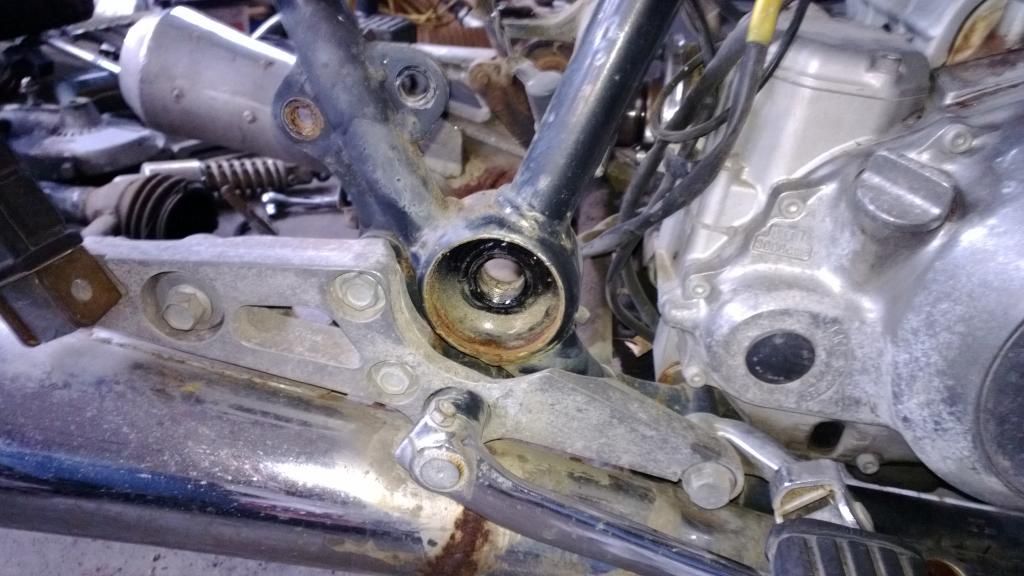
And yes, the exhaust has several spots on each muffler that have been welded up. Goging to take some time to grind / sand the welds down so I can paint that exhaust.
And here is the other side swing arm pivot bearing area...note the lack of rust....
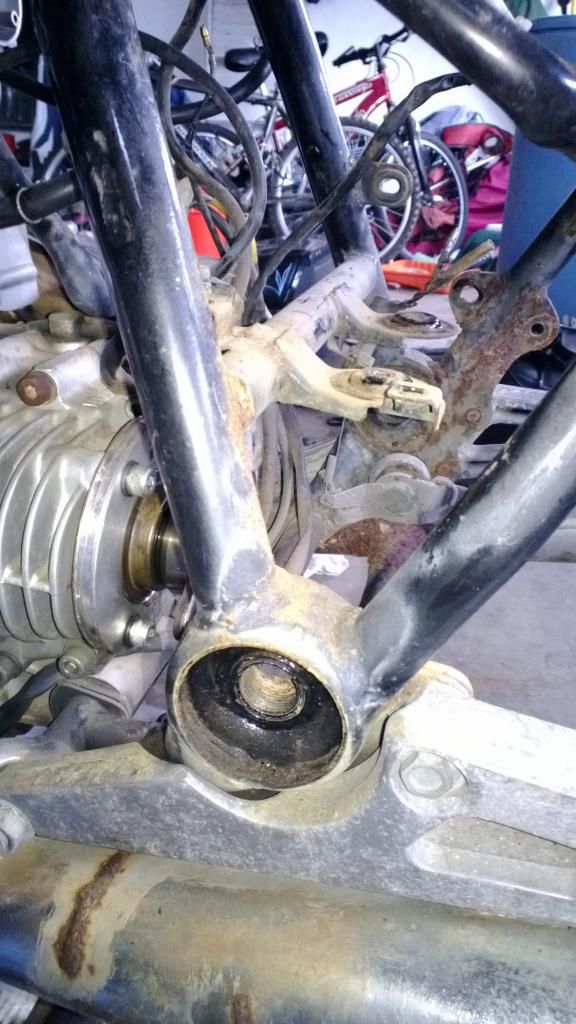
Now another thing I had fun with was the rear wheel. In all my years of playing with these bikes and other shaft drive bikes, I have never had to fight, push hit and all but kick the wheel to try to get it off the hub, and still it would not move. I finally decided to remove the FD with the wheel on it, down to the last nut holding the FD on, the wheel finally came free. I have never seen grease that looks like a red fine dust before. Interesting part was that the drive shaft splines looked well greased, but the hub connection was in such bad shape.

Anyway I got the fork seals removed, so the front end is mostly ready to be reassembled once the new seals and bearings come in. I do need a day or so to work on the frame and maybe even polish up the fork lowers.Life is what happens while your planning everything else!
When your work speaks for itself, don't interrupt.
81 XS1100 Special - Humpty Dumpty
80 XS1100 Special - Project Resurrection
Previously owned
93 GSX600F
80 XS1100 Special - Ruby
81 XS1100 Special
81 CB750 C
80 CB750 C
78 XS750Comment
-
Photobucket does not want to cooperate with me today, so no pics. But, I broke my cherry on engine removal today. I now officially crossed into the frame off rehabilitation game.

I had it on the centerstand with a jack stand under the front frame crossbar. So I grabbed the steering head section lifted the front end up pivoting on the centerstand and moved the jackstand with my foot, then lowered the front down onto a 4" cinderblock. Then grabbed the back end lifted, and raised the centerstand with my foot and lowered the back end to the floor. Back tot he front end to raise and move the block.
So now the frame and engine are sitting on the floor. I had removed the nuts from the two through bolts that mount the engine. Removed the shifter lever, and the no 1 spark plug (just to be sure since it looked like it might make contact with the ground). Now gently roll the assembly on its side on a piece of old carpet.
Remove the centerstand, side stand, and then the mounting bolts and two front upper mounting brackets. From there the frame does lift off quite easily. I still have the furniture dolly we used to put my engine on from the SH I wrecked a few years ago, so the engine is now rolled up onto the furniture dolly. Pretty easy process really.
Now if it will only warm up enough for the drive through pay-n-spray places o open up so I can take both over to get degreased an cleaned.Life is what happens while your planning everything else!
When your work speaks for itself, don't interrupt.
81 XS1100 Special - Humpty Dumpty
80 XS1100 Special - Project Resurrection
Previously owned
93 GSX600F
80 XS1100 Special - Ruby
81 XS1100 Special
81 CB750 C
80 CB750 C
78 XS750Comment
-
Dang Don ya shoulda called..coulda helped ya out a little with the engine removal. '80 XS1100 SG
Don't let the good times pass you by..grab all you can
https://www.youtube.com/watch?v=x_Z4cjUlIo4Comment
-
The update
Well, Photobucket is back to cooperating, sooo....
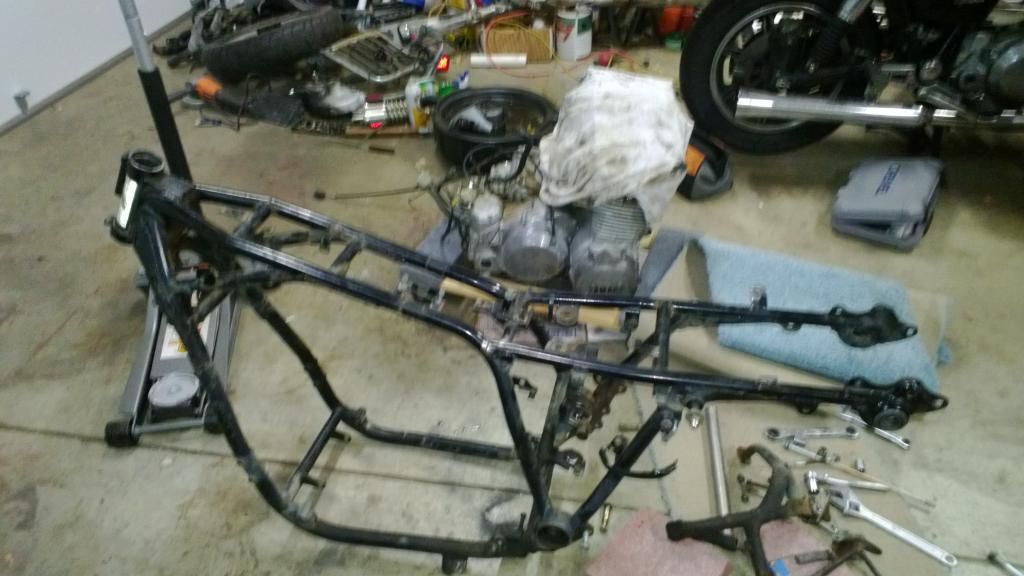
Here is the engine removed from the frame on the furniture dolly. This is the second XS engine to grace that dolly, it was bought for removel of the engine from my first SH (also my first XS11)...
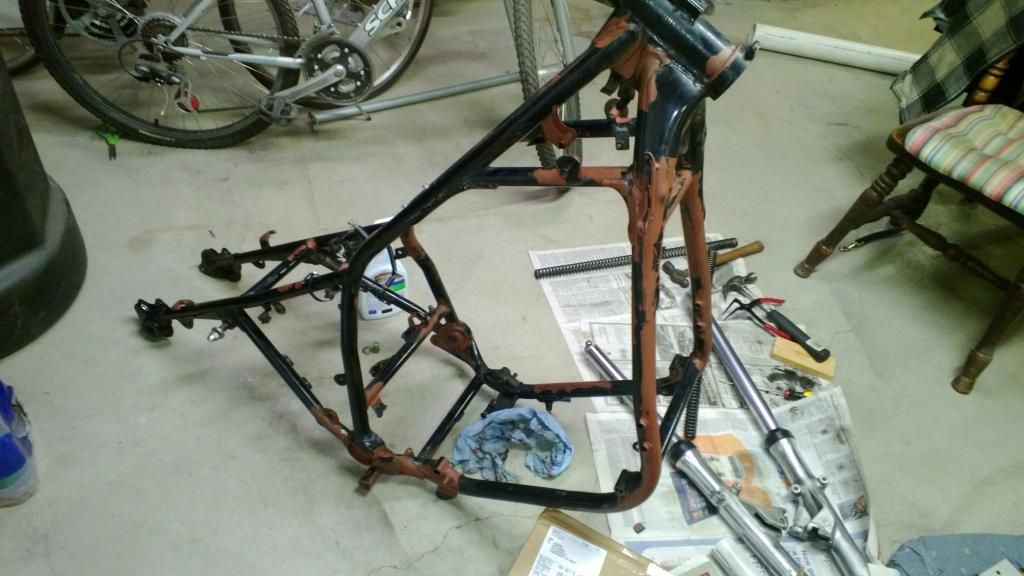
So I took a wire wheel to it, along with a dremel, some hand sanding, ect...ect.. and now I have primer over the areas with rust spots. I know, I probably would have been better off striping it and sand blasting, but I do not have access t sand blasting equipment, so this is how the cheapazzes do it...
I also got my steering head bearings in, along with the fork seals... So now I have the races and lower bearing installed, and the forks reassembled. You may notice I did polish the forks up a little bit....
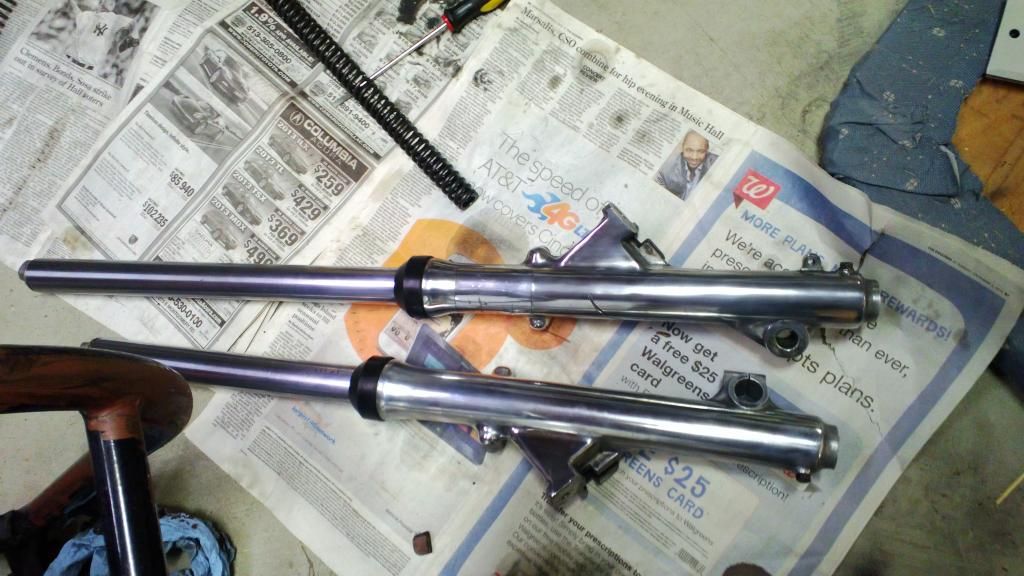
You may notice one has a deep gouge that the dirt was hiding. I do nto try to sand out deep scraped, and such anyway, just get them looking at least as shiney as when they were new. I also got the foot peg brackets shined up today.
I do not have pics, but, the grease gun was the ONLY way to get those pistons out of the brake calipers. All three did not even budge with 100 PSI of air pressure on them. But the grease gun worked like a charm. Now I just need to get one of the pins holding the pads on to come loose. It is frozen in place.
The deep freeze was a huge success in getting the bearings in the steering stem. I happen to have a zero degree freezer in my basement work shop area. So I had the races and lower tree colder than a well diggers but in an Alaska January before SWMBO ever knew it happened. Really worked well. Of course, I could have just put them outside tonight and they would have been even colder!!
 They are predicting -4 F here tonight. -9 by tomorrow evening. And here I thought I was BELOW the Artic Circle!!!

So now I need to wait a week for to get some higher temps so I can spray the frame with some doors open in the shop so I do not smell up the entire house. In the meantime I will clean and prep the final drive for paint. It needs some derusting work as well.Life is what happens while your planning everything else!
When your work speaks for itself, don't interrupt.
81 XS1100 Special - Humpty Dumpty
80 XS1100 Special - Project Resurrection
Previously owned
93 GSX600F
80 XS1100 Special - Ruby
81 XS1100 Special
81 CB750 C
80 CB750 C
78 XS750Comment
-
These forks were not to bad off to start with. I used a green scrubby pad to clean them up.
Then I used 180 grit wet dry sand paper to smooth out some of the casting marks. I did not try to remove the casting seams, or smooth out the rough cast areas on the tire side of the slider and such. Only the front side around the brake mount, drain screw, and speedo bracket areas. Then worked down to 320 grit wet sand over most of the fork, and then 600 grit wet sand over everything.
Next I moved to my newly acquired bench top buffer from HF. BTW, it is a POS and will be going back. The bearings are already screaming and it slows down with any amount of pressure on the wheels. But, I started with Tripoli grinding bar on the sewn wheel, and then the white compound on the flannel wheel.
It's not exactly a mirror shine, but it will look ten times better than when I got the bike and look good when finished. After it warms back up to only fricken cold and not ungodly cold, I will get the Mothers Aluminum Polish and use that on them as well.Life is what happens while your planning everything else!
When your work speaks for itself, don't interrupt.
81 XS1100 Special - Humpty Dumpty
80 XS1100 Special - Project Resurrection
Previously owned
93 GSX600F
80 XS1100 Special - Ruby
81 XS1100 Special
81 CB750 C
80 CB750 C
78 XS750Comment
Comment