If this is your first visit, be sure to
check out the FAQ by clicking the
link above. You may have to register
before you can post: click the register link above to proceed. To start viewing messages,
select the forum that you want to visit from the selection below.
Hey Rob it look Great I blasted my frame befor i painted it glad i did cause i found some bad spots on the bottom of it. Had to replace some of it very small holes in it rusted but a easy fix. What year are you restoring?
Jim
Hey Jim ... This is the 1978E model hop-up bike that has been in the works for a few years now. The engine is pretty much complete and all the other "trick" parts have been acquired. I was held up on this project by LIFE ... LOL LOL ... it seems to get in the way sometimes.
Rob
A couple of things! First, is that the Canadian spelling for WELDING?!
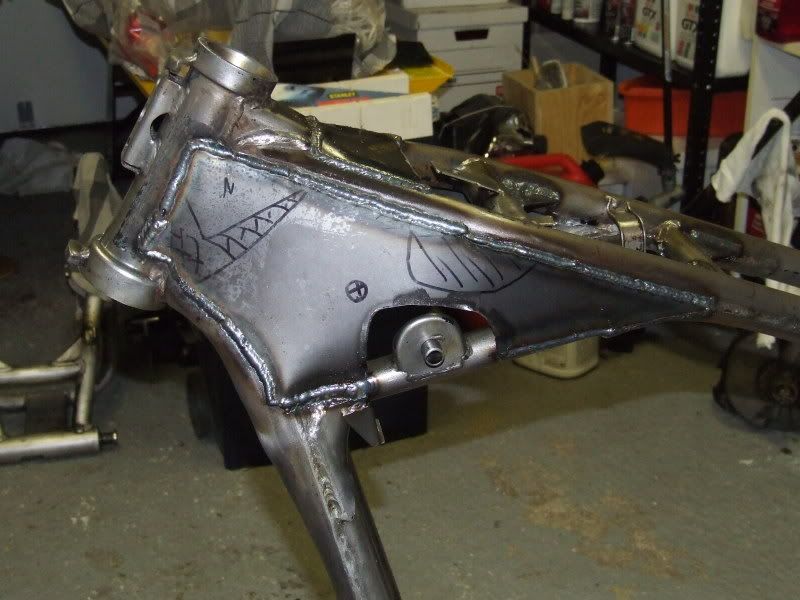
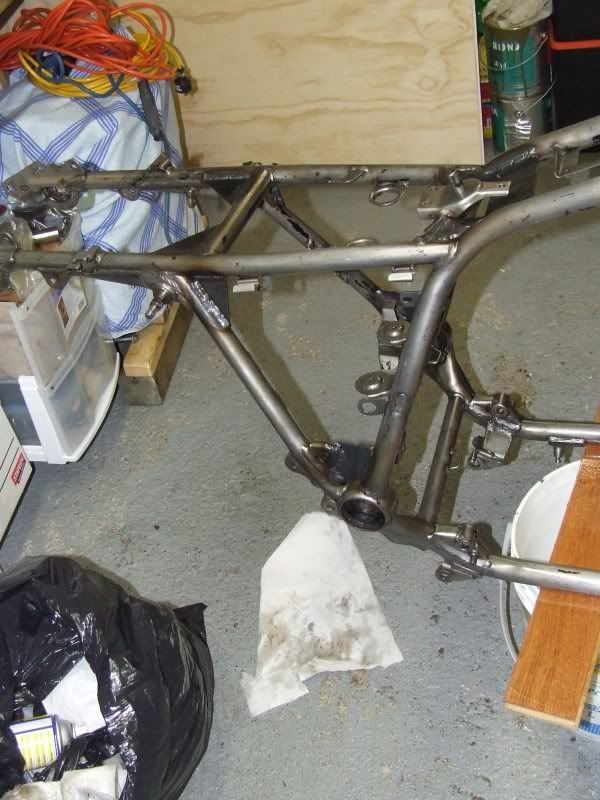
Secondly, in the first photo, are those sharpie marks where you are going to do some cutouts to allow the routing of the wires and cables? Looking forward to hearing how all the gussets improve/reduce the "FLEX" feel of the bike!
T.C.
T. C. Gresham
81SH "Godzilla" . . .1179cc super-rat.
79SF "The Teacher" . . .basket case! History shows again and again,
How nature points out the folly of men!
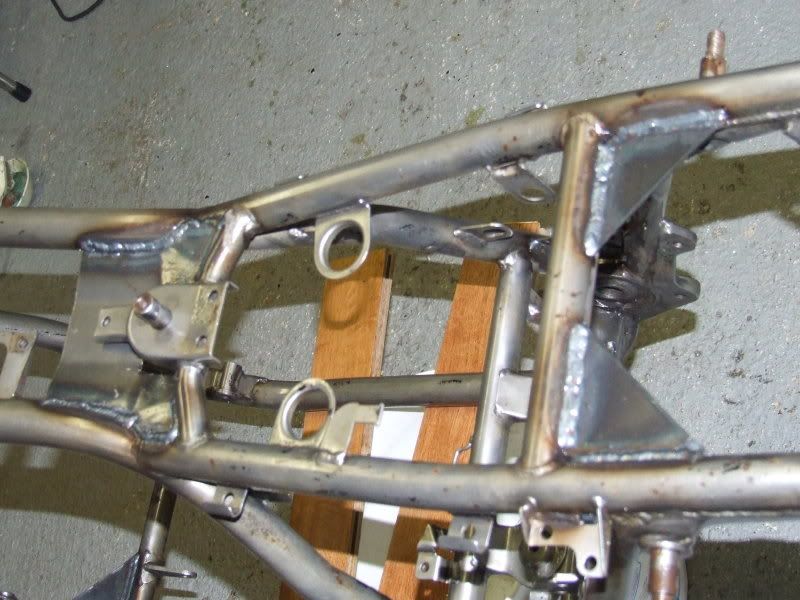
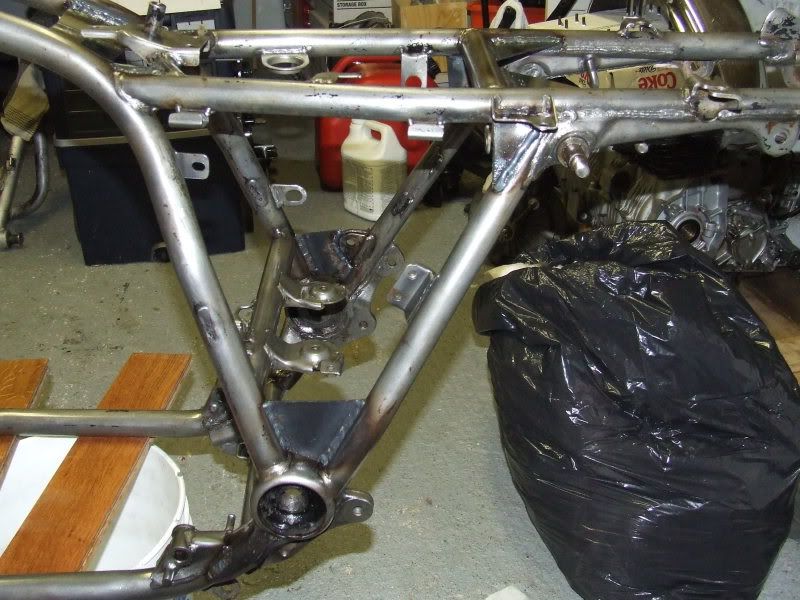
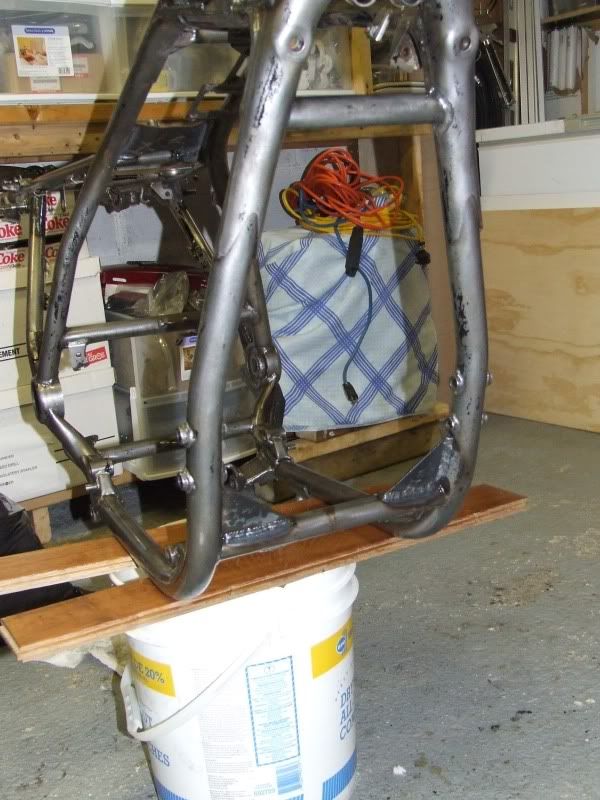
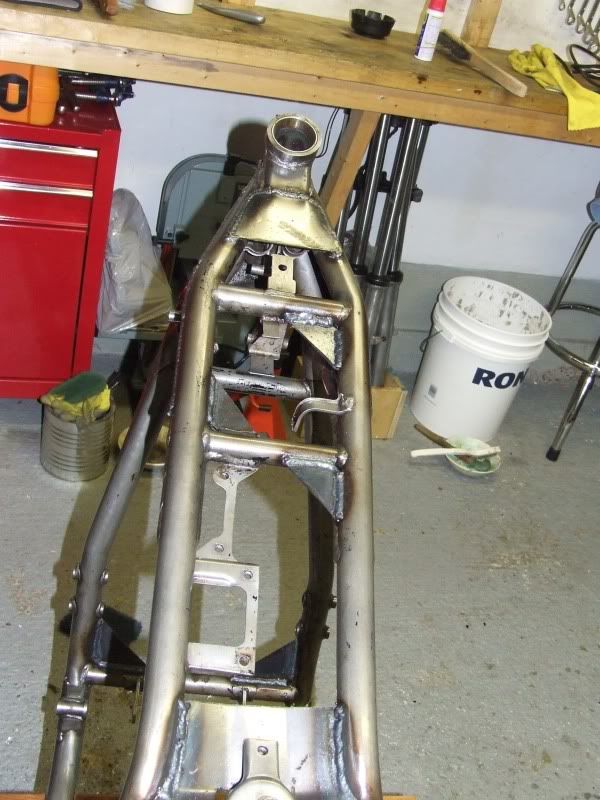
The marker marks are there because we re-cut the pieces to avoid welding onto existing welds. Wrapping the head like this should in theory prevent side to side flex and misalignment between the top and the bottom of the head set. the only way it can move now is if all the tubes move at the same time because they are now linked together. The other gussets are at places where the frame would be inclined to want to flex as a result of the head not wanting to move. the desire to flex has been displaced to the middle under tank area so it is also reinforced. Added strength at the to of the shock area is also a good idea. Right at the top middle where the seat meets the tank is now bridged to make the entire area more rigid. Again, in theory, by bridging the tubes together they all share the load so flex should be minimized. Gussets are fast, light and easy to do. i will know the first time I run her if the work was worth it.
Rob
Okay, but WHERE are you going to run the WIRES since you've sealed up the front of the frame area??
T.C.
PS, "wield", is like he wielded a sword in battle.
Or, he wielded/weilded the welding tip in a very proficient manner, ending up with very clean looking welds!
Merriam Webster online dictionary:
Main word: wield
Pronunciation: \ˈwēld\
Function: transitive verb
Etymology: Middle English welden to control, from Old English wieldan; akin to Old High German waltan to rule, Latin valēre to be strong, be worth
Date: before 12th century
1chiefly dialect : to deal successfully with : manage
2: to handle (as a tool) especially effectively <wield a broom>
3 a: to exert one's authority by means of <wield influence> b: have at one's command or disposal <did not wield appropriate credentials — G. W. Bonham>
T. C. Gresham
81SH "Godzilla" . . .1179cc super-rat.
79SF "The Teacher" . . .basket case! History shows again and again,
How nature points out the folly of men!
LOL . Will l ever regret not spell checking that post LOL ... I forgot to bring the guides with me to be reattached so the cables will be clipped in place with wire clips like those used on the plastic part of the rear fender. To get through the steel plate a hole of about 1/2 an inch DIA will be drilled through. Once it is drilled the plate will be heated up and a steel drift will be used to distort the hole and face it somewhat forward. Picture if you will a steel drift placed into the drilled hole and then pulled straight forward to twist and stretch the back half of the hole outward while the front half is collapsed inward. I'll post a photo when I am done that part.
Rob
Comment