Announcement

Collapse
No announcement yet.

XS taking a stand

Collapse
X
 
  • Filter
  • Time
  • Show
Clear All
new posts

  • XS taking a stand

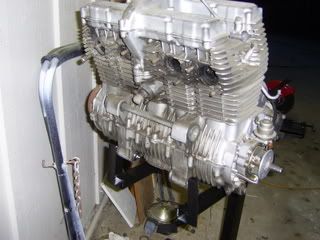
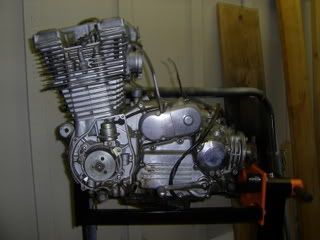
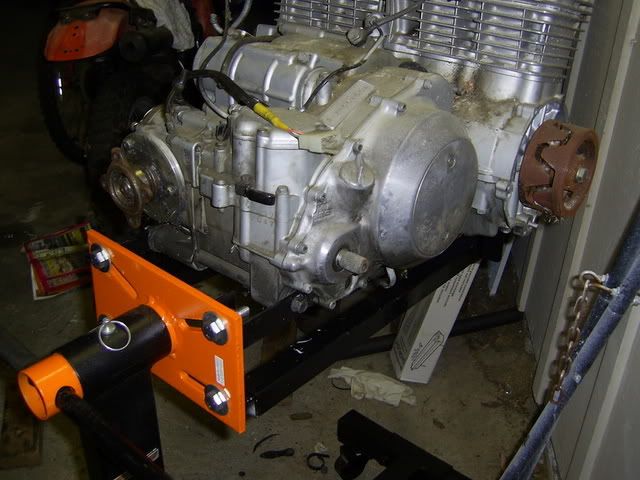
    just over twenty seven years old with but 2,600 original miles

    Had talked to DiverRay once about making an XS engine mount.
    The frame this 79 came in was toast so a while back I cut out the front mount and welded on some bolts and just got around to sticking it on today. Most of this engine will be going into my MNS


    mro

  • #2
    Hey .. Great stand ...Thats perfect. Love it. That engine looks to be in very good condition too.
    Rob
    KEEP THE RUBBER SIDE DOWN

    1978 XS1100E Modified
    1978 XS500E
    1979 XS1100F Restored
    1980 XS1100 SG
    1981 Suzuki GS1100
    1983 Suzuki GS750S Katana
    1983 Honda CB900 Custom

    Comment


    • #3
      Good thinking. That looks good.

      Appears about the only thing that you will not be able to do on the stand is split the cases. Or, is there a way to do that also?
      Mike Giroir
      79 XS-1100 Special

      Once you un-can a can of worms, the only way to re-can them is with a bigger can.

      Comment


      • #4
        Can not split the cases with this set up.
        Ideal would be to a mount that held to the top case only which is something I may look into later.

        I have a small roll around wood top work bench I use when splitting cases. It's just wide enough to set an XS engine on and allows getting to all sides when needed.


        Not too sure of any benifits to having it on a stand like this one. Normally pull head and cylinders before taking it outa the frame.

        Will make spit and polish easier

        mro

        Comment


        • #5
          Damn, that's nice! What a great idea!

          I have a frame (in good shape, but will be difficult to title) that would make one of those quite nicely. Hmm....

          I swear, if you guys don't stop with all this brilliance, I will be busy for the next 10 years!
          80 XS1100SG
          81 XS400SH

          Some men miss opportunity because it is dressed in overalls and looks like work. - Thomas Edison

          A Few Animations I've Made

          Comment


          • #6
            MRO,
            I've been working on an engine stand, and have it almost done. I did buy a cheap stand from the local discount auto parts store, and I'm building four brackets to hold just the LOWER CASE. Once I know every thing fits, I'll post a pic and or drawings. As I plan on rebuilding the engine, I AM going to split the cases, so I designed for that.
            Ray Matteis
            KE6NHG
            XS1100 E '78 (winter project)
            XS1100 SF Bob Jones worked on it!

            Comment


            • #7
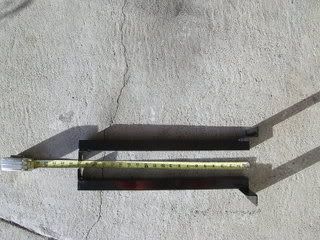
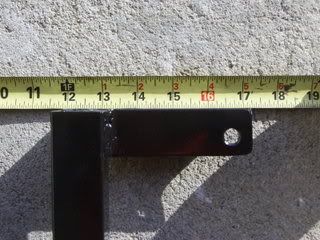
              OK, Here it is. Just got it done tonight!!


              The bottom support is 20" long, but should be 6" up to bolt holes. the rear supports are 3.5" from center of mount to back, with the mount hole 3/4" above the motor mount. I used 1" square tube, and 1"X1" angle iron.
              Ray Matteis
              KE6NHG
              XS1100 E '78 (winter project)
              XS1100 SF Bob Jones worked on it!

              Comment


              • #8
                Hi Ray

                So you just had to "One Up Me"
                or... er... "One Bottom Case Me"

                Got a pic from the bottom?

                Last year started to make one simular to yours,
                but like to work with the top case which will make dealing with
                crank/rods/oil pump etc. easier.
                Have a few ideas...just have to get around to it.

                Right now, just need a set of main bearings, (and time).
                Going to use cases from MNS and internals from engine in pic.
                Have yet to make up my mind on using an 80 head with 79 cams or just the low mile 79 head.


                mro

                Comment


                • #9
                  MRO,
                  I have a few more pics, but I plan on changing the design a little. The bottom rails should be about 22" long, and the upright on it should be 6.5". I also want to put the tube about 1" farther from the engine, for clearance. I have not thought about doing the top case, because the bottom was a lot easier. I think I can come up with a design for holding the engine by the top, it will just take a little more work.
                  This took so long because I had other things in the way, and am just about done with the work for other people.


                  Last edited by DiverRay; 05-02-2007, 08:36 AM.
                  Ray Matteis
                  KE6NHG
                  XS1100 E '78 (winter project)
                  XS1100 SF Bob Jones worked on it!

                  Comment


                  • #10
                    Hell of a good Idea!

                    You guys just keep 'em coming, don't ya! My eng. stand currently has 4.3w chev sittin on it with death knock. I do have bad 11 frame sittin out back. Don't anticipate any XS11 rebuilds soon, but you never know?
                    Keep the great ideas comin'!
                    "Elvira"
                    '80 XS1100LG

                    Comment


                    • #11
                      Idea,..... sorta

                      Just happen to have some fubar'ed engine covers.
                      Will look into splitting em and mount to top case only......
                      Sounds good in my head, will see if practical this weekend.
                      Wonder if the alan-head bolts on the covers will be strong enough....to hold the entire engine.


                      mro

                      Comment


                      • #12
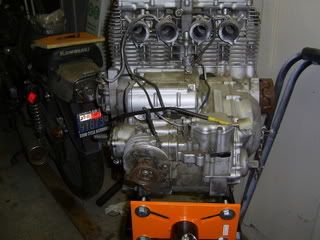
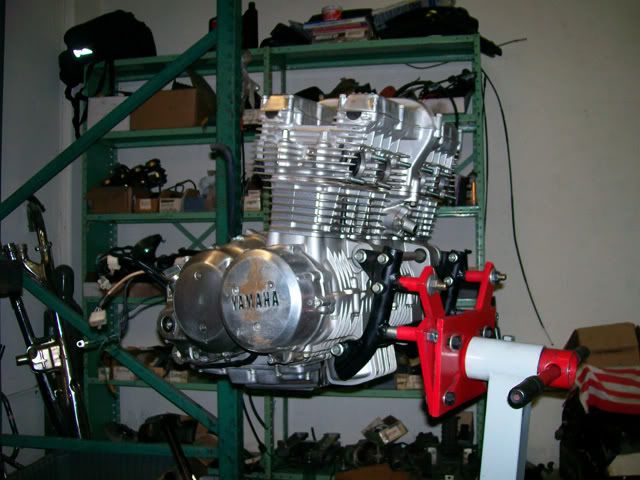
                        Okay, time for another variation on using an engine stand to hold an XS motor.

                        This unit cost me about 30 bucks at Princess Auto. It is rated for 1000 lbs.


                        I took the adaptor plates to a machine shop and had them grind off the small diameter collars that you would put mounting bolts through. They then welded on some pieces of larger diameter pipe threaded on the inside.


                        Then, I simply picked up a bunch of pieces of black pipe from a plumbing shop in various lengths, a few collars, and some 90 degree elbows. I ran the pipes out extra long on the side away from the mounting plate so I could have some handles for packing the motor up out of the basement where I rebuilt it. I put a bar through a hole in the mounting collar for two guys to hang onto, then two more guys each grabbed one of these extension handles on the other side. Worked slick, no popped nut$, etc.


                        This has proven to be a real handy way to paint the motor, seen in these shots with a good quality self-etching primer. Next comes the satin black paint!

                        Ken Talbot

                        Comment


                        • #13
                          green with envy

                          good quality self-etching primer
                          I've never painted a MC motor, so kinda wondering about the cylinders.
                          You gone to paint em too??, and would they be primed like the cases???
                          Really like the look with the edge of the fins polished.

                          mro
                          btw, very cool...gave me an idea how I may be able to hold just the top case. Top case on rear has the vertical hole and the metal looks about 10 mm thick. Should be able to hold the back there and then use the two top front motor mounts.

                          Comment


                          • #14
                            Yup, cylinders are going to be satin black also, with black fin edges, not shiny. I sandblasted and glassbeaded these ones, then primed and painted before I did the rebuild. They need a bit of touch-up now, and I'll do that when I shoot the black on the rest of the job. When done, they will be a very close match with all of the powdercoated parts.


                            When this project is done, the only chrome bits will the the friction surfaces of the brake rotors, and maybe the inner fork tube. If I can find some black gaiters that I like for the fork tubes, thy'll be black too.
                            Ken Talbot

                            Comment


                            • #15
                              powdercoated parts.

                              I actually saved that pic the first time you posted it to my hard drive


                              mro

                              Comment

                              Working...
                              X