-
Did you need to use a bolt extractor to remove the old bolt shaft? Was there enough material to grab with vice-grips and unscrew the tamper bolt out? -
Yes. I just did this. After drilling out the tamper proof bolts and marking the timing location, I replaced with bolts from NAPA to match the thread and length.
If you replace the whole thing you will need to time it.
If you remove the 3 screws with the pick-up coils on it and just replace that part, then the bolts do not need to be drilled.
I used the original timing marked part and took apart the rest to use the new parts.Leave a comment:
-
No LAB3, everything is running fine. Just a tech question for future reference. I like the idea of just replacing the guts and leaving the plate.Leave a comment:
-
-
I just picked this one up from eBay $80.00. Bike had about 18K miles on it. Have you guys ever removed and replaced the tamper proof screws that hold the timing setting (1980+)? Can you use conventional metric cap screws once the old "snapped off" screw is extracted?
Last edited by DEEBS11; 07-02-2023, 04:10 AM.Leave a comment:
-
Leave the crimps a little loose so the wires can slide a bit. I try to keep them as a large circle just bigger than the braided sheathing. If the wires are able to move over about 2" they don't seem to beak as often. Do NOT open it so much that the wire can slip out of the crimp, as it can then catch in the spinning parts and break.Leave a comment:
-
-
I've replaced mine with silicon insulated 100 strand 18ga wire and the bike is running top notch, I just don't want to have to deal with it again! You know how electrical problems work, they tend to show up at 4am in a torrential rain storm.Leave a comment:
-
Don't forget, the crimp on the wire guide is the main problem with the pick up coils! Yamaha didn't leave any room for movement, and that is why the wires break. I tried to point that out to them in 1978 when the wires on my XS did that. But working in a small town dealer, and not going through training at the "factory" school, they didn't change anything....Leave a comment:
-
Looks like the FJ1100 ignition pickup and Ignitor box is a direct swap, this seems like the most affordable option to replace the moving vacuum advance plate!
Leave a comment:
-
My electronics training was a half day high school / half day trade school in the late 70's and needless to say there's a lot I'm not current on.
Seems to me that there's nothing particularly unique about pickup coils, only in how they mount. Could there be a doable swap for the coils alone and not the backing plate out there?
How about going to old fashioned points? Is that idea worth entertaining?Leave a comment:
-
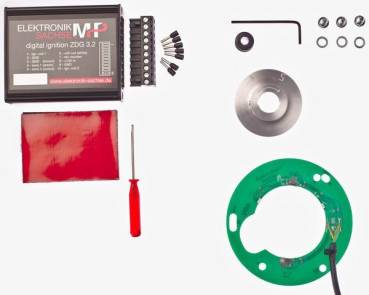
Hi LAB, I'm not sure if that unit would survive the environment of heat and cold more that a few years. It has never been tested because there is no documentation other than a sales ad. Maybe it would last. Maybe it wouldn't. The original equipment has lasted up to 45 years. I would spend the money on the real deal.Leave a comment:
-
For the money I'd be tempted to go with this.
Leave a comment:


Leave a comment: