 Tweet
Tweet
Hey there folks,
Haven't done much this winter tech wise, but recently I had to do some simple welding on an office chair cylinder that was blown/leaking, wouldn't maintain height, so I just welded it together to keep being able to use the chair, without having to spend the $$ to try to find a replacement piston/cylinder!
Well, while welding, my 110 x 90mm autodarkening shield would flicker and not stay protectively dark. I had both an older helmet that I had gotten from Harbor Freight, and then a newer one with better control settings ie. delay on, variable shielding level, trigger sensitivity, which worked better for my lower light triggering TIG welding rig and work. Both of them seemed to flicker/not darken properly. Thankfully, I only needed to do a few small beads,and was able to get it done without frying my retinas!
So...then I did some research on these screens/shields, looking to replace mine, but then also learned a bit more about how they worked. It was described as SOLAR and thought it was SOLAR powered by the energy from the welding arc light. BUT....it's just SOLAR triggered, the actual shading shielding is done by 2 little 3V lithium batteries inside the shield that work the LED shutters/filters. And so apparently they have run out of power after several years of use.
I then looked on YouTube about how to fix/repair the shield, and it involved replacing the batteries....but the ones they have are soldered onto the circuit board, and the tangs are spot welded to the battery. I found replacement batteries with the tangs already welded to them, but that would still require soldering them to the circuit board every time they needed to be replaced. Other techniques on YouTube showed connecting EXTERNAL type battery holders via wires, zip ties to the inside of the helmet and wires soldered to the circuit board, but that didn't seem very good to me, loose wires to snag and such.
SO...I found some 2/3 circle open battery holders that I thought could fit inside the shield case. The Original batteries were CR2430....24mm wide. But there wasn't much room inside the case, so I thought about using the slightly smaller CR2032 batteries, 20mm wide, which allowed room for the holders inside the case. The actual power specs for the 2 different batteries were almost identical...probably just a little less power capacity in the smaller ones, but with the ability to easily replace them, I opted for the 2032's.
And since I know how we all love photos, here are a few images of the shield and the repair/mod process.
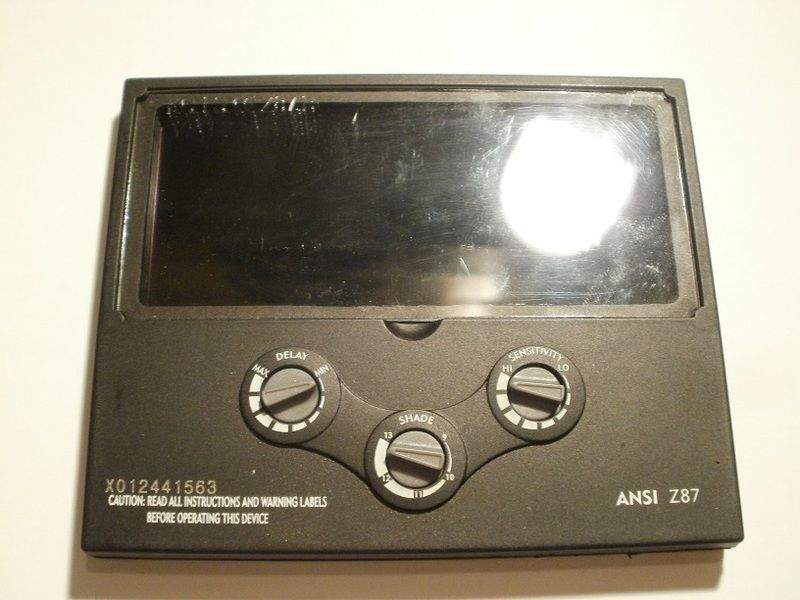
These first 2 just show the shield/ front and back.

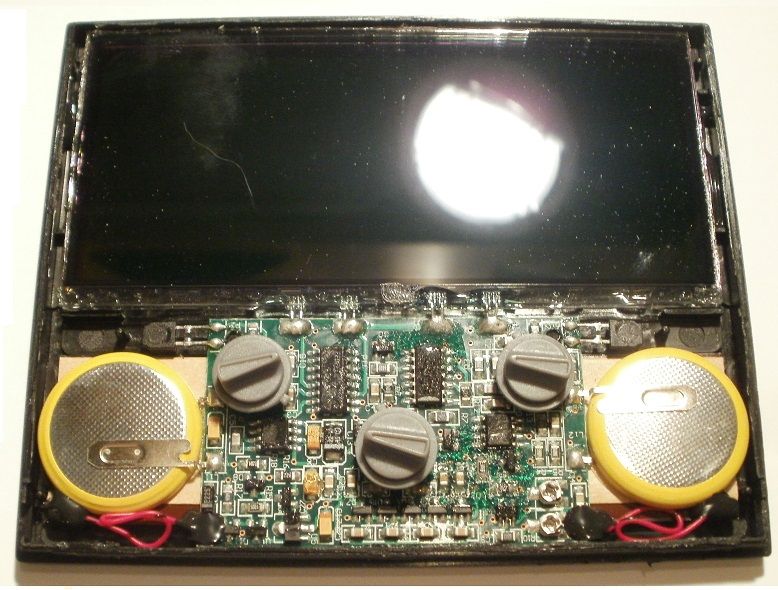
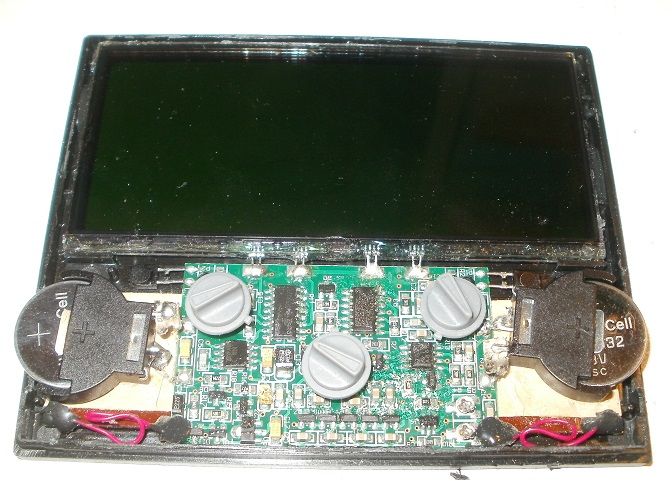
Here's the INSIDE view, note the batteries and the tangs soldered to the board.
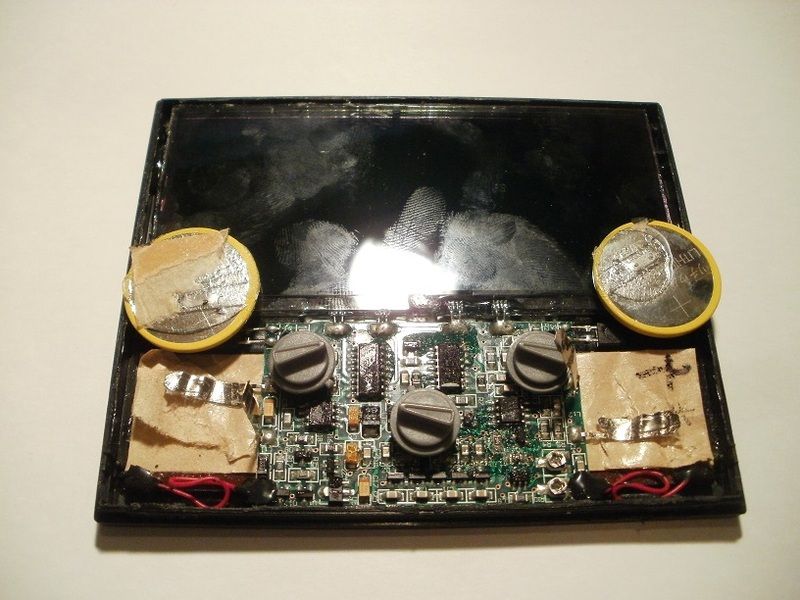
Here are the batteries removed from the tangs, just used a leatherman tool knife to carefully separate the welded tangs from the batteries, and I noted which tang was + and -, the batteries were silicone glued in place.
Here is showing the holder in position as a trial fit. I needed to cut out a bit of the plastic housing along the sides to allow the battery to stick out just to the edge, but also to allow a path to remove and replace the batteries after the holders are soldered in place.
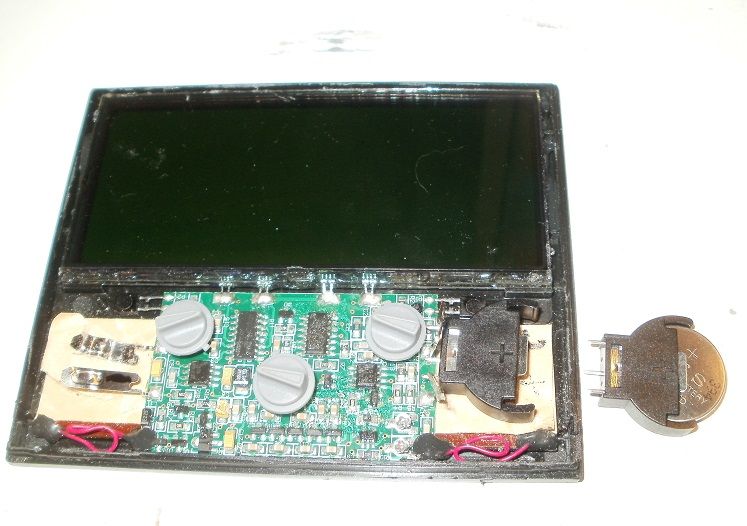
Here it is with the holders soldered in place, the batteries installed.
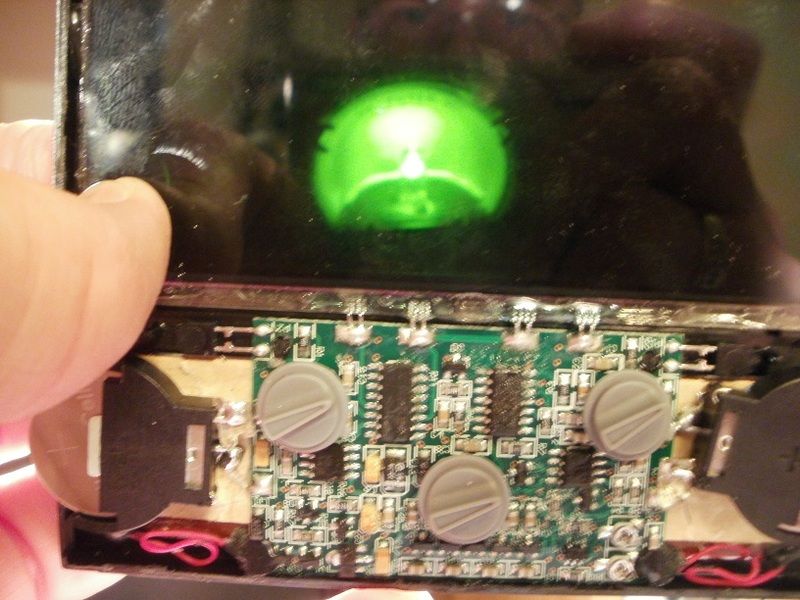
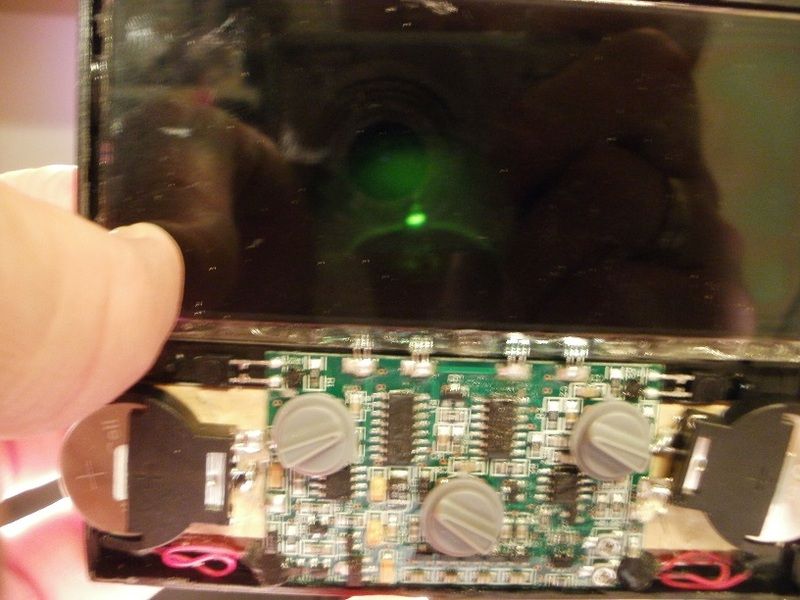
These show the view thru the shield at a very bright HALOGEN desk lamp, I had the shielding level turned all the way back to the least shielding at first, then all the way to the darkest level in the last image so you can barely see the halogen filament showing thru the shield. Sorry for the poor focus, but was at a fairly low room light level and the camera took a while to capture the image!")
The case cover would not totally close completely, but I secured the halves with electrical tape, and can still access the variable control knobs, and the shield will be held in place with a couple of brackets and thumbscrews into the helmet, so I consider it a success. A few bucks for the holders, a few bucks for the batteries, and an hour of time to do the mod....vs.the $25.00 or so for a completely new replacement shield.
T.C.
Haven't done much this winter tech wise, but recently I had to do some simple welding on an office chair cylinder that was blown/leaking, wouldn't maintain height, so I just welded it together to keep being able to use the chair, without having to spend the $$ to try to find a replacement piston/cylinder!
Well, while welding, my 110 x 90mm autodarkening shield would flicker and not stay protectively dark. I had both an older helmet that I had gotten from Harbor Freight, and then a newer one with better control settings ie. delay on, variable shielding level, trigger sensitivity, which worked better for my lower light triggering TIG welding rig and work. Both of them seemed to flicker/not darken properly. Thankfully, I only needed to do a few small beads,and was able to get it done without frying my retinas!
So...then I did some research on these screens/shields, looking to replace mine, but then also learned a bit more about how they worked. It was described as SOLAR and thought it was SOLAR powered by the energy from the welding arc light. BUT....it's just SOLAR triggered, the actual shading shielding is done by 2 little 3V lithium batteries inside the shield that work the LED shutters/filters. And so apparently they have run out of power after several years of use.
I then looked on YouTube about how to fix/repair the shield, and it involved replacing the batteries....but the ones they have are soldered onto the circuit board, and the tangs are spot welded to the battery. I found replacement batteries with the tangs already welded to them, but that would still require soldering them to the circuit board every time they needed to be replaced. Other techniques on YouTube showed connecting EXTERNAL type battery holders via wires, zip ties to the inside of the helmet and wires soldered to the circuit board, but that didn't seem very good to me, loose wires to snag and such.
SO...I found some 2/3 circle open battery holders that I thought could fit inside the shield case. The Original batteries were CR2430....24mm wide. But there wasn't much room inside the case, so I thought about using the slightly smaller CR2032 batteries, 20mm wide, which allowed room for the holders inside the case. The actual power specs for the 2 different batteries were almost identical...probably just a little less power capacity in the smaller ones, but with the ability to easily replace them, I opted for the 2032's.
And since I know how we all love photos, here are a few images of the shield and the repair/mod process.
These first 2 just show the shield/ front and back.
Here's the INSIDE view, note the batteries and the tangs soldered to the board.
Here are the batteries removed from the tangs, just used a leatherman tool knife to carefully separate the welded tangs from the batteries, and I noted which tang was + and -, the batteries were silicone glued in place.
Here is showing the holder in position as a trial fit. I needed to cut out a bit of the plastic housing along the sides to allow the battery to stick out just to the edge, but also to allow a path to remove and replace the batteries after the holders are soldered in place.
Here it is with the holders soldered in place, the batteries installed.
These show the view thru the shield at a very bright HALOGEN desk lamp, I had the shielding level turned all the way back to the least shielding at first, then all the way to the darkest level in the last image so you can barely see the halogen filament showing thru the shield. Sorry for the poor focus, but was at a fairly low room light level and the camera took a while to capture the image!
The case cover would not totally close completely, but I secured the halves with electrical tape, and can still access the variable control knobs, and the shield will be held in place with a couple of brackets and thumbscrews into the helmet, so I consider it a success. A few bucks for the holders, a few bucks for the batteries, and an hour of time to do the mod....vs.the $25.00 or so for a completely new replacement shield.
T.C.

 .
.
Comment