Godzilla Resurrection: Re-build thread

Collapse
X
 
  • Time
  • Show
Clear All
new posts

  • TopCatGr58
    replied
    Hey Mike,

    Spread out over 30 years, not so much seat time, did a lot the first 2 years once I got it back from Japan, my car died, and so I had to commute on it, was a 35 miles one way trip, so put a lot of highway miles then. Once got the money and the car fixed, the bike then became a leisure machine again. And this is just the 2nd chain....I did NOT replace the cam chain when I did the big bore in 2000, and then only put like 2k a year max since then. Yes, I've seen those eBay manual CCT's, but I just did the conversion of the OEM that was posted a few years ago.

    Thanks Brant, I guess I'm making progress, but taking 1 step foward and 2 steps back!

    Pulled the battery box and started to derust it with my assortment of wire brushes(have torn up several already ) and found some cancerous rust on the vent tube side/end! So...after getting as much rust as I could off, I then cut out the rotted section as per the BLUE LINE.
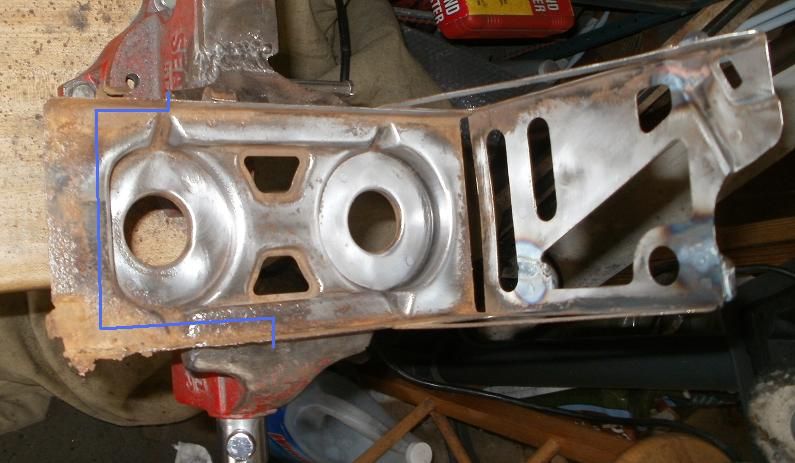


    I then grafted some slightly thicker plate material onto it. Also, because of the reduced width spacing of the custom side covers, so I had to mod the hold down bar, changing the bolt joint at the top to a solid corner, put a screw/bolt on the other end that will secure thru the battery box and a stabilizing bar. I'll then add a tightening bolt and anchor nut down at the bottom corner...but haven't fabricated that yet.
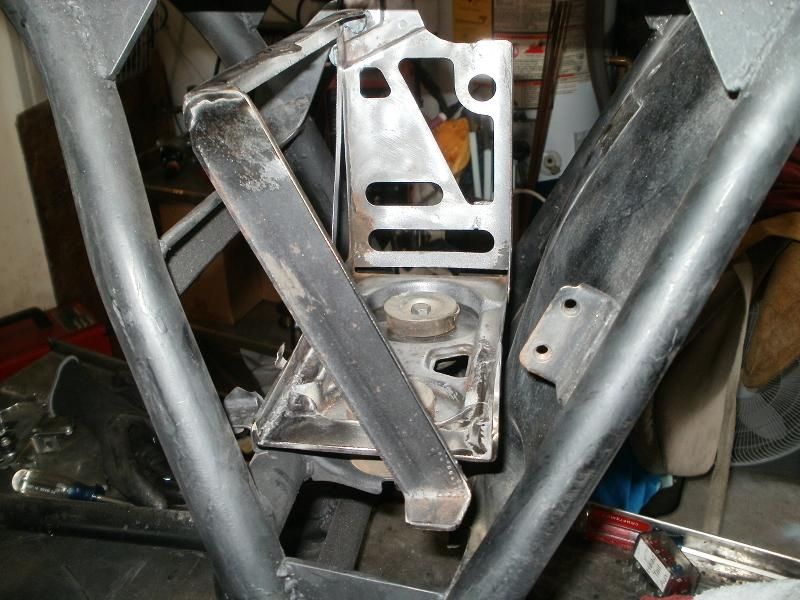

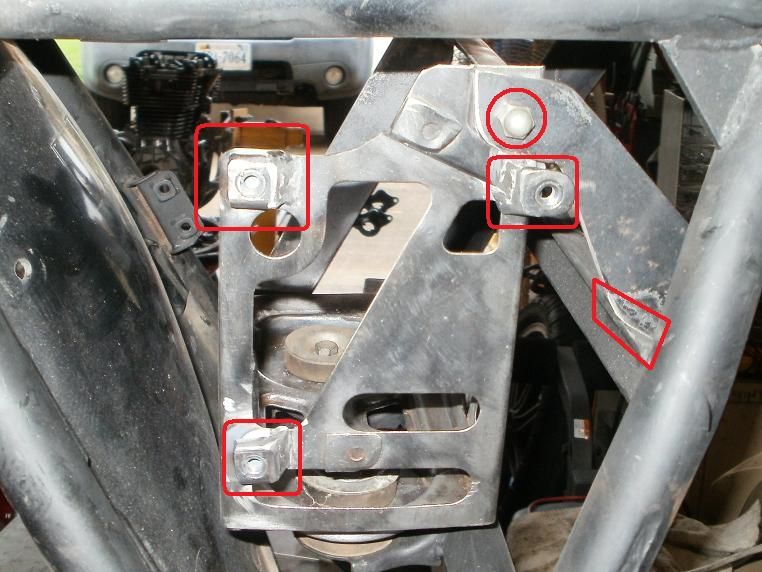
    Here's the other side of the battery box, showing the shortened/narrowed fuse panel mounting bracket/nuts, along with the anchor nut and stabilizing bracket for the top of the battery box. I had cut out the rubber stabilizing rings that were above the battery lock down bar.

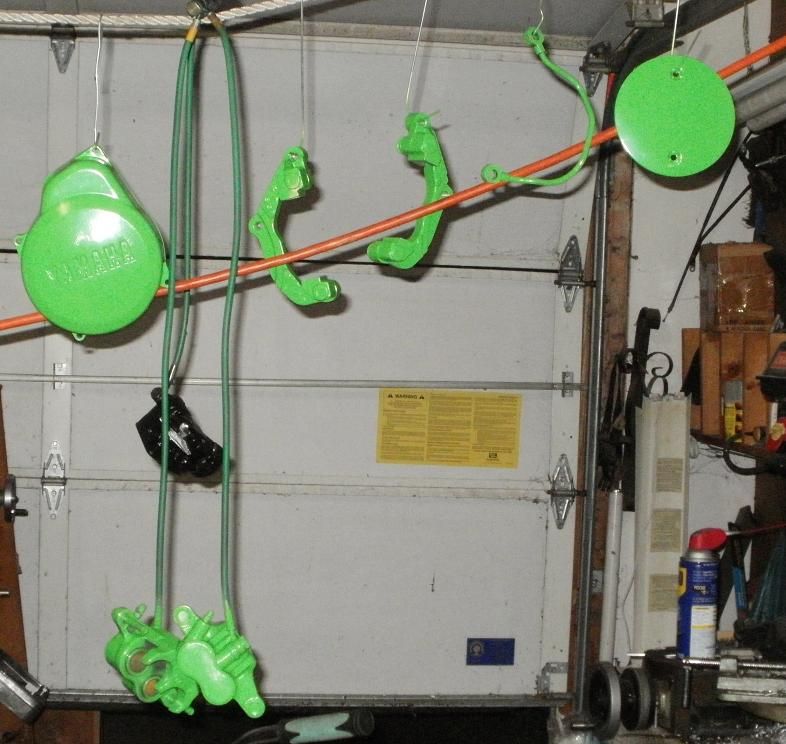
    And here is a shot of some of the BLING, wanted to get the rotors painted before they flash rusted. Also shows the clutch cover and one of the handlebar switch control boxes.
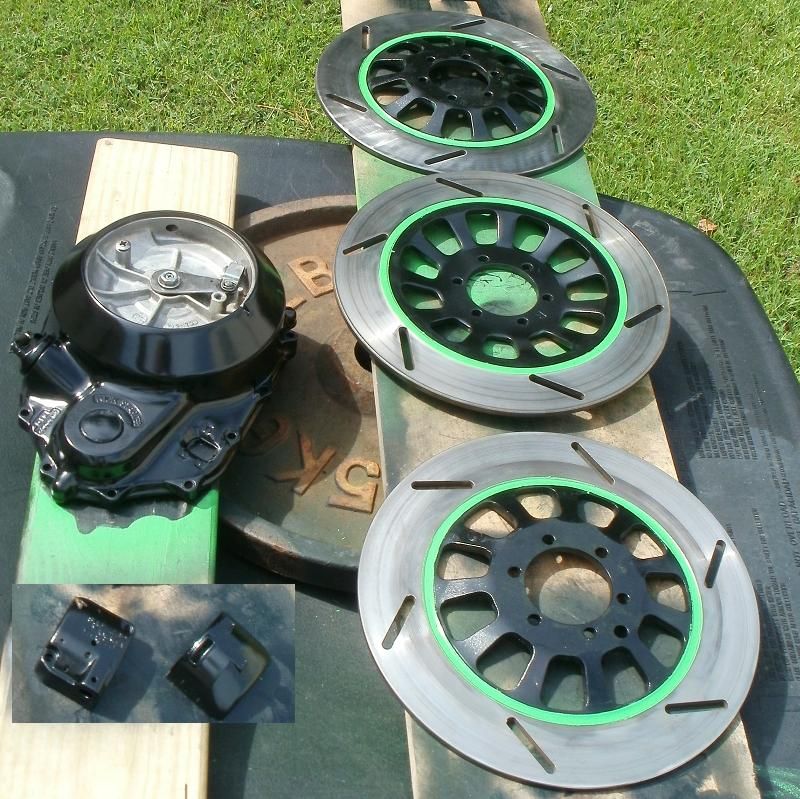


    Here's hoping YOUR Labor Day wasn't as Laborious as mine!

    T.C.

    Leave a comment:


  • MPittma100
    replied
    Cam Chain

    Originally posted by TopCatGr58
    ~75K miles, ~55K was the original, and some 20K with the new topend, but same cam chain, and was near the end of the OEM CCT adjustment range. I had converted to the Modded Manual CCT, but I had checked the plunger after had set the final adjustment and took it off, and it was at the end of the play.

    I have measured the shaft on my manual CCT and know how far out it sticks out from the housing, and know how far in it can go before it reaches the same distance equaling the end of the adjustment range as set by the OEM CCT plunger.

    T.C.


    Wow. Looks like you are on your way to wearing out your 3rd chain. That is a lot of seat time. I have seen an aftermarket manual adjuster offered on eBay recently.


    http://www.ebay.com/itm/NEW-1978-198...9SFjn1&vxp=mtr
    Last edited by MPittma100; 09-05-2016, 12:15 PM.

    Leave a comment:


  • motoman
    replied
    good to see your having progress T.C. For the kill switch assembly, toss all the pieces including the switch itself in shot glass full of Evaporust overnite......once rinsed off with water, even the switich itself will look as new.

    Leave a comment:


  • 3Phase
    replied
    That's very, erm "Green," you need sun glasses for that paint. It looks good!


    The crank seals are semi-pressurized by the bearing juice pressed out of the #1 and #5 bearings; some goes into the case, some goes into the seal gallery. The gallery has to to be able drop the pressure and drain the oil back into the case or it'd just build up and squirt out around the crankshaft past the seal like a very expensive supersoaker. Eeewww.

    Leave a comment:


  • TopCatGr58
    replied
    Originally posted by MPittma100
    T.C.,

    What was the condition of the old cam chain? How many miles were on it?
    ~75K miles, ~55K was the original, and some 20K with the new topend, but same cam chain, and was near the end of the OEM CCT adjustment range. I had converted to the Modded Manual CCT, but I had checked the plunger after had set the final adjustment and took it off, and it was at the end of the play.

    I have measured the shaft on my manual CCT and know how far out it sticks out from the housing, and know how far in it can go before it reaches the same distance equaling the end of the adjustment range as set by the OEM CCT plunger.

    T.C.

    Leave a comment:


  • MPittma100
    replied
    Cam Chain

    T.C.,

    What was the condition of the old cam chain? How many miles were on it?

    Leave a comment:


  • TopCatGr58
    replied
    Okay, thanks for clearing that up regarding the seal leak incidents....Rich, I remember now about the speedy sleeve. ViperRon, I didn't remember your series of problems..sorry! My seals required a bit of tapping to get them into place, had a good layer of RTV in the crankcase recess area to assist with the seal, and so now that we know it's not a pressure port, but just a drain, then hopefully mine will stay sealed and not leak. I do plan on getting it running and doing some tests prior to actually making the trip. Once I got my timing parts and rotor off, and saw that most of the oil leaking was actually the galley plug, so hopefully I haven't opened a can of worms!?

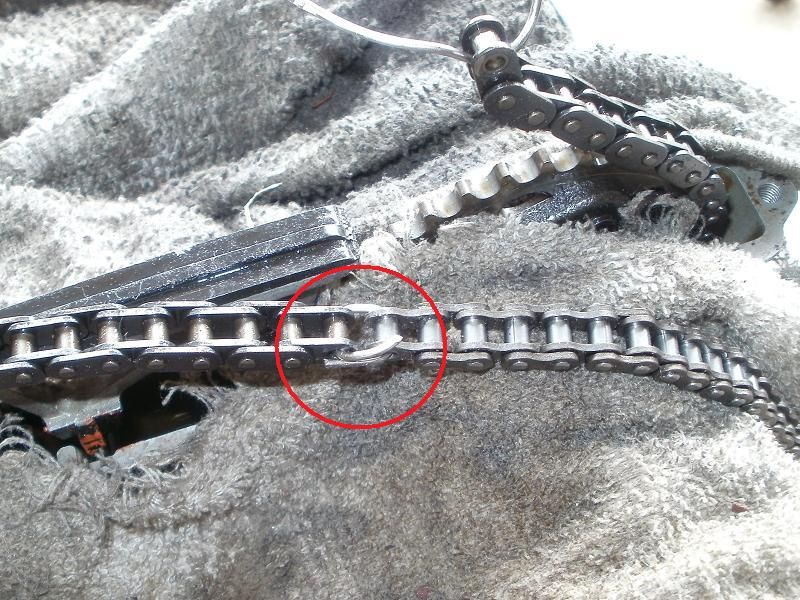
    Okay, on to today's progress, I worked on putting in the new cam chain. Tested the "CHEAP" chinese chain breaker/peener tool on the new chain first....it BROKE! Of course, it didn't come with any instructions...and I didn't realize that I needed to grind off the peened edges of the pins of the link I wanted to break first, and so the push out pin of the tool broke. SO I said, okay, I'll still try to use the peen part later! Used my Dremel to cut off the peened ends, and then was able to take apart the link. I then did the same thing to the chain on the bike.
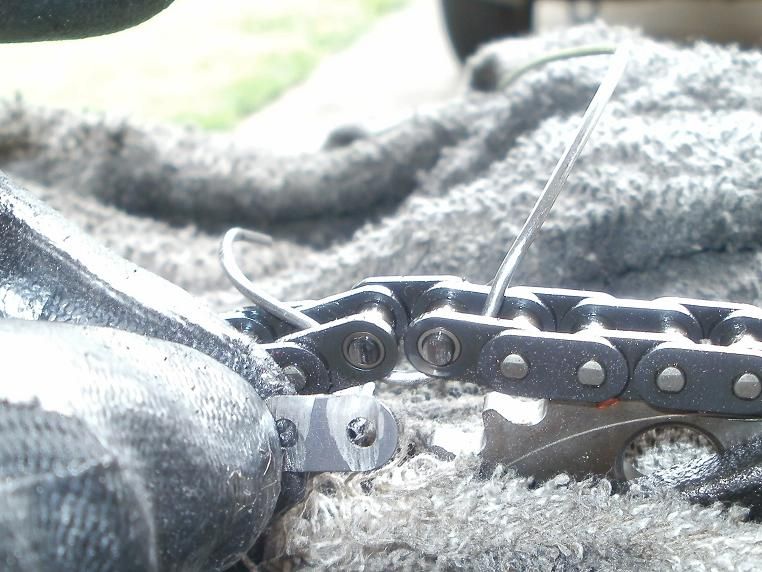
    I stuffed some rags around the chain/sprockets to keep from loosing stuff down the cam chain tunnel! I also used a stainless steel Tig Rod to secure the ends after cutting it apart.


    Then I used a section to secure the new chain onto the old one.


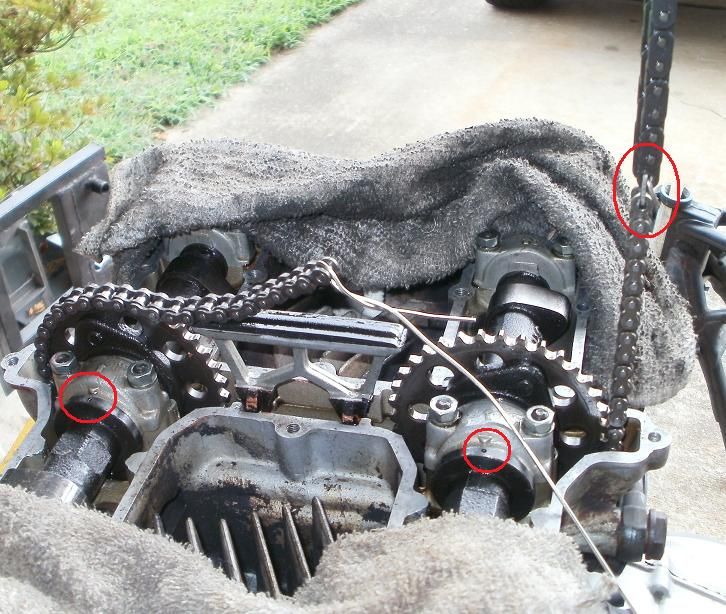
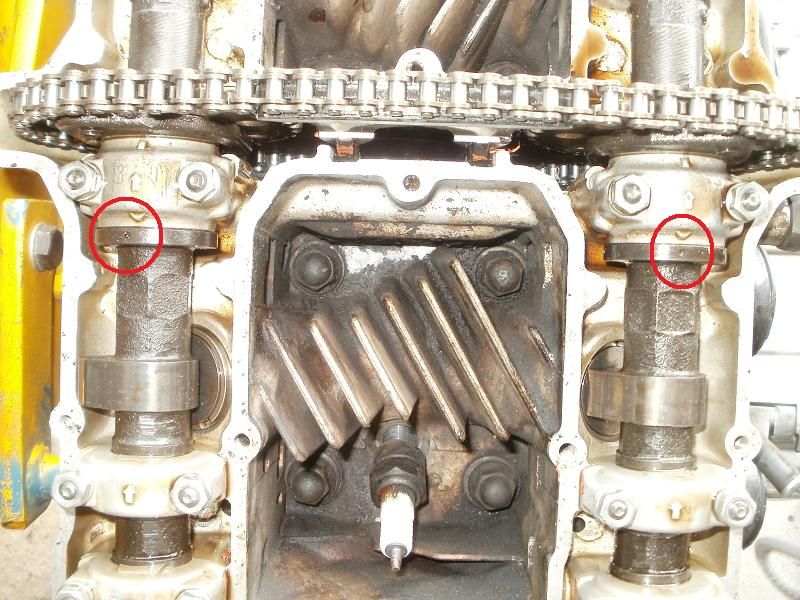
    Then I was able to simply fish it around feeding in the new one while gently pulling the old one out. Note the alignment dots of the cams.


    Got the new one lined up and secured. I tried using the peening tool, but it didn't work, and I ended up messing up the link. Thankfully I had ordered one separately, I had ordered the chain from GeorgeFix, but his eBay description didn't mention a link, and I had sent him a note about that, and so when it arrived, it had a master link with it, that's how I had 2! So..I used a couple of sledges as an anvil, and then used a large pry bar/drift to hammer/peen the link pins.

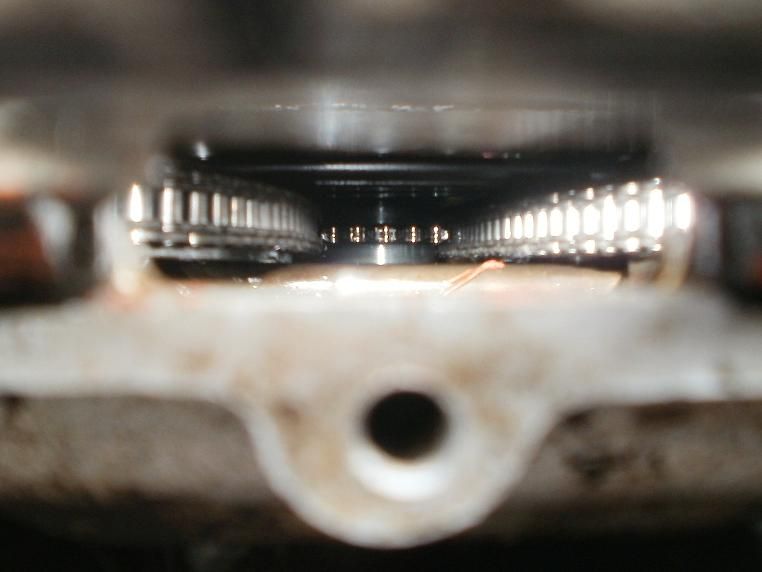
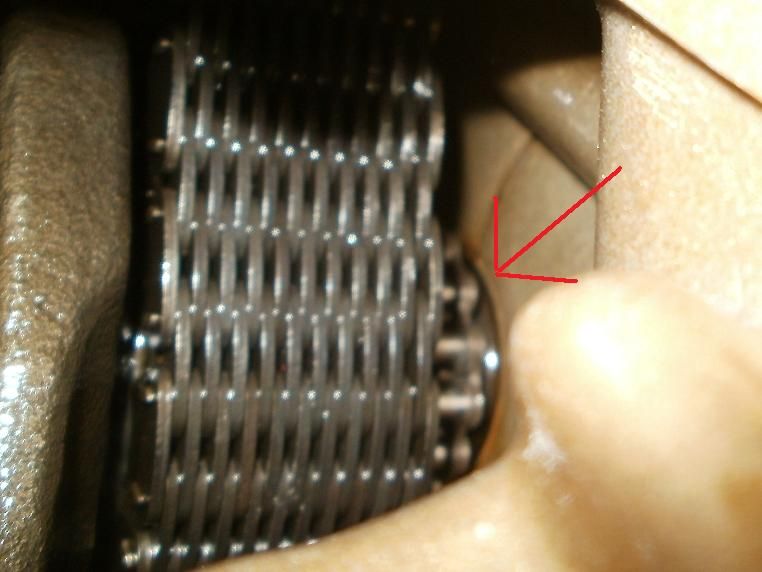
    Because of other folks posts about not having the cam chain on the crank sprocket, I checked both down the cam chain tunnel....

    As well as from the bottom side since I had the pan off anyways!


    After I set the CCT tension and rotated the crank around, I checked the cam alignment dots, and the exhaust ones didn't look quite right!


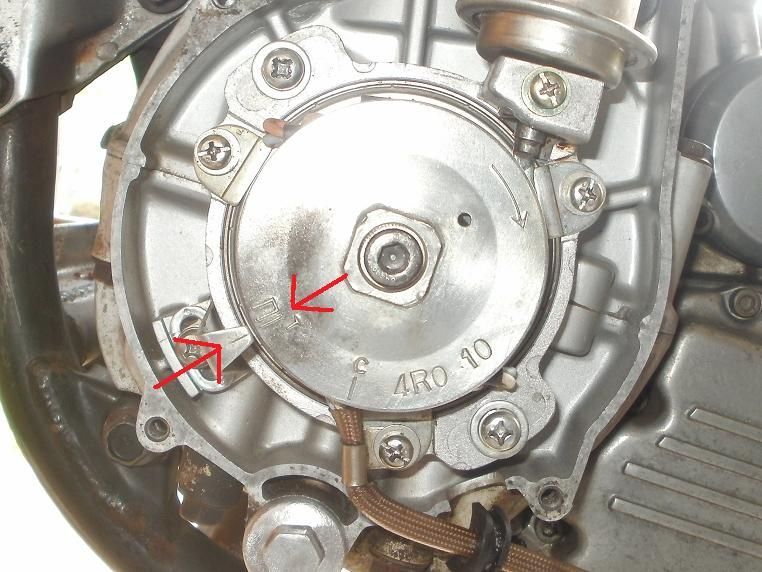
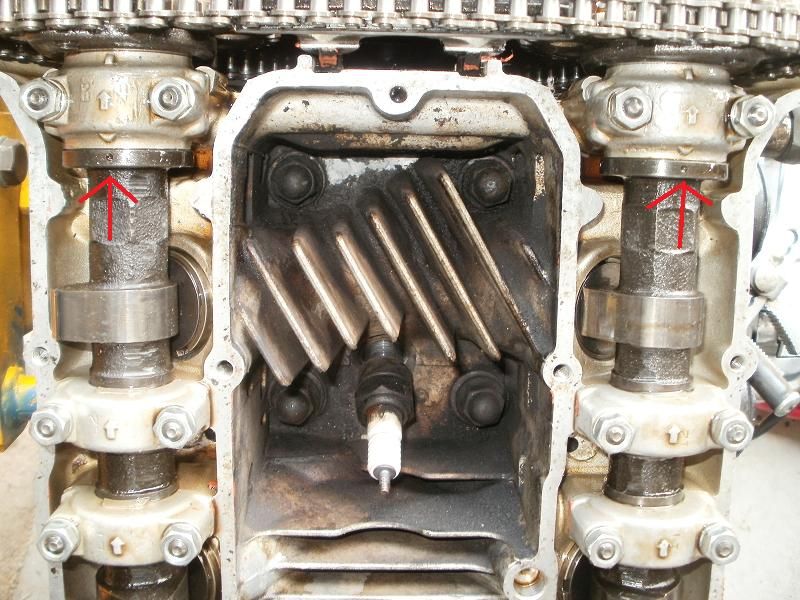
    So I figured that it was one tooth off. The way to adjust it is relatively easy. I rotated the cam 180 degrees...loosened and removed the opposing sprocket bolt, then rotated it again back to dots up, removed the upper sprocket bolt. I then loosened the CCT, pulled the sprocket off the cam shoulder, rotated the sprocket 1 tooth, put it back on the cam, then used a wrench to rotate the cam backwards to bring the dot more in line, and to line up the sprocket bolt hole, put the bolt back in, torqued, then retightened the CCT take up the slack, rotated 180 degrees and reinstalled and torqued the second bolt, and then rotated a couple of times and stopped at the "T" mark, and the dots were now perfectly aligned!


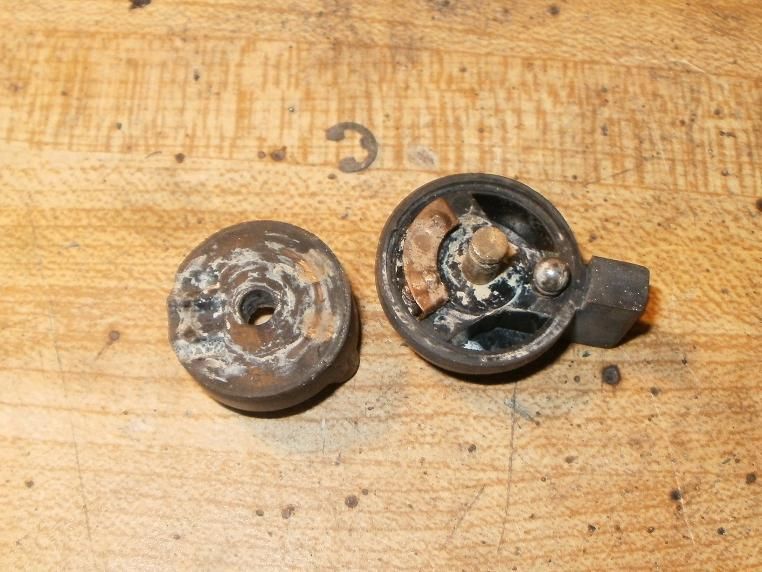
    Also got the new Barnett Springs installed. The old ones were ~39mm , the Barnett's are 43! And I didn't break my star plate in the process! Did a bunch of cleaning/prepping of other parts, like the handlebar switch sets, and while I was at it, took apart the Emergency Kill Switch....everybody talks about it, but nobody ever posted a photo so here's one! Note the dried/gunked grease and contact plate.


    And just a preview of some of the parts I have painted with the ENGINE PAINT I had that is very close to the Synergy Green....but it can stand up to HEAT, can't use the synergy paint for those parts, saving it for the tank/fenders/side covers!


    Hopefully I'll get the frame sorted out tomorrow, along with cleaning the engine and painting it and other stuff in preparation for reassembly!

    Leave a comment:


  • 3Phase
    replied
    There are drain holes behind the crankshaft seals on both sides of the lower engine case.

    Leave a comment:


  • ViperRon
    replied
    TC I was the one that had all the issue with the seal pushing out. I went threw 5 multiple types and a few of the dual lip Marty give the part number for. RTV failed every time Blue, Copper, High temp even when I used JB weld on the outside like you did. What has held (Legs crossed) was Indian Head gasket cement and on the outer lip instead of JB Weld I used the Aluminum repair paste. You can file it drill it tap threads in it and I do not know what dissolves it but gas and oil have had no effect.
    I sincerely hope to god you do not have the fun I had with the one under the timing cover. In-fact it left me scared, afraid to even look too hard at the generator side.

    You know you clean all aluminum dry with acetone tap seal in slathered in RTV. Clean all excess put JB Weld on outside then leave it set up for a week run it till it warms up throttle to about 4000 Rpms and then see smoke from where the seal pushed out against the timing mechanism.

    And say D%n it, I wish I'd never touched that F&!k*%g thing. But Mine was really leaking bad to begin with.


    I do suggest a good long test with fan running on engine before hitting the road as an issue on the street is bad news trust me been there and no one answers the phone to help.

    Now Yours may be entirely different Mine was not hard to tap in with a mallet. Most have described hammering them in.

    The single lip seal I tried actually leaked from the internal lip. The dual lips did not.

    Leave a comment:


  • MPittma100
    replied
    Speedi-Sleeve

    RichV

    "The corrosion was caused by the period of time that the bike was exposed to the environment. It was very small and hard to see and I wished I took care of it before I put the crankshaft back in. However, the speedi sleeve did a great job. Prior to that I went through about six seals."


    I know that the Speedi-Sleeves have been around for a long time and are available for any size shaft. Where did you get the one you used?

    Leave a comment:


  • MPittma100
    replied
    Oil Galley

    Originally posted by DiverRay
    Looking at the oil galley page, I think they are a return hole. Oil pressure is to the bearings all around, and everything else is "splash oiled". I'll look at my lower case in a few weeks when I get back to it.

    That is my thinking also. Drain back hole behind an oil seal is a common feature in automotive engines. Oil would flood and cause the seal to leak without a relief.

    Leave a comment:


  • DiverRay
    replied
    Looking at the oil galley page, I think they are a return hole. Oil pressure is to the bearings all around, and everything else is "splash oiled". I'll look at my lower case in a few weeks when I get back to it.

    Leave a comment:


  • MPittma100
    replied
    Oil Galley

    Originally posted by RichV
    I had a problem with some corrosion on the crankshaft that was tearing up the lips of the seal. I ended up putting a sleeve on the crankshaft and filing it around the edges so that it had a smooth surface for the shield to slide back on. I then RTV'ed the seal in place. Leak stopped for good. I also didn't plug the little oil supply hole. But I did see you all the way around the outside using the RTV.

    The corrosion was caused by the period of time that the bike was exposed to the environment. It was very small and hard to see and I wished I took care of it before I put the crankshaft back in. However, the speedi sleeve did a great job. Prior to that I went through about six seals.
    Does anyone know whether the referenced "oil hole" is actually oil pressure? Or is it likely an oil return hole?

    Leave a comment:


  • GLoweVA
    replied
    Originally posted by GLoweVA
    I'll check for a 270 shim first thing in the morning. Pretty sure i have one, but got to check.
    Ive got a 265 and a 280 and above.

    Leave a comment:


  • RichV
    replied
    I had a problem with some corrosion on the crankshaft that was tearing up the lips of the seal. I ended up putting a sleeve on the crankshaft and filing it around the edges so that it had a smooth surface for the shield to slide back on. I then RTV'ed the seal in place. Leak stopped for good. I also didn't plug the little oil supply hole. But I did see you all the way around the outside using the RTV.

    The corrosion was caused by the period of time that the bike was exposed to the environment. It was very small and hard to see and I wished I took care of it before I put the crankshaft back in. However, the speedi sleeve did a great job. Prior to that I went through about six seals.

    Leave a comment:

Working...