-
I'll check for a 270 shim first thing in the morning. Pretty sure i have one, but got to check. -
TC,
That's great! Home Depot & Lowes Fasteners are not for bikes or cars! We have an ACE here that has a small selection of 10.9 rated metrics.
Those foot pegs are nice! I upgraded to XJ Pegs on all my bikes. If I can find an even wider and better looking option, I will make that move too. Looking forward to seeing those at XSSE.
No damage from the hurricane I hope?
KURTLeave a comment:
-
Just my 2 cents, I would be wary standing up on those softer aluminum pegs when hitting a pot hole or train tracks at 40 MPH, the steel IMO is much stronger, aluminum may snap with that added stress/weight.Leave a comment:
-
Hey Kurt,
Thanks, I have a REAL local hardware store, they have lots of metric stuff, Stainless, Grade 8.8 and such. I got a bunch of bolts, flat and lock washers, crown nuts, most in Stainless, along with a few other bits, ran to about $75.00!! Took me over an hour to do that shopping....finding the right sizes...had made a long list Friday Night noting the size/pitch/length and type, socket or hex head, etc.! Then did the regular household shopping, so I didn't get to start working on the bike until around 3pm today after late lunch!
I got some stuff done, specifically the crank shaft seals....and have an interesting twist on doing it. I remember reading about RichV and the several attempts he went thru to get his seals in and NOT leak....can't remember if it was more due to a double lip on the crank side, or just getting the RTV to seal and hold them in place?? So..I thought about that for a while and then came up with what I think is a good simple solution!
First, the photos! I may make a tech tip out of this if you guys think it merits it.
BTW, I switch from the left to right side just because of the different steps that I photodocumented...got in a hurry on the first side!
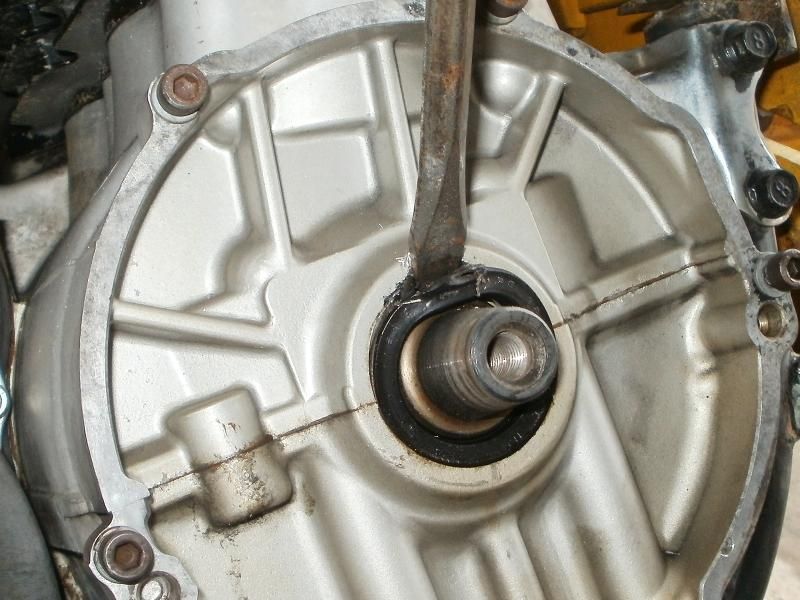
First step, pry out the old seal with a flat blade screwdriver and hammer.
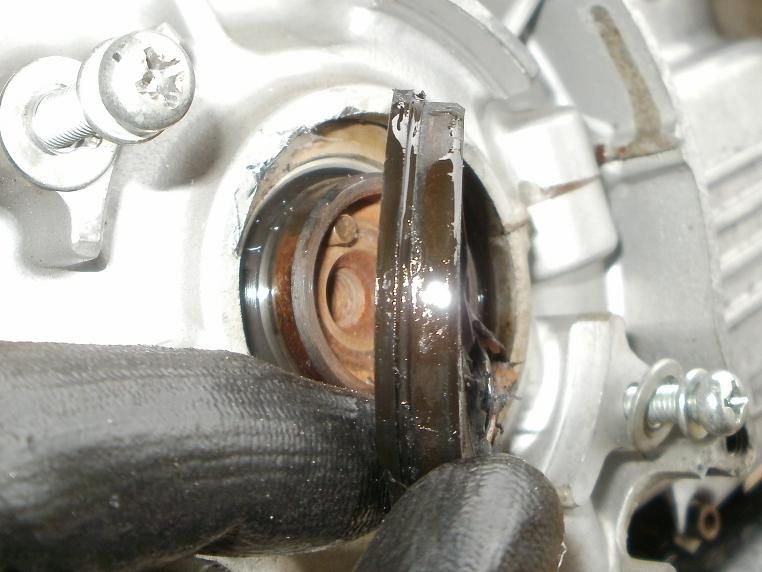
Here is the sideview showing the inner LIP edge of the OEM seal.
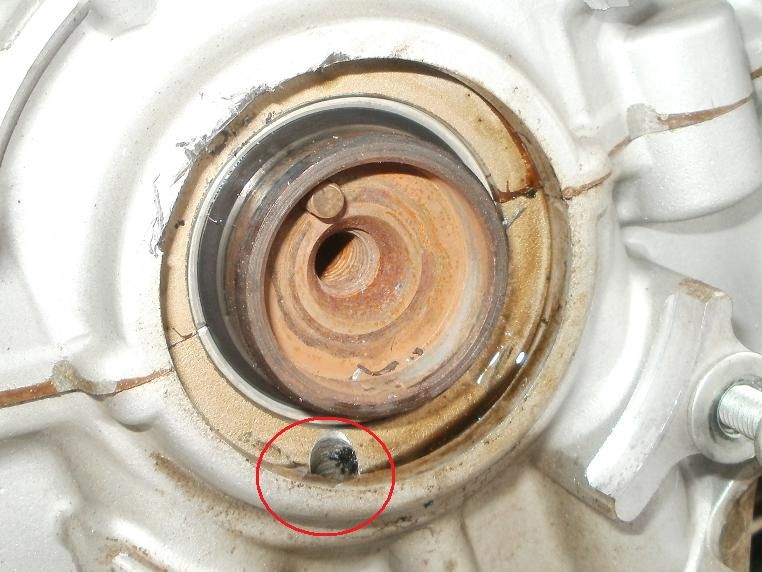
This shows the area of the crank case, and what's interesting is the oil galley hole at the bottom...that I remember reading about someone saying that it didn't do anything!?
But then I thought about it more, and it opens just behind the seal, and so I think it actually provides lubrication to help keep the seal and it's contact surfaces with the crank lubed?? And so there's Oil PRESSURE coming out of that port, and that's partly why the seal has to have an internal LIP to help keep it in place against that pressure. And so folks have installed lipless replacement seals so that they wouldn't have to split the cases, and have used just RTV and the tightness of the seal to try to hold it in place.
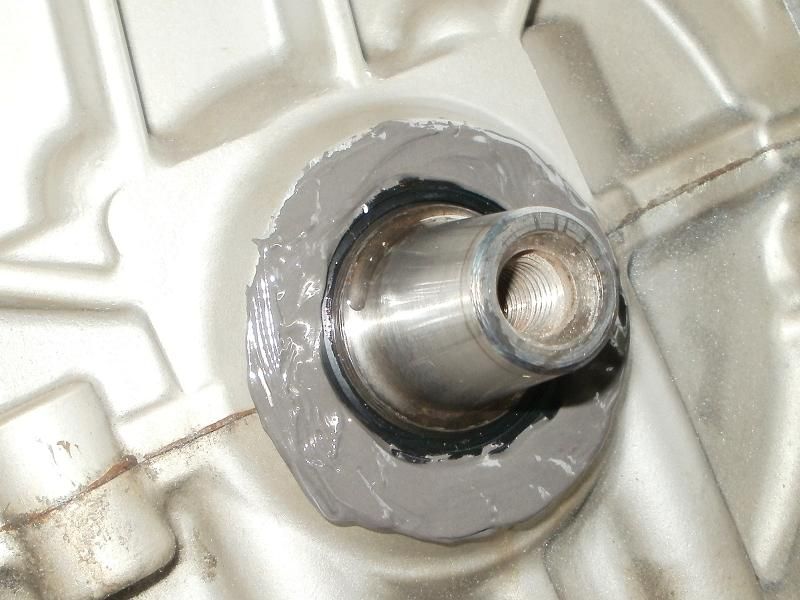
So....my idea was to try to provide a better securing method of the seal after it's been inserted. This image shows the seal already in place, but also that I've roughed up the edges of the crankcase for better sticking grip!
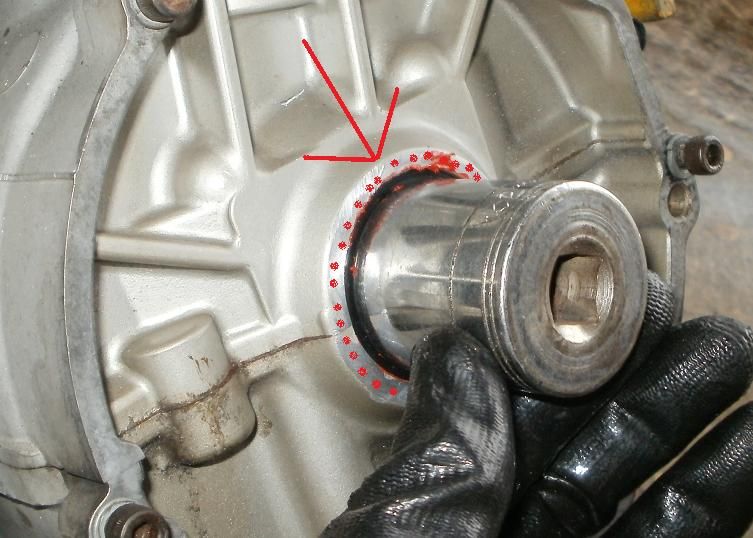
And here's my solution to prevent the seal popping out. I mixed up a batch of J-B Weld
and slathered a nice layer around the seal just a mm or so away from the crankshaft, but plenty of it all around the seal and crankcase which I hope will provide the support the seal will need to keep it from being pushed outwards by the oil pressure.
I didn't get to replacing the cam chain....was checking my valve clearances, all within spec but 2 intakes...they were both .004", modded the Motion Pro tool to get it to work, found one shim was 280 and had a 275 that I could swap. The other one had a 275 and needs a 270, but all I have is a 265 which will be too loose!
George, do you have any shims, specifically a 270??
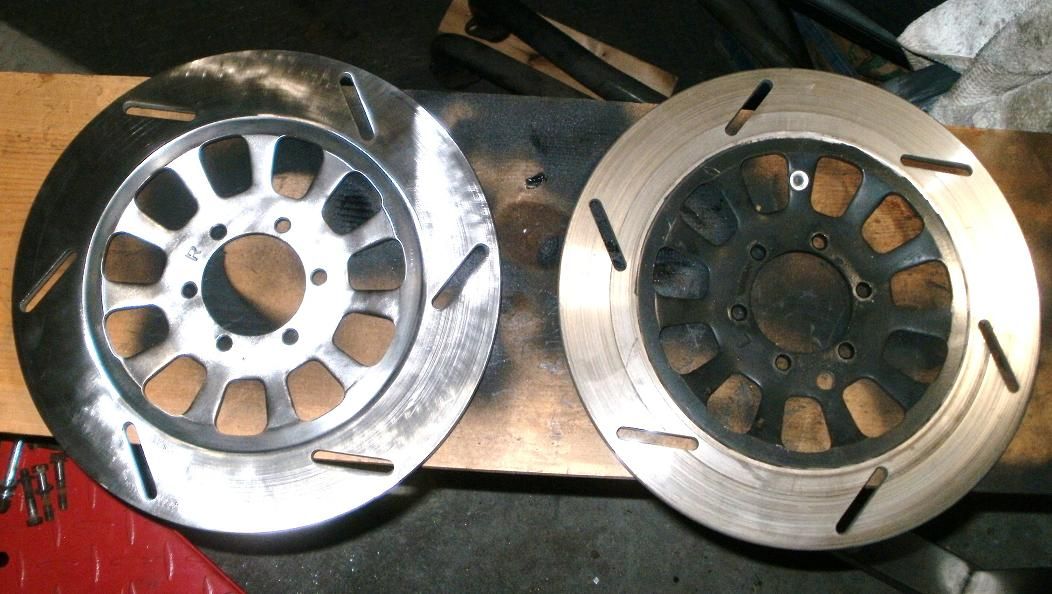
Here's a photo of the Rotors after I cleaned one up compared to the other old one. At least they are ready for painting now!
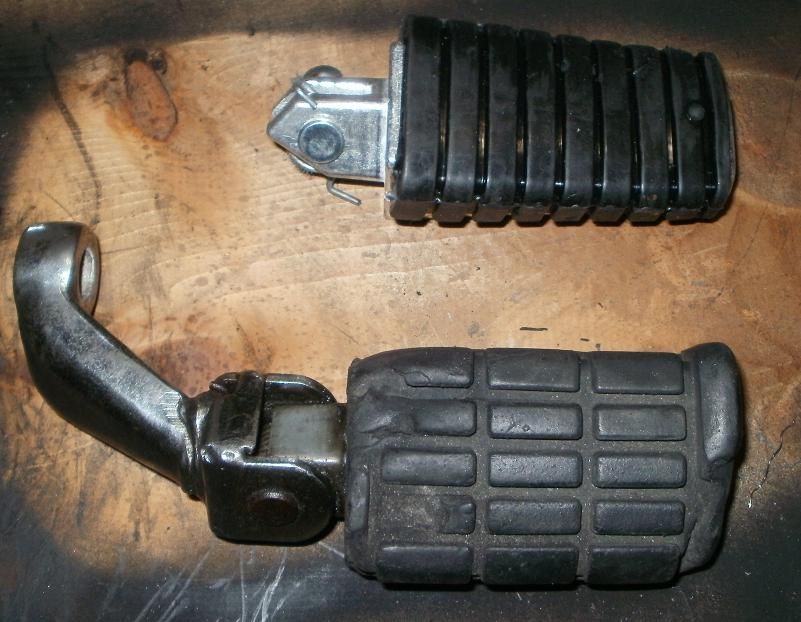
And Kurt, here's a shot of the OEM Special footpeg and the replacement from a Yamaha cruiser IIRC? The shape is quite different, and it's aluminum instead of steel, and from looking at it, looks like it won't STOP in the correct position. I think I will be able to weld a stop brace down inside the OEM part to stop the peg in the right position.
T.C.Leave a comment:
-
Cleaners
Someone brought their airplane to a GA mech friend of mine. He had to tell the owner his airlane was totaled and would never fly again. The owner had been cleaning the airplane with Simple Green. It got under fayed surfaces and destroyed it. Watch what you lut on aluminum.Leave a comment:
-
Fastenal
TC,
I know you are pressed for time and may not have the option BUT if there is a FASTENAL Location near you (it would seem likely) they will have the higher grade fasteners not typically available at most hardware stores. The prices will be comparable. Unfortunately, they are 8-5 Mon-Fri so that may not be a good option being pressed for time...
That's where I get all my hardware....
Just a thought........... FWTW
KURT
11861 Canon Blvd. Ste O/P Newport News VA 23606 (757)591-2658
408 Aberdeen Road Hampton VA 23661 USA (757) 838-0079
7712 Hampton Blvd. Norfolk VA 23505 (757) 625-6041
5650 East Virgina Beach Blvd Norfolk VA 23502 (757)853-2695
602 Port Centre Pkwy Portsmouth VA 23704 (757) 399-1602
4007 Seaboard Court, Suite 5-7 Portsmouth VA 23701 (757)465-7870Leave a comment:
-
Leave a comment:
-
Hey Mike,
I appreciate it, but I'll be painting it BLACK as part of the black contrast to the bright Synergy Green parts...similar to the Camaro scheme. So...Skids, black after oven cleaner wouldn't be a bad thing anyways, but I think the gloss black will work and look okay after degunking as best I can.
Worked on cleaning the front MC and brake calipers, it's amazing how much time it takes just in the CLEANING process. Despite the Hurricane event, I'm thinking about going ahead and painting some of the smaller parts and then putting them on newspaper IN the climate controlled/dehumidified HOUSE environment to allow them to attain some level of dry/curing. Might even slip a few things into Swmbo's OVEN for a little while!

I'll be doing a bunch of shopping at the local hardware store for lots of nuts/bolts, stainless steel and chrome. Stay tuned....feeling the time pressure though!
T.C.Leave a comment:
-
oh and HAPPY Labor Day to all of the Brothers out there...
 stay safe my Brothers...
Leave a comment:
-
myself... replace if the tires are bad... no worse thought than rolling and have a blow out... you could tube them but there go's a free spin balance... TC the project is coming along wonderfully... hats off...Leave a comment:
-
-
TC if you want to use over cleaner, test it on a small area where the aluminum is exposed. If I remember correctly, it turns aluminum BLACK!Leave a comment:
-
-
Engine
TC,
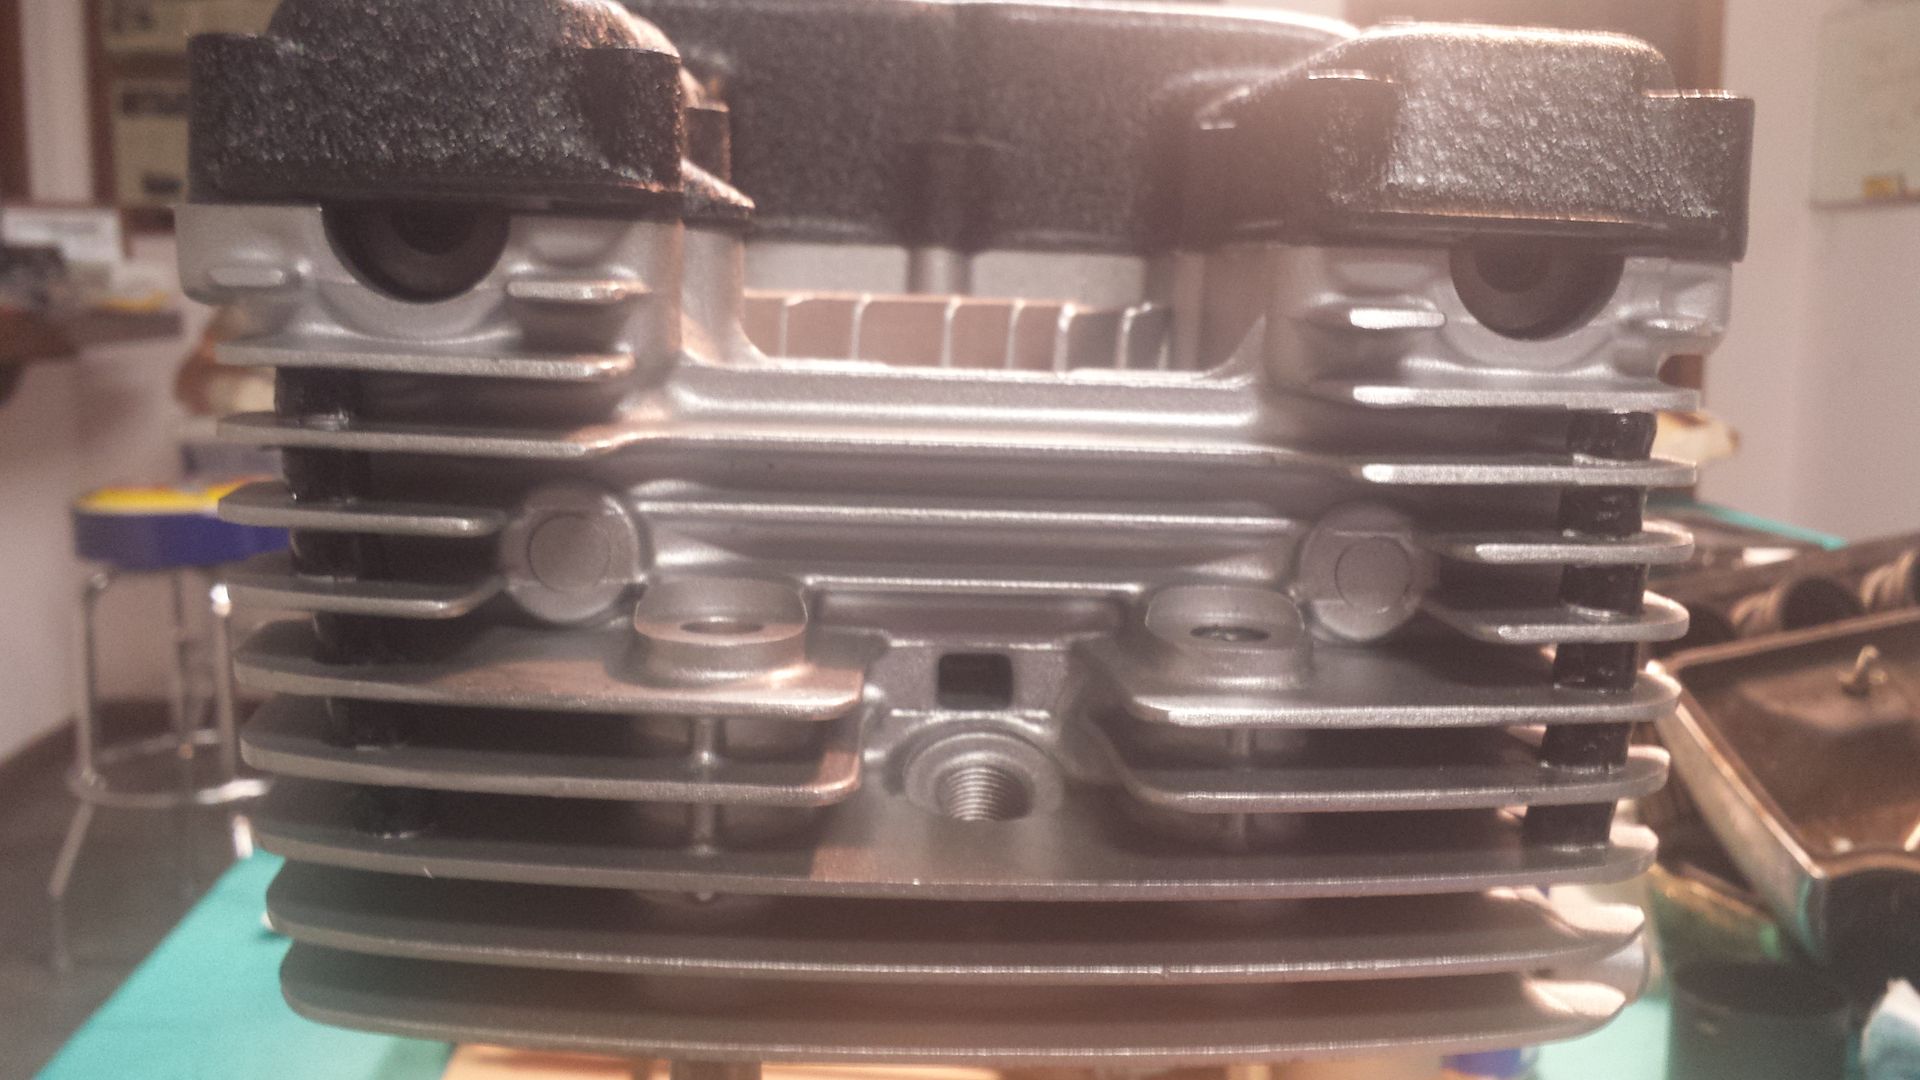
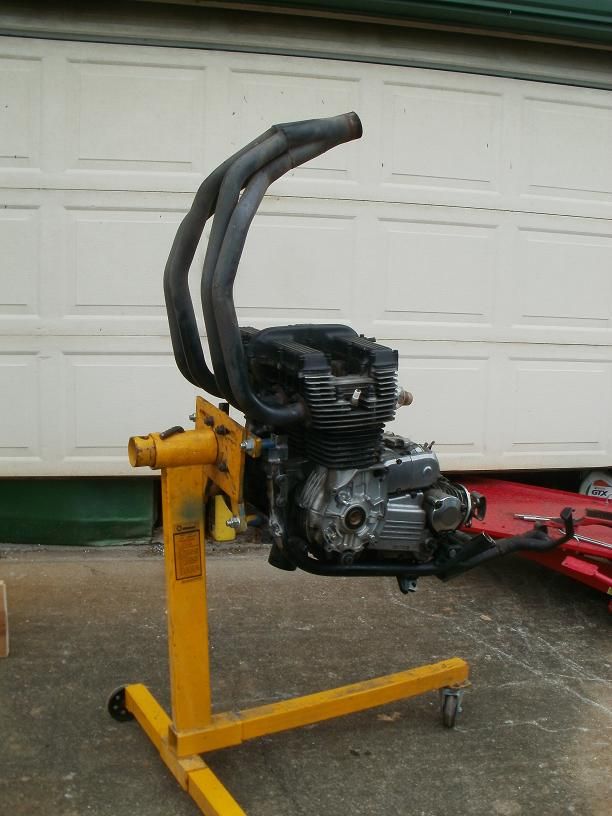
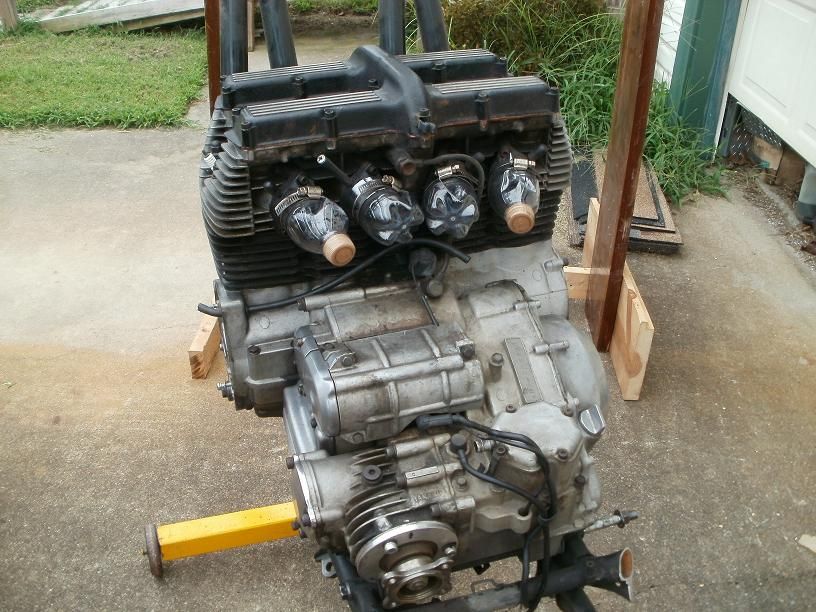
Get the engine as clean as you can and then spray paint it with aluminum (rattle can). No need to use clear. It will look new and original. No one has produced a cleaner "yet" that will perfectly remove 30+ years of deterioration.
 Last edited by MPittma100; 09-02-2016, 09:29 AM.
Leave a comment:
-


Leave a comment: