

-
Glad you are OK!
T.C.,
Wow! Glad you are OK! I've BTDT! I was porting & polishing some SBC Heads a couple years ago and felt something hit my eye. Two days later and the rusty piece of metal was easily visible in my eye. The optometrist removed it and patched me for several days.
I occasionally get stupid and forget or neglect to put on my safety glasses when doing this type of work. Gosh, I hope I never get crap like that in my eye again!
Thank you for the reminder.... Doing SIMILAR work today....glasses will be ON MY FACE!
KURTLeave a comment:
-
Sorry, still no photos,
I got a little delayed today, was doing some heavy metal grinding last night fitting the saddlebag support structure to the frame and making room for the shocks and such, and apparently got some piece of grinder flack in my left eye, irritated me even during my sleep, and was still there this morning! Thankfully, I work for eye doctors, called up one of them and had them meet me at the office this morning, and he was able to remove it from my eye. It was just at the edge of the clear/cornea and conjunctival junction, no patch required. But that set me back a couple of hours!
I think I finally got the frame completed! Almost forgot to make some brackets to hang the coils from, but since I had put those extra braces around the neck area, the OEM hanger bolts would not fit anymore! I welded some bolts to some angle brackets, and then welded the brackets to the hanger structure on the frame. Then I wore out another round wire brush cleaning up the frame in preparation for painting. If I had realized how long this process would have taken, I would have started months earlier to allow time to get it properly powdercoated....but PAINT has worked for 30 years, guess it'll work for a few more! Also primed the sidecovers, and cleaned and painted the valve cover.
So...tomorrow I HAVE to get the wiring harness straightened out, along with the engine cleaned/painted, and then I can start ASSEMBLING it! Also have the wheels/rim to clean/paint, and the rear MC/Caliper rebuild, clean/paint. And also to paint the tank, sidecovers, fenders, and then assemble them also! TICK TOCK ! !
T.C.Leave a comment:
-
TC, I think you'll appreciate this thread :
http://www.st-owners.com/forums/show...ST1100-painted
If it were not such a pain, I'd post a picture.Leave a comment:
-
-
Dawn works great but do not let it get to a dry point while in sun shine it can discolor the paint. Any thing harsh enough to cut grease can be ruff on paint just thought I'd make sure people here understand so they do not damage their paint like my girl friend did her vehicle.Leave a comment:
-
Apparently a 50:50 mix of household ammonia and simple green makes one hell of a great grease cutter. The guys at www.owwm.org use it sometimes for stubborn stuff. That and blue Dawn with hot water are popular there for restoration paint prep work.
I've not tried it, but will try it soon when i work on my xj and my new 75 year old bandsaw...Leave a comment:
-
lol... sometimes I do get a touch'excited when it comes to these older bikes, and to see the care/professionalism that you and the others here put out to share... and yes, I did find another 79special, she needs to be cleaned up but she has my junkie heart strings... you can see her at my profile page...Leave a comment:
-
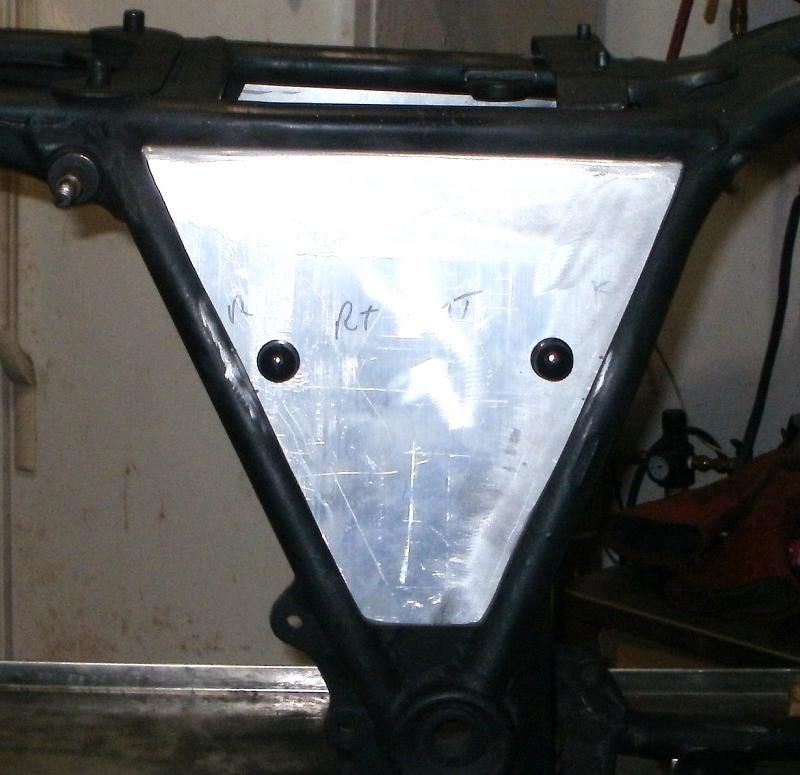
TC Clean off the marker on the aluminum as it will bleed though your paint.
I would use acetone or alcohol.
PhilLeave a comment:
-
A little more progress
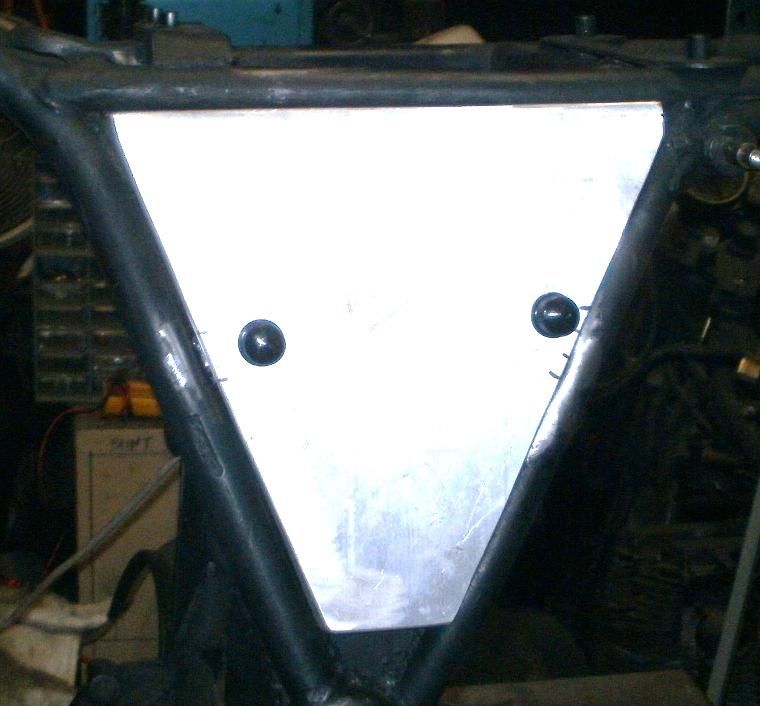
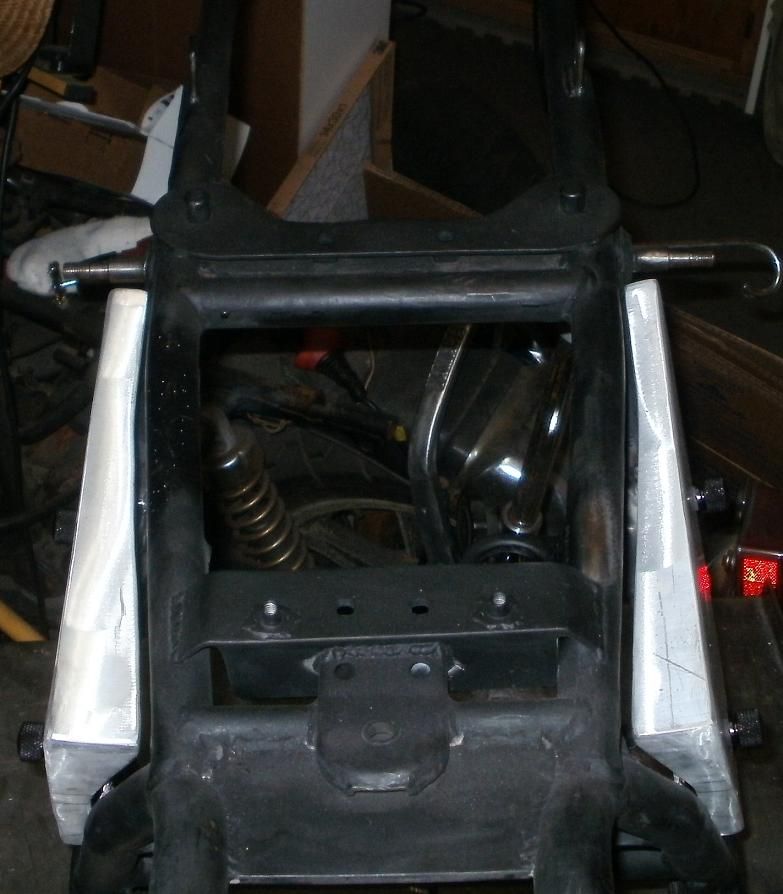
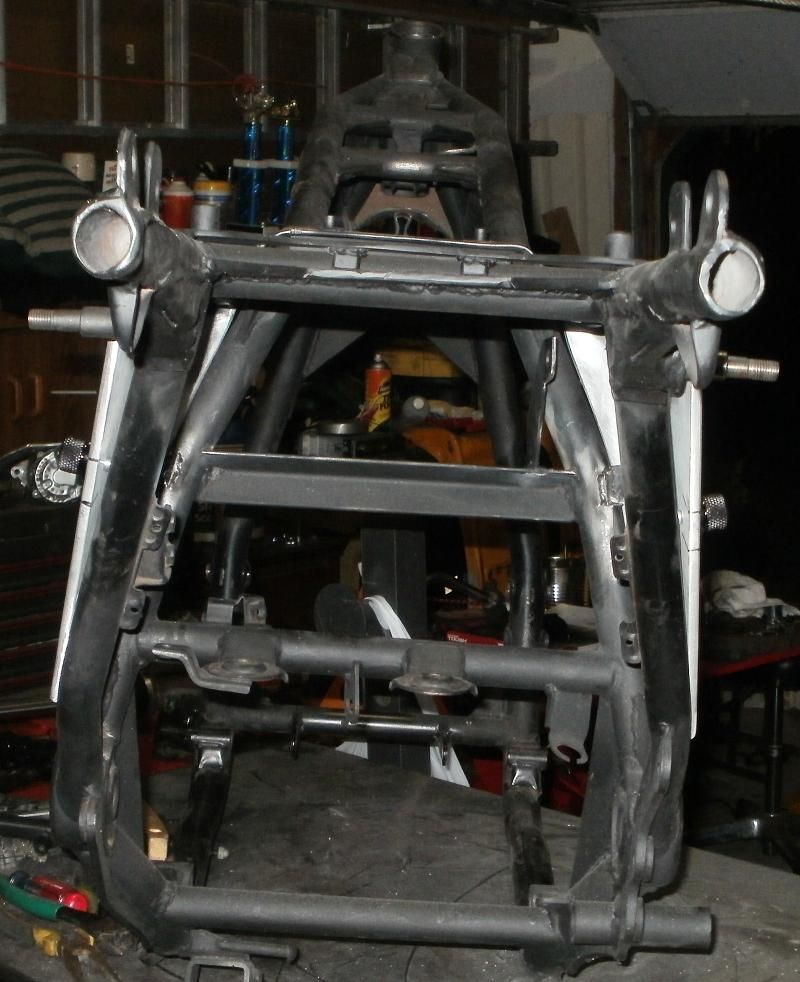
Okay, got the side cover brackets made/mounted. I had described in a much earlier post my plans on how I wanted to mount and secure the sidecovers using more than just basic screws/bolts. I had ordered 6 black knurled knobs that are usually used for securing a Harley Seat, but thought the solid black would be a nice contrasting accent to the green covers(they aren't painted YET). BTW Rich....let me have some of what you're smokin'!  Thanks for the comments, just trying to make it functional and aesthetically appealing as well.
So...here's tonight's photos:
T.C.Leave a comment:
-
a magic "man"... TC... you are introducing the next "gen"... nice...XSing, play the music.... forward.... wonderful... here is where we find tomorrow.... nice job "guy's...." for the record, can I get an "amen"!..? 11SX interface..! (green is a Momentum), black is best but hey its a shared world.... Nice "TC"... you are in the world of black and bright green.. (wonderful)... internally shafts to the pavement... "If we are not rolling then someone has a word to share..." peace on brothers... Me'Man...Leave a comment:
-
Hey George,
Thanks for checking, no problem, went to Casey Cycle City at lunch, they exchange shims...for a nominal fee of $5.00 PLUS giving them a shim. But I got the 270 needed, installed and it's good to go!
I completed the battery box, reinstalled/welded one of the upper rubber stabilizer rings on the left side along with the alignment pin back onto the tie down bar. The right side has that other welded bracket for the right side. Also put the lock down nut in the bottom edge of the tray. Yesterday I also welded the VIN # plate onto the frame neck.
Have only 10 days to get it to a point to where it will run and can get inspected, but these are just 8 evenings of 2-3 hours each, and the coming weekend.
Still need to do the rear MC and caliper rebuild and painting. Engine cleaning, painting. Valve cover cleaning/painting with custom accent. Paint the gas tank, fenders, side covers, as well as the frame, install the steering bearings and races. Have to adjust the grab rail some more for better fitment, will probably involve cutting off the rail's mounting brackets and welding them back on repositioned. Also need to customize the saddle bag frames and mounts moving them forward a few inches, and a new backrest built in with the trunk frame support. Also still need to fab/weld the side cover mount tabs.
I want to trim a lot of fat off of the wiring harness, I have the 1 wire ALT with built in Reg/Rect. I don't want/need the light checker stuff, also the automatic headlight relay....will be using a regular relay instead with a separate handlebar switch.
Also want to clean and paint the rims, swap out the rear tire, install the new tire valve, and of course reassemble the rims/rotors. Yeah, I'm liking the green accents, have plans for a few more here and there, just hope it matches the body panel Synergy paint.
Once everything is ready to go, assembling the bike surprisingly won't take that long, it's just all of the PREP stuff!
Yeah, Greg, it keeps the raccoons from getting into the trash!
T.C.Leave a comment:
-
TC its looking good... love the green... you are both patient and professional... "wonderful my friend, simply wonderful..."
Leave a comment:


Leave a comment: