 Tweet
Tweet
Honestly, I would do a real die grinder over a dremel. dremels don't spin fast enough or have enough power. I actually burnt the motor on a dremel doing this task once.
-
1980 XS850SG - Sold
1981 XS1100LH Midnight Special (Sold) - purchased 9/29/08
Fully Vetterized and Dynojet Kit added, Heated Grips, Truck-Lite LED headlight, Accel Coils, Irridium plugs, TKAT Fork Brace, XS850LH Final Drive & Black SS Brake lines from Chacal.
Here's my web page devoted to my bike! XS/XJ User's Manuals there, and the XJ1100 Service Manual and both XS1100 Service manuals (free download!).
Whether you think you can, or you think you cannot - You're right.
-H. Ford -
If you know what bits you need...harborfreight has cheap air die grinders if
you have access to a compressor...good luck79 XS 1100 Special "Basket Case"Comment
-
You need a pretty high volume compressor to keep up with an air rotory tool.Greg
Everybody is a genius. But if you judge a fish by its ability to climb a tree, it will live its whole life believing that it is stupid.”
― Albert Einstein
80 SG Ol' Okie;79 engine & carbs w/pods, 45 pilots, 140 mains, Custom Mac 4 into 2 exhaust, ACCT,XS850 final drive,110/90/19 front tire,TKat fork brace, XS750 140 MPH speedometer, Vetter IV fairing, aftermarket hard bags and trunk, LG high back seat, XJ rear shocks.
The list changes.")
Comment
-
I don't have access to an air compressor... I have a die grinder, but it's not the kind that takes the kinds of attachments I need & I'm not buying a different one... I just need to know if the dremmel-type tool I'm buying with the attachments it comes with is good enough for this one job. I'm on the way to Harbor Freight already tho, so if no one can answer that while I'm here I'll just find out for myself. I'll be back with the results.>>Insert clever statement here<<Comment
-
I just got a 1 speed plug in type dremmel from WallyWorld for about 20 - 25 bucks. One of the screw in brush holders broke and it has electrical tape wrapped around it holding it together now but it still works just fine.
You can get one of those rotory tool bit sets from HF or any cheap tool store that works just fine and it'll come with other bits that can be used elsewhere.Greg
Everybody is a genius. But if you judge a fish by its ability to climb a tree, it will live its whole life believing that it is stupid.”
― Albert Einstein
80 SG Ol' Okie;79 engine & carbs w/pods, 45 pilots, 140 mains, Custom Mac 4 into 2 exhaust, ACCT,XS850 final drive,110/90/19 front tire,TKat fork brace, XS750 140 MPH speedometer, Vetter IV fairing, aftermarket hard bags and trunk, LG high back seat, XJ rear shocks.
The list changes.Comment
-
Hey there,
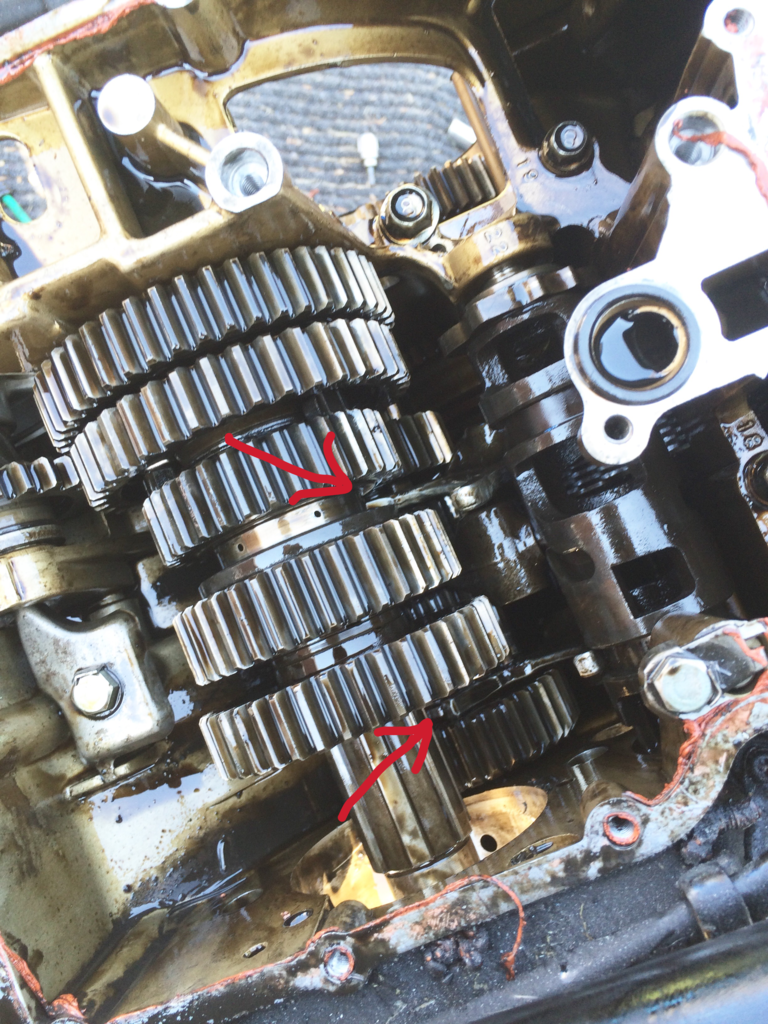
The HF advert doesn't describe the dimensions of the grinding stones it comes with. It does say that it will take 1/8 and 1/16 sized bits, which I assume will hold the Dremmel stones. In the tranny tech tip, I specify which bits I used that worked to fit into the SLOTs for cutting/grinding them at the proper angle, and is the right size to match the curvature.
The other stone is a large flat round one for the dogs on 2nd. The HF also showed a slightly smaller one, but not sure if it's small enough to fit into the 1st/4th gear flat slots, so you may still need to get the ones I mention which are chain saw sharpening ones that are small enough to allow you to get into the flat slots effectively.
T.C.T. C. Gresham
81SH "Godzilla" . . .1179cc super-rat.
79SF "The Teacher" . . .basket case!
History shows again and again,
How nature points out the folly of men!Comment
-
Progress?
Well I've made it this far, so there's no turning back now...
I'll be going back to HF tomorrow & I'll check to see if I have the right bits or if I need to buy them... (Guess I should've skimmed ahead in the instructions again). Hopefully this project will be done tomorrow tho. (Ran into a stripped shifter cover bolt I had to grind/drill out, and then realized I didn't have a big enough socket for the clutch bolt, but again... Another trip to HF & I should be ok.)>>Insert clever statement here<<Comment
-
While you're there, don't forget to get the NEOPRENE O-ring set, you'll need a new one to replace the old one when you take the oil pump off and put it back on. Also, make sure you have the good quality fitting TORX bits for the 3 screws on the oil bearing cap on the side. They are locktited in place, be careful not to strip them, and then use blue locktite when you put them back in.
T.C.T. C. Gresham
81SH "Godzilla" . . .1179cc super-rat.
79SF "The Teacher" . . .basket case!
History shows again and again,
How nature points out the folly of men!Comment
-
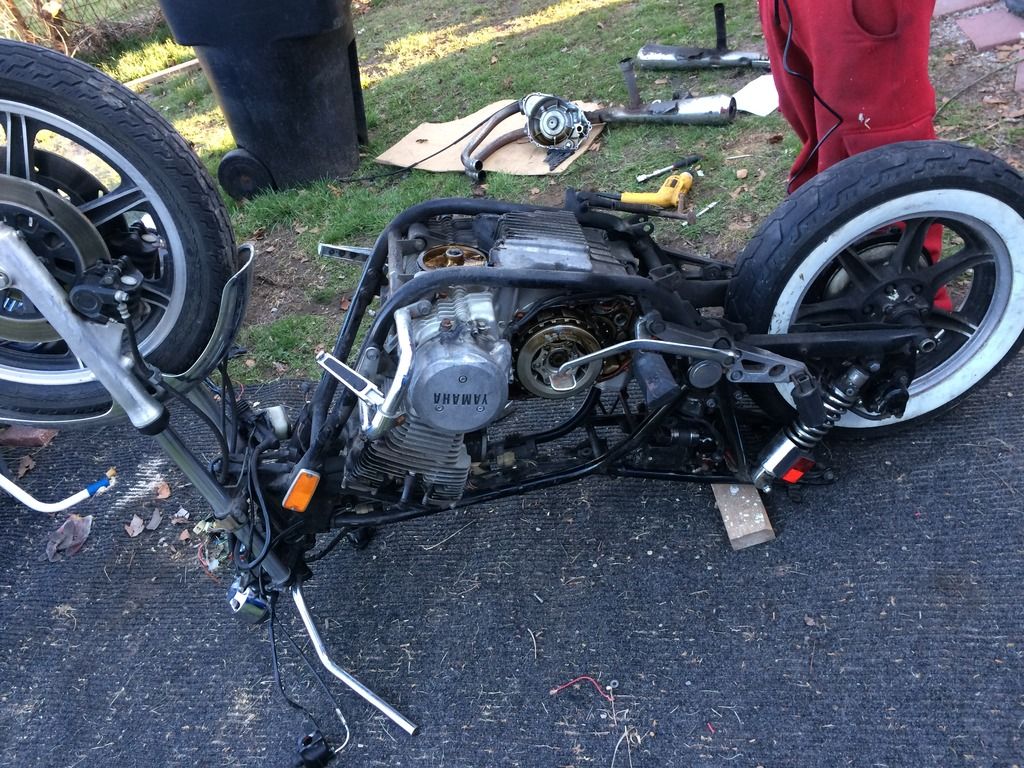
The only negative I see here is you should have removed the oil pan BEFORE flipping the bike. Any metal chunks or stray washers/nuts that may have fallen or been dropped down in there over the last 35 years are now up in the engine.Greg
Everybody is a genius. But if you judge a fish by its ability to climb a tree, it will live its whole life believing that it is stupid.”
― Albert Einstein
80 SG Ol' Okie;79 engine & carbs w/pods, 45 pilots, 140 mains, Custom Mac 4 into 2 exhaust, ACCT,XS850 final drive,110/90/19 front tire,TKat fork brace, XS750 140 MPH speedometer, Vetter IV fairing, aftermarket hard bags and trunk, LG high back seat, XJ rear shocks.
The list changes.Comment
-
If you have any help there with you...you might want to think about sitting upright again and see if anything falls out...I'm sure you would have noticed
anything like metal in you cover when you took it off...chances are there was
some muck left on the inside of the pan/cover...???79 XS 1100 Special "Basket Case"Comment
-
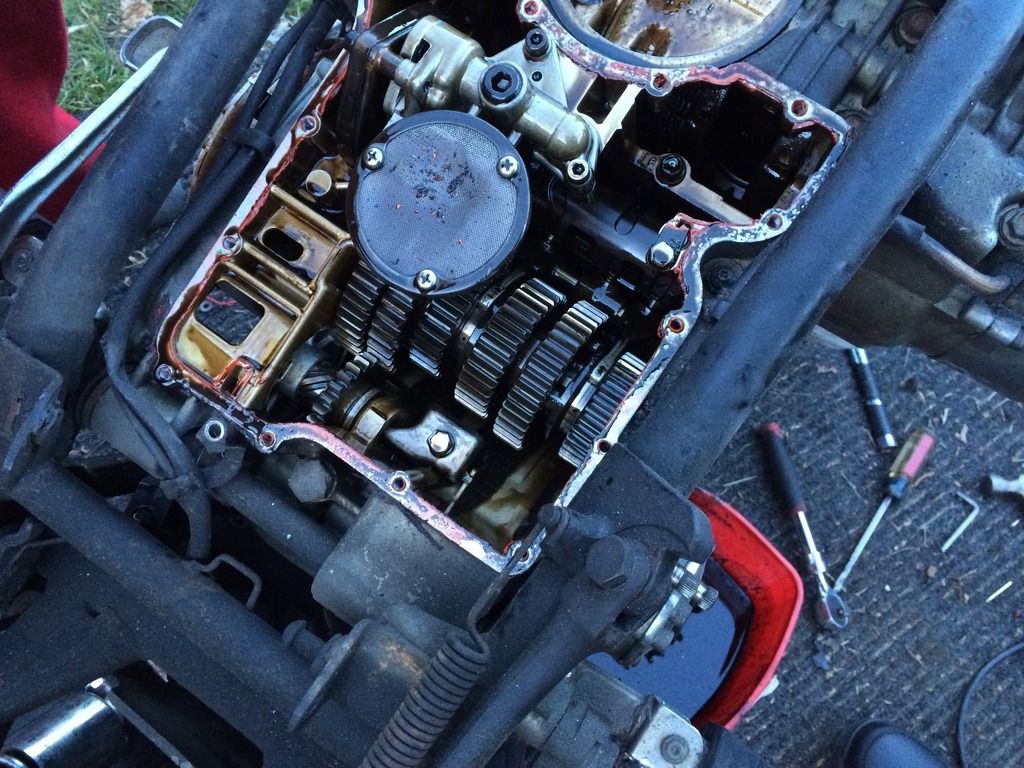
I've ran into a bit of an issue...
I've gotten 5th gear out, but that's it...
I've removed everything the instructions said remove (I believe), but I can't get the rest of the gears out... What am I doing wrong?
Also, after I got the first shift fork to fall down by pulling the shaft out a little, it then said two more would fall after pulling it out the rest of the way...
I ONLY SEE ONE MORE... Am I blind? Could it have fallen somewhere I can't see it?? Could it be possible a PO neglected to put it back in??? (Because clearly this has been opened before judging by all the orange gasket sealer in there, unless that was factory standard)
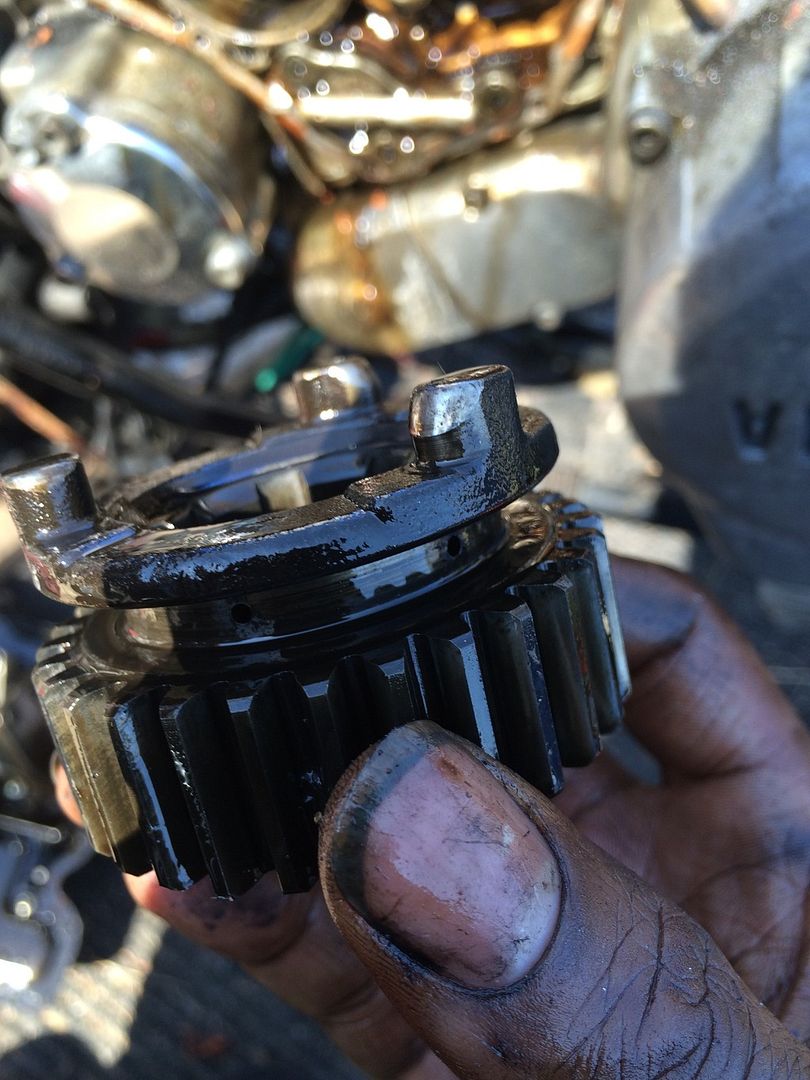
I also bent the two small c clips on the little gear that connects to the shift lever taking them off because I didn't use the proper tool... Anybody know the size of them, part number, or where I can get alternative replacements???>>Insert clever statement here<<Comment
-
There should be 3 shift forks total. They are marked 1 2 & 3. Pay attention to where they go.
I may have missed it but what year is the engine you are working on? ( first 3 digits in the serial # stamped in the case)Greg
Everybody is a genius. But if you judge a fish by its ability to climb a tree, it will live its whole life believing that it is stupid.”
― Albert Einstein
80 SG Ol' Okie;79 engine & carbs w/pods, 45 pilots, 140 mains, Custom Mac 4 into 2 exhaust, ACCT,XS850 final drive,110/90/19 front tire,TKat fork brace, XS750 140 MPH speedometer, Vetter IV fairing, aftermarket hard bags and trunk, LG high back seat, XJ rear shocks.
The list changes.Comment


Comment