Announcement

Collapse
No announcement yet.

Battery terminal boot fix

Collapse
X
 
  • Filter
  • Time
  • Show
Clear All
new posts

  • Battery terminal boot fix

    I'm sure there's a lot of us that have the same problem - cracked, dry, deteriorated battery terminal boots. It's not like they really do much, but every time I look at one in that condition it kind of bugs me. But fear not gentle readers, I've got a fix for you.

    I took a spark plug wire distributor boot out of a set of universal wires I used to do my coils, opened the plug wire end up with a 3/8" drill bit, and snipped off about 1/4" of the part that's supposed to go over the distributor terminal, put a little WD40 on the rubber part of the wire, slipped the boot over it, and voilĂ  - brand new battery terminal boot for zero dollars and zero cents.

    If I have to do it again - which I will on Betsy - I'll cut the distributor part of the boot back flush with the underside of the "wire end". But this is my brother's bike, and if he wants it perfect he can pull the terminal back off and fix it. And I'm positive this would work for the boot on the other side of that short wire too.

    Here's a few pics -

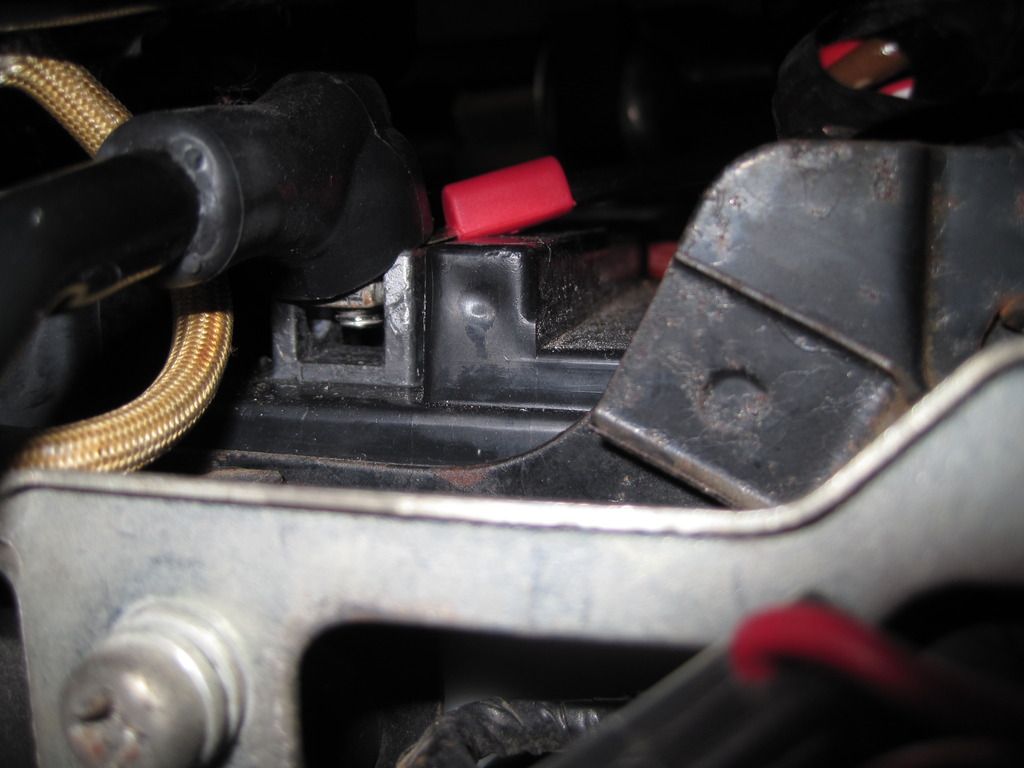
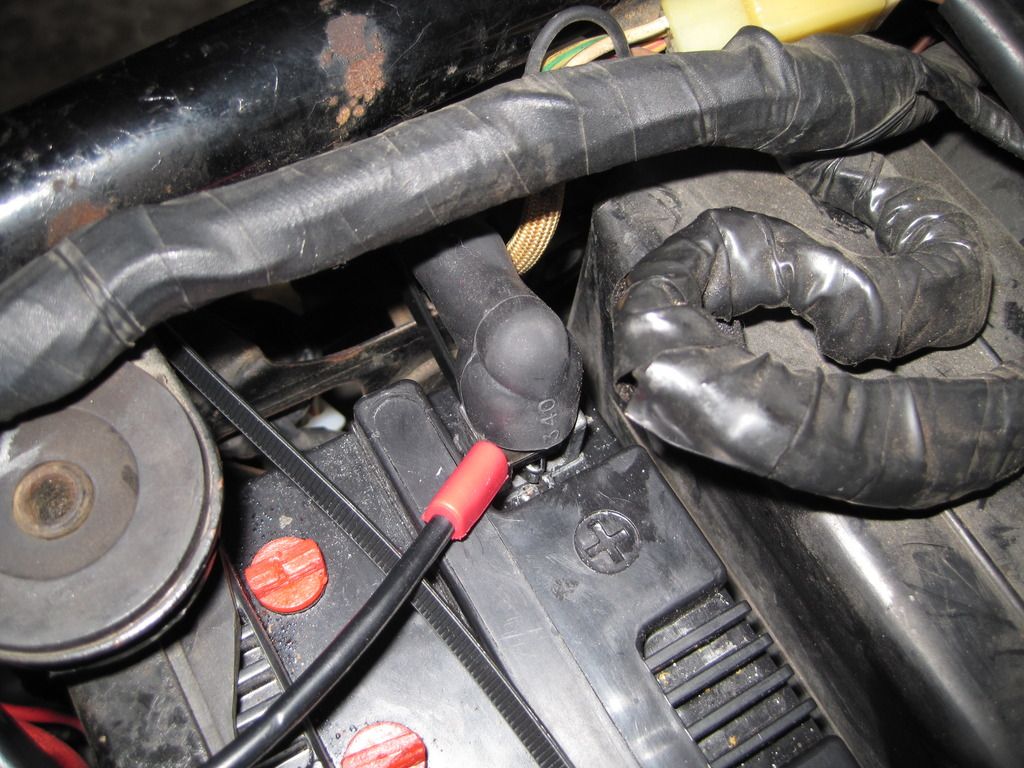
    Here's the old, cracked, nasty looking boot
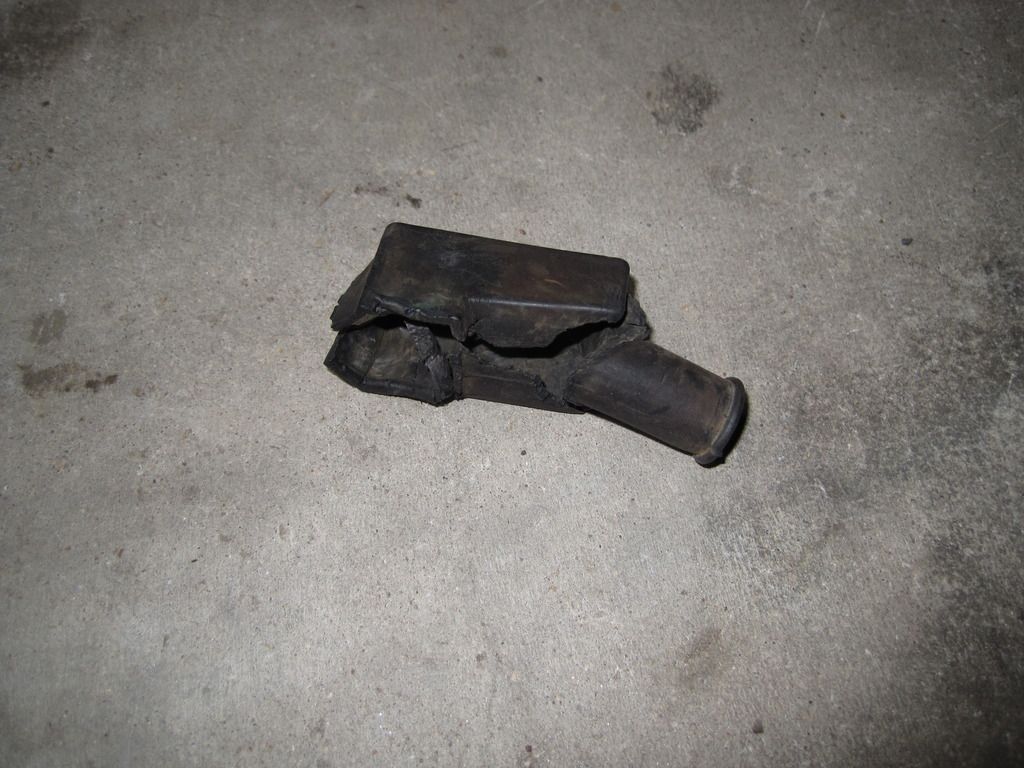

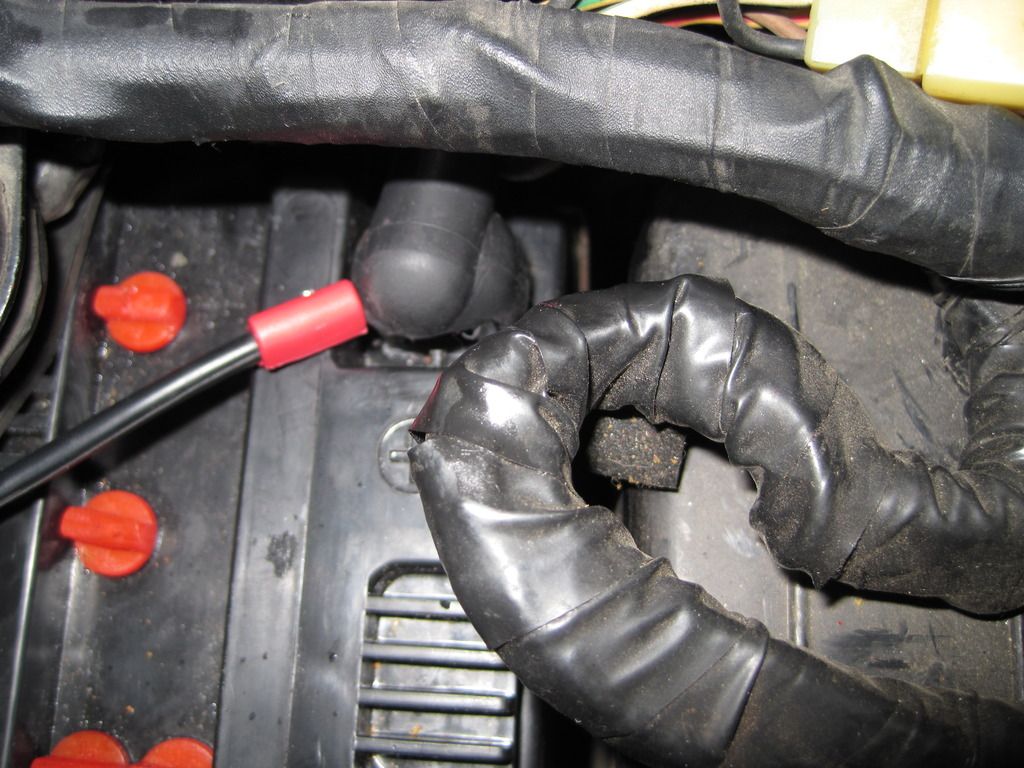
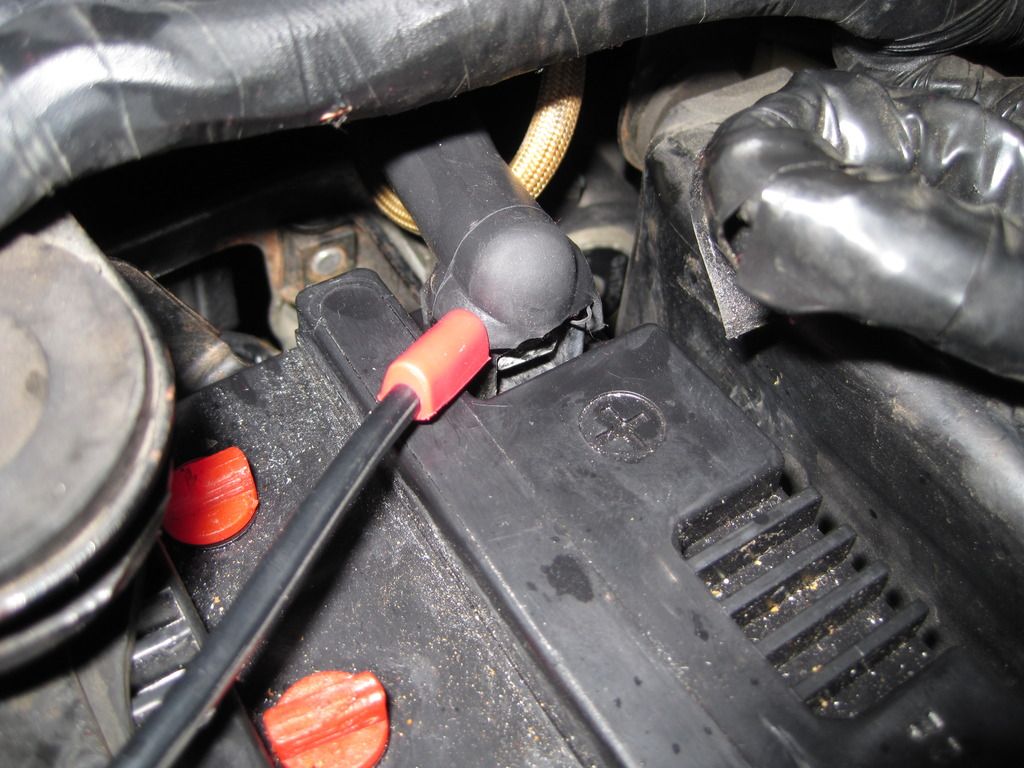
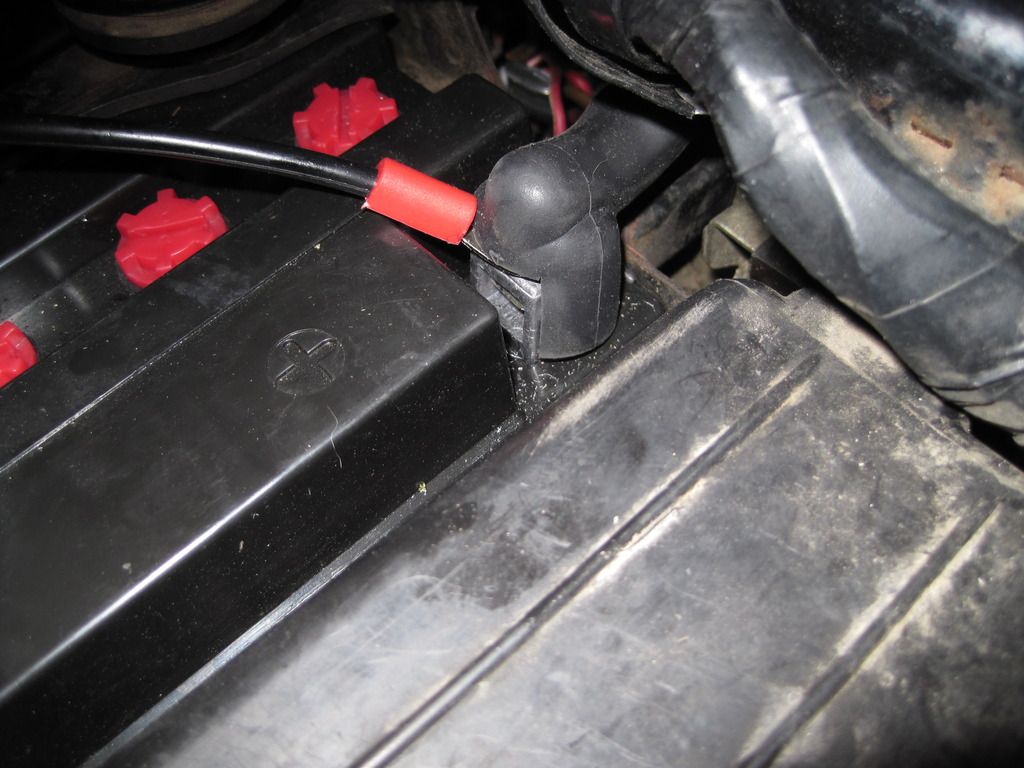
    And here's the shiny, clean, nice, pretty, new one


    I think I have a loose screw behind the handlebars.

    '79 XS11 Standard, Jardine 4/1, Dyna DC1-1 Coils, 145 mains, 45 pilots, plastic floats - 25.7mm, XV920 fuel valves, inline fuel filters, speed bleeders, Mikes XS pods, spade-type fuse block, fork brace, progressive fork springs/shocks, manual petcocks, 750 FD, Venture cam chain tensioner, SS brake lines

  • #2
    Originally posted by dbeardslee View Post
    I'm sure there's a lot of us that have the same problem - cracked, dry, deteriorated battery terminal boots. It's not like they really do much, but every time I look at one in that condition it kind of bugs me. But fear not gentle readers, I've got a fix for you.

    I took a spark plug wire distributor boot out of a set of universal wires I used to do my coils, opened the plug wire end up with a 3/8" drill bit, and snipped off about 1/4" of the part that's supposed to go over the distributor terminal, put a little WD40 on the rubber part of the wire, slipped the boot over it, and voilĂ  - brand new battery terminal boot for zero dollars and zero cents.

    If I have to do it again - which I will on Betsy - I'll cut the distributor part of the boot back flush with the underside of the "wire end". But this is my brother's bike, and if he wants it perfect he can pull the terminal back off and fix it. And I'm positive this would work for the boot on the other side of that short wire too.

    Here's a few pics -

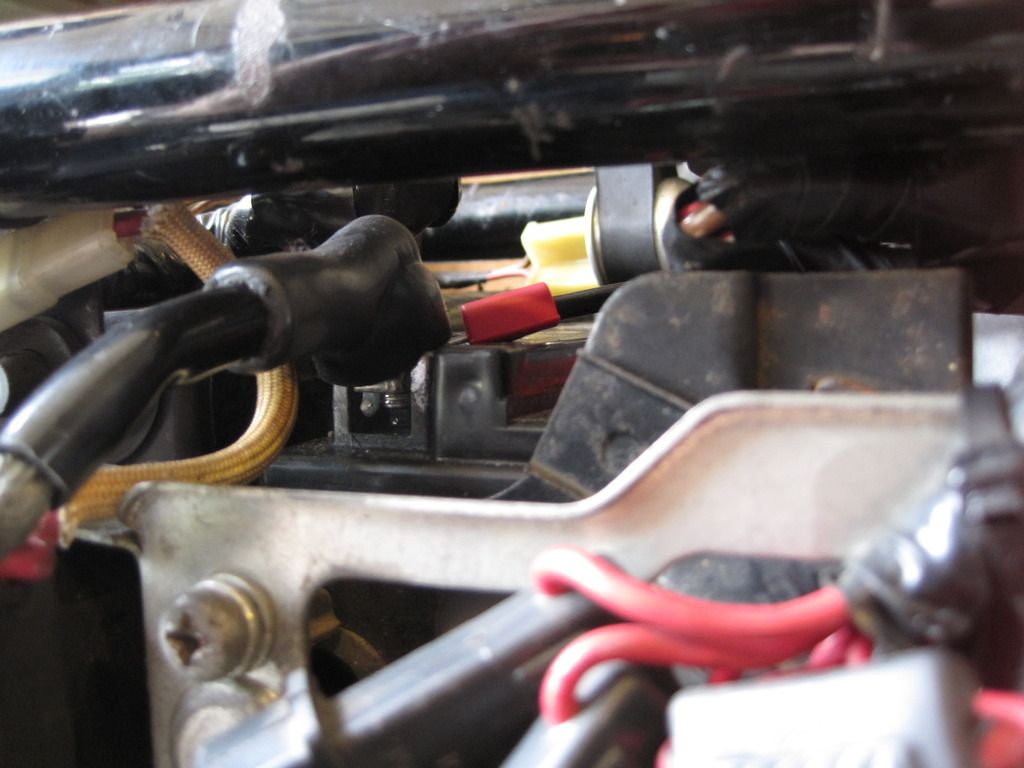
    Here's the old, cracked, nasty looking boot


    And here's the shiny, clean, nice, pretty, new one


    No need if you scrub ALL the pieces with water and baking sodaa(baking soda nuetralizes the batt. acid). After clean, put back together and spray whole area including terminal connection wirth batt. terminal cleaner. Just another of my forte expertese areas over many a decade.
    81H Venturer1100 "The Bentley" (on steroids) 97 Yamaha YZ250(age reducer) 92 Honda ST1100 "Twisty"(touring rocket) Age is relative to the number of seconds counted 'airing' out an 85ft. table-top.

    Comment


    • #3
      Originally posted by motoman View Post
      No need if you scrub ALL the pieces with water and baking sodaa(baking soda nuetralizes the batt. acid). After clean, put back together and spray whole area including terminal connection wirth batt. terminal cleaner. Just another of my forte expertese areas over many a decade.
      What's that got do do with the boot?
      I think I have a loose screw behind the handlebars.

      '79 XS11 Standard, Jardine 4/1, Dyna DC1-1 Coils, 145 mains, 45 pilots, plastic floats - 25.7mm, XV920 fuel valves, inline fuel filters, speed bleeders, Mikes XS pods, spade-type fuse block, fork brace, progressive fork springs/shocks, manual petcocks, 750 FD, Venture cam chain tensioner, SS brake lines

      Comment


      • #4
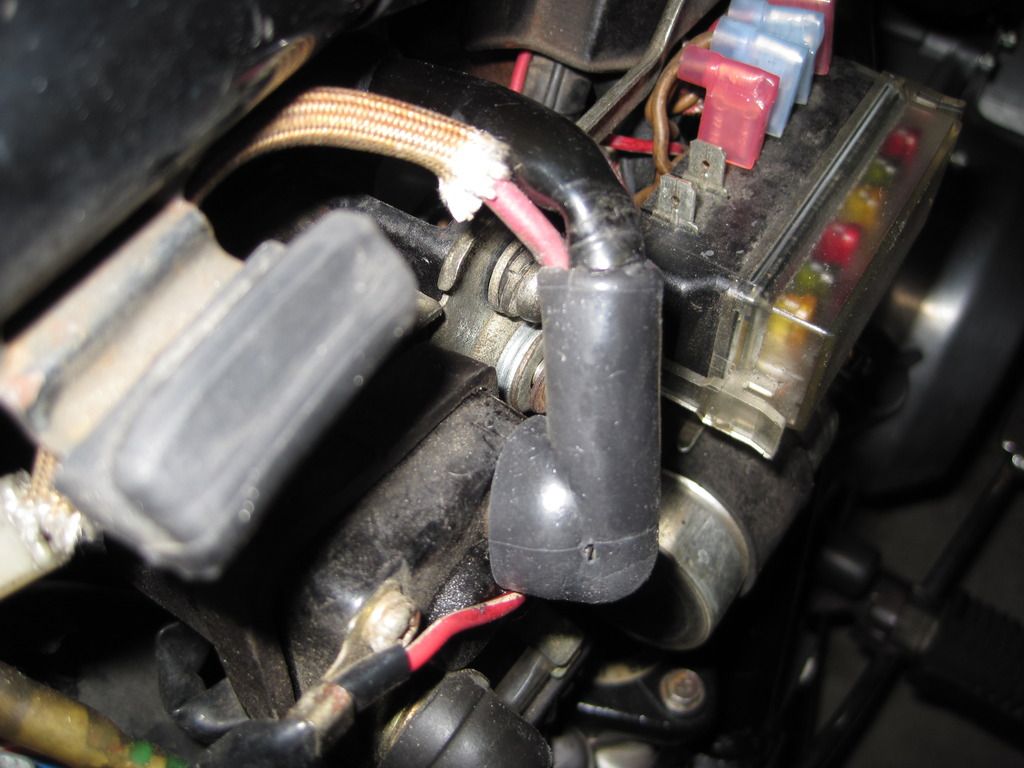
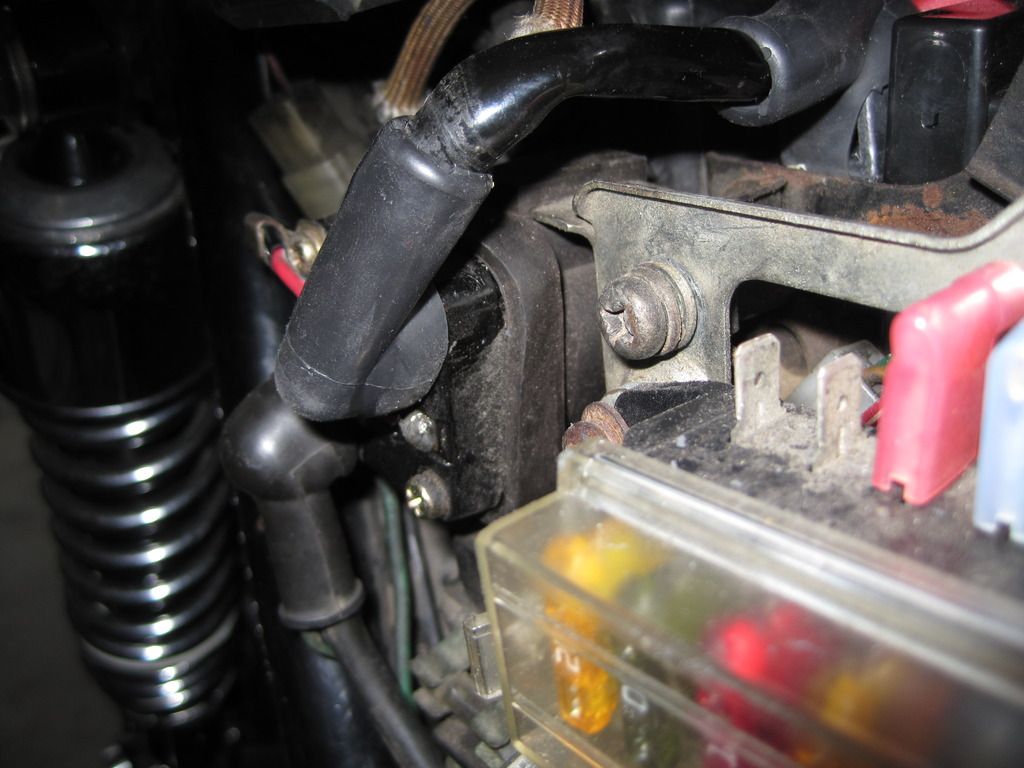
        I thought about it, and figured I could adjust the boot without removing the cable, so I just pulled it back and removed about half of the "skirt." Now it fits like I want it to and covers almost all the exposed part of the positive terminal...


        I think I have a loose screw behind the handlebars.

        '79 XS11 Standard, Jardine 4/1, Dyna DC1-1 Coils, 145 mains, 45 pilots, plastic floats - 25.7mm, XV920 fuel valves, inline fuel filters, speed bleeders, Mikes XS pods, spade-type fuse block, fork brace, progressive fork springs/shocks, manual petcocks, 750 FD, Venture cam chain tensioner, SS brake lines

        Comment


        • #5
          Originally posted by dbeardslee View Post
          What's that got do do with the boot?
          Re-read my post and FOLLOW it to a tee. That rubber boot ISN't gonna save ANYONE from internal corrosion caused from current flow.
          81H Venturer1100 "The Bentley" (on steroids) 97 Yamaha YZ250(age reducer) 92 Honda ST1100 "Twisty"(touring rocket) Age is relative to the number of seconds counted 'airing' out an 85ft. table-top.

          Comment


          • #6
            Originally posted by motoman View Post
            Re-read my post and FOLLOW it to a tee. That rubber boot ISN't gonna save ANYONE from internal corrosion caused from current flow.
            It's not there for corrosion. It's there in case you get something in close proximity to the cable 'cause if you make metalic contact between the positive battery terminal and the frame it's going to spark.
            I think I have a loose screw behind the handlebars.

            '79 XS11 Standard, Jardine 4/1, Dyna DC1-1 Coils, 145 mains, 45 pilots, plastic floats - 25.7mm, XV920 fuel valves, inline fuel filters, speed bleeders, Mikes XS pods, spade-type fuse block, fork brace, progressive fork springs/shocks, manual petcocks, 750 FD, Venture cam chain tensioner, SS brake lines

            Comment


            • #7
              Originally posted by dbeardslee View Post
              I thought about it, and figured I could adjust the boot without removing the cable, so I just pulled it back and removed about half of the "skirt." Now it fits like I want it to and covers almost all the exposed part of the positive terminal...
              Now that looks real good. I have a boot that is broken like yours was. I just replaced the plug wires on the Dakota Pickup. Must go the trash can and fish one out!
              Skids (Sid Hansen)

              Down to one 1978 E. Stock air box with K&N filter, 81H pipes and carbs, 8500 feet elevation.

              Comment


              • #8
                Originally posted by skids View Post
                Now that looks real good. I have a boot that is broken like yours was. I just replaced the plug wires on the Dakota Pickup. Must go the trash can and fish one out!
                I'm going to replace the boots on Betsy next, but this time I think I'll leave the 'skirt' at its full length and just remove the sides where the plastic on the battery protects the terminal. I think I can get full coverage around the terminal all the way to the bottom that way. And while I've got the cable off the battery I think I'll replace the lower boot too. They're both pretty ratty.
                I think I have a loose screw behind the handlebars.

                '79 XS11 Standard, Jardine 4/1, Dyna DC1-1 Coils, 145 mains, 45 pilots, plastic floats - 25.7mm, XV920 fuel valves, inline fuel filters, speed bleeders, Mikes XS pods, spade-type fuse block, fork brace, progressive fork springs/shocks, manual petcocks, 750 FD, Venture cam chain tensioner, SS brake lines

                Comment


                • #9
                  Originally posted by dbeardslee View Post
                  It's not there for corrosion. It's there in case you get something in close proximity to the cable 'cause if you make metalic contact between the positive battery terminal and the frame it's going to spark.
                  Follow your reasing. unfortunately, not having things wire brushed clean with baking soda and water, sprayed with terminal sealer just hides the ongoing corrosion.
                  81H Venturer1100 "The Bentley" (on steroids) 97 Yamaha YZ250(age reducer) 92 Honda ST1100 "Twisty"(touring rocket) Age is relative to the number of seconds counted 'airing' out an 85ft. table-top.

                  Comment


                  • #10
                    Originally posted by motoman View Post
                    Follow your reasing. unfortunately, not having things wire brushed clean with baking soda and water, sprayed with terminal sealer just hides the ongoing corrosion.
                    The way you can tell the boots are just there for electrical insulation is that there's only a boot on the positive terminal, since it's the only one that will cause a problem if you inadvertently connect it to the frame. The negative one is already connected to the frame.

                    I've never had a problem with corrosion on motorcycle batteries, and I use those little felt discs on the battery terminals on my jeep and spray them with WD40 and I don't get any corrosion on that one. But as batteries age and the plastic gets old corrosion tends to be more of a problem, and all my batteries are pretty new right now. But I'll definitely keep the baking soda in mind 'cause I'm sure I'll see it again one of these days.
                    I think I have a loose screw behind the handlebars.

                    '79 XS11 Standard, Jardine 4/1, Dyna DC1-1 Coils, 145 mains, 45 pilots, plastic floats - 25.7mm, XV920 fuel valves, inline fuel filters, speed bleeders, Mikes XS pods, spade-type fuse block, fork brace, progressive fork springs/shocks, manual petcocks, 750 FD, Venture cam chain tensioner, SS brake lines

                    Comment


                    • #11
                      Originally posted by dbeardslee View Post
                      What's that got do do with the boot?
                      To add......boot has noting to do with the look. Its the still left contaminated connector that does, even though it may 'look' clean'.
                      81H Venturer1100 "The Bentley" (on steroids) 97 Yamaha YZ250(age reducer) 92 Honda ST1100 "Twisty"(touring rocket) Age is relative to the number of seconds counted 'airing' out an 85ft. table-top.

                      Comment


                      • #12
                        Originally posted by dbeardslee View Post
                        The way you can tell the boots are just there for electrical insulation is that there's only a boot on the positive terminal, since it's the only one that will cause a problem if you inadvertently connect it to the frame. The negative one is already connected to the frame.

                        I've never had a problem with corrosion on motorcycle batteries, and I use those little felt discs on the battery terminals on my jeep and spray them with WD40 and I don't get any corrosion on that one. But as batteries age and the plastic gets old corrosion tends to be more of a problem, and all my batteries are pretty new right now. But I'll definitely keep the baking soda in mind 'cause I'm sure I'll see it again one of these days.
                        In your last statement.....'see it again' won't cut it my friend/ If ypu 'see' any corrosion, it's alrady to late. Baking soda mixed with a bit of water in a small cup to dunck them in for awhile.............then pull them out, dribble some more baking soda on them and wire brush them. Then riot nce clean. THEN those connections will be good to go. After re-connecting don't forgrt to hit them with a shot of batt, sealer............from a reputable battery dealer, not from wally world.
                        81H Venturer1100 "The Bentley" (on steroids) 97 Yamaha YZ250(age reducer) 92 Honda ST1100 "Twisty"(touring rocket) Age is relative to the number of seconds counted 'airing' out an 85ft. table-top.

                        Comment


                        • #13
                          Corrosion

                          Buy the AGM batteries for you bike and cars and corrosion issues will disappear.
                          1981 XS1100H Venturer
                          K&N Air Filter
                          ACCT
                          Custom Paint by Deitz
                          Geezer Rectifier/Regulator
                          Chacal Stainless Steel Braided Brake Lines
                          Chrome Front Rotor & Caliper Covers
                          Stebel Nautilus Horn
                          EBC Front Rotors
                          Limie Accent Moves On In 2015

                          Mike

                          Comment


                          • #14
                            Originally posted by MPittma100 View Post
                            Buy the AGM batteries for you bike and cars and corrosion issues will disappear.
                            You'll also spend 1/3 again more, and have to replace it just as often.

                            The best corrosion prevention I've seen, and used for years, is anti-seize. When the battery is new, just lightly paint the entire terminal with it, and it will protect against corrosion as well as improve the electrical conductivity. Do the same on all ground connections. No boots on my battery. Mine rotted away too, and it's more hassle to deal with lifting it out of the way than the spark protection it offers.
                            1980 XS850SG - Sold
                            1981 XS1100LH Midnight Special (Sold) - purchased 9/29/08
                            Fully Vetterized and Dynojet Kit added, Heated Grips, Truck-Lite LED headlight, Accel Coils, Irridium plugs, TKAT Fork Brace, XS850LH Final Drive & Black SS Brake lines from Chacal.
                            Here's my web page devoted to my bike! XS/XJ User's Manuals there, and the XJ1100 Service Manual and both XS1100 Service manuals (free download!).

                            Whether you think you can, or you think you cannot - You're right.
                            -H. Ford

                            Comment


                            • #15
                              [HIJACK OFF]

                              Okay, I'm going to bring this thread back on topic - which is rubber boots, not corrosion.

                              And speaking of boots, I made up some for Betsy on both ends of the positive battery cable, and it does in fact work on both ends. Here's a few pics of the finished cable.

                              Here's the upper boot with the skirt left long...


                              And here's the lower boot, which only required opening up the ends and clipping about 3/8" off the skirt...


                              And this shows both ends...


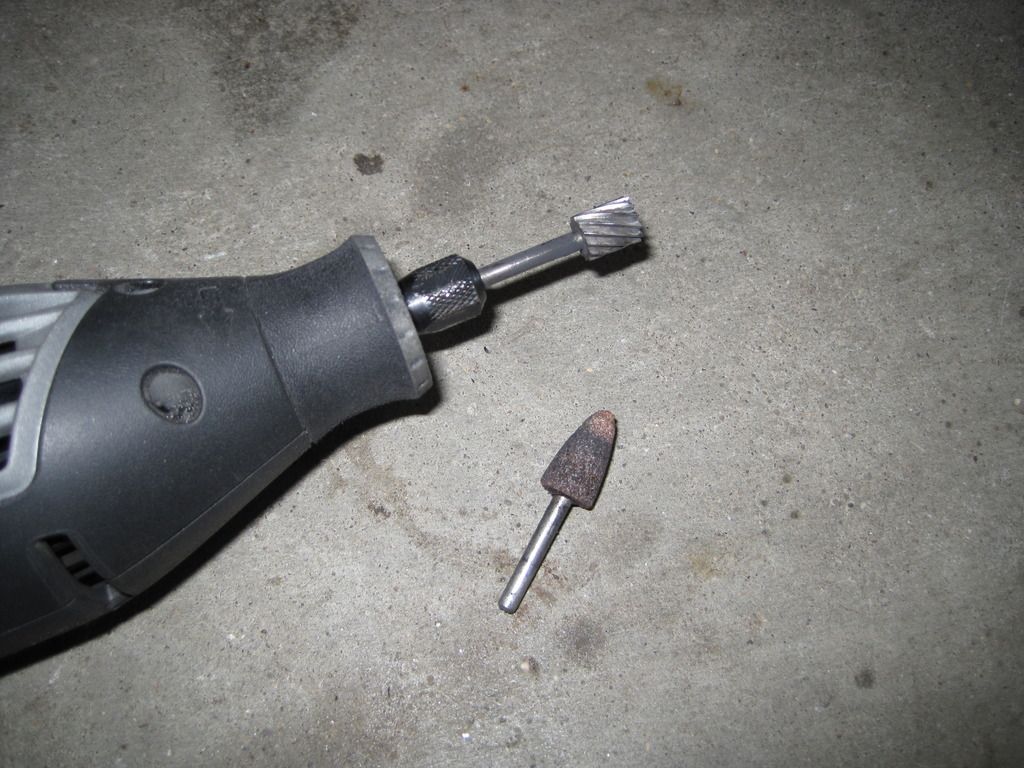
                              The tools I found to work best for opening up the ends is a dremel tool with a conical abrasive bit, and a steel rotary file. I used the abrasive bit first, and it makes short work of the task at hand. It also gets the rubber very hot, so gloves are in order. Then I used the rotary file to open up the "bolt end" and to tune the "wire end" a bit. Be careful - if you stick that rotary file too far in the "wire end" it will grab the boot and sling it. DAMHIK But you have to push it in just about as far as it will go for that to happen.
                              I think I have a loose screw behind the handlebars.

                              '79 XS11 Standard, Jardine 4/1, Dyna DC1-1 Coils, 145 mains, 45 pilots, plastic floats - 25.7mm, XV920 fuel valves, inline fuel filters, speed bleeders, Mikes XS pods, spade-type fuse block, fork brace, progressive fork springs/shocks, manual petcocks, 750 FD, Venture cam chain tensioner, SS brake lines

                              Comment

                              Working...
                              X